Add, Edit, or Deactivate a User (Web)
- 1
-
Select Settings > Users > Add User.

- 2
-
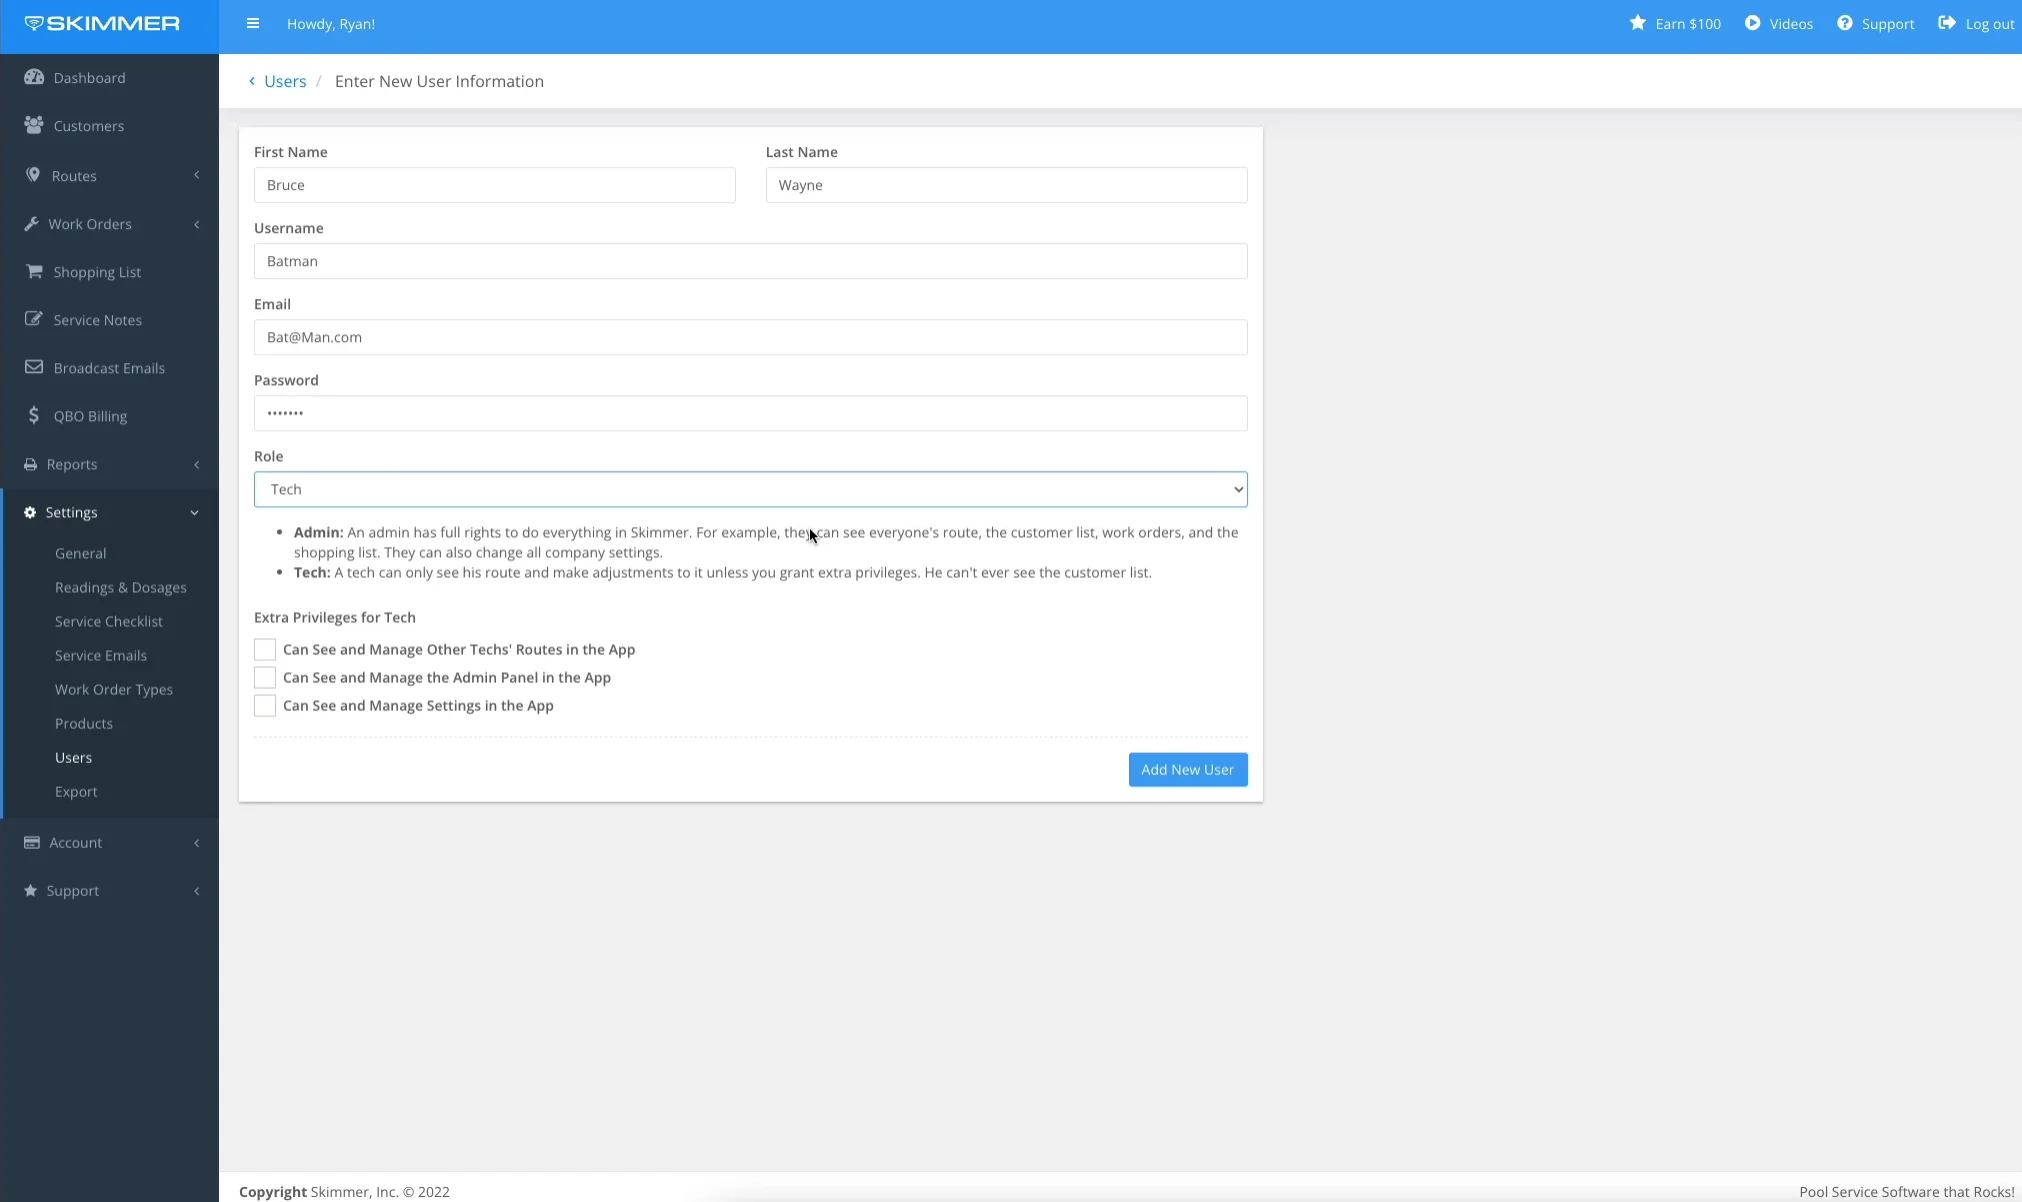
Enter the required information within all User fields.
Note: The Username must be unique as Skimmer is taking all Skimmer Usernames into account. The email address you enter will receive the reset password email if/when needed.

- 3
-
Select Role.
Note: Selecting 'Tech' will populate Extra Privileges to select from. Opt in/out of each privilege (optional).


-
Can See Other Techs' Routes in the App: Grants visibility into other technicians' routes via the Route Dashboard in the mobile app.Can See and Manage the Admin Panel in the App: Provides access to the Admin Panel, including the ability to view, add, and delete items from the Shopping List, Work Orders, and Service Notes.Can See and Manage Settings in the App: Allows technicians to edit settings like Readings and Dosages, Service Checklist, Service Email Messages, Work Order Types, and Products from the Settings screen.Can Move Route Stops in the App: Allows route stops to be moved to another day or reassigned to a different technician. If they have the ability to see other tech's routes, they can also move other tech's route stops. Moves can be one-time or permanent.Can Reorder Route Stops in the App: Lets technicians change the sequence of stops within their route.
- 4
-
When finished, click Add New User.

- 5
-
To edit a User's information, select Settings > Users > Edit > Save User Info.
Note: If updating a User’s password, click Save New Password.


- 6
-
To make a User inactive, select Settings > Users > Edit > uncheck User is Active > Save User Info.
Note: Click the Inactive tab to view inactive Users.


Watch the video or scroll down for step-by-step instructions.
Tiers: All