Create a New Work Order From the Route Dashboard (App)
To learn how to create a work order in the Skimmer app, see the video below. Or, if you prefer, scroll past the video to view our step-by-step text instructions.

Step-by-step instructions . . .
- 1
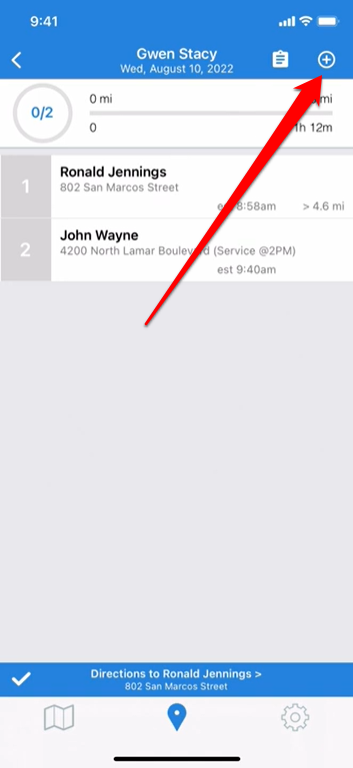
- You’re working in the field, and you’ve just found out that a new work order needs to be added to your route today. Well, both admins and techs can do this on the Skimmer app. We’ll show you the process from the tech’s point of view. Here’s how to do it. On your route screen, click the Plus (+) sign in the top right corner. This will open the list of your company’s work order types. There will be a difference depending on your access level. Admins will see all of your company’s work order types, but techs will only see those they have been given permission to see. Choose the work order type you need. On the next screen, select the customer this work will be done for.
- 2
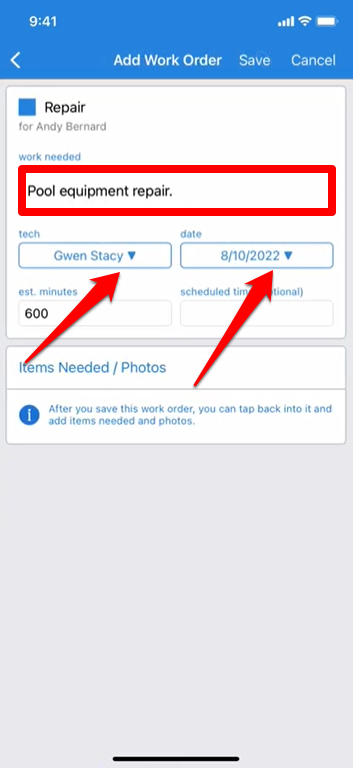
- Then you’ll come to the final setup screen. If you need to adjust the default Work Needed, you can do so here. Assigned tech and date defaults to yourself today, but if you need to, you can use the dropdown menus to assign this work order to someone else, to a different day, or both.
- 3
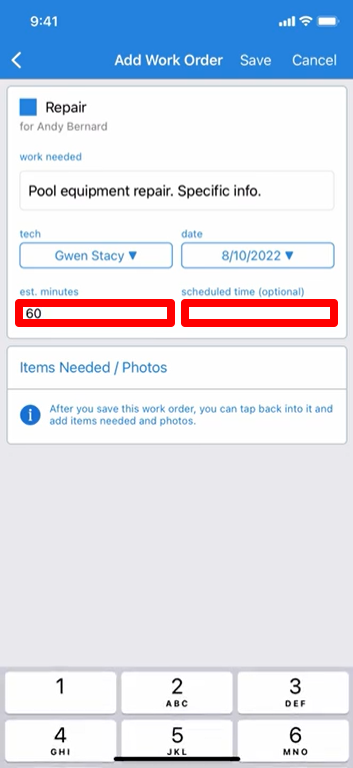
- You can also adjust the estimated minutes to match this particular job, and if desired, you can add a scheduled time if you have a specific appointment with the customer. Admins will see a couple extra boxes here, which relate to cost of doing the job and final price for the customer, but a tech’s view is focused on just scheduling and performing the work.
- 4
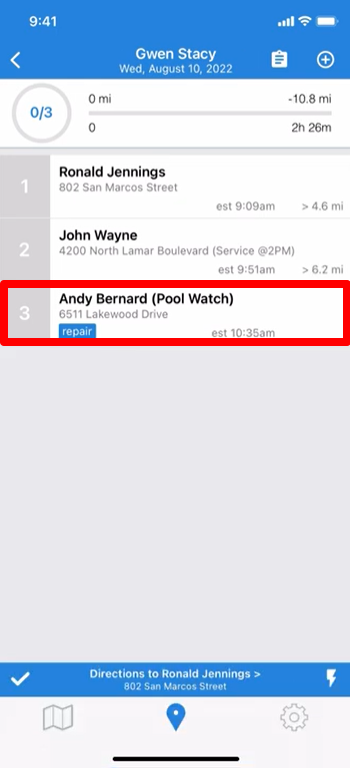
- Note that Items Needed and Photos are currently locked, and that’s because we haven’t actually created the work order yet. Here’s what happens when we do.