Billing - Payment Settings
Watch the video or scroll down for step-by-step instructions.
Tiers: All

Overview
The Payment Settings page allows you to configure your connection to Stripe for payment processing. In addition, this page allows you to customize the payment receipts emailed to your customers.
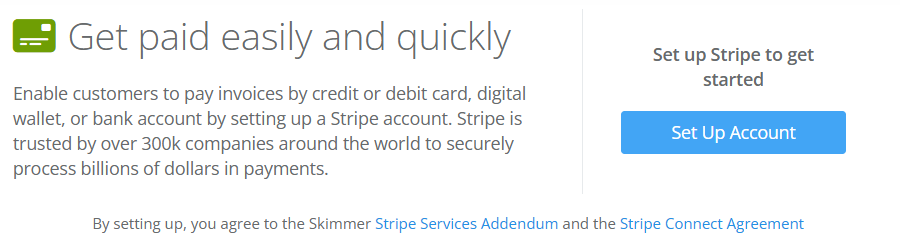
Connect to Stripe and configure payment settings
- From the Settings section in the left navigation menu, click the Payments option.
- In the top section of the Payment Settings page, click the Set Up Account button.
Note: This button also serves as a status indicator. It updates throughout the process to reflect your current connection status such as, verification in progress, updates needed, restricted, or pending.
- After you enable your Stripe account, review the options in the Payment Types section. To enable an option, click the toggle next to it until it displays ON.
Note: Toggling an option to ON or OFF automatically applies your change.

| Payment type options: | |
| Accept credit and debit cards and digital wallets for new invoices | |
| Accept bank payments (ACH) for new invoices | |
| Accept consumer financing | |
| Surcharge options: | |
| Use credit card surcharging | |
| Apply Sales tax to surcharge fees | |
| Reporting option: | |
| Email office a daily report when customer payments fail option | |
Configure payment receipt emails
- From the Payment Receipt Email Settings section, click the Enable Payment Receipts toggle.
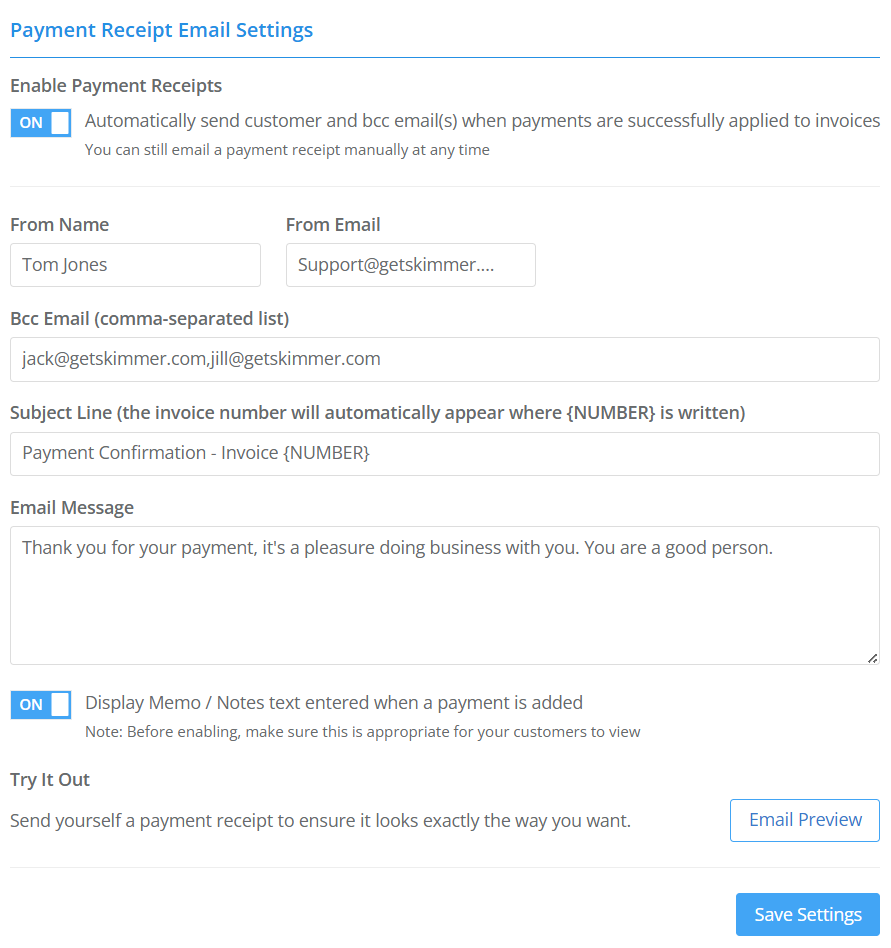
- Populate the following fields:
- From Name/From Email - enter your business name and company email address in the sender fields.
- Bcc Email - enter the email address(es) to be blind carbon copied for each payment receipt.
- Subject Line/Email Message - enter a default subject line and message for your receipt emails.
- Toggle the Display Memo/Notes entered when a payment is added option to ON if you want to include that information in the payment receipt email.
- Click the Save Settings button.
- To preview your receipt email, click the Email Preview button.
- Check the email account associated with your username to review the sample email.
