Billing – Client Payment Process
To learn the client payment process after you've sent an invoice through Skimmer Billing, see the video below. Or, if you prefer, scroll past the video to view our step-by-step text instructions.

Step-by-step instructions . . .
- 1
-
When you send an invoice, your client will receive an email that looks like this. The email will display your company information and the custom header and message you’ve set up. The email gives your client a brief overview, who’s billing them and the amount due. When they’re ready to see details of the invoice and submit payment, they’ll click Review and Pay.

- 2
-
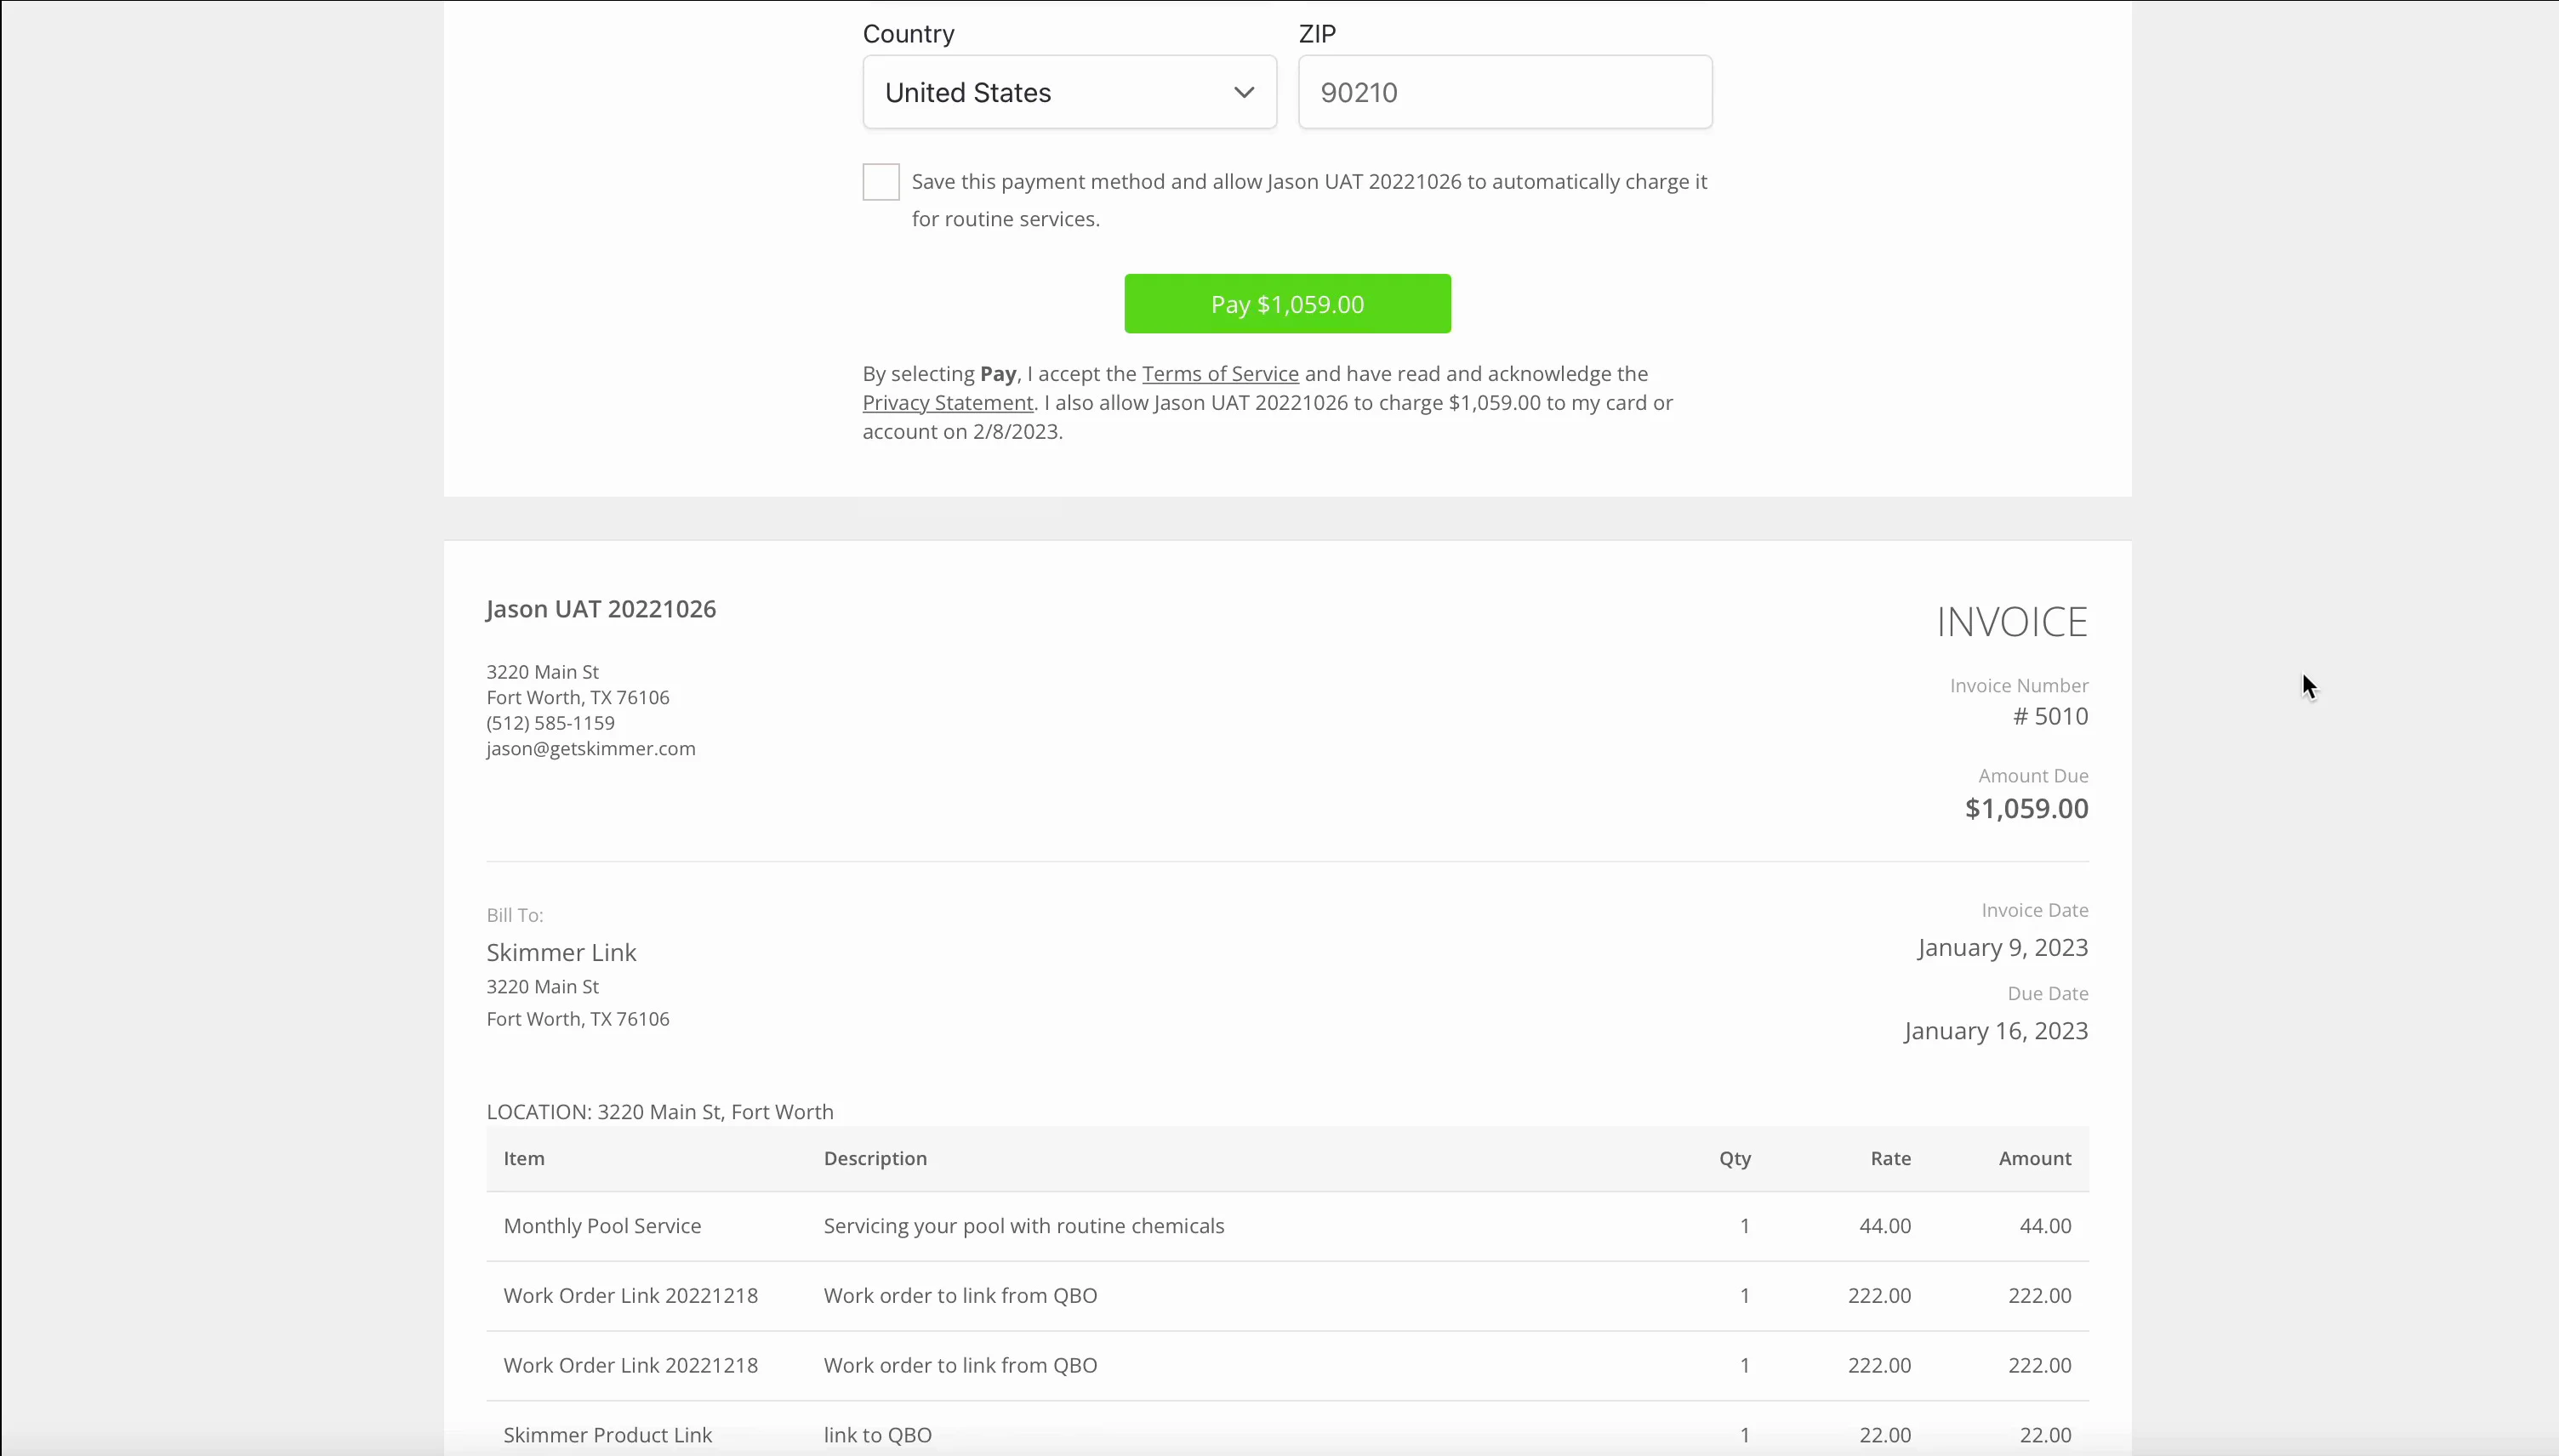
Clicking the button will take them to their web browser and open a payment screen. They can scroll and review every line item they’re being charged for. They’ll also see any applied taxes. And, if partial payments or refunds have already been applied to this invoice, they’ll be reflected here and in the total amount due.

- 3
-
When they’re ready to submit payment, they’ll scroll back to the top and enter their information. Payment source options display at the top. So if you’ve chosen to allow credit cards or bank payments, those options will be there.
Note the checkbox above the Pay button. If your client wants to save this payment method and allow it to auto-pay for routine service every month, they can check this box. Once your client has reviewed the invoice and entered their payment information, all they need to do is click Pay.


