Flow of Parts from the Shopping List to Skimmer Billing
To learn how sold or installed items flow from the Shopping List all the way through Skimmer Billing, see the video below. Or, if you prefer, scroll past the video to view our step-by-step text instructions.

Step-by-step instructions . . .
- 1
-
Have you ever sold an item to a customer, then forgotten to include it in that month’s invoice? Well, with the Shopping List and Skimmer Billing, that’s a thing of the past. Here’s how Skimmer keeps track of all the items you’ve sold, and makes it quick and easy for you to get paid.
On the app, we’ve already navigated to the shopping list and added two items for a customer’s pool that we’re servicing today. Next step is to provide service and sell those items.

- 2
-
On the route stop screen, where you’ll indicate completed tasks and chemical readings and dosages, you also have an Items Needed box. Note that the two items we added to the Shopping List are here. Once you’ve installed the item, or sold it to the customer, how do you indicate it here? It’s as simple as swiping right on the item. You’ll see that it turns gray and the note below it says Installed, which is Skimmer’s way of saying the item has been sold to the customer and needs to be included in the bill for this service.
Then you’ll Finish the route stop. The next time Skimmer syncs to the cloud, your service data - including these installed items - will be uploaded.

-

-

- 3
-
Now let’s get you paid for those parts with Skimmer Billing. On the website, go to Billing, then Invoice Generator. Using this, we could generate invoices for all customers across your whole billing period, but for demonstration we’re going to focus on that one customer we sold the items to. So we’ll set a single day for the range and click Continue.
On the Pool Service tab, all our defaults are in place and that’s what we want, so we’ll just click Continue.

-

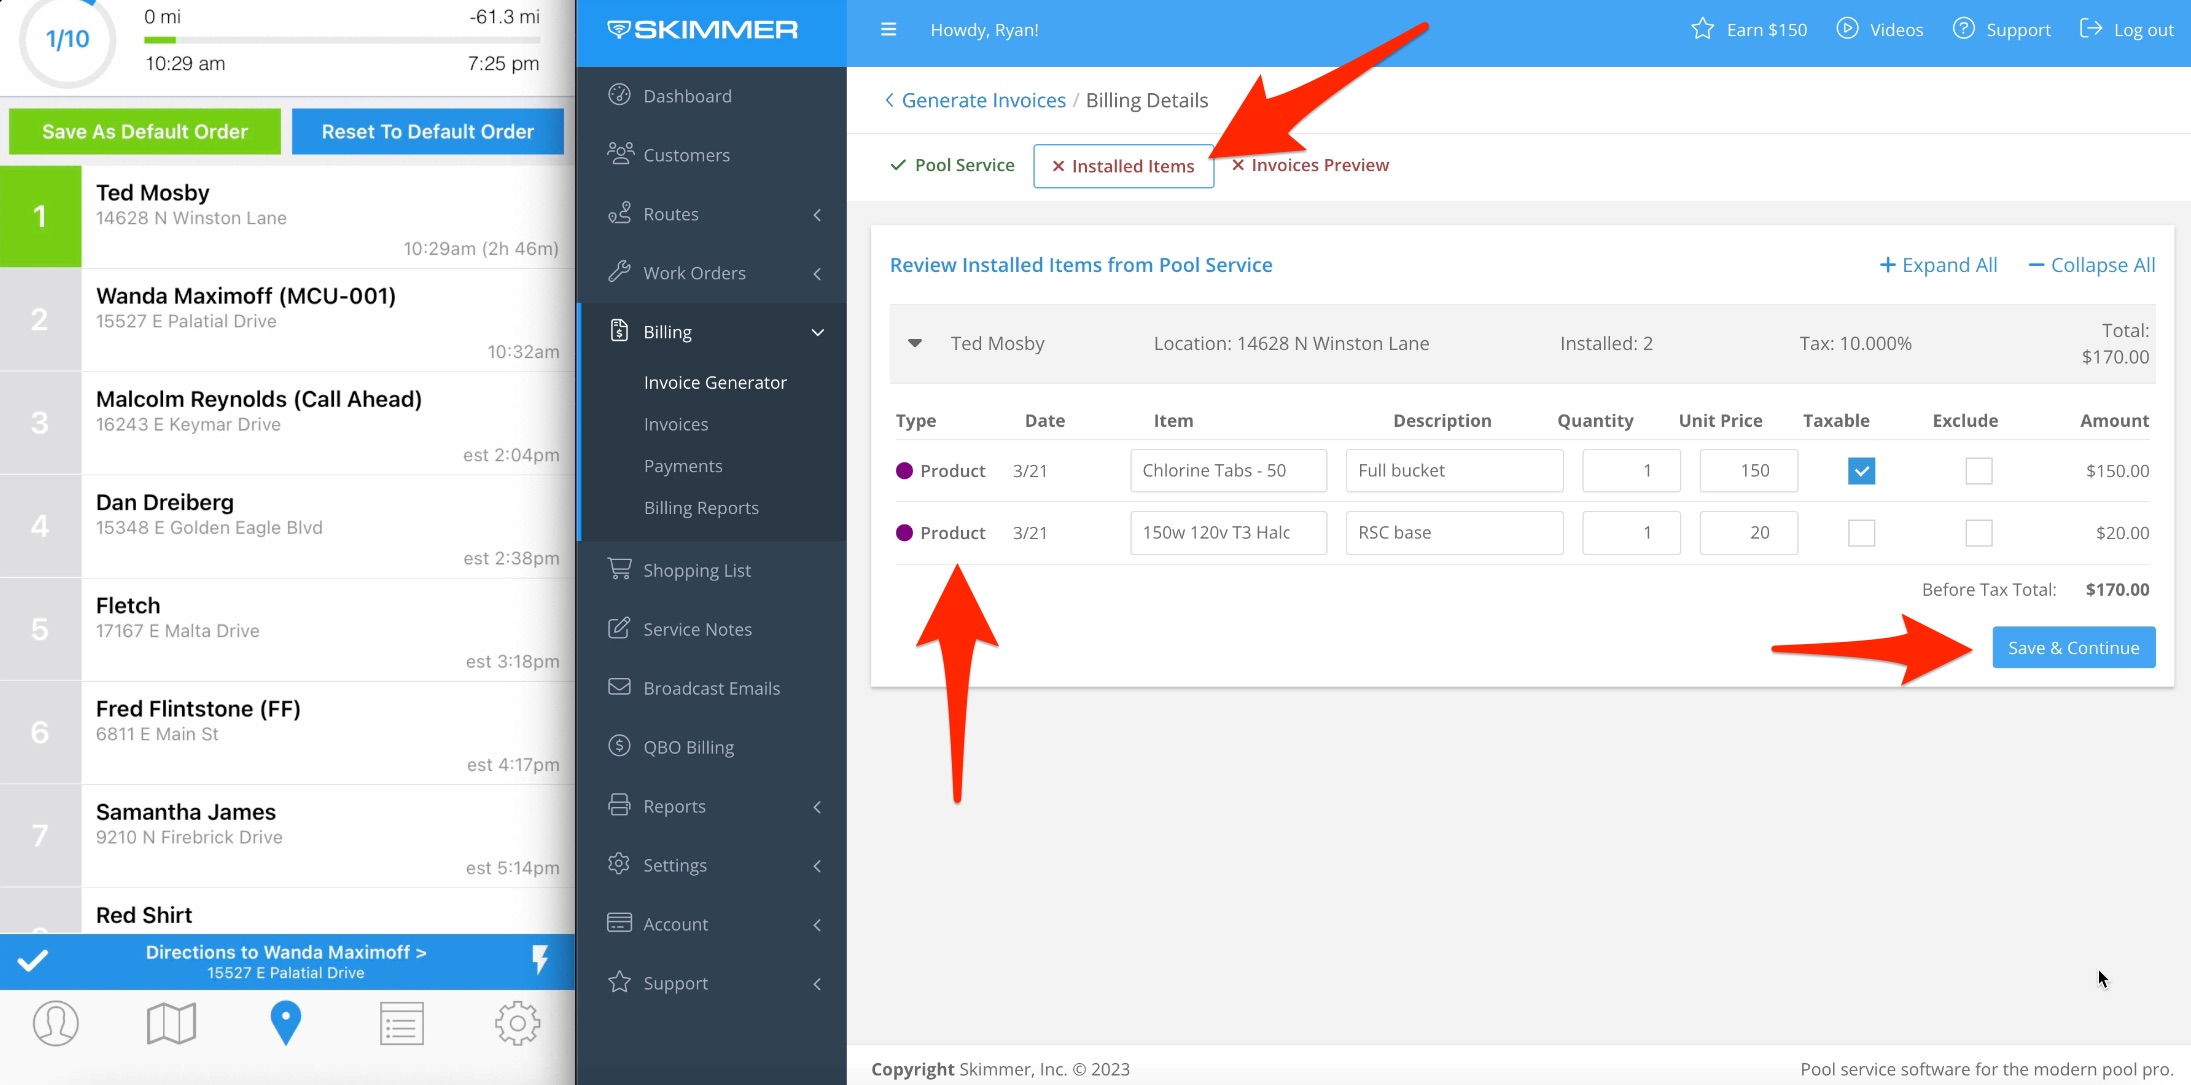
- 4
- Now we’re at the Installed Items tab, and you can see the parts we sold to the customer whose pool we serviced. If you need to make any changes, such as adjusting the price or taxable status, or even the item description, you can do so here. Then, when you’re ready, click Save & Continue.
- 5
-
Now we’re at Invoices Preview, the last screen before you generate and send your invoice the customer.
If you want to see all the line items before doing this, you can click Details and see everything included in this invoice. Note that are items are included.
Back on the main screen, when you’re ready, you can click the Generate button to create this invoice and send it to your customer. And that’s it, you’re done! No more forgetting items you sold and essentially giving them away for free. With Skimmer, it’s as easy as adding them to the Shopping List, marking them as Installed, and generating the invoice.

-

-

-