Skipped Stops - Skip Tracking, Reasons, and Email Alerts
Watch the video or scroll down for step-by-step instructions.
Tiers: All

Step-by-step instructions . . .
- 1
-
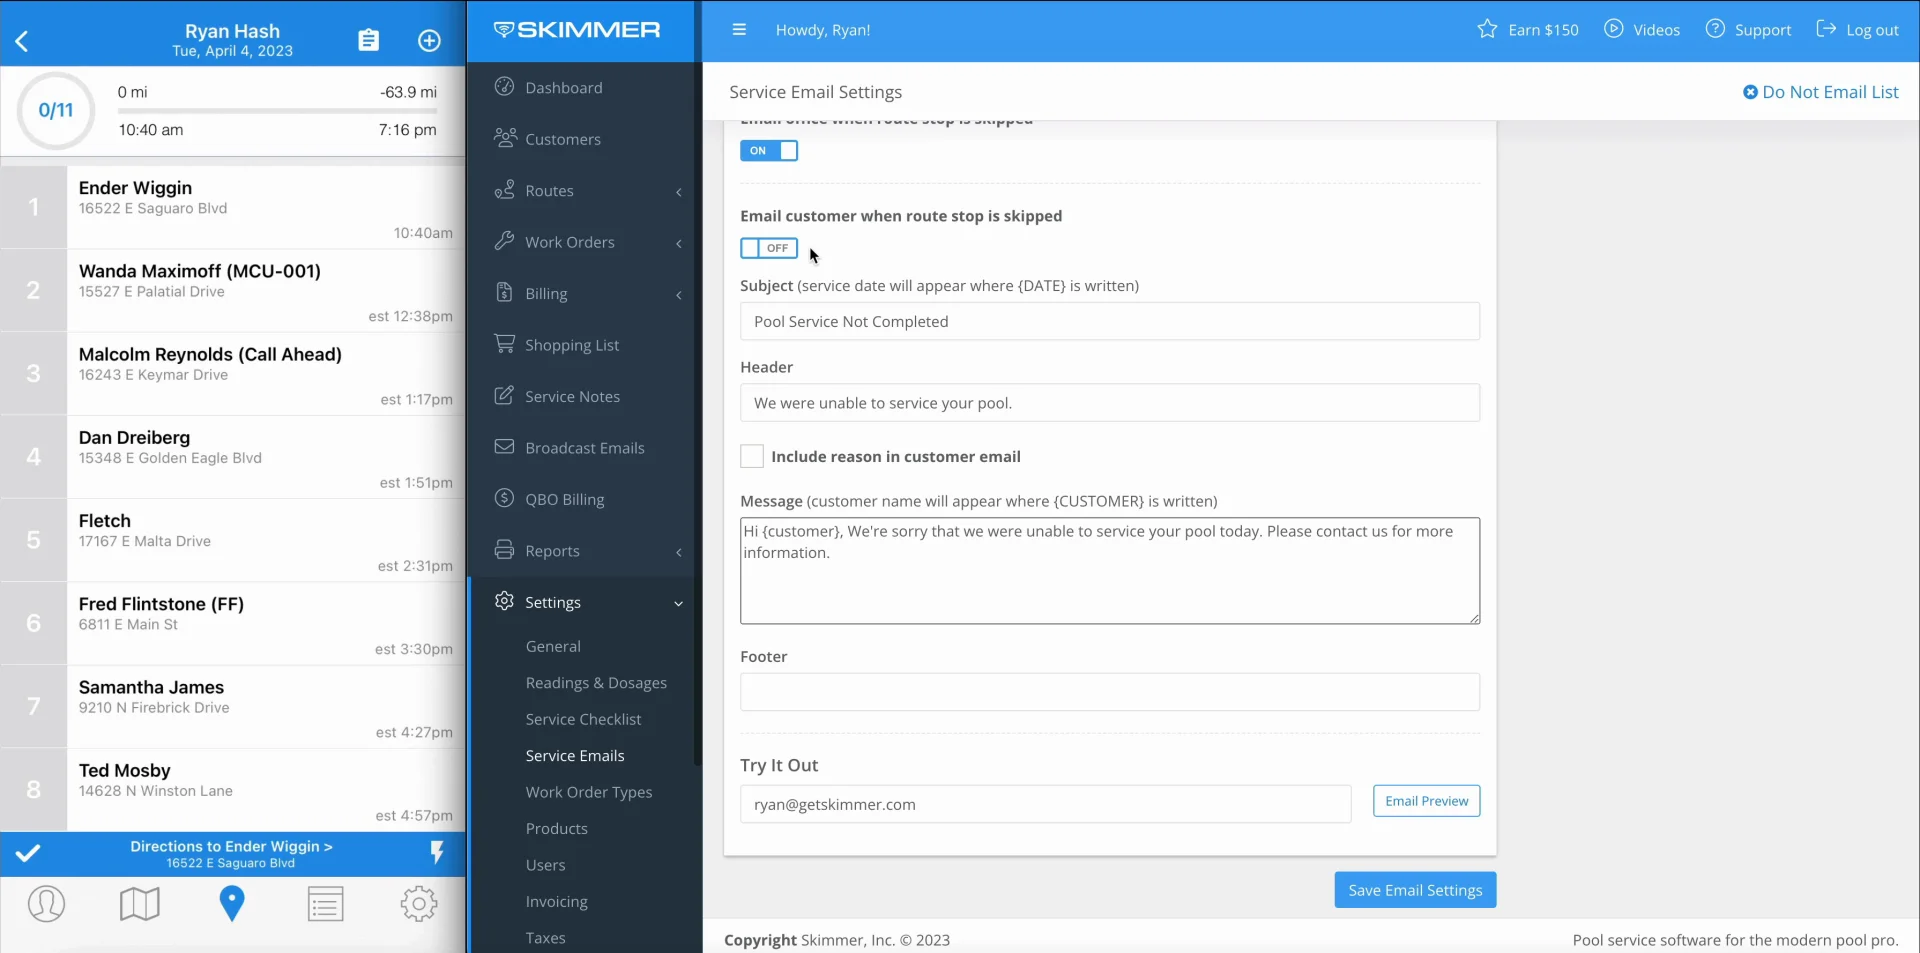
Select Settings > Service Emails, then scroll down and click Skipped Stops Email.
-

- 2
-
Turn ON Require a tech to choose a reason when the route stop is skipped (optional).
-
- If selected, click Add & Edit Reasons
- To add a new reason, click Add > create default reason, and Save.
- You can edit, reorder, or delete skipped stop templates
-


- 3
-
Turn ON Email the office when a route stop is skipped (optional).
- The email(s) under Settings > General will receive skipped email notifications.

- 4
-
Turn ON Email the customer when a route stop is skipped (optional). If you enable this, it will apply to every customer in your account.
-
- If selected, complete the email fields.

- 5
-
Click Save.
-

- 6
-
Skipped stops will be highlighted in orange, and can be viewed from the Route Dashboard.
-

-


