Billing - Add Fees, Discounts, and Line Items in Bulk
To learn how to apply fees, discounts, and line items to invoices being generated by Skimmer Billing, see the video below. Or, if you prefer, scroll past the video to view our step-by-step text instructions.

Step-by-step instructions . . .
- 1
-
When generating invoices in Skimmer Billing, you have the option of applying additional items to any invoice you want. Those items include additional fees, discounts, and line items. Here’s how to do it. On the website, when you’re ready to create your invoices for the billing period, go to Billing and then Invoice Generator.
Start by choosing all your basic parameters. We show you how to do this, and go through the invoice generation process as a whole, in another video. When you’re ready, click Continue.

- 2
-
Once you’ve worked through the other billing tabs and made your choices, you’ll come to the tab named Additional Items. Here’s where you can bulk apply these items to any invoice you’re generating. If you don’t need to add anything, you can of course click Continue to Invoices Preview without making any changes. We’re going to show you how to add these items when you want to.
We’ll start by adding a Line Item. To do that, click Add, and a box will appear. This allows you to create from scratch any additional line item you want, and manually control all its parameters. For demonstration, let’s say that twice per year you perform a special chemical service on every pool, and this billing period you performed that service for most of your customers. Give the item a name, a description, the quantity if it’s different from the default of 1, and the rate you’re charging. Then indicate whether this service is taxable. Note that if a customer has multiple service locations, and you’re generating a single invoice for all those locations, this line item will be added to all those locations in that invoice. So if there are five locations in the invoice, you’ll add this item five times. If you don’t want to do that, you can of course choose to generate separate invoices for each location. Once you’re ready, click Save, and you’ll see we have a new entry in the box showing the Line Item we created. You also have the option to edit if you want to change something, or delete if it turns out you don’t need it.

-

-

- 3
-
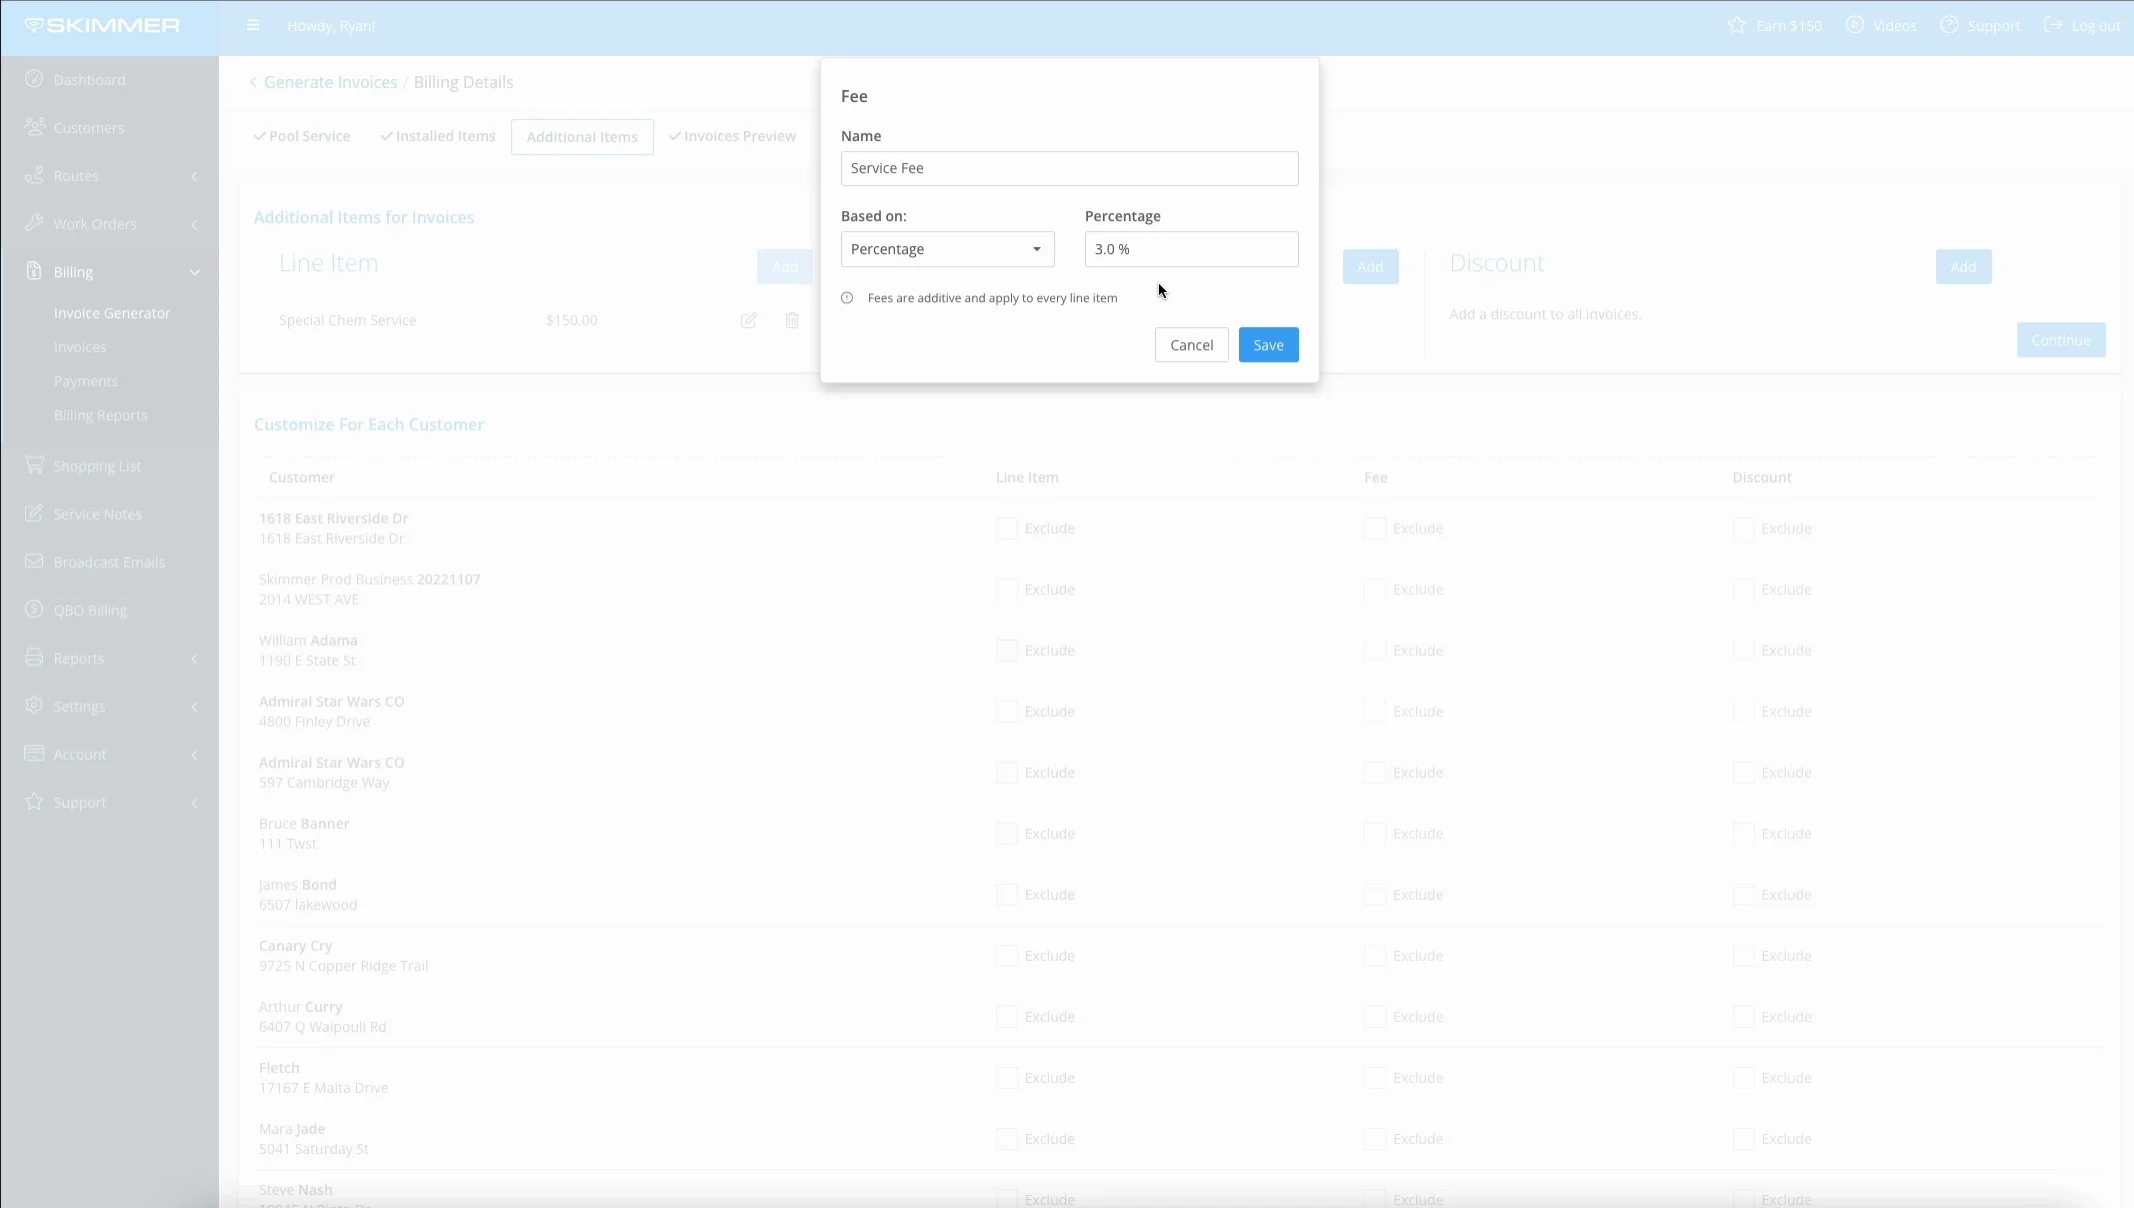
Continuing along the top row, let’s add a Fee. To do that, click Add, and another box will appear. You can name it whatever you like, to match whatever fee you’re adding. It could be a general service fee, or an administrative fee, Skimmer lets you customize it for whatever your business needs. Next, you can choose how you want to charge that fee, whether it’s a flat rate or a percentage of the amount being charged on each invoice. For demonstration, we’ll choose Percentage and 3%. What this will do is add a fee that’s the sum of 3% of every line item in the invoice. So it’s essentially adding a 3% increase to the total for all the invoices you apply this to. When you’re done, click Save, and again you can see a new entry in the box with the service fee we created. If you need to, you can edit or delete the fee before continuing.


- 4
-
Now let’s add a Discount, which essentially applies a negative amount to an invoice and adjusts the total down. Click Add, give the discount a name, and again you can choose whether to discount a percentage or a flat rate. This time, we’re going to choose Flat Rate and a set dollar amount. And keep in mind that the system will not allow a discount that results in a negative balance on any invoice. When you’re ready, click Save, and once again you have the new entry in the box, with options to edit or delete.

-

-


- 5
-
By default, the items we added here will apply to all generated invoices. However, for each item, you can choose to exclude any customer invoices from having it applied. All you have to do is scroll down to the Customize box and click the Exclude button. Note that, if for example we didn’t create a Line Item, the Exclude boxes under Line Item would be grayed out. They’re only accessible for items that you actually add.
For any of these, keep in mind that if you create an item here but then back out of the invoice generator, and then come back later and start over, you’ll need to recreate these items. Skimmer’s not going to hold onto them if you cancel out of the session.
When you’re ready, click Continue.

- 6
-
On Invoices Preview, let’s look at the Details screen to see how our bulk items applied. We didn’t exclude anything for this invoice, so we can see the Special Chem Service Line Item, the $1 Friendly Discount, and the 3% fee all applied.


- 7
-
Let’s look at the invoices we set exclusions for. The corresponding customer’s invoice doesn’t have the Line Item. The same holds true for the invoice without the Fee, as well as the Discount.
For fees and discounts, note that they’re added to, or subtracted from, the subtotal before taxes are applied. So taxes are also calculated for the total amount that includes all fees and discounts.
Also, note that adding a custom line item should not affect autopay. Autopay will still process.
And that’s how you bulk apply line items, fees, or discounts, with the Invoice Generator.
-

-

-


