Billing - How to Refund a Payment
To learn how to issue payment refunds and then reconcile your accounts with Skimmer Billing, see the video below. Or, if you prefer, scroll past the video to view our step-by-step text instructions.
Step-by-step instructions . . .
- 1
-
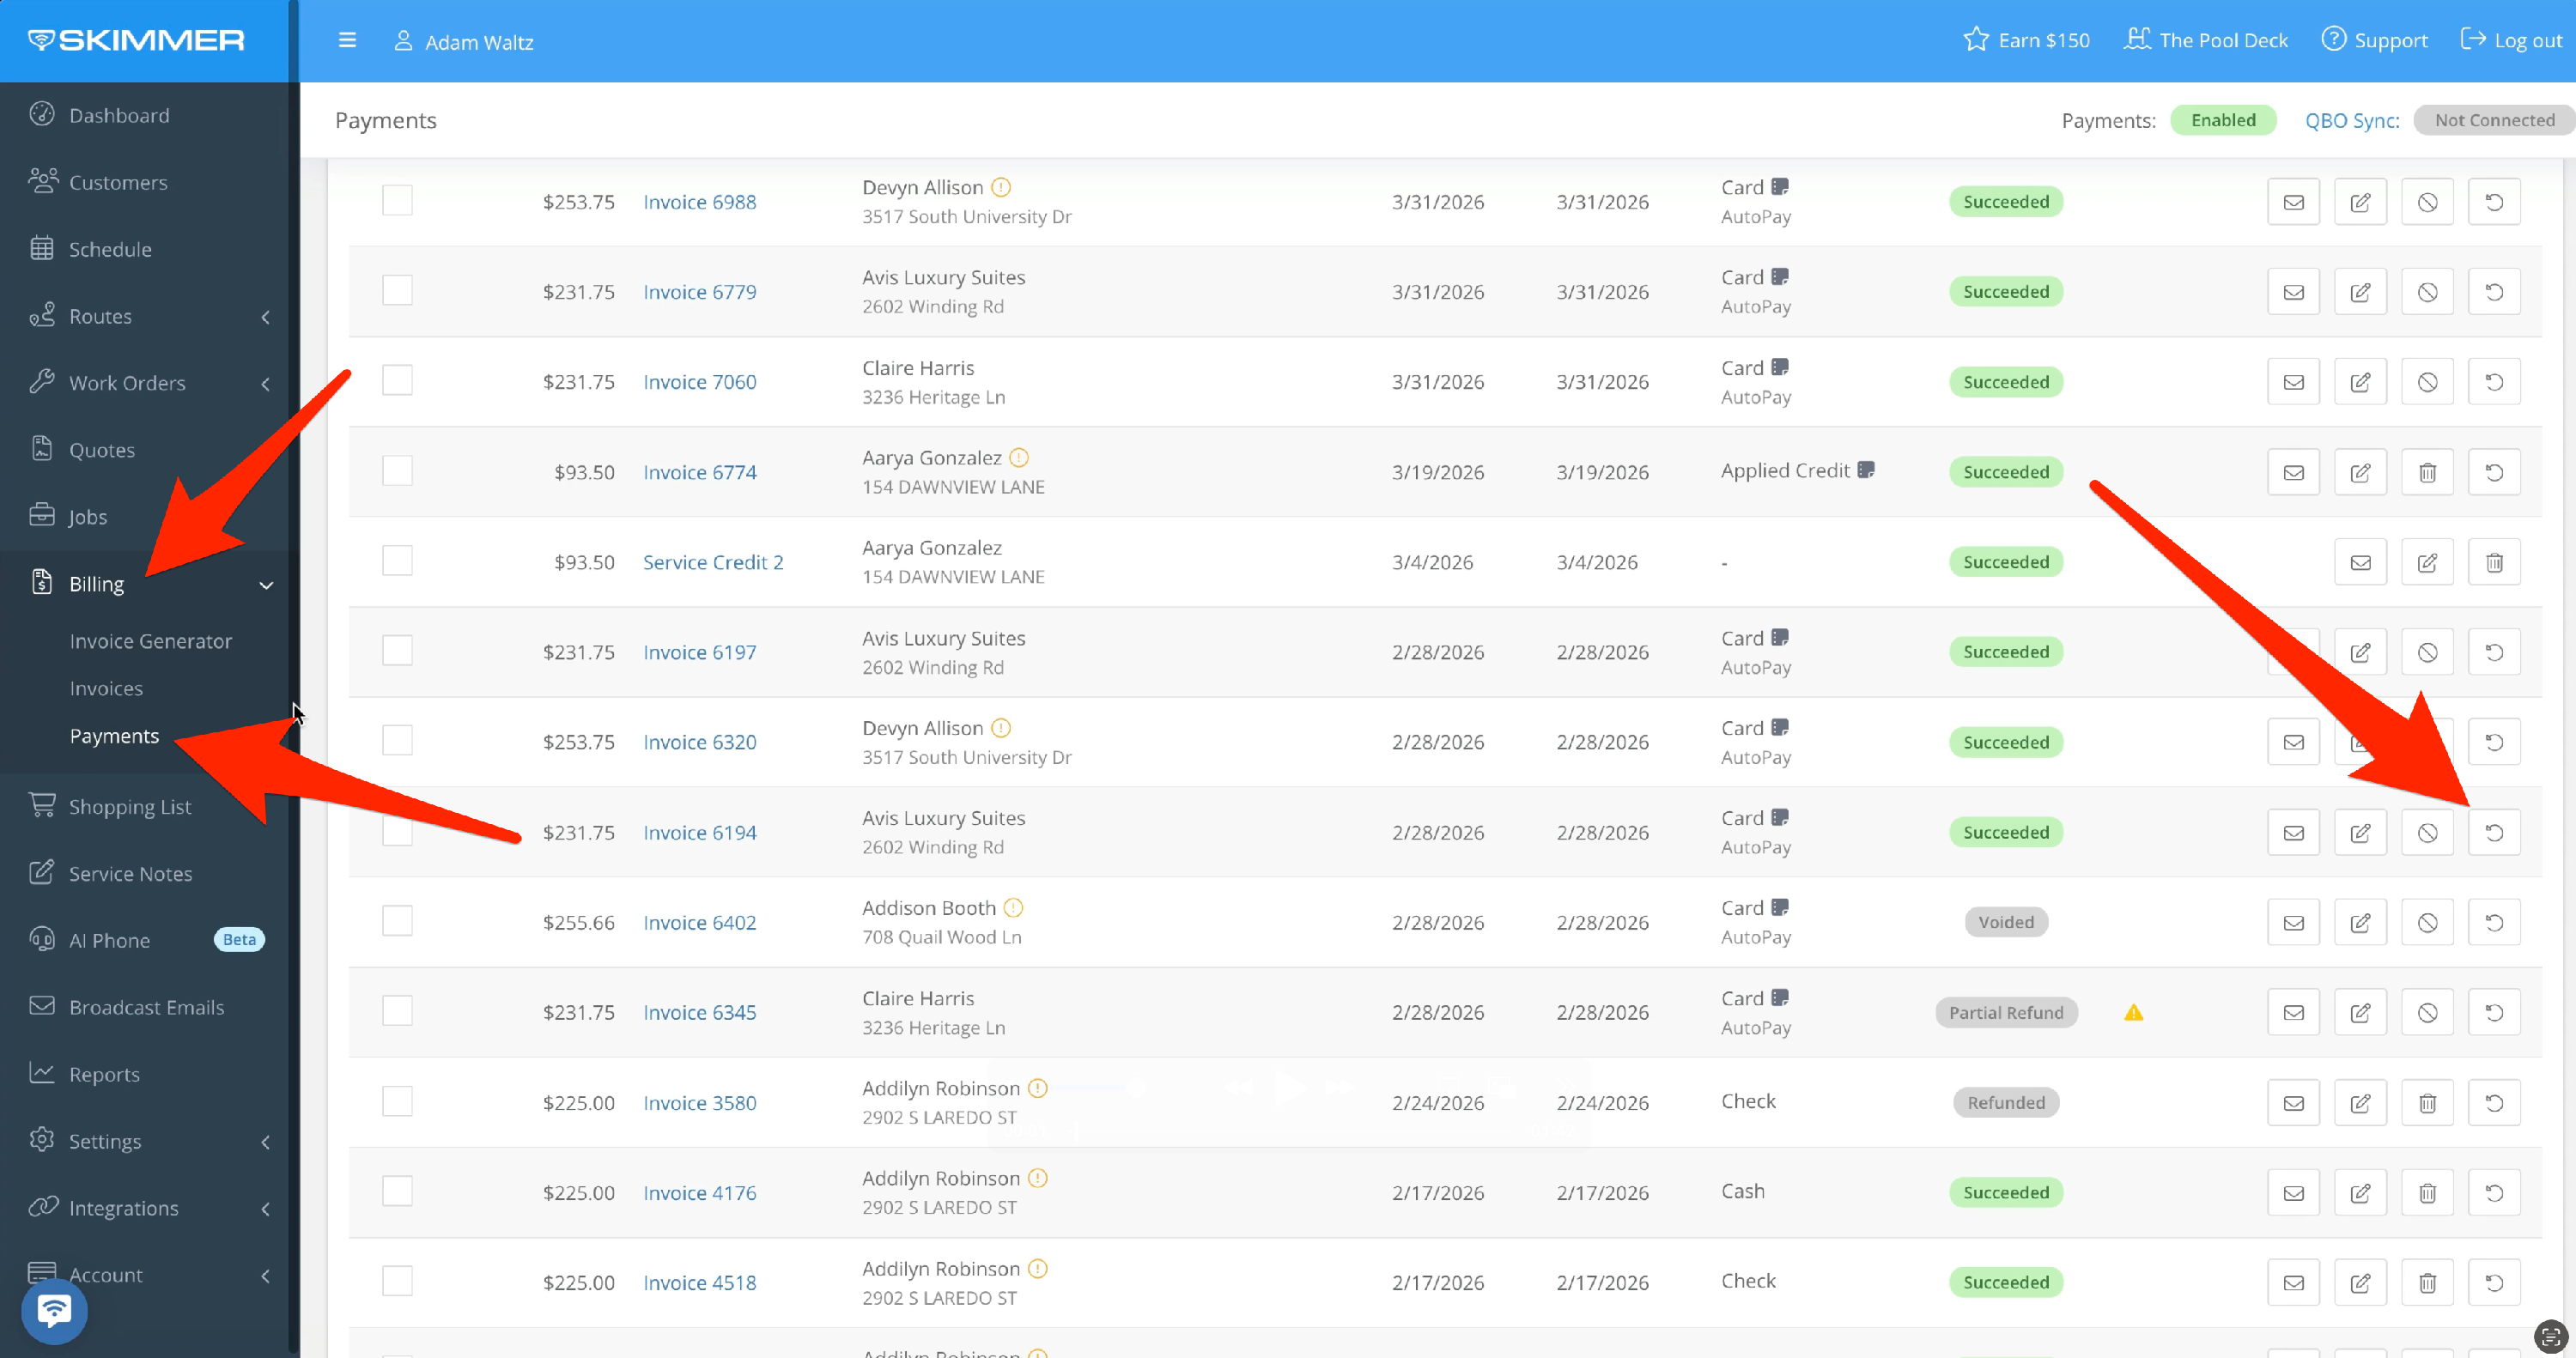
Go to Billing > Payments, and click the circular arrow icon.
- 2
-
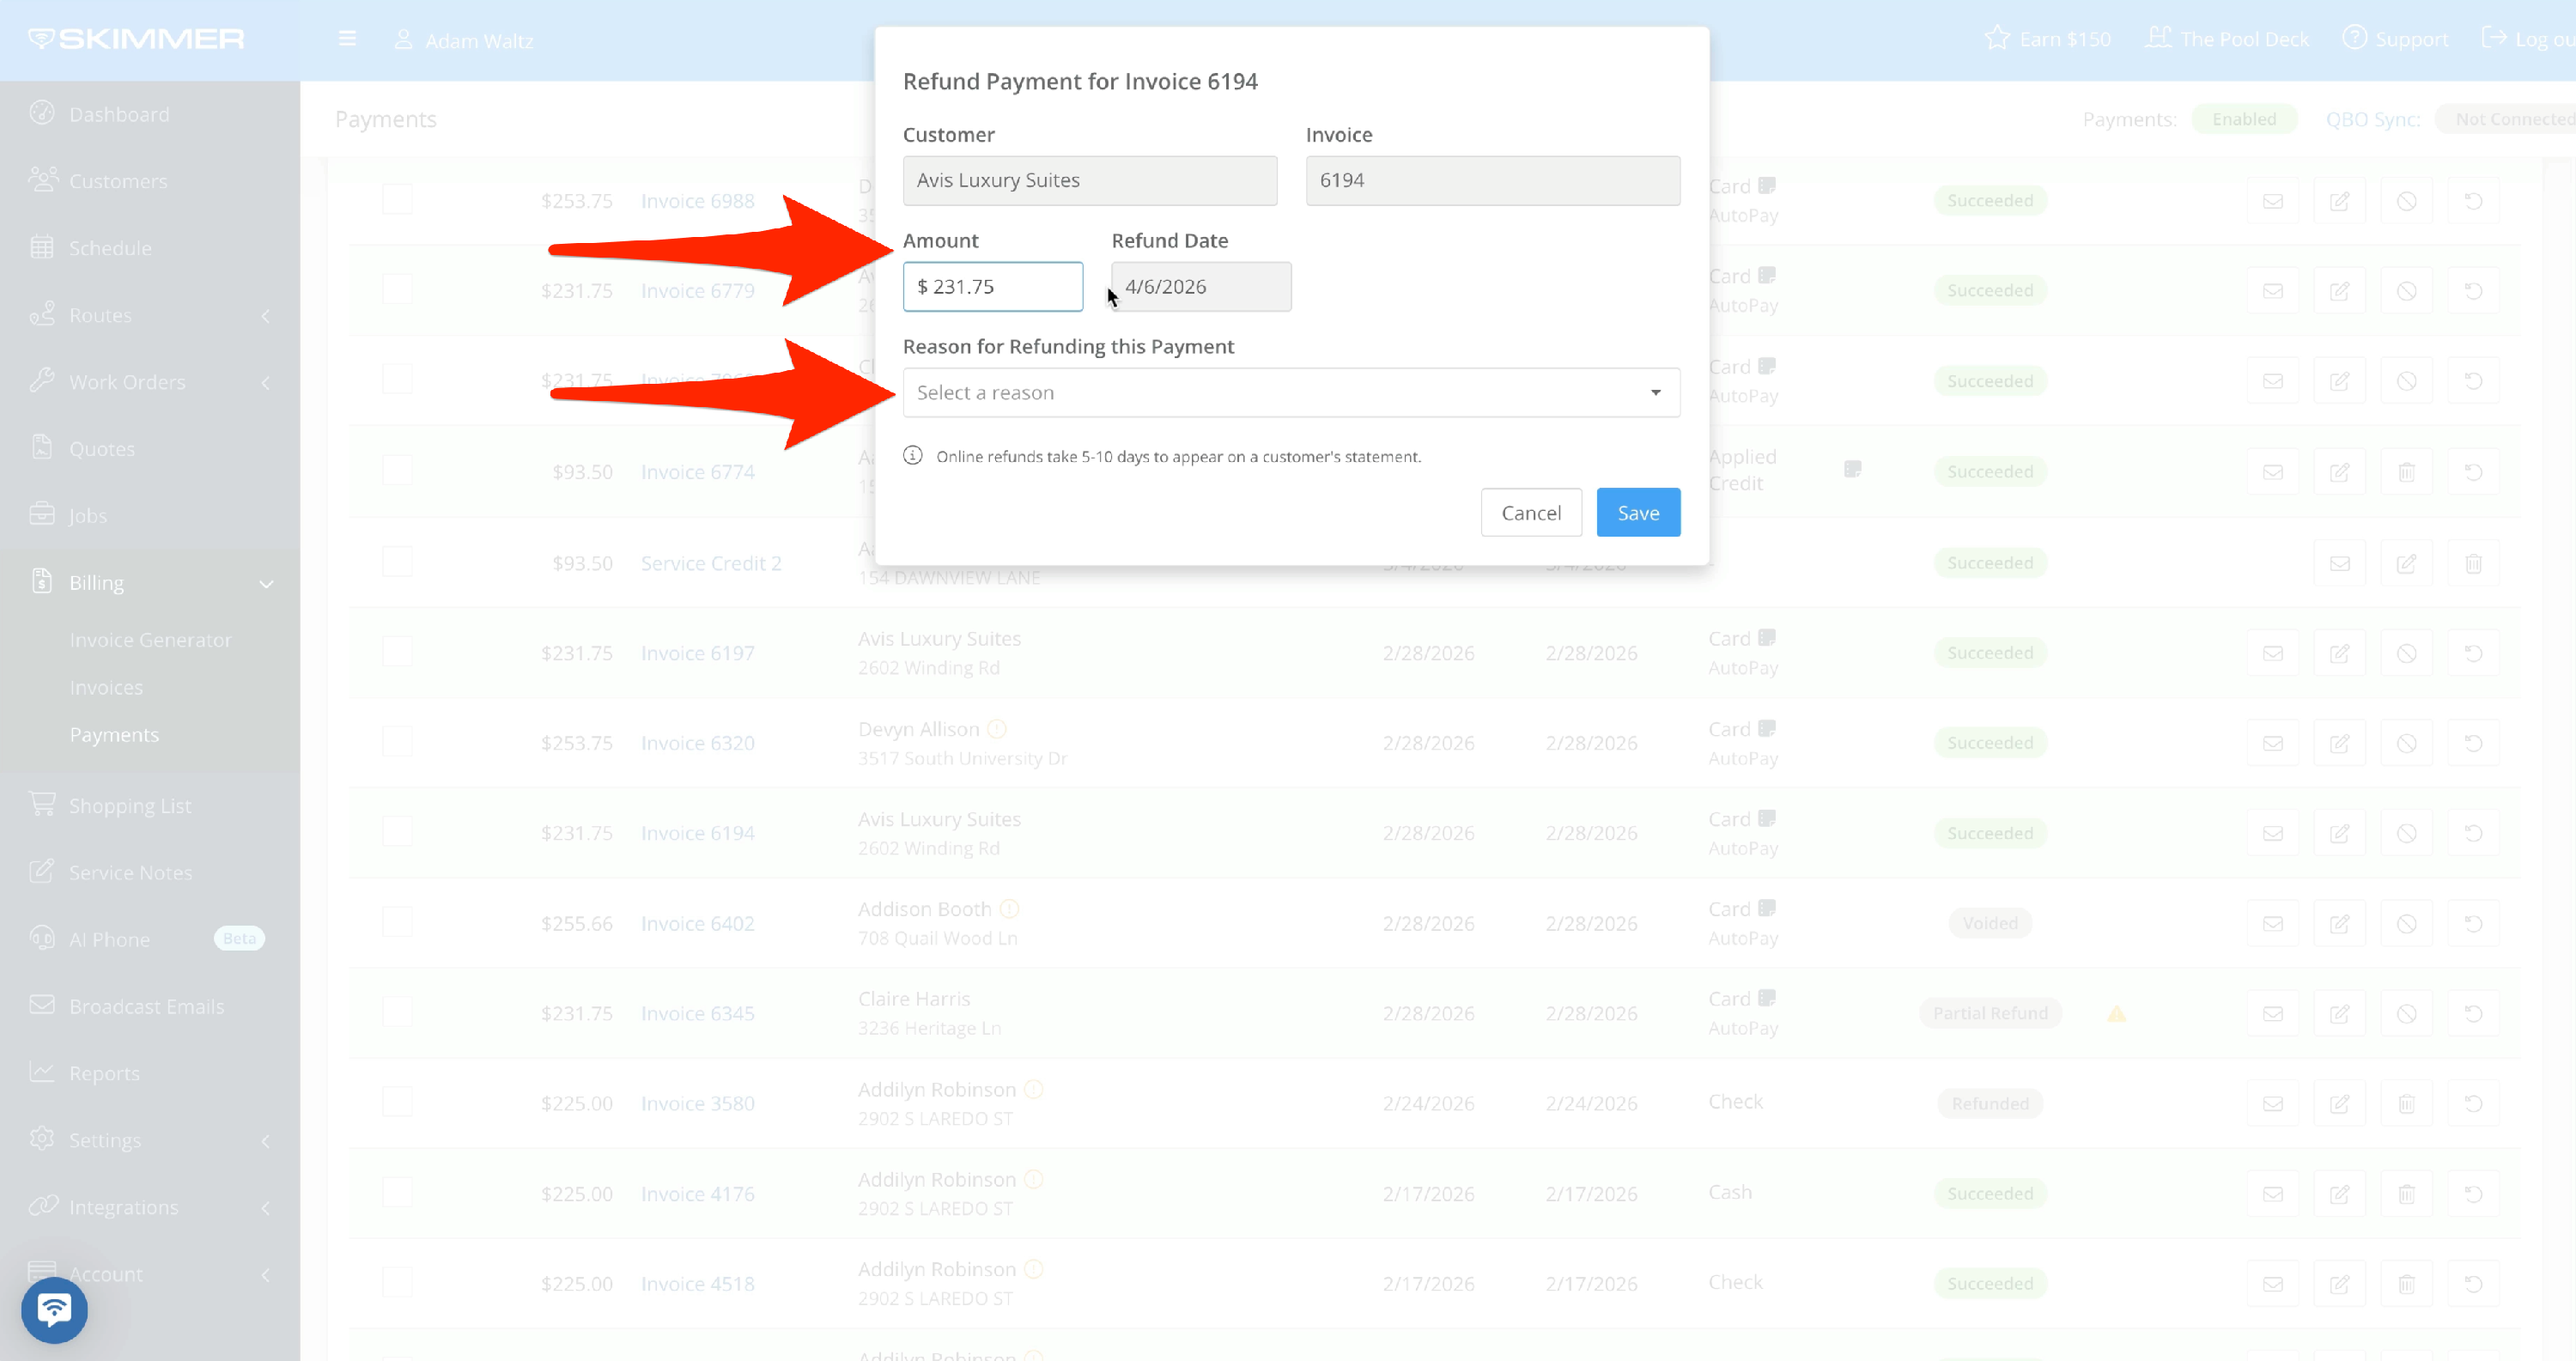
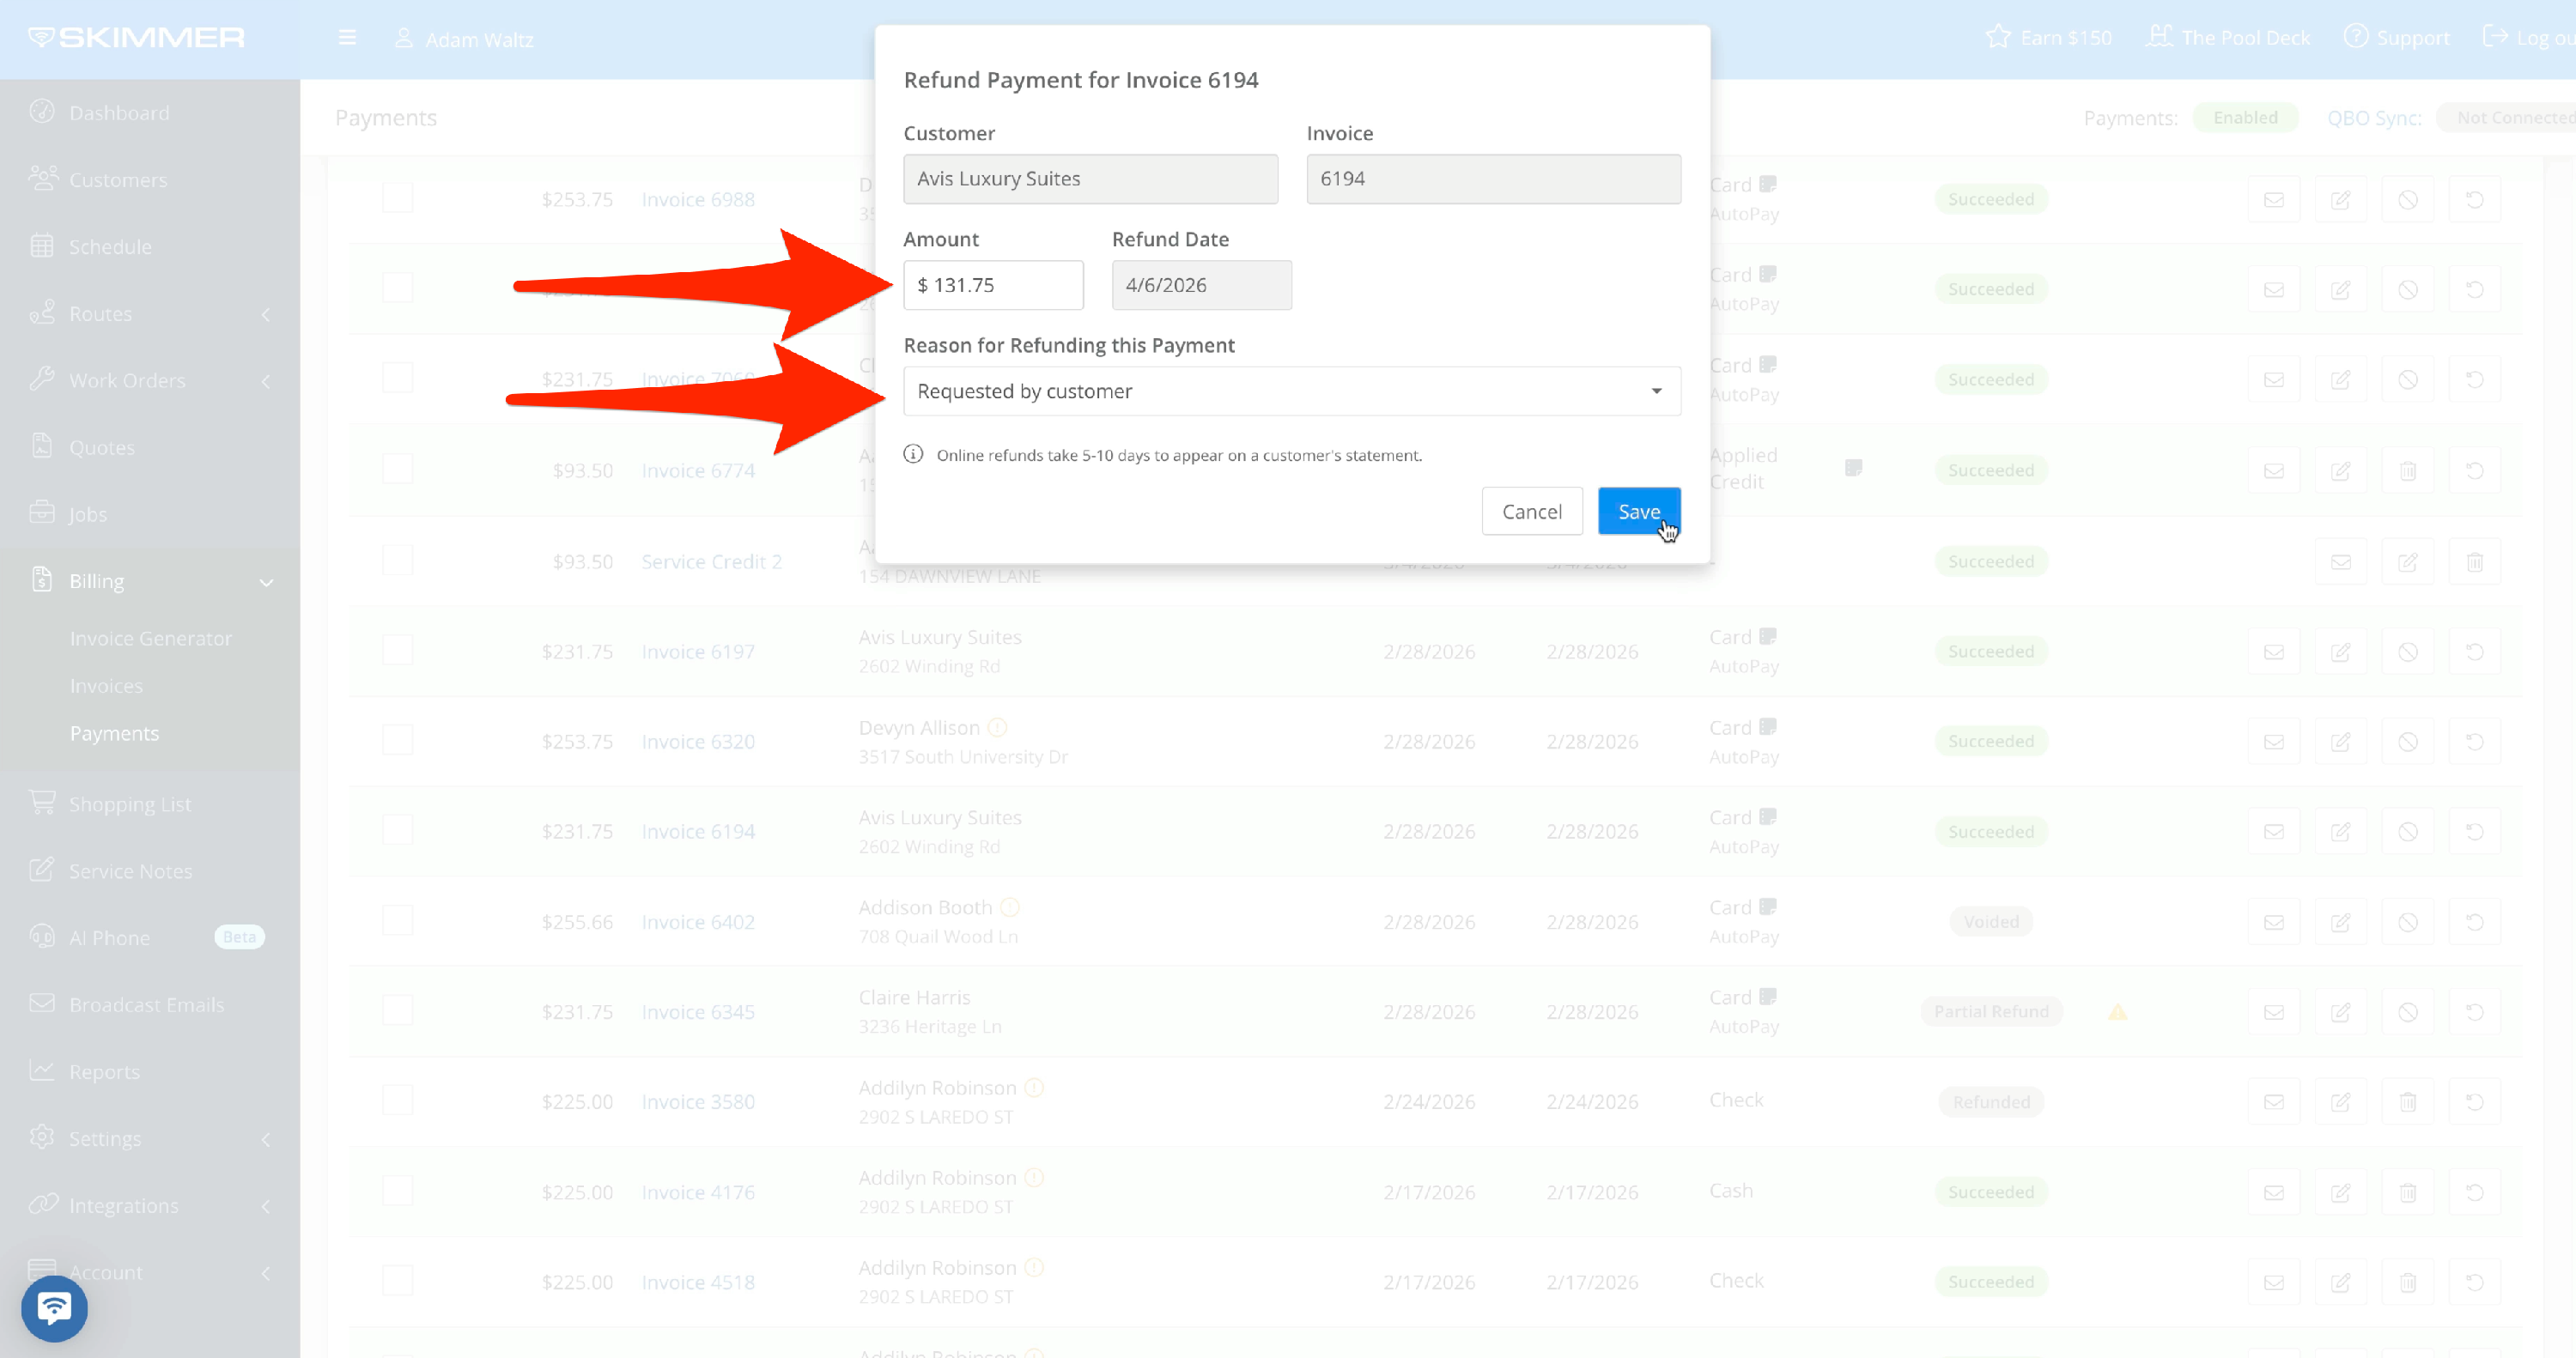
You can refund the full amount, or change it to whatever amount you want to refund. Select the reason for the refund, and Save. Online refunds take 5-10 days to appear on a customer’s statement.
- 3
-
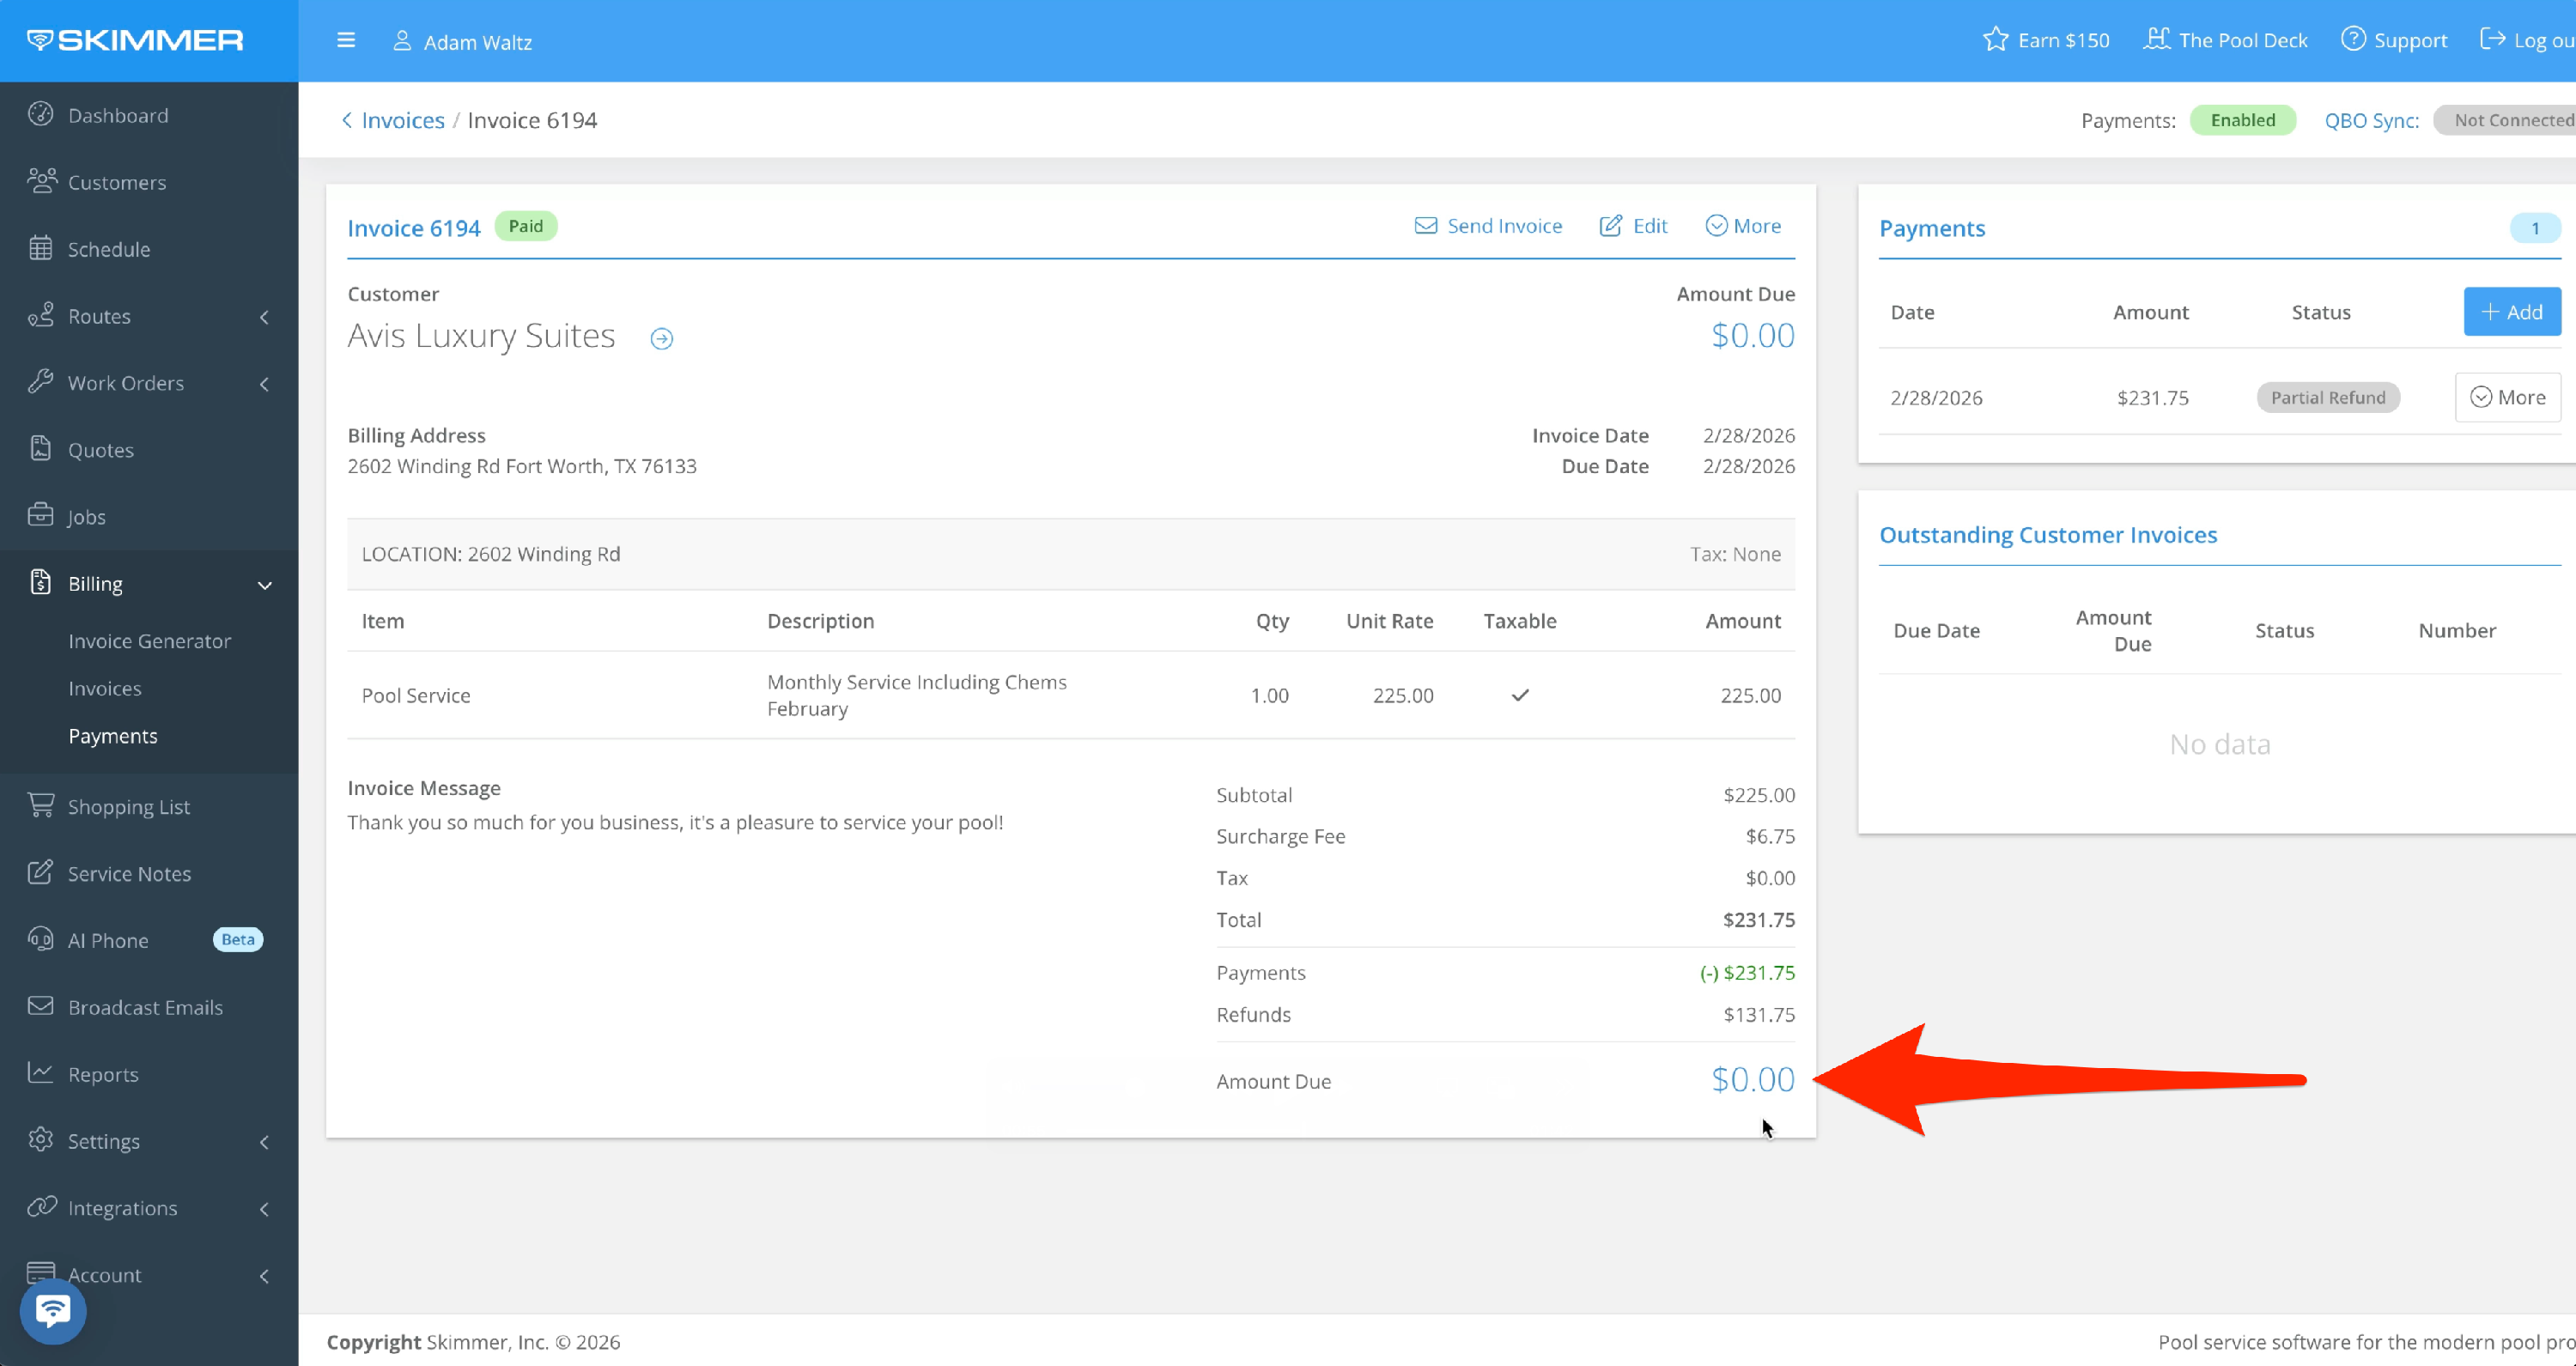
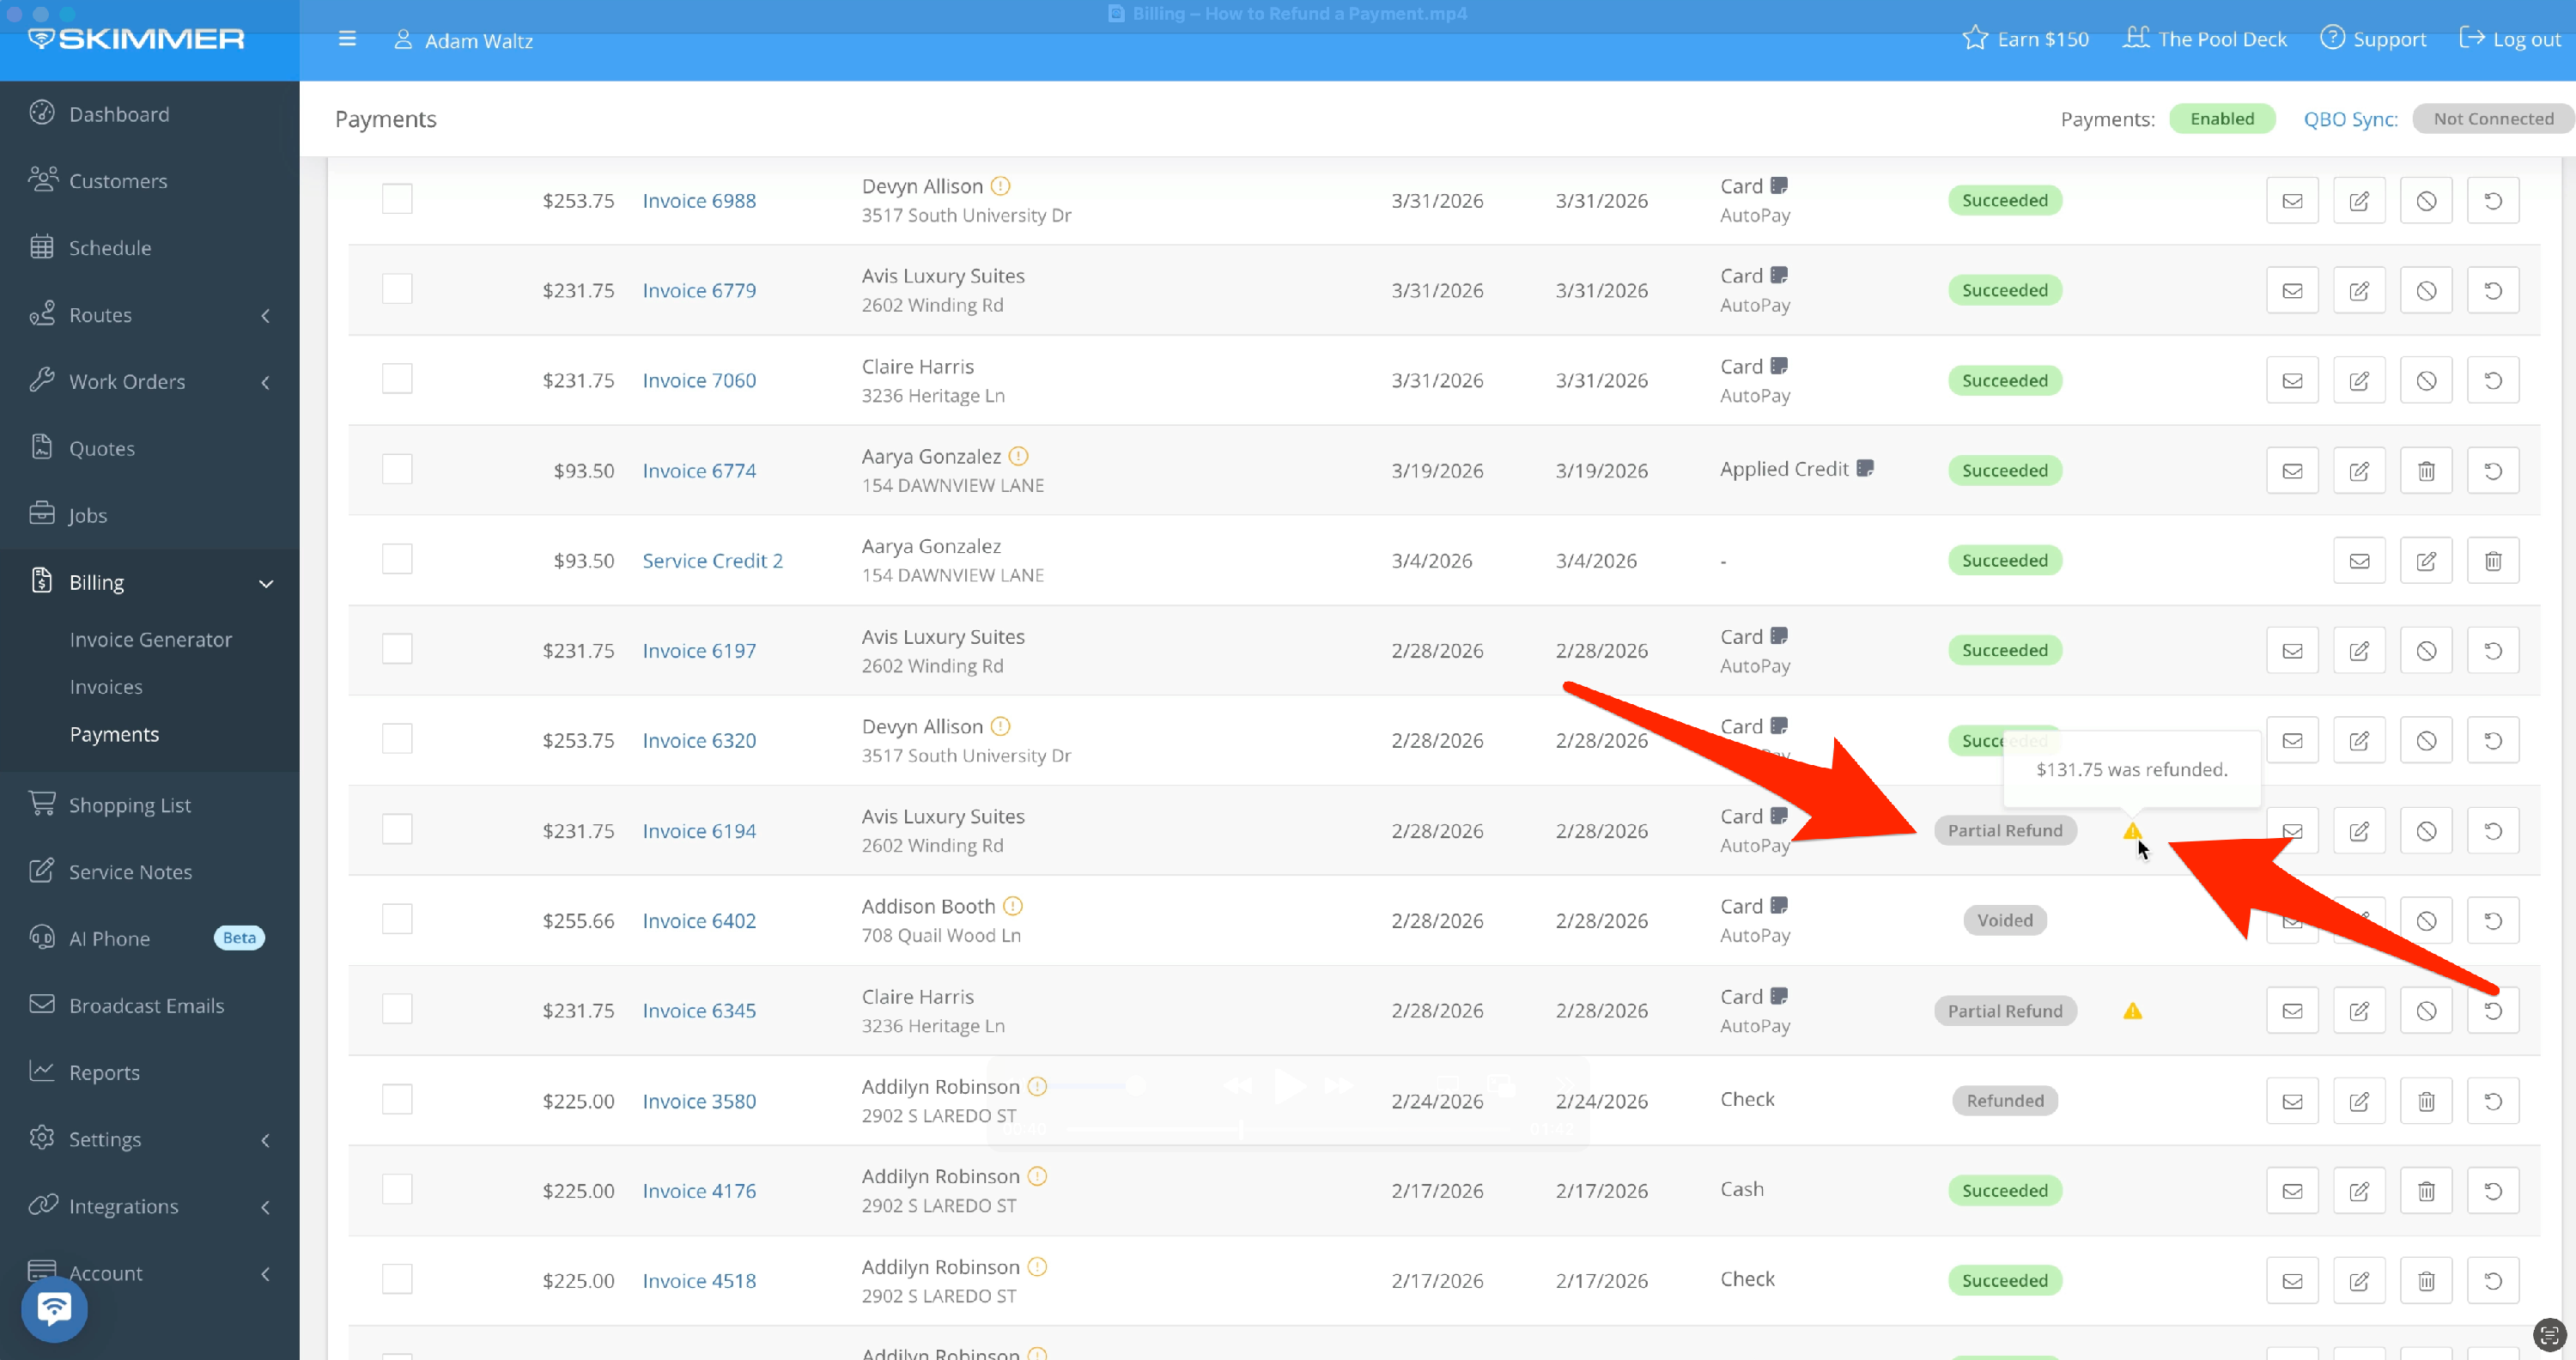
You’ll see a change to the payment status and an alert icon, from Succeeded to Partial Refund. Hover over the alert icon and it will let you know how much was refunded.
- 4
-
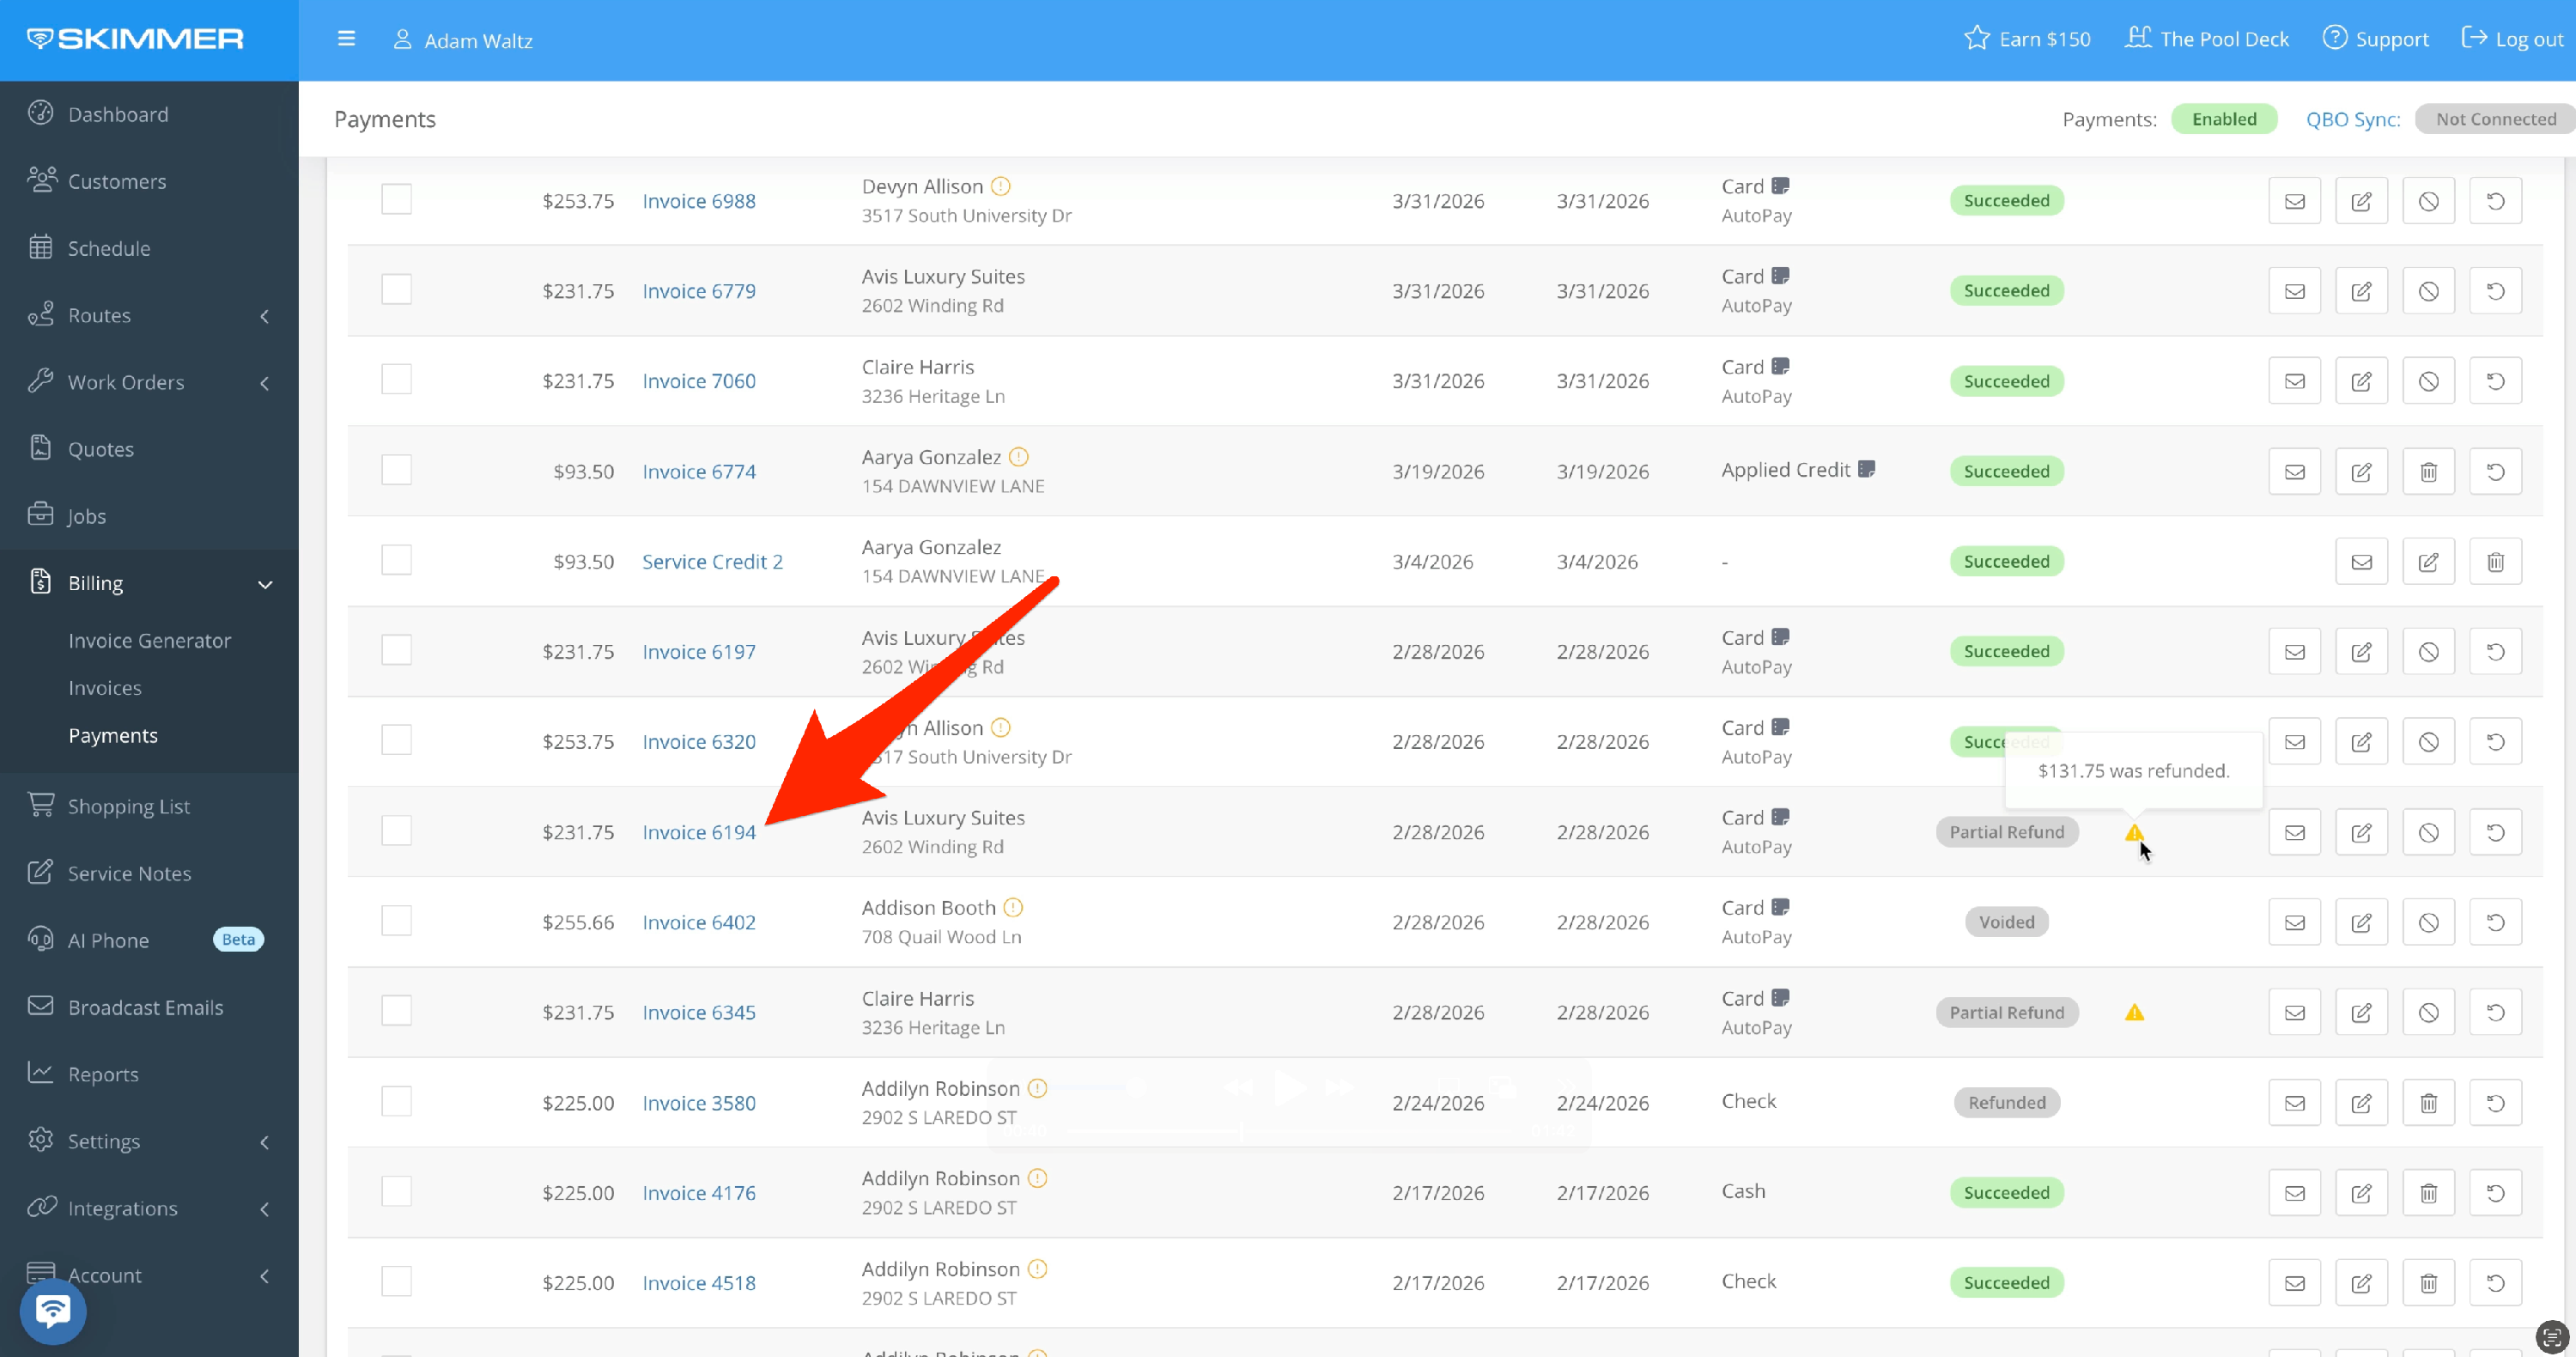
Click into the invoice. The amount due is still zero. When you refund or partially refund a payment, that amount is forgiven, which means the amount due stays at zero.
- 5
-
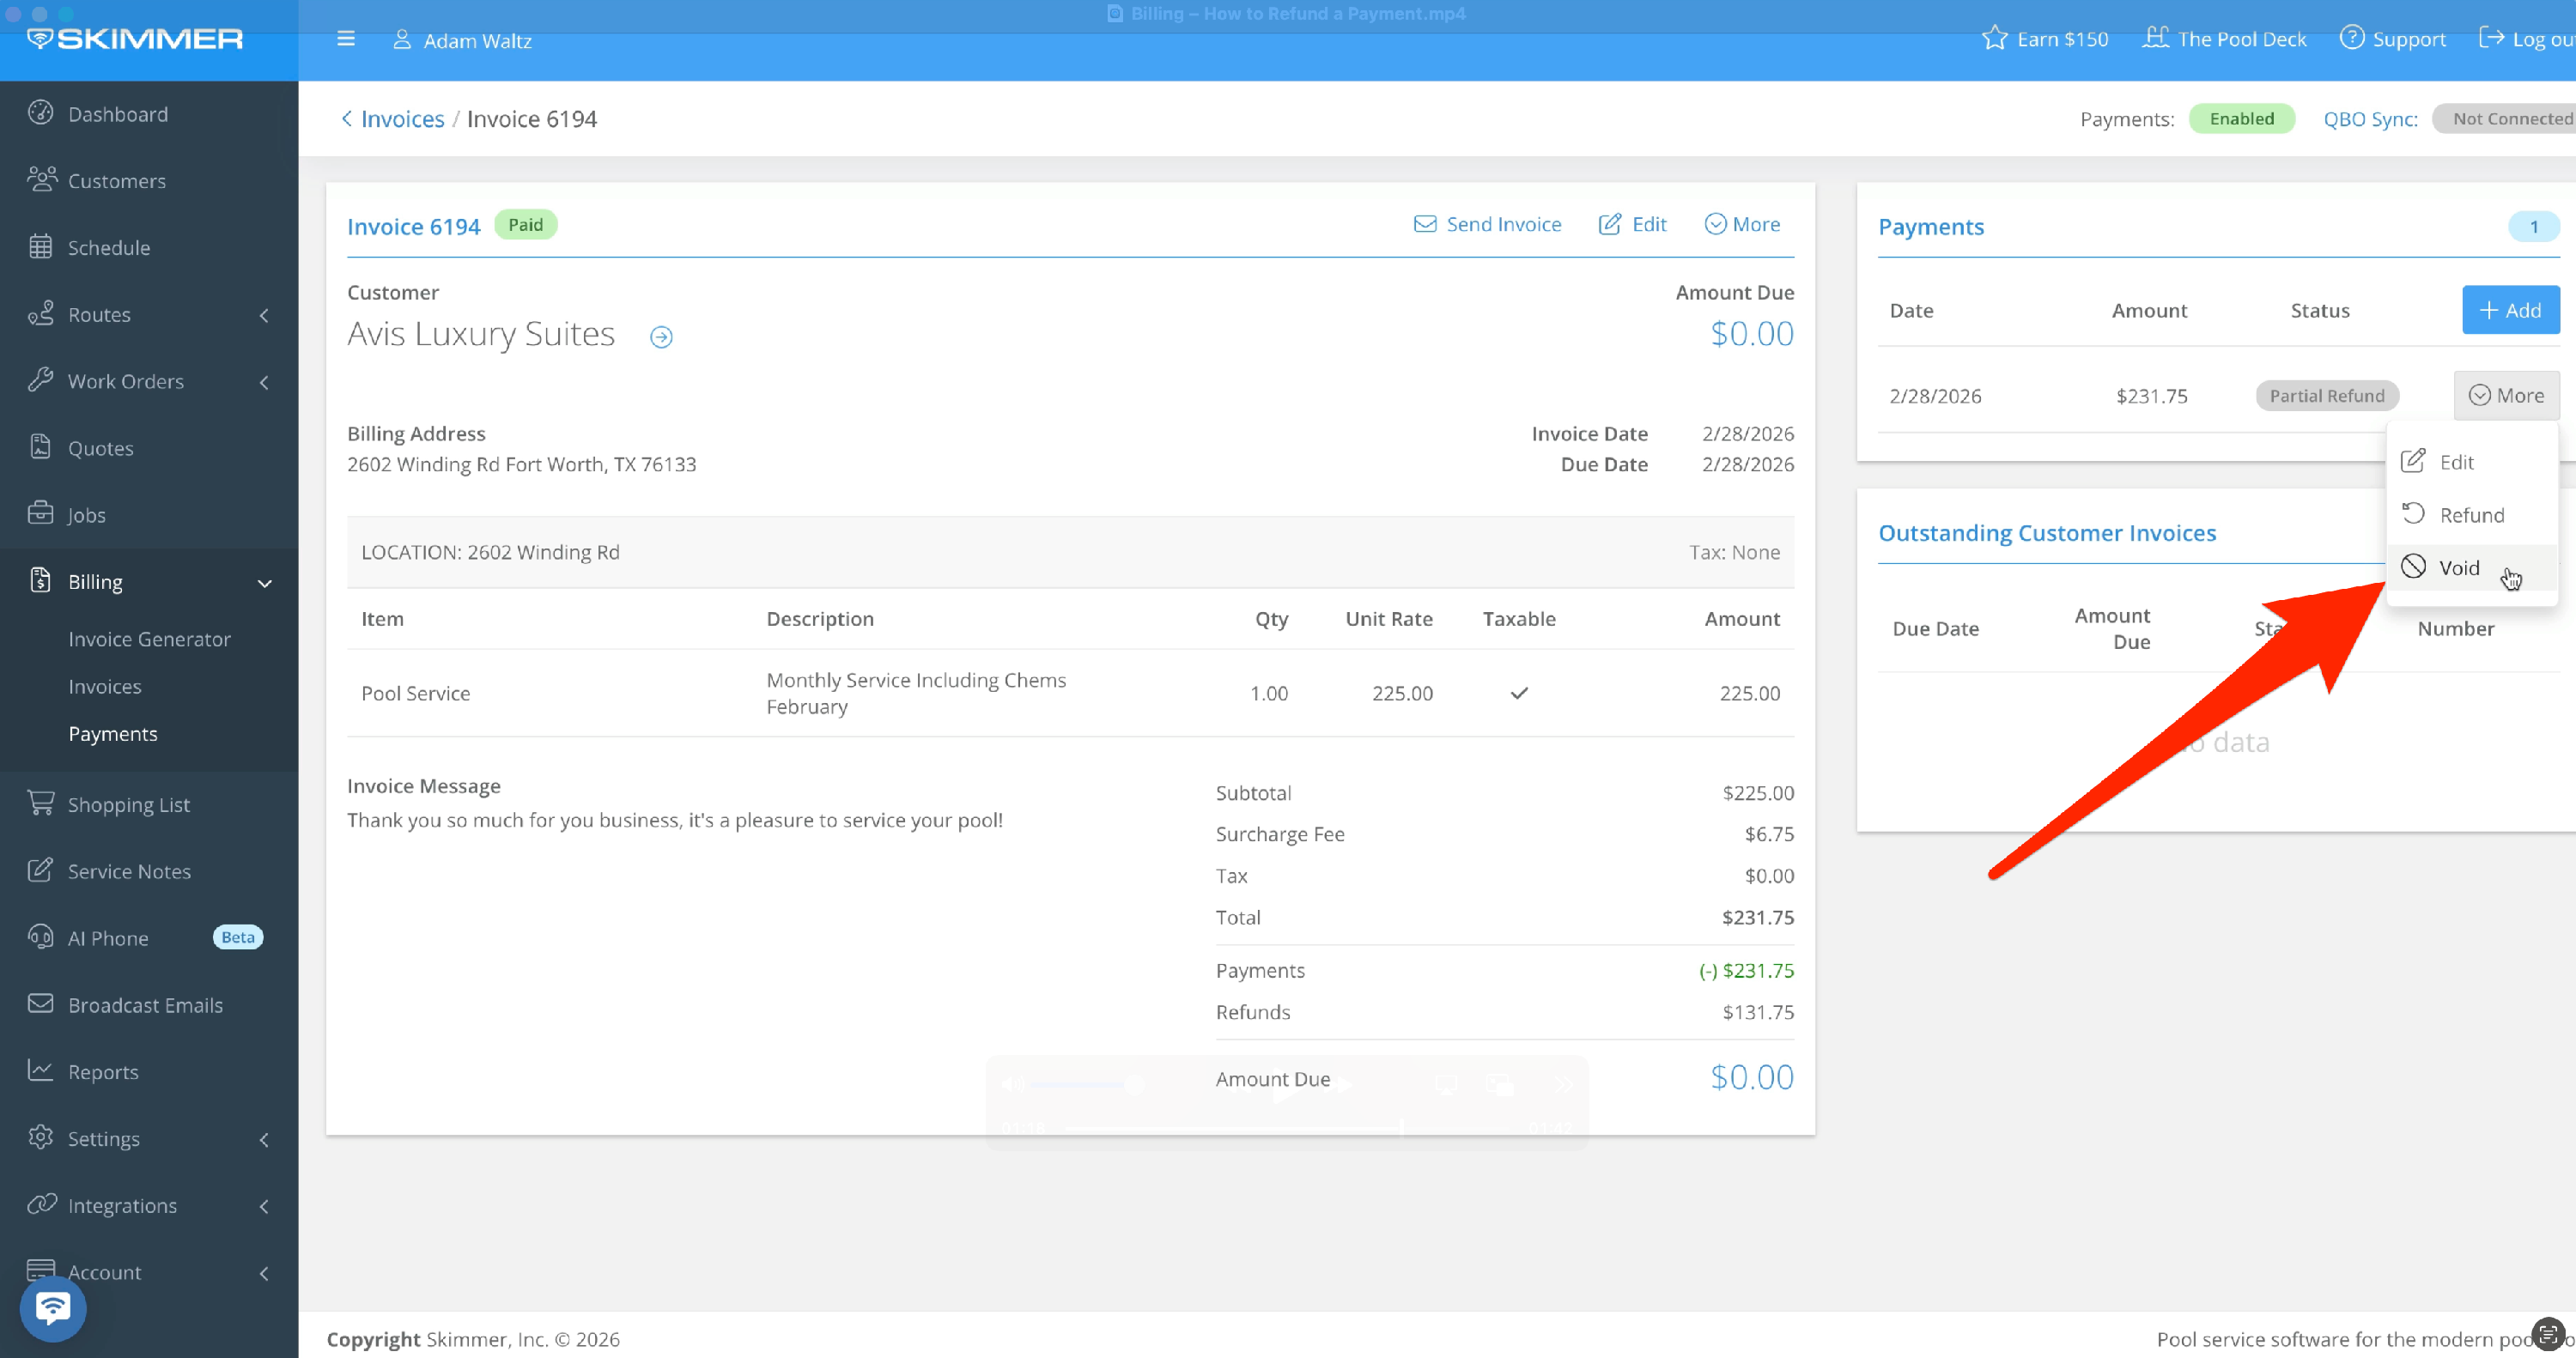
If you want to revert an invoice to the original amount due, delete or void the current payment. Deletion applies to cash or check payments, and void applies to card and auto payments. Voiding a payment will refund the full amount and return the invoice to its previous state. You cannot void a payment if it has already been fully or partially refunded.