Quotes – Create and Send
To learn how to create and send Quotes to your customers, see the video below. Or, if you prefer, scroll past the video to view our step-by-step text instructions.

Step-by-step instructions . . .
- 1
-
Here’s how to create a Quote and send it to your customer for approval. On the website, start by going to Billing > Quotes.
The first thing you’ll see is a dashboard. At the top, there are four tiles showing the dollar value of different categories of Quotes. On the far left, you have the value of all Quotes sent in the last 30 days. Then, moving to the right, you see the value of all Quotes, all Quotes approved, and all Quotes rejected within the last 30 days.
Below the tiles, you have a section for viewing and managing each individual Quote. At a glance, you can see key information about each Quote, such as its creation date, total dollar value, expiration date if you’ve assigned one, and status. You can filter the list by Start and End Date, one or more Statuses, Customer name, or Quote number.

- 2
-
Look to the far right and you’ll see a number of button options. Click Details if you want to go into an expanded screen that allows you to view and edit information related to this Quote.
Click More for a dropdown list that provides a shortcut to certain options. Right from here, you can send the Quote email, select an approval status, and more.

- 3
-
We’ve reviewed some of the basic elements. Now let’s create a Quote and send it to a customer. To start, click Create Quote. This will take you to the initial creation screen.
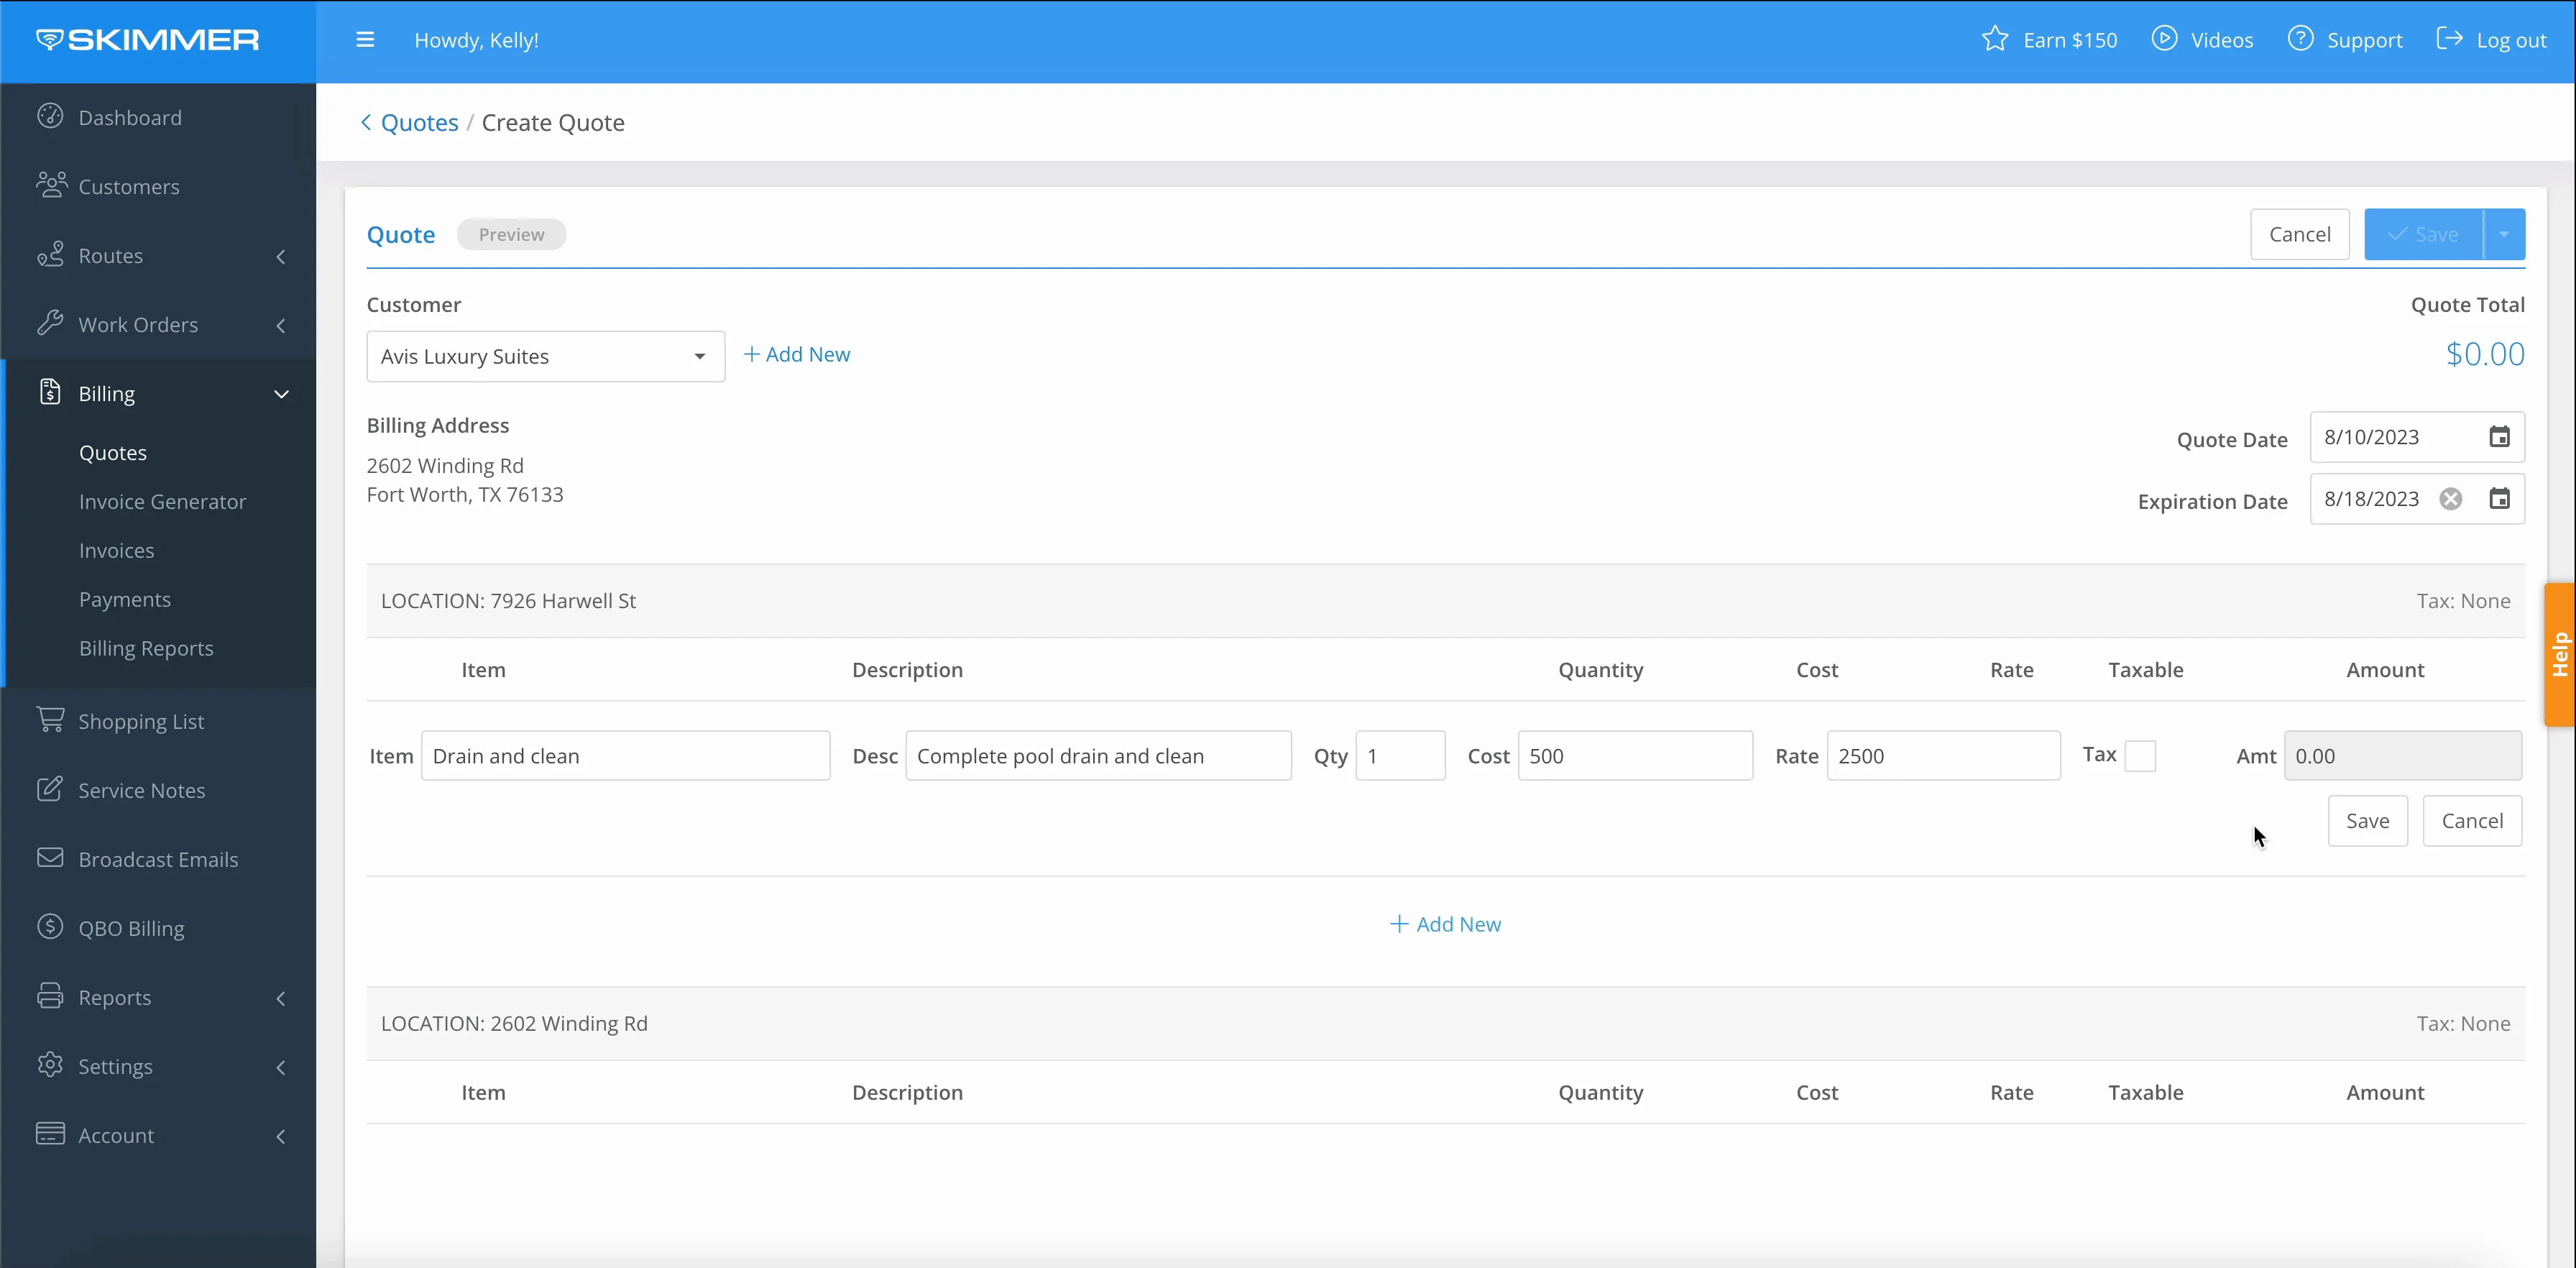
First, when it comes to selecting the customer you’re creating the Quote for, you have two options. One option is to create a new customer, which is useful if you’re proposing work for someone who’s a potential customer but not a customer yet. Click that button and you’ll be prompted to fill out some customer information and create them in Skimmer, after which you can progress to generating the Quote. For demonstration purposes, we’ll choose an existing customer.

-

-

- 4
-
Here’s where we’ll create the Quote. Billing and location information have already populated. Note that this customer has two service locations, and we can add line items for one or both locations. While you can see both here, if you create line items for only one location, the other service location will not be included in the final Quote that’s generated and sent to the customer.
Quote Date defaults to today’s date when you’re creating the Quote, but you can select a different date if you like. Below that, if you want this Quote to expire on a certain day, meaning the customer’s access to view and approve it will end, select an Expiration Date. This is useful for work that has a variable cost that can change over time.

- 5
-
To begin adding line items, click Add New. This will create a blank line item, which you can then populate with all the relevant details. When that line item is ready, click Save.
Now the Amount field in the line item has populated, as have the Quote Total and margin calculation at the bottom. Quick note about the margin calculation: that is for internal view only and is not included in the Quote document sent to your customer.
If you need to add more line items, the Add New button is still there, so just click it to add another one.

-

- 6
-
The Message to the Customer box has already populated with the default message we set up under Quote Settings. However, this box is editable, so if you want to change any part of the message for this one quote, you can do so here.
The Internal Notes box is for your use and view only. Whatever you add here will stay within Skimmer and will not be sent to the customer. So, for instance, if this is a potential new customer and you want to make notes about where you are in the sales process, or make a record of something you talked about, you can do so here. It’s an open text box, so you can add whatever notes are useful to you.

- 7
-
Just like with an invoice, you can add discounts and fees. But for Quotes, you can also define a required down payment, an initial amount you need to collect before work begins. Click Add and you’ll find two options. The first is to require a specific dollar-amount flat rate. The second is to require a percentage. So for instance, if you enter the requirement for a 20% down payment, the amount will be calculated and added as a parameter to this Quote.


- 8
-
Once the Quote is ready, you have three options for what to do with it. See the button in the top right corner. The first option is to Save, which will create the Quote and keep it in Skimmer, but will not yet send it to your customer.
The third option is to save the Quote in Skimmer and mark it as sent without actually sending it to the customer. You might choose this if, for instance, you’re planning to print the Quote for your customer instead of emailing it.
We’ll focus one the second option, which is to save and send the Quote to your customer. When you choose this option, you’ll get a pop-up that asks you to confirm some information for the email that’s about to be sent. Here you can edit recipients, the subject line, and the email message, and any edits you make will apply to this specific email only. When you’re ready, click the button to Save and Send it to the customer.

-

- 9
-
Once you send the Quote, note that its status has changed to Sent. The status will change again when the customer either approves or rejects the Quote, or if it expires. You can see the full list of possible Quote statuses in our Quotes FAQ.
So that’s an overview of the Quotes dashboard, and how to create and send Quotes.


