Quotes – Create Related Invoices
Tiers: All
To learn how to create invoices and associate them with a specific Quote, see the video below. Or, if you prefer, scroll past the video to view our step-by-step text instructions.

Creating a related invoice from a quote
After a customer approves a quote and pays the deposit, you can create a related invoice directly from the quote. This keeps your invoices linked to the original quote and automatically applies the collected deposit to the balance due.
Creating an invoice from a quote is a multi-step process:
- Open the quote
- Collect the deposit
- Add a related invoice
- Build the invoice
- Save and send the invoice
Open the quote
- Select Quotes from the left navigation menu.
- From the Quotes page, locate the quote using one of the following methods:
- Filter by start date, end date, status, customer, quote number, or tag(s)
- Sort by creation date, quote number, customer, total, expiration date, or invoice total
- Scroll the list to locate the quote<
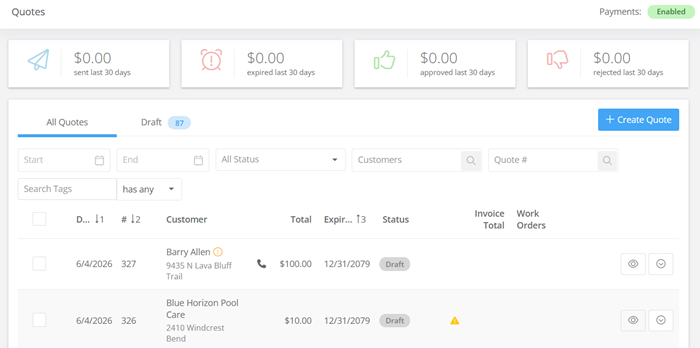
- Click the quote number to open it. Confirm the quote shows an Approved badge next to the quote number.

Collect the deposit (if not already paid)
If the Related Invoice panel displays a Not Collected badge, complete the following steps to add the deposit payment. You can also see Quotes - Deposits for more detail on deposit payments.
- From the Related Invoices panel, click the Collect button.
- From the Add Payment for Quote window, confirm the customer name, invoice number, amount, and date.
- Select a payment method:
- Cash
- Check
- Other
- Online Payment
- Complete any additional fields that appear based on your payment method selection. For example, selecting Online Payment prompts you to select a credit card on file or enter a new card.
- Click Add Payment. The deposit status updates to Paid and the deposit amount appears in the Related Invoices panel.
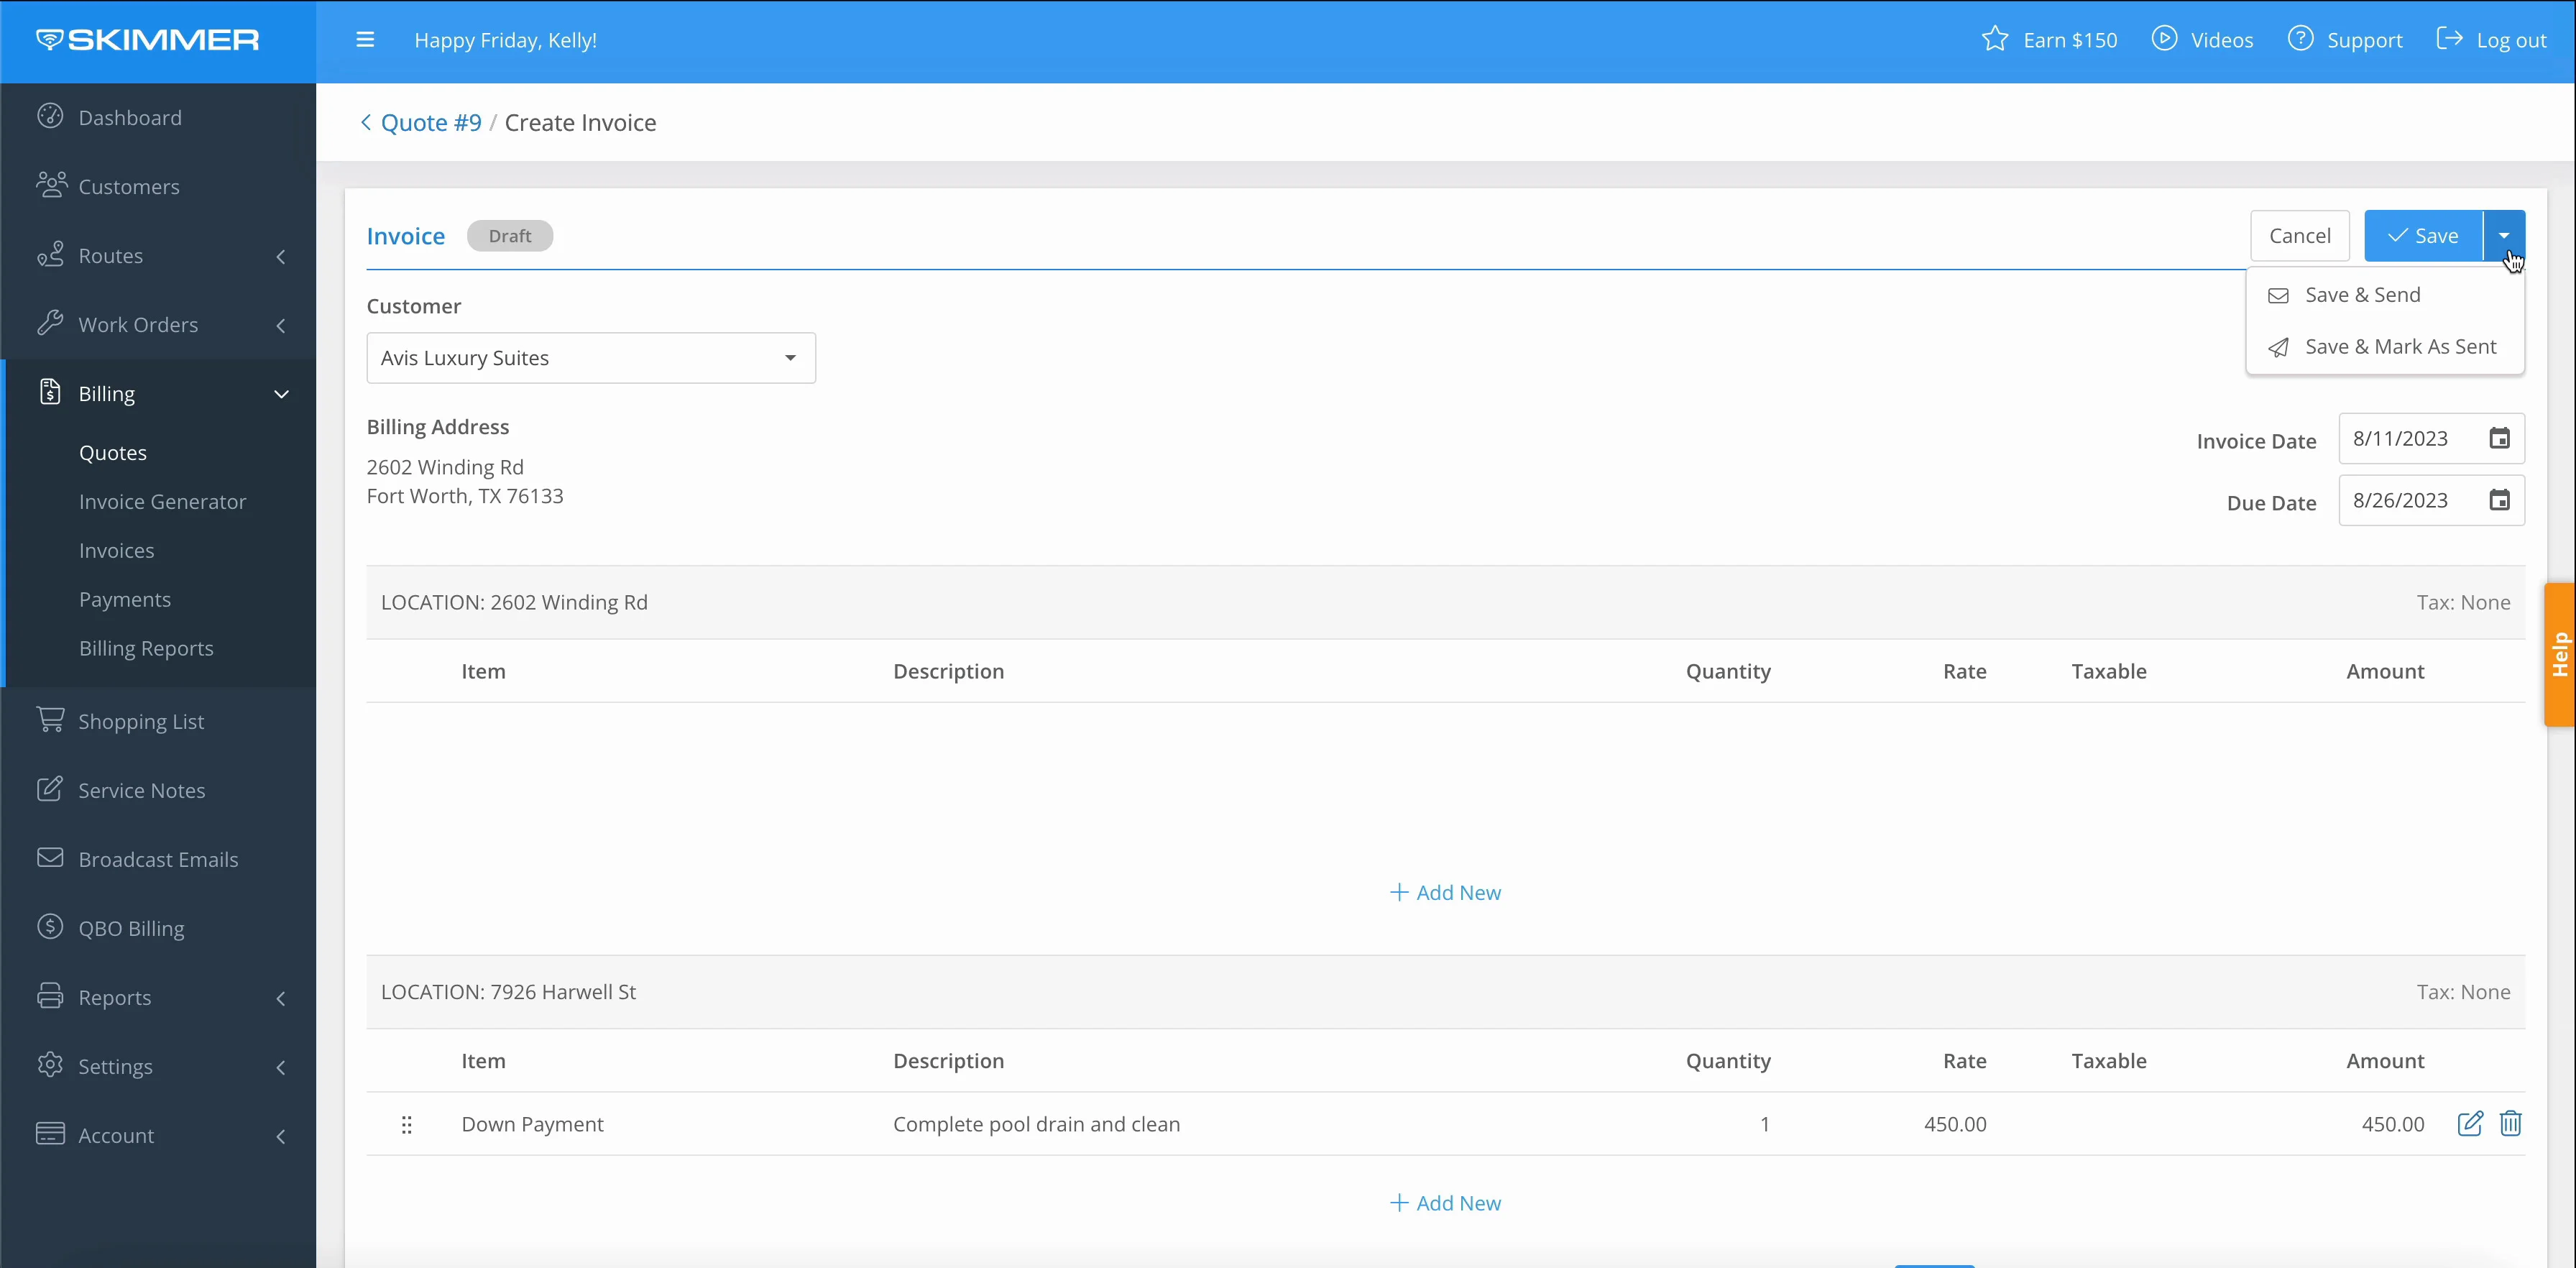
Add a related invoice
- In the Related Invoices panel on the right, click the Add button.
- Select a starting point for the invoice:
- Use items from quote — pulls the line items from the quote into the invoice automatically
- Blank invoice — opens a customer invoice without line items
- Click Next. Skimmer opens the Create Invoice screen with the customer information, billing address, and tax rate pre-filled.
Build the invoice
- Confirm the invoice and due dates.
- Review and update the invoice message if needed.
- If you selected Use items from quote, confirm the line items carried over correctly.
- Add, edit, or remove line items as needed:
- Add items — click Add New and fill in the item details:
Field Description Item Select an item from your product catalog. Default values populate automatically; changes here only affect this invoice. Desc Line item description Qty Item quantity Unit Cost The amount your company pays for the line item Unit Rate The amount your company charges the customer Tax Check this box to apply taxes to the line item Click Apply to save the new item.
- Edit items — click the edit icon next to the item's amount, make your changes, then click Apply.
- Remove items — click the delete icon next to the item's amount.
- Add items — click Add New and fill in the item details:
- To add a discount, click Add next to the Discount field. Update the discount name, type (flat rate or percentage), and amount.
- To add a fee, click Add next to the Fee field. Update the fee name, type (flat rate or percentage), and amount.
- Review the invoice totals:
Field Description Discount Total discount applied to the invoice Fee Total fees applied to the invoice Subtotal Line item total − Discount + Fee Tax Total taxes on the invoice Total Subtotal + Tax Amount Due Total − Deposit Amount Margin Percentage of the total sale kept as profit after subtracting costs
Save and send the invoice
- Click the arrow next to the Save button.
- Choose one of the following:
- Save & Send — saves the invoice and sends it to the customer immediately
- Save & Mark As Sent — saves the invoice and marks it as sent without emailing the customer
Skimmer saves the invoice and returns you to the quote. The Related Invoices panel now shows the new invoice with its amount, status ( Sent), and invoice number. The deposit line updates to Applied.