Billing Report – Customer Statement
Watch the video or scroll down for step-by-step instructions.
Tiers: All

.wistia_no_animate * { transition: none !important; -mozilla-transition: none !important; -ms-transition: none !important; -o-transition: none !important; -webkit-transition: none !important; }
Step-by-step instructions . . .
- 1
-
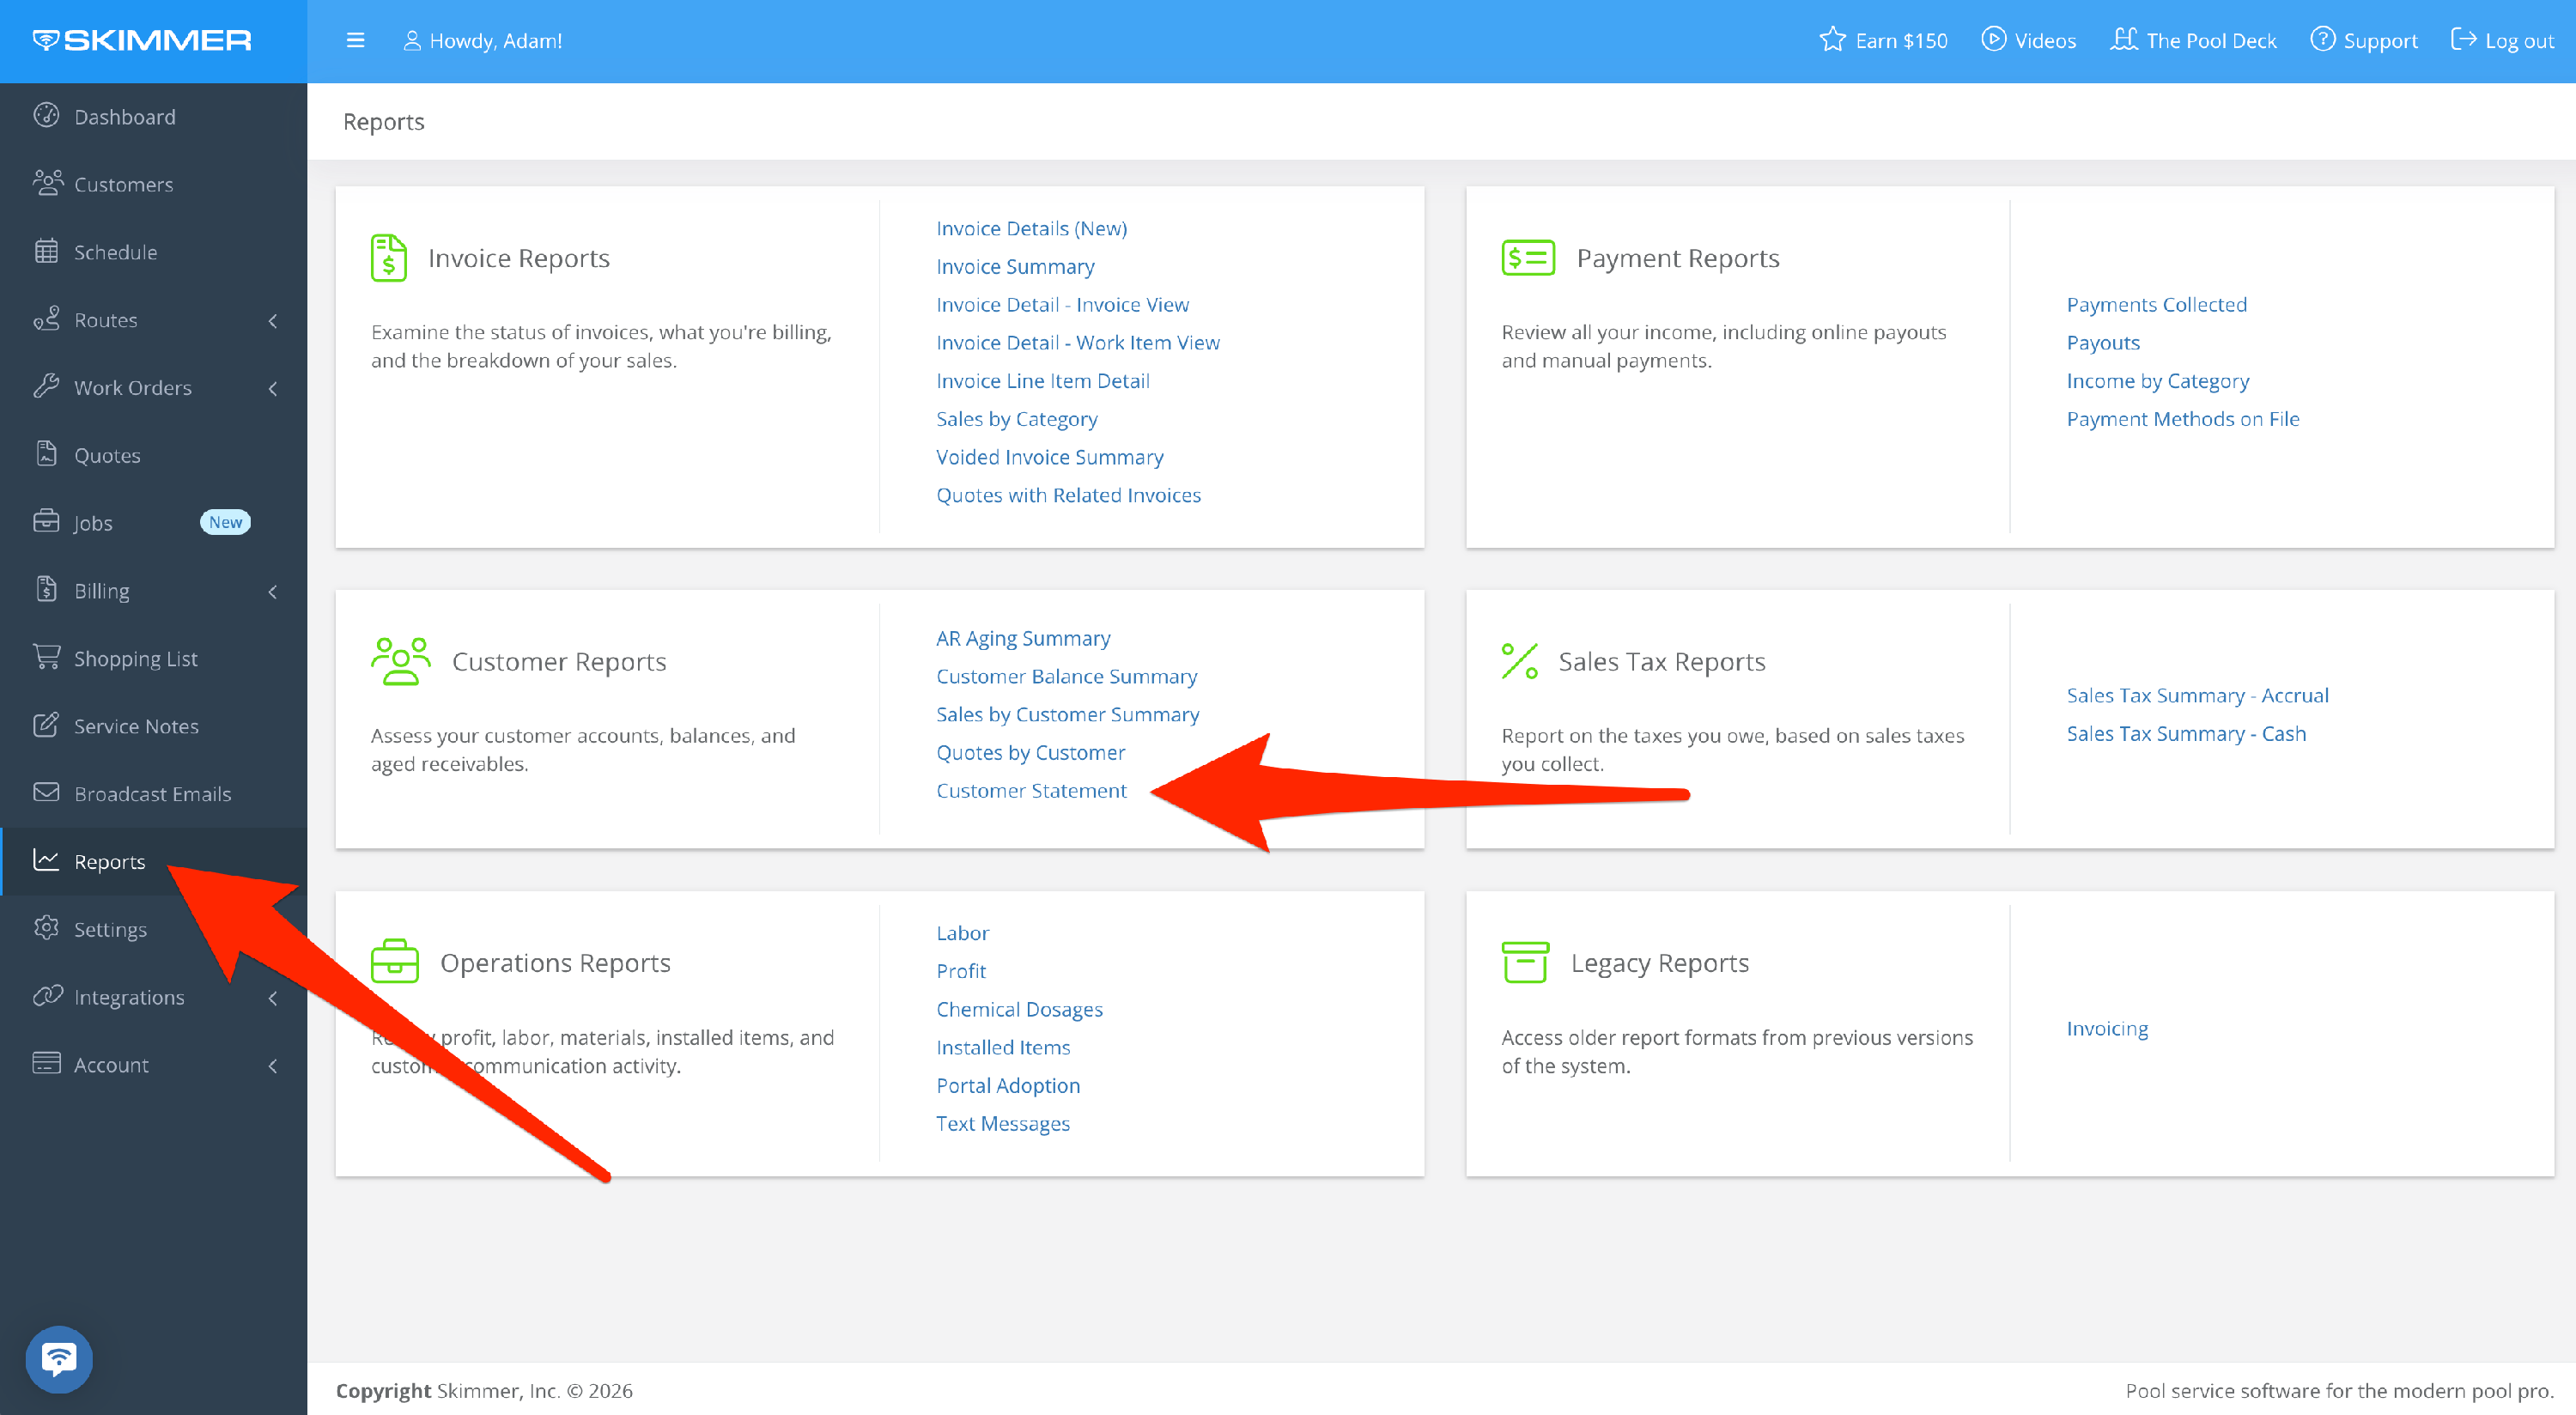
Select Reports > Customer Reports > Customer Statement
NOTE: This report is now in a new location, as indicated by the screenshot below. Disregard the previous location under Billing, as reflected in subsequent screenshots. Going forward, the Payments Collected Report can be found under Reports in the main menu.
- 2
-
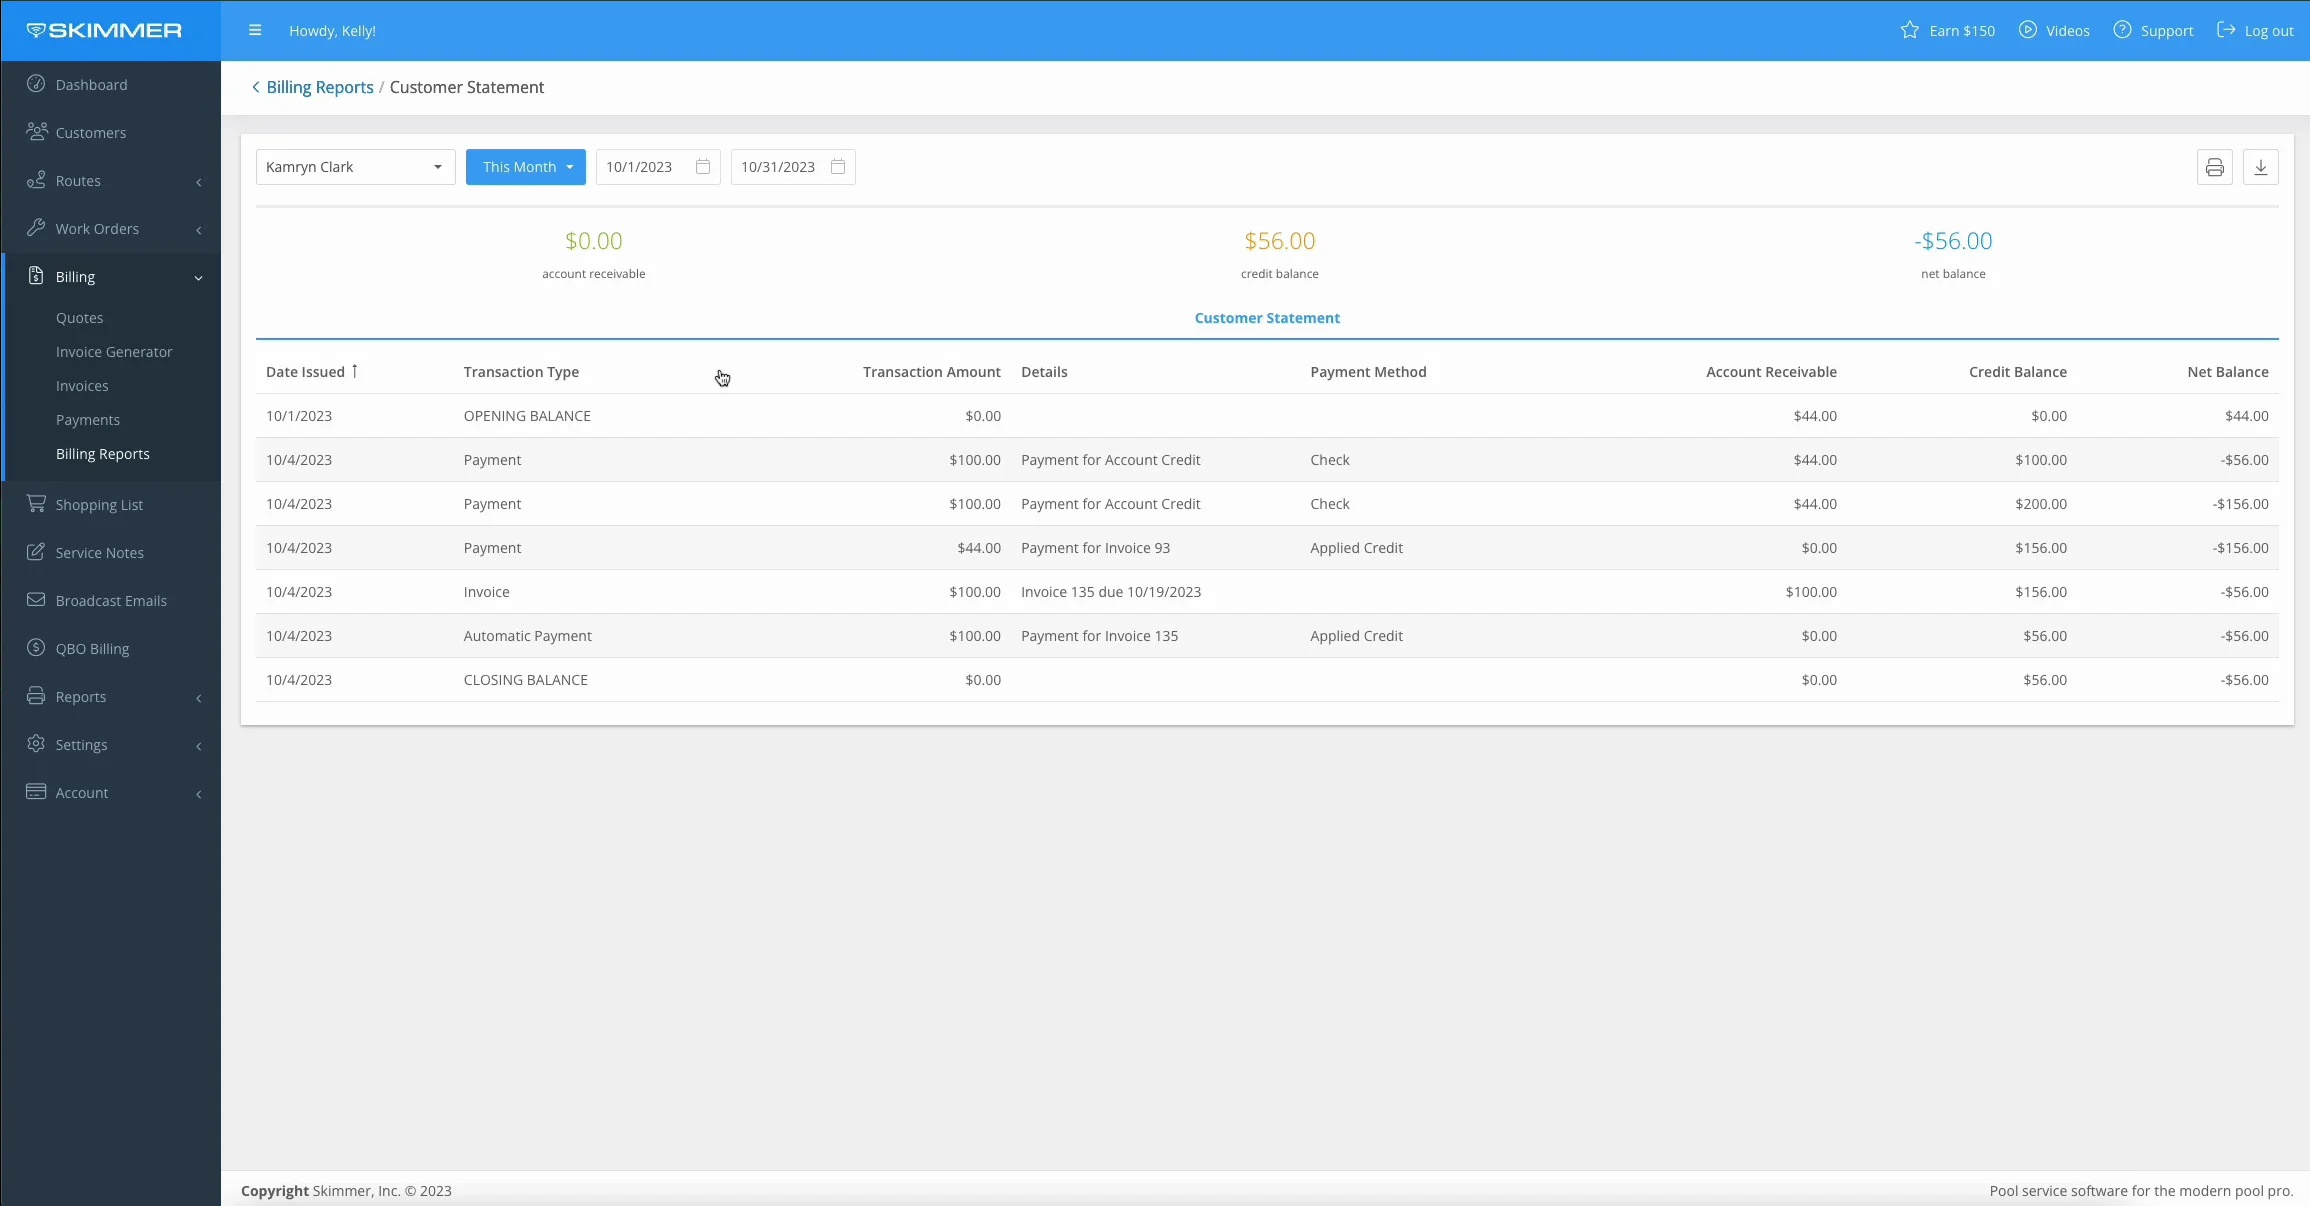
Click and select the customer name from the dropdown bar.

- To access the customer statement from the customer’s profile, click View Statement.

- 3
-
To choose a date range, click and select from the blue dropdown, or click the calendar to view a specific date range.

-


