Add a Product (App)
To learn how to add a custom product using the web portal, see the video below. Or, if you prefer, scroll past the video to view our step-by-step text instructions.

Step-by-step instructions . . .
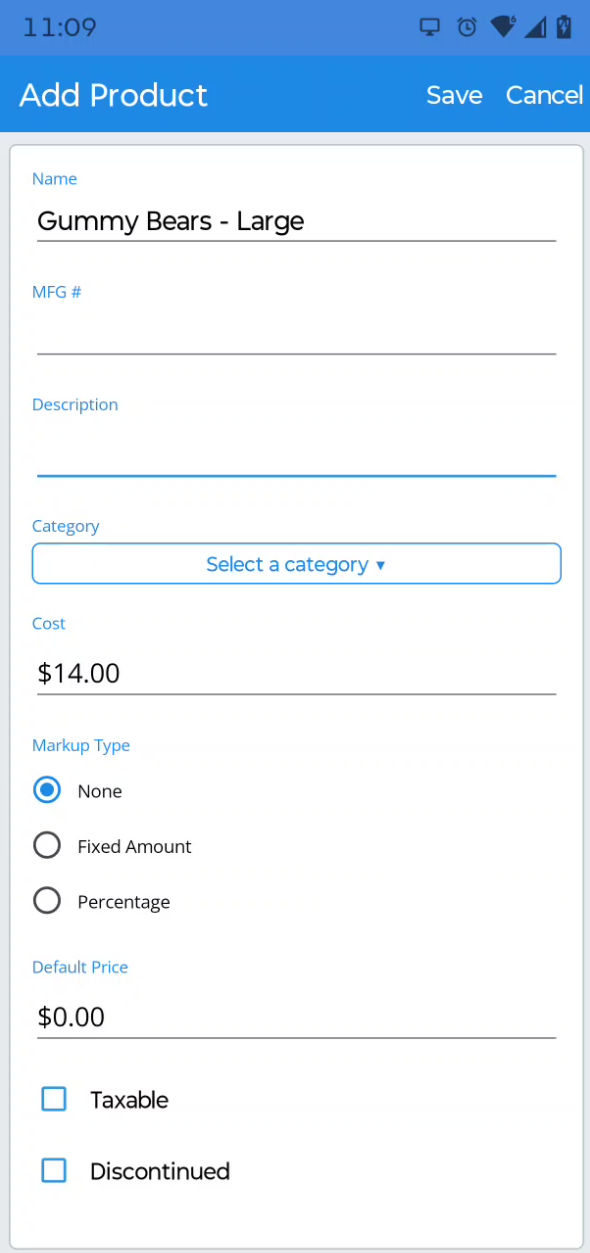
With Skimmer, you have the ability to create and manage your own list of Products. You can add them to the shopping list, mark them as installed, and bill for them just like you would items from Skimmer’s database. And because these Products are unique to your company, you can assign them extra information, such as;
- Cost
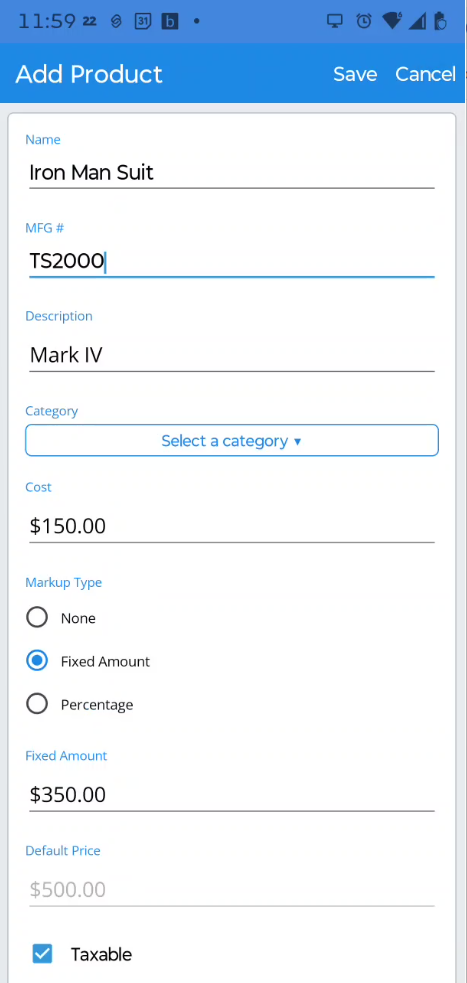
- Markup Type (None, Fixed Amount, or Percentage)
- Markup Value
- Default Price (auto-calculated when a markup type is set)
- Manufacturer ID
- Heritage ID
- Discontinued - Discontinued products can be viewed in the product catalog but are filtered out of all product selection screens.
This tutorial explains how to a add or edit a product using the app as well as how to add a product to your shopping list. We show you how to do this on the web in another tutorial.
Add or Edit a Product
- 1
-
To begin, log into the Skimmer app and navigate to the Settings tab. Then scroll down and tap on Products.

- 2
-
You can edit or delete any products currently on your list. To edit, simply tap the product, make your changes on the edit screen, and save.
To delete, swipe left on the product to reveal a trash can icon. Tap the icon, confirm, and the product will be deleted. Keep in mind that delete only works if you haven’t added that item to the shopping list or marked it as installed. If you’ve only added it to the shopping list, you can remove it and then delete the product. Once you mark it as installed, though, it becomes part of the service history and can’t be deleted. But you can still edit the product and change its identifying information, such as name and category.

-
-

- 3
-
To create a new item, click the + in the top right corner. This opens the Add Product screen, where you can enter the details of this item.
After you enter the product details, tap Save, and you’ll see it’s been added to the list on your mobile device. The next time you sync, this new item will be uploaded to the cloud and added to your company Products list.

- 1
-
Go to the Admin Panel and then the Shopping List, and tap the plus. Here you’ll see Products included in your options. You can choose to add a product and associate it with a specific customer, or just add it for your company in general.
For demonstration, we’ll add a product for a customer, which opens a selector box. Choose the customer, select the correct location and body of water, and then select the product.
-

-

-

-

- 2
-
On the Add Item screen, you can adjust the default description, quantity, or price for this customer if you need to. When you’re ready, tap Save.
And now we see our Product on the shopping list. Once it’s marked as installed during service, Skimmer will record that installation and it will reflect in your billing and various reports.

-


Add a Product to Your Shopping List
Now, how does your Products list help with your work? You can access and add these items directly to your shopping list.


