QuickBooks Online – Syncing Your Data
To learn how to utilize Skimmer's data integration for billing information, see the video below. Or, if you prefer, scroll past the video to view our step-by-step text instructions.

Step-by-step instructions . . .
- 1
-
Skimmer lets you sync all of your billing, customer, and product data to QuickBooks Online seamlessly and automatically. In another video, we showed you how to set up your connection to QBO. Now we’ll demonstrate how that connection functions and how your data flows from Skimmer to QBO. Once you initiate the sync, it’s always on and working in the background. So we’ll show you the results of that automatic process.
First, we’ll add a new customer account in Skimmer. Then we’ll go to QBO and refresh our customer list, and there we see the new customer. This also applies to edits you might make to the customer. For instance, if you change their name in Skimmer, you’ll see that change reflect in QBO.

-

-

-

- 2
-
Now we’ll add a new Product in Skimmer. Then we’ll go to QBO, Products & Services, refresh, and there’s our new product.
Also of note, the Product and Service account we set as the default on Skimmer’s Integration screen (which we demonstrated in the setup video), has been assigned to this item. We can confirm that on the description screen in QBO. Once you’re in QBO, if you want to change product’s account, you con do so there. Skimmer will not overwrite that change, but the change will not be transferred back to Skimmer to affect the default there. It will only change this product’s assigned account in QBO.
What we’ve demonstrated so far, creating a customer or product in Skimmer and seeing them transfer QBO, can also be done with work order types. We won’t demonstrate that here because it works the exact same way you’ve already seen. So just know that this same automatic process applies to work order types.

-

-

-

- 3
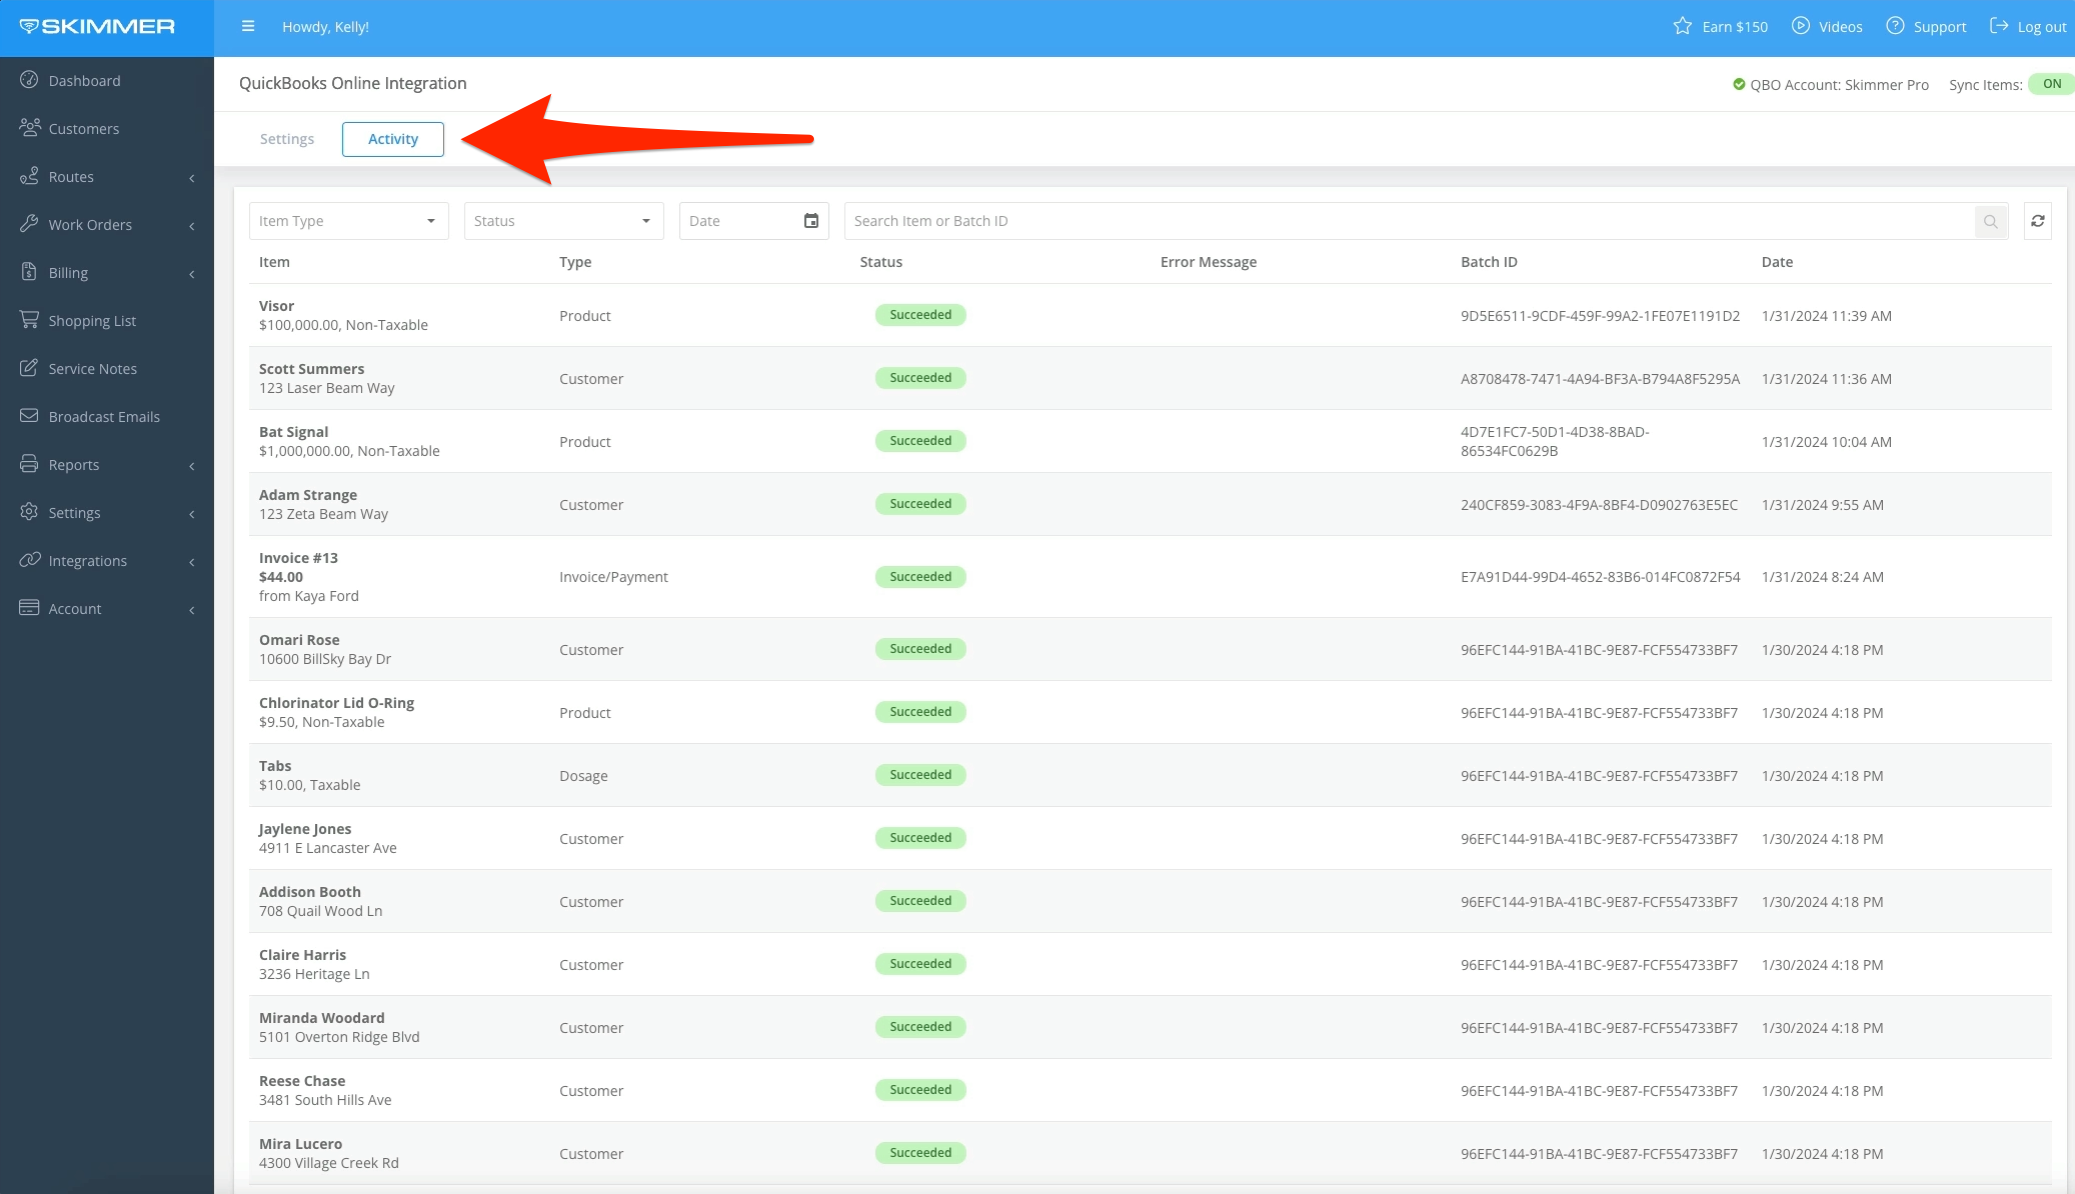
- You can also see a record of this activity in Skimmer’s Integrations Activity Log. So we’ll go to the Integrations screen, choose the Activity tab, and there we’ll see the customer and product that we created, and a record of them syncing to QBO.
- 4
-
Now we’ll show you how this integration works with invoices and payments. This is a direct connection between Skimmer Billing and QuickBooks Online. We’ll go to Invoices and create single invoice for demonstration.
Now we’ll save and send this invoice to the customer. At this point, Skimmer is not sending anything over to QBO. Why? Because it only syncs payments and paid invoices. Right now, this invoice has been generated and sent to the customer, but the customer has not submitted payment yet. So this information will stay in Skimmer Billing until they do so.

- 5
-
In Invoices, we’ll find that invoice and record a submitted payment. Now that a payment has been recorded, will this be synced over to QBO. Yes, instantly.
Go to QBO, click into Customer account, and we’ll see a record of the invoice and payment. What if turns out you received a check, and accidentally applied the payment to wrong account or wrong invoice or the wrong customer? If you were to delete that payment from that invoice we generated, it will also delete payment here and then show as still due. You don’t have to change that payment status in QBO manually, the integration will update it automatically.

-

-

- 6
-
Account Credit payments are also synced the same way. So we’ll add a credit to our customer’s account. Then we’ll refresh the customer screen in QBO, and see that payment information was sent automatically and instantly. A record is there now as an Unapplied Payment in QBO.
Keep in mind that in all of these transfers from Skimmer to QBO, we’re just sending the records of these invoices and payments to QBO.

-

-

- 7
-
What about refunds? They will also reflect in QBO the same way. In Skimmer, we’ll find that account credit payment and refund the full amount. Then we’ll refresh the customer screen in QBO, and now we see the refund record appear.
So, that’s a general overview of how the sync process works for Skimmer’s integration with QuickBooks Online.

-