All About ACH
What is ACH?
Invoice payment with a bank account instead of a credit card. Below, you'll find a step-by-step walkthrough showing two ways to implement ACH payments (for manual bank account verification, skip to step 7).
Step-by-step instructions . . .
- 1
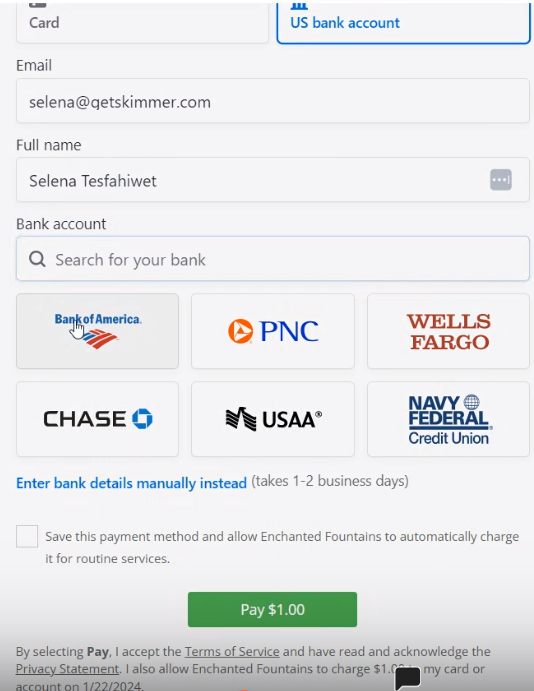
- To add a US bank account (ACH) with a method that results in instant verification, customers will need to switch the tab from card to US bank account, enter their email address, name, and select their bank. Follow the screen steps for Stripe to retrieve the bank account by logging into their bank.
-
- 2
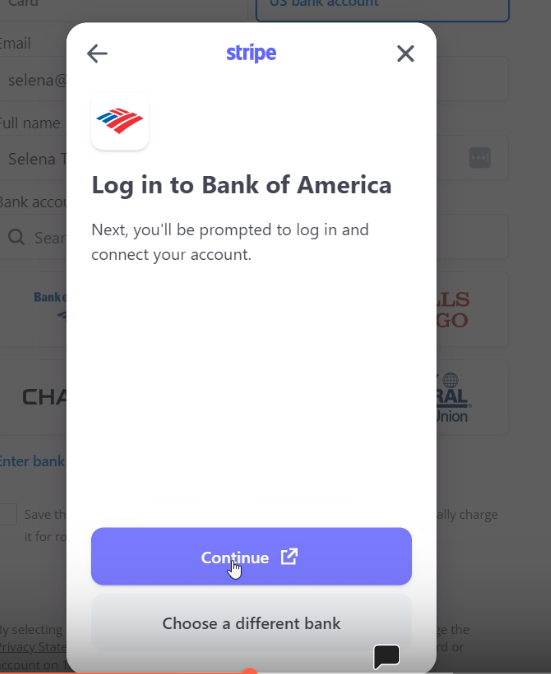
- Agree and continue.
-
-
- 3
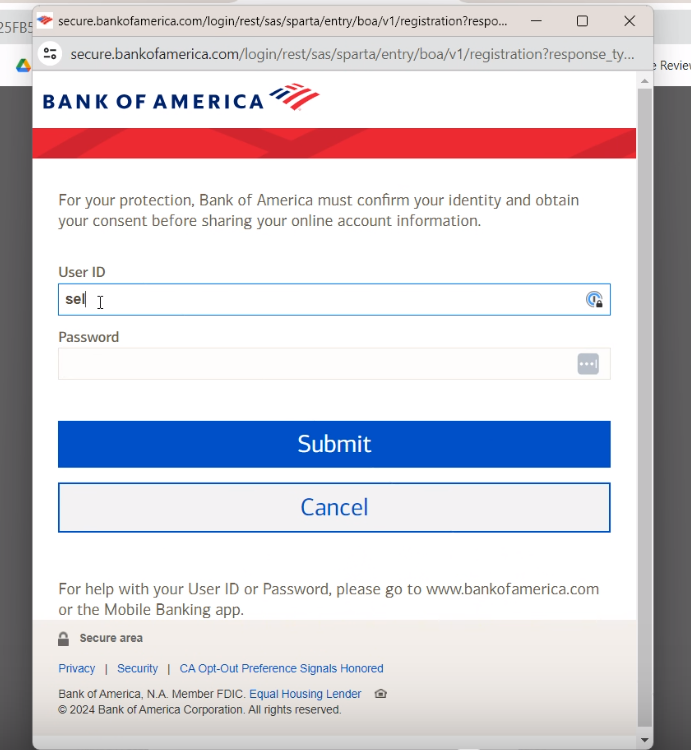
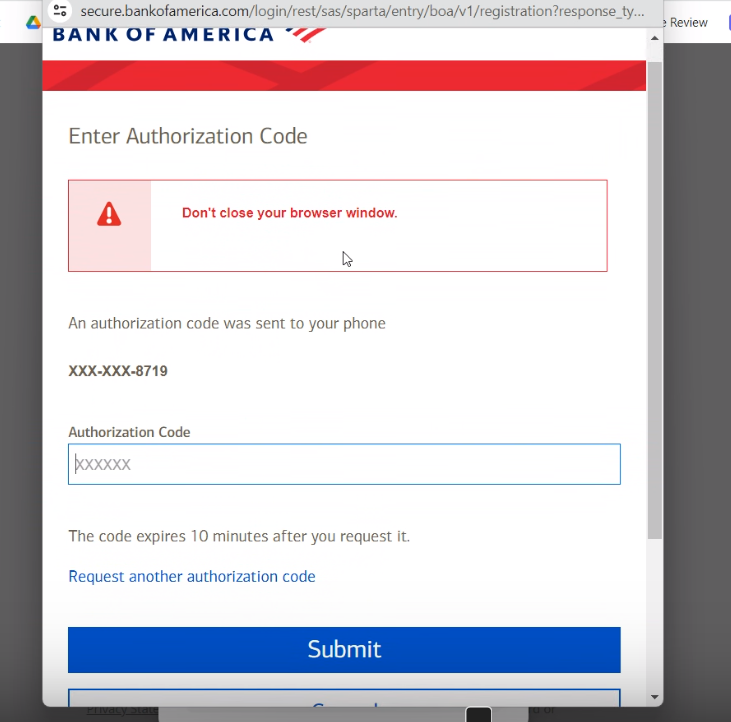
- Your client will need to log in to their bank account to connect. The bank may text or call the client with an authorization code to confirm their login. Select Share My Data to provide consent.
-
-
- 4
- Select the account the client would like to associate with ACH payments.
-

- 5
-
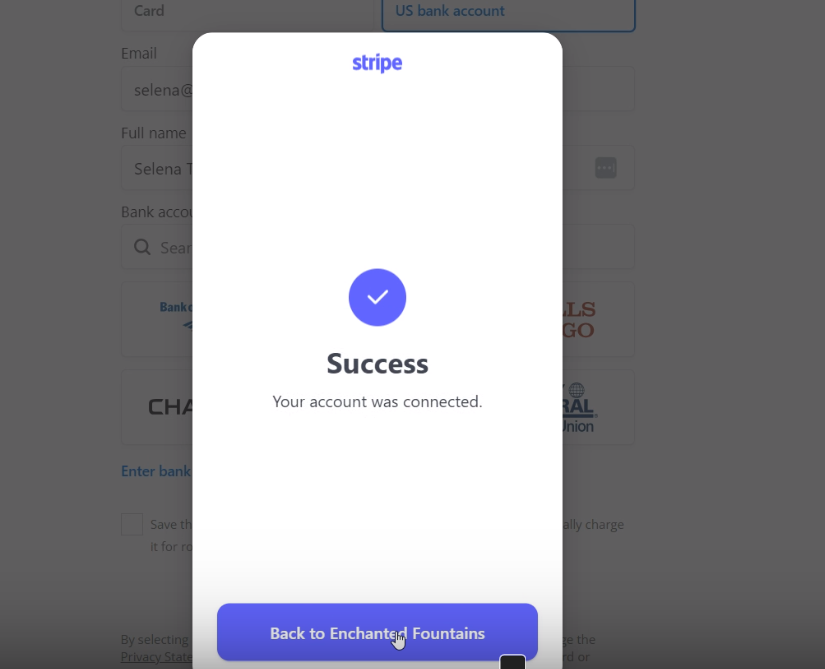
Once a Success confirmation is received, select Back to (Company Name). Then confirm the bank account is displayed on the invoice. Checking the box allows this payment method to be filed as autopay for future routine services. Select the green Pay icon to pay the invoice.
-
-

- 6
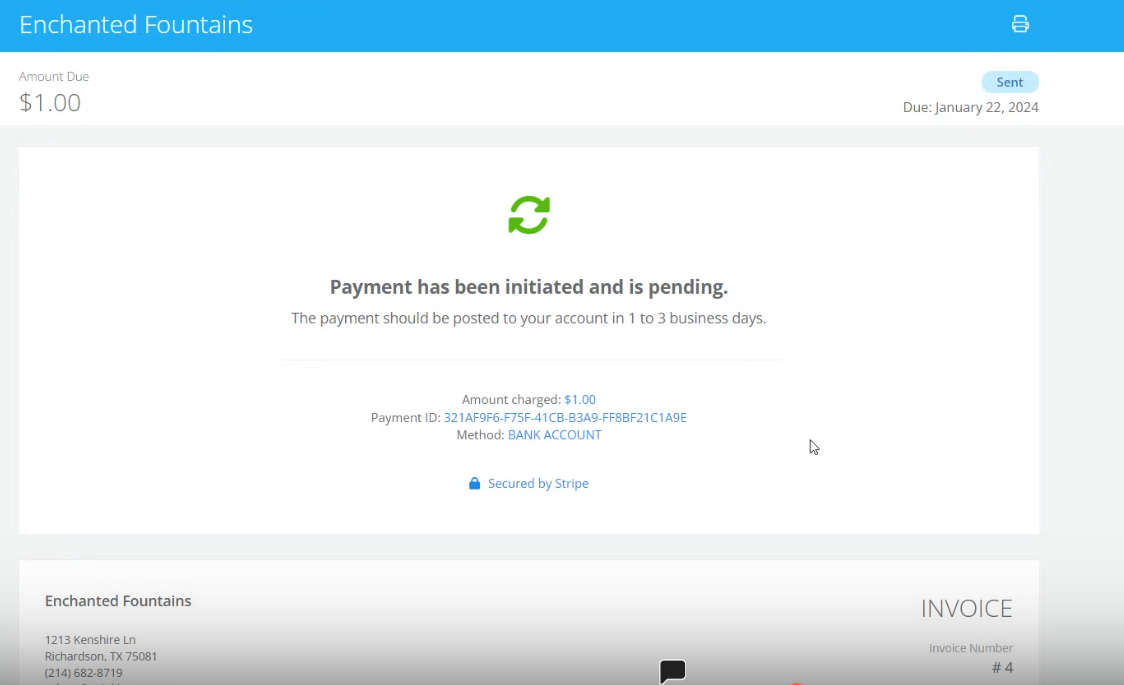
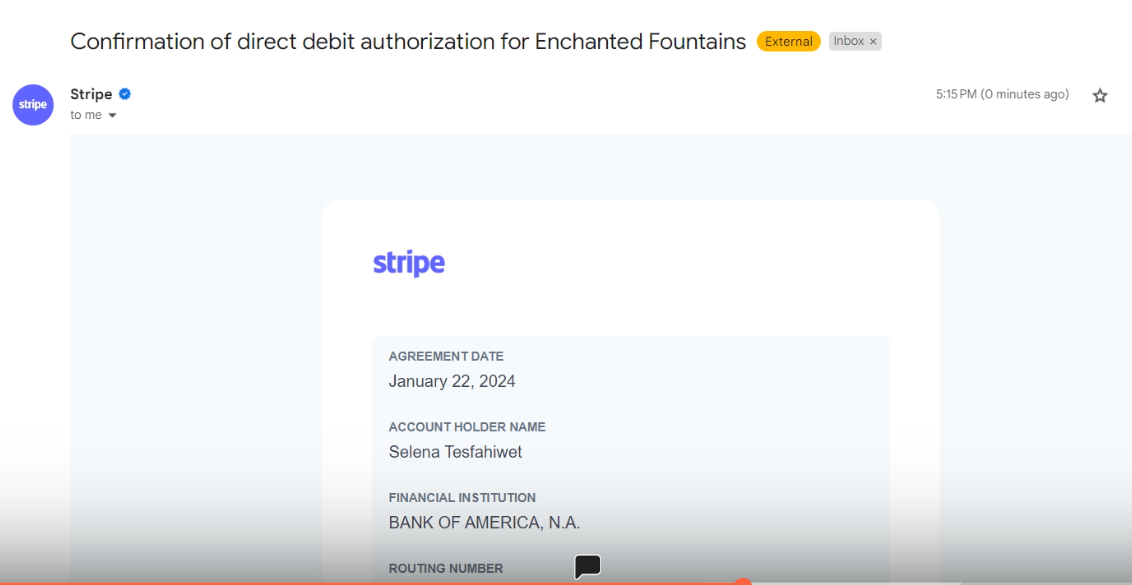
- The payment shows as pending in the invoice. Allow 1-3 business days for the payment to post in the bank account. The customer will receive an email verification from Stripe confirming that direct debits have been authorized. Invoice status should show as Pending from the your invoice summary in Skimmer.
-
-
-
- 7
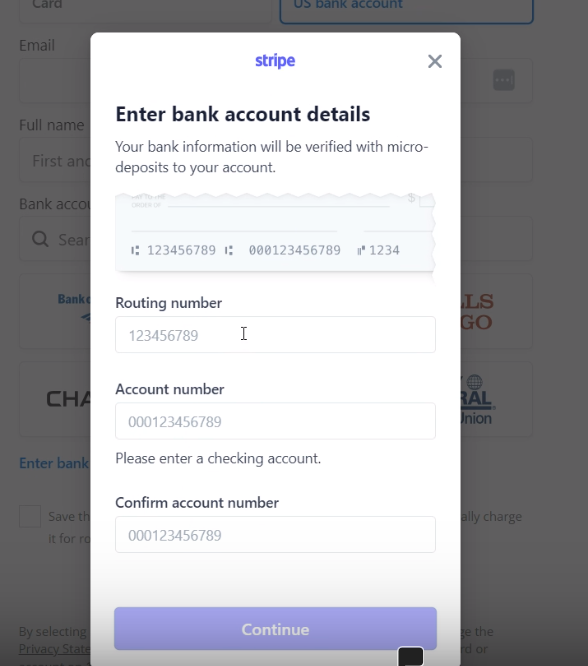
- Here's an alternate method involving manual entry of bank details (ACH Microdeposits). The client will open the invoice, switch to the US Bank account tab, and select the link ‘Enter bank details manually instead.’
-
- 8
- The client will then enter their routing number, account number, and confirm the account number.
-
- 9
- Select ‘Continue with Skimmer.’
-

- 10
- The client will see their bank account added to the invoice. They can expect a $0.01 deposit in their bank account in 1-2 business days. Then they’ll get an email with instructions to complete the payment to the company. The client needs to add their email and name before selecting Pay.
-

- 11
- Payment and email confirmation.
-
-
- 12
- Email is sent to the client for verification of microdeposits.
-
- 13
- The client will select Verify Deposit, which will direct them to the page on which they will to enter the microdeposits.
-

-

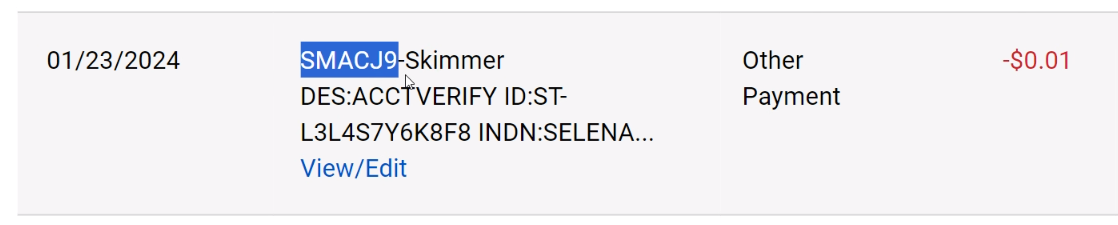
- 14
- The client will see two bank transactions in their bank statement–one where Stripe deposits $0.01 and the other where $0.01 is withdrawn. The last 4 characters in the statement starting with SM (SMXXXX) is what the customer will need to enter in the appropriate fields shown in the previous step.
-
-
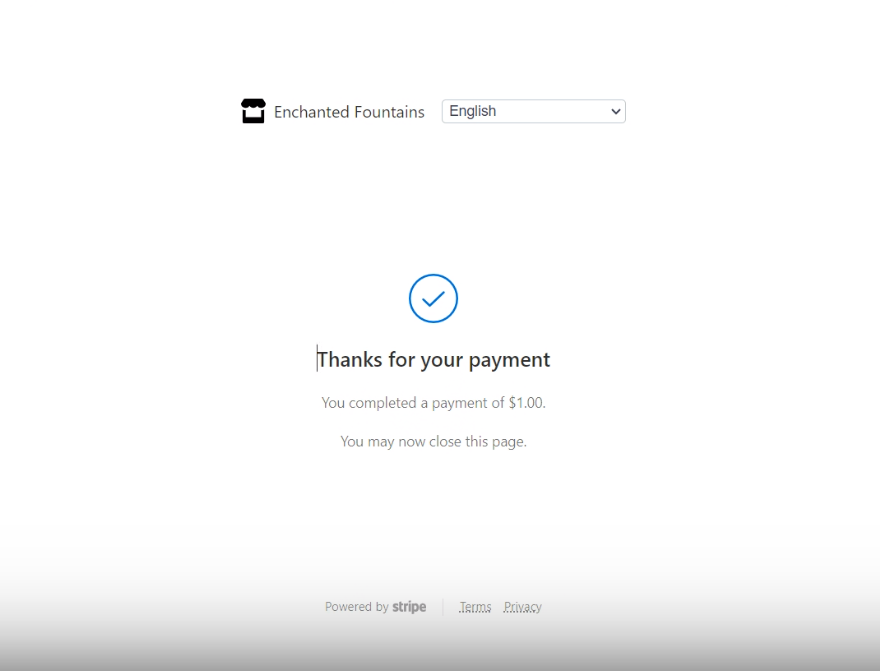
- 15
- Once the client selects Verify and Pay, they will see a confirmation message.
-