Add, Edit, or Deactivate a User (Web)
Tiers: All
Step-by-step instructions . . .
- 1
-
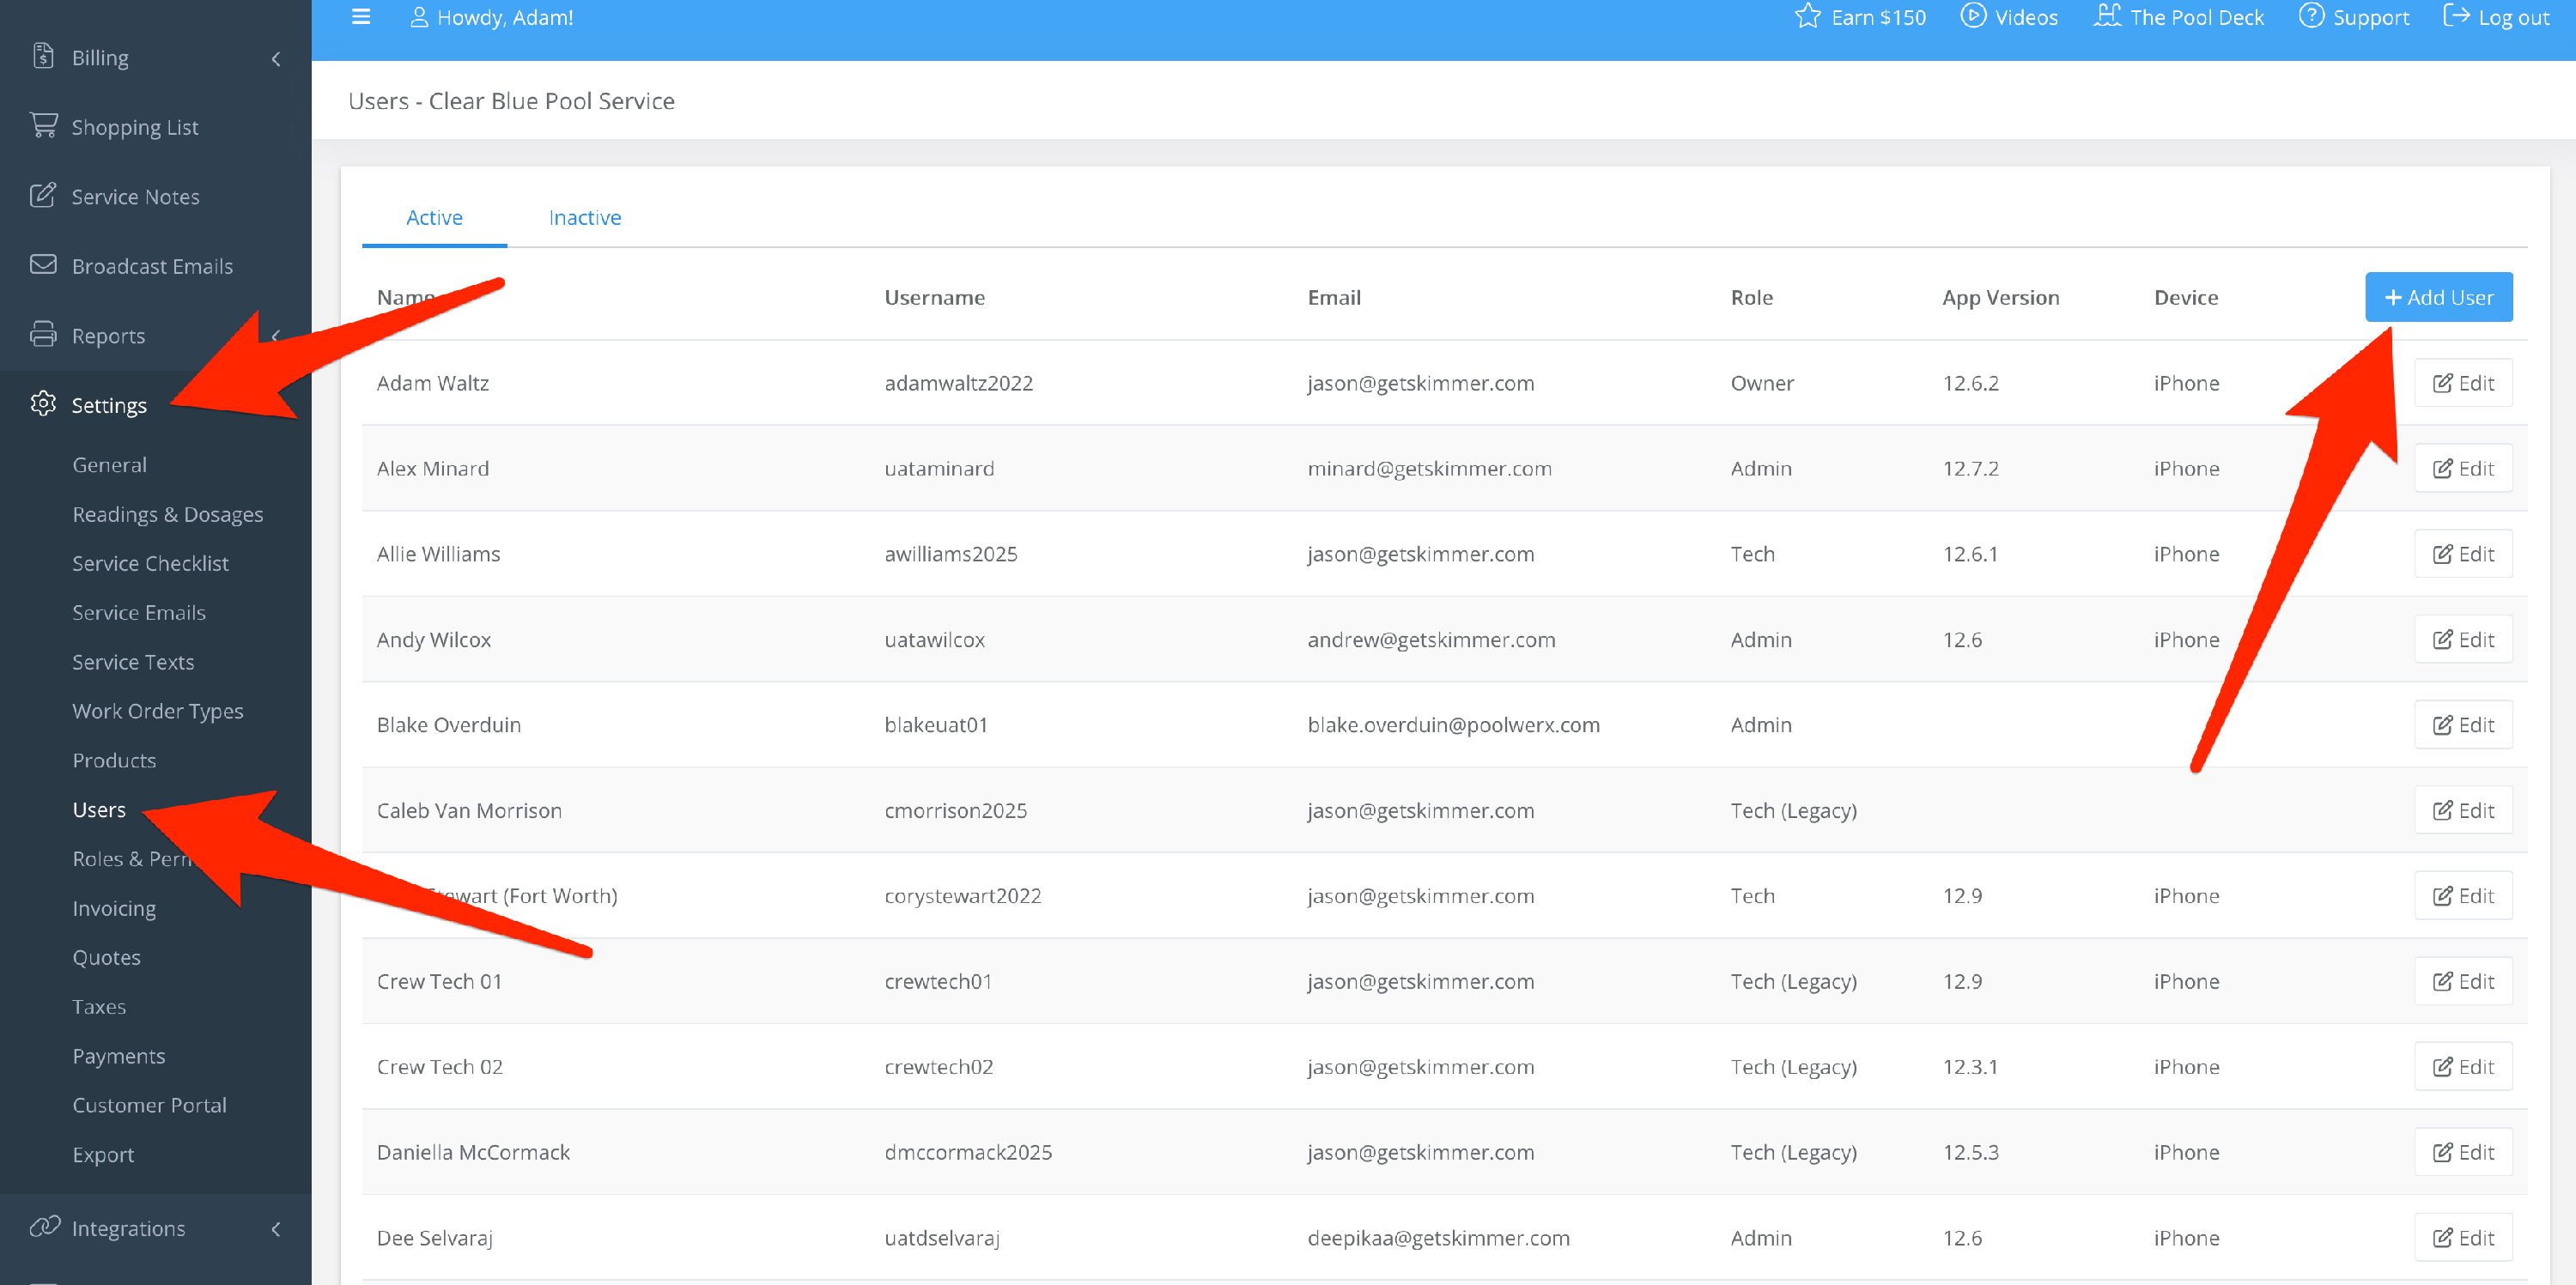
Here’s how to add and manage user access. On Skimmer’s website, go to Settings > Users. There you’ll find the list of current users in your company. To add a new user, click the Add button in the top right corner.
- 2
-
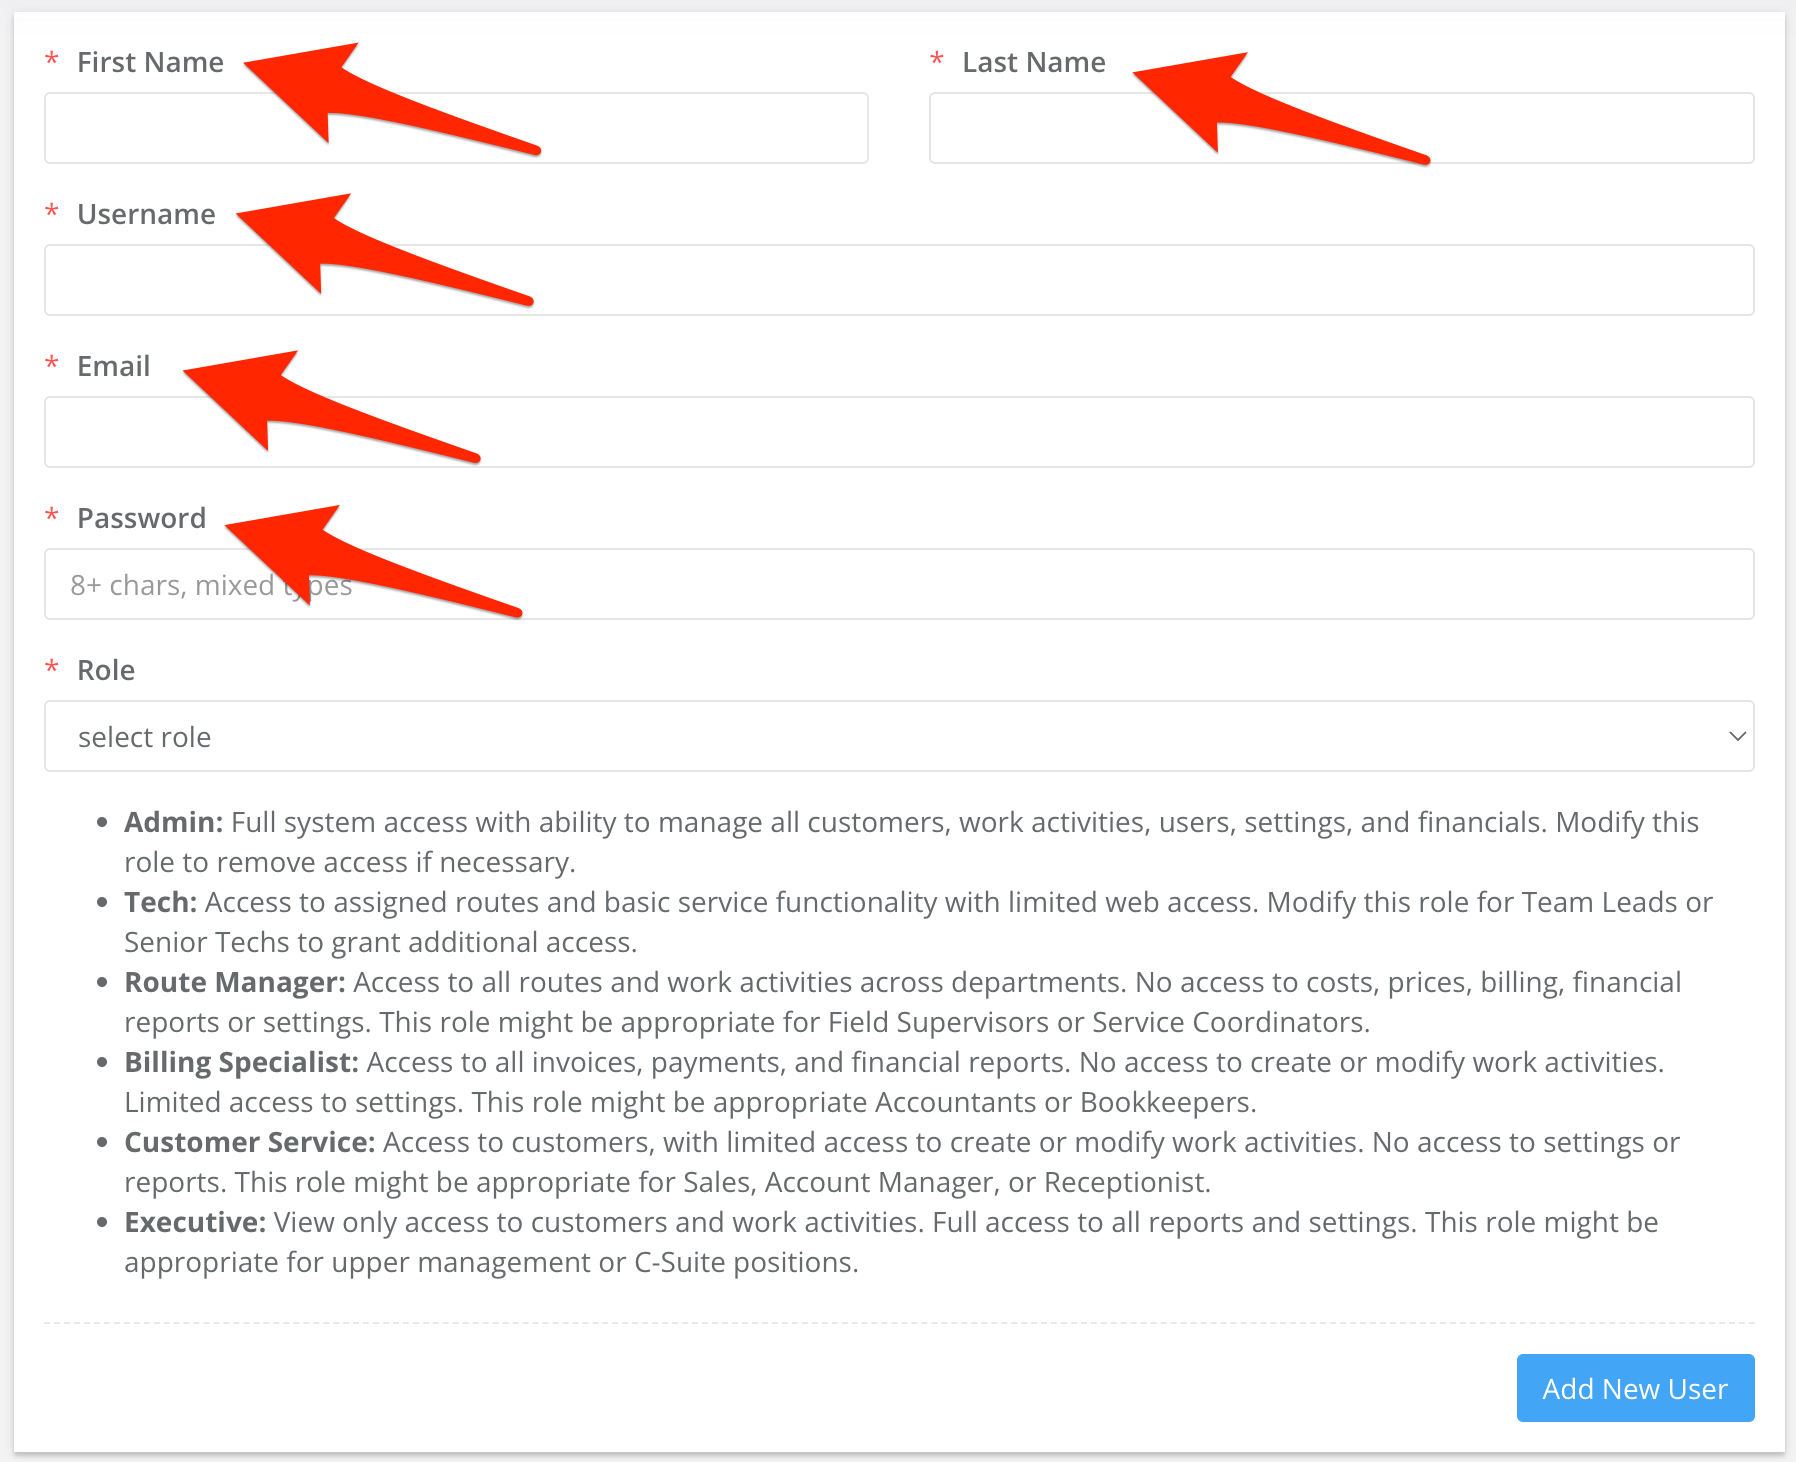
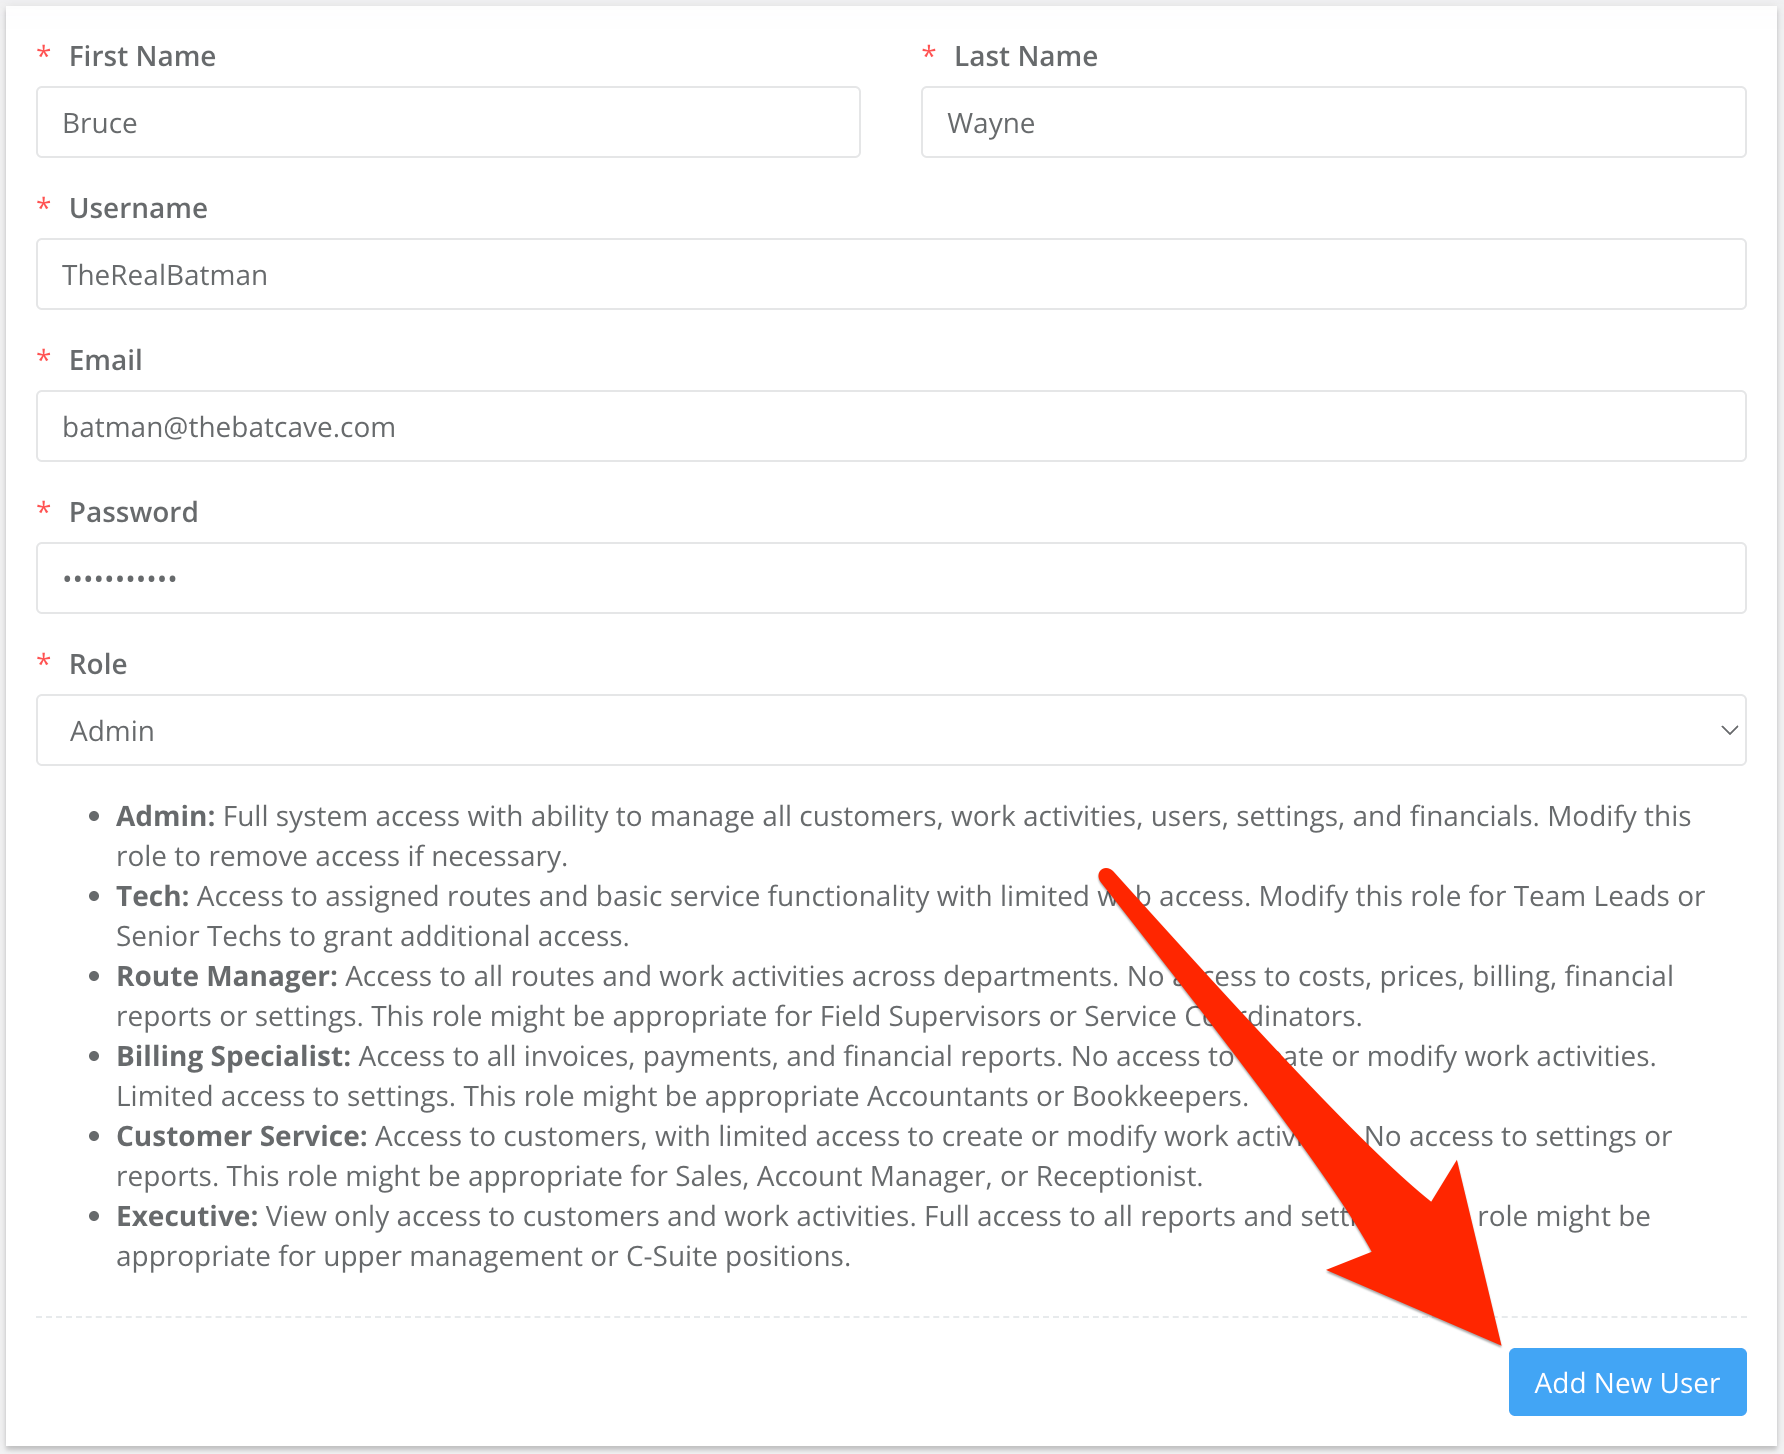
Fill in their basic information, starting with first and last name. Then give them a username, which is what they’ll use to log into Skimmer. This username must be unique, not just for your company, but across all of Skimmer. So if you try one and Skimmer tells you it’s taken, you’ll need to choose something else. Enter an email address, which will mainly come into play when the user needs to reset their password. Then give the account a password.
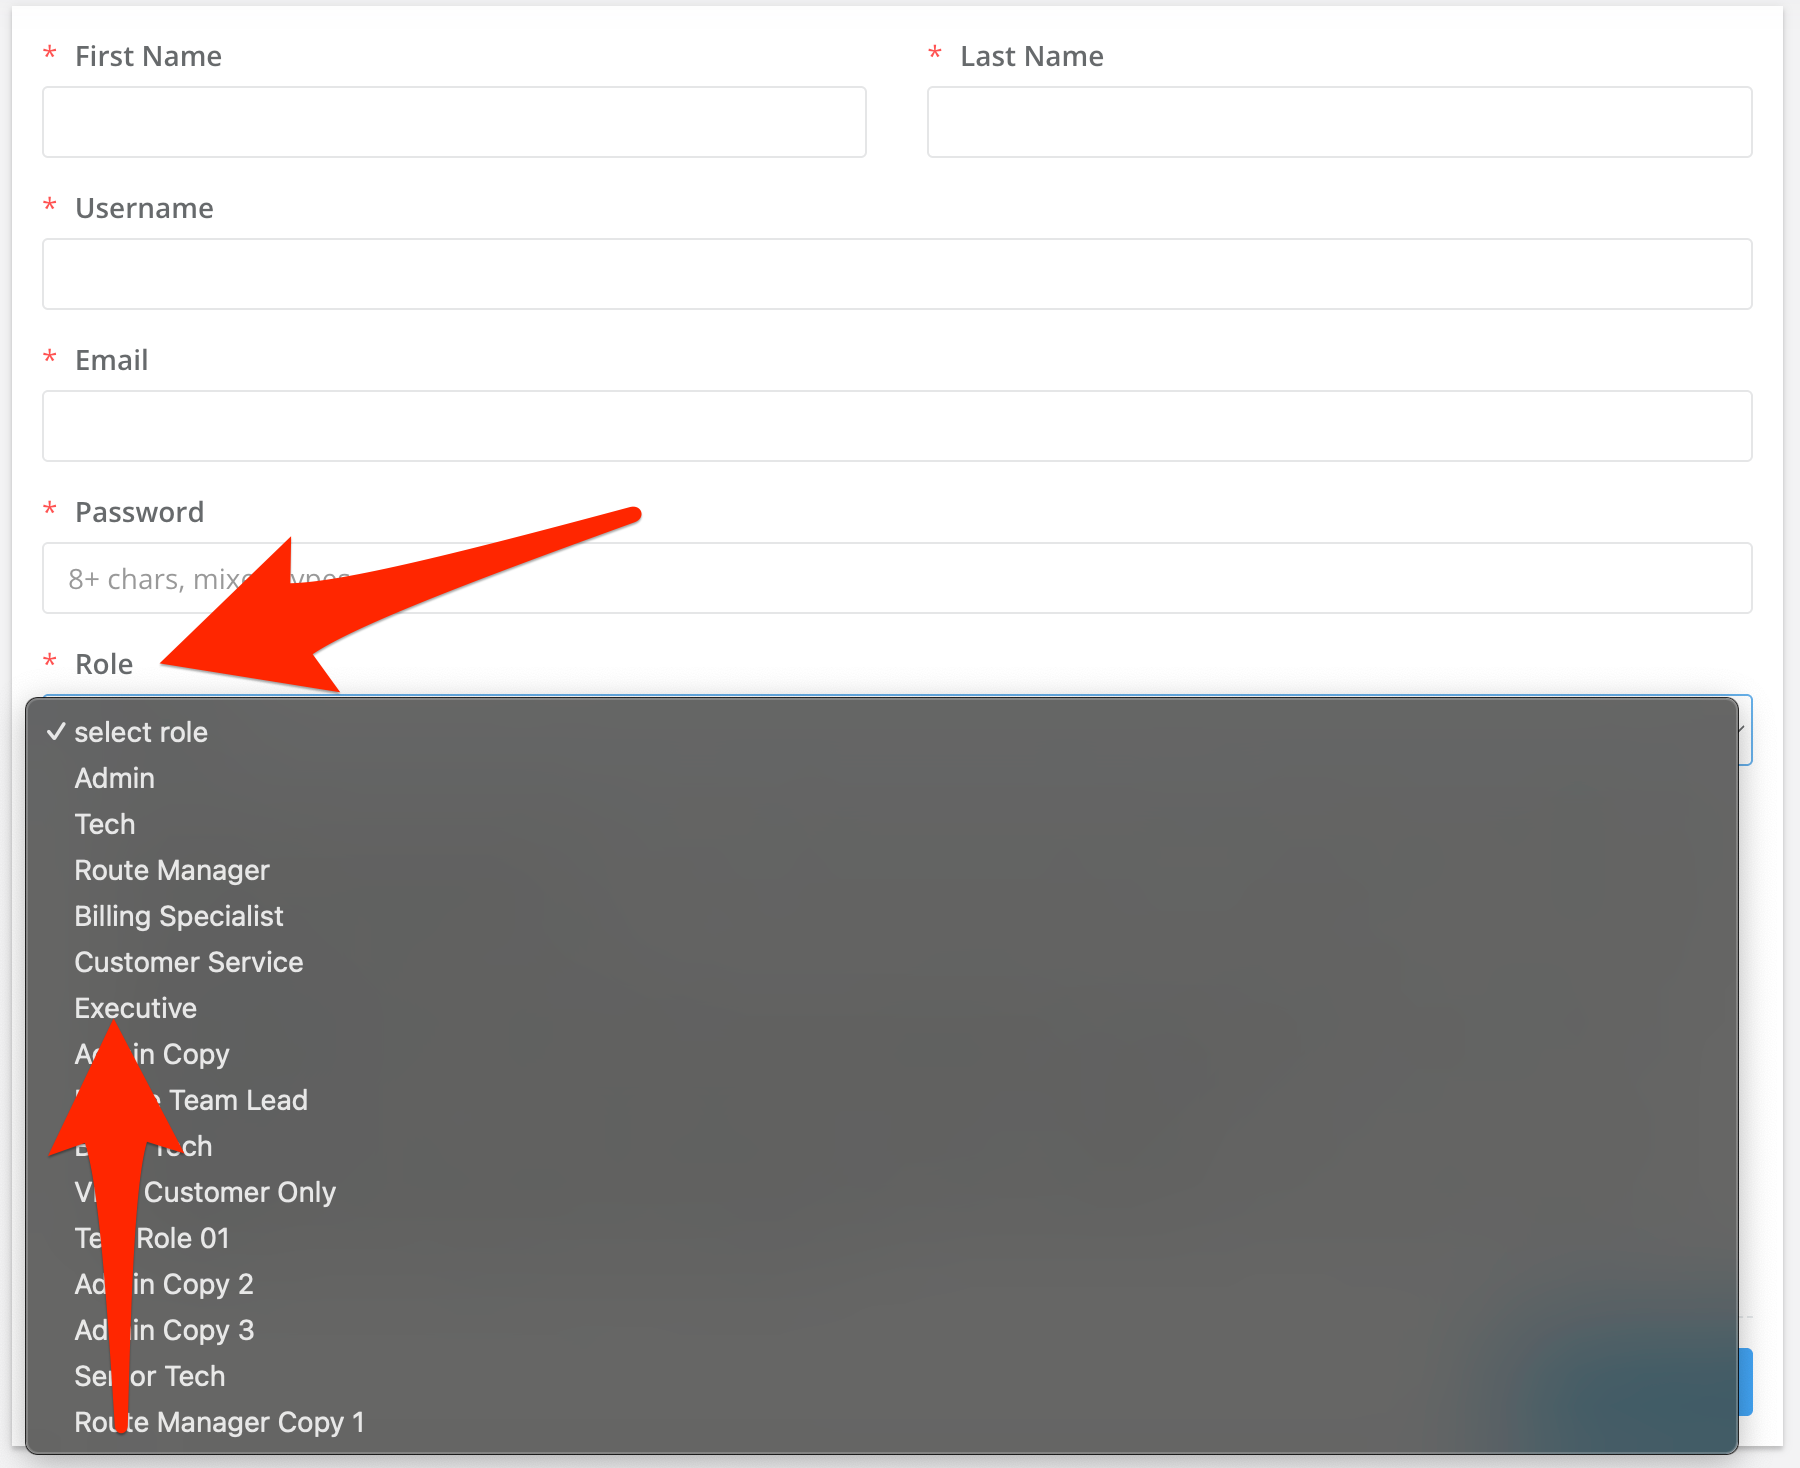
- 3
-
Now you’ll choose their access level. We go into detail about customizing user access in another tutorial, so you can tailor their feature access to exactly what they need for their job. In general, there are six default roles you can choose from, each with predefined permission levels ranging from very limited Tech access to full Admin access. Or you can create your own custom roles and choose from over 100 possible access options. Both default and custom roles will show in this dropdown list, allowing you to choose exactly which access you want this user to have.
- 4
-
When you’ve made your selections, click Save. Give the username and password to the user and they’ll be able to login right away.
- 5
-
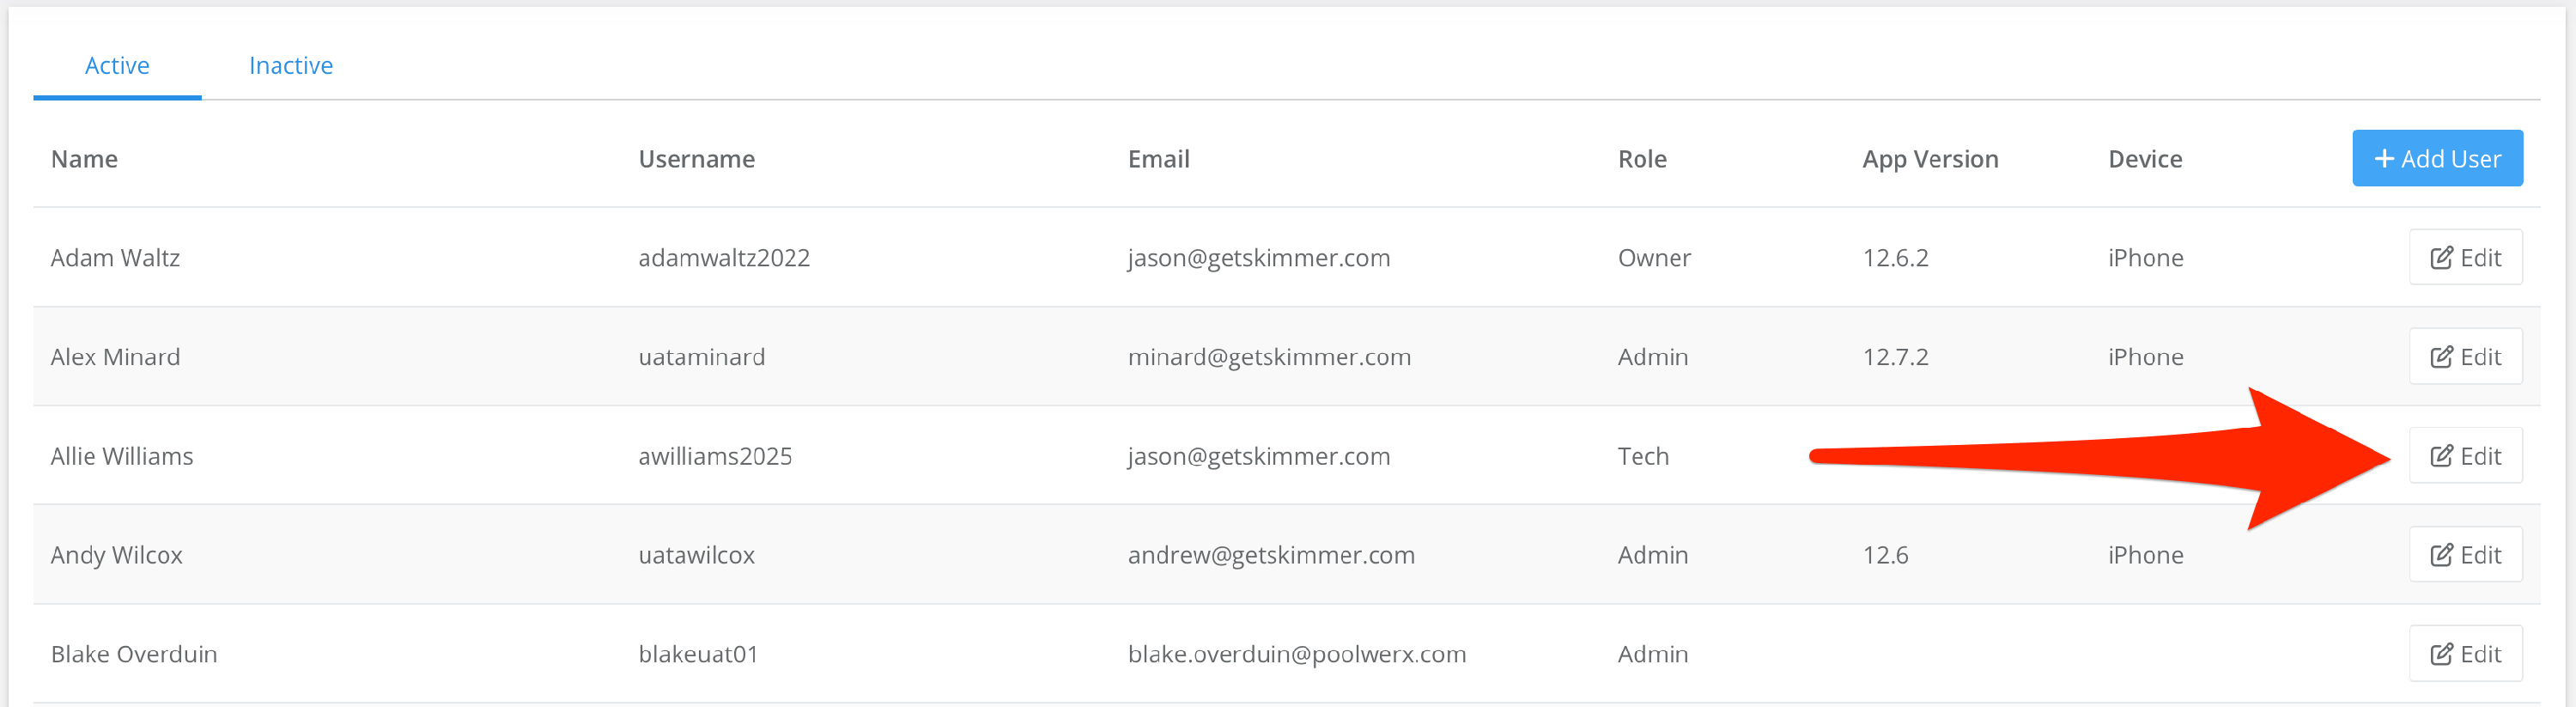
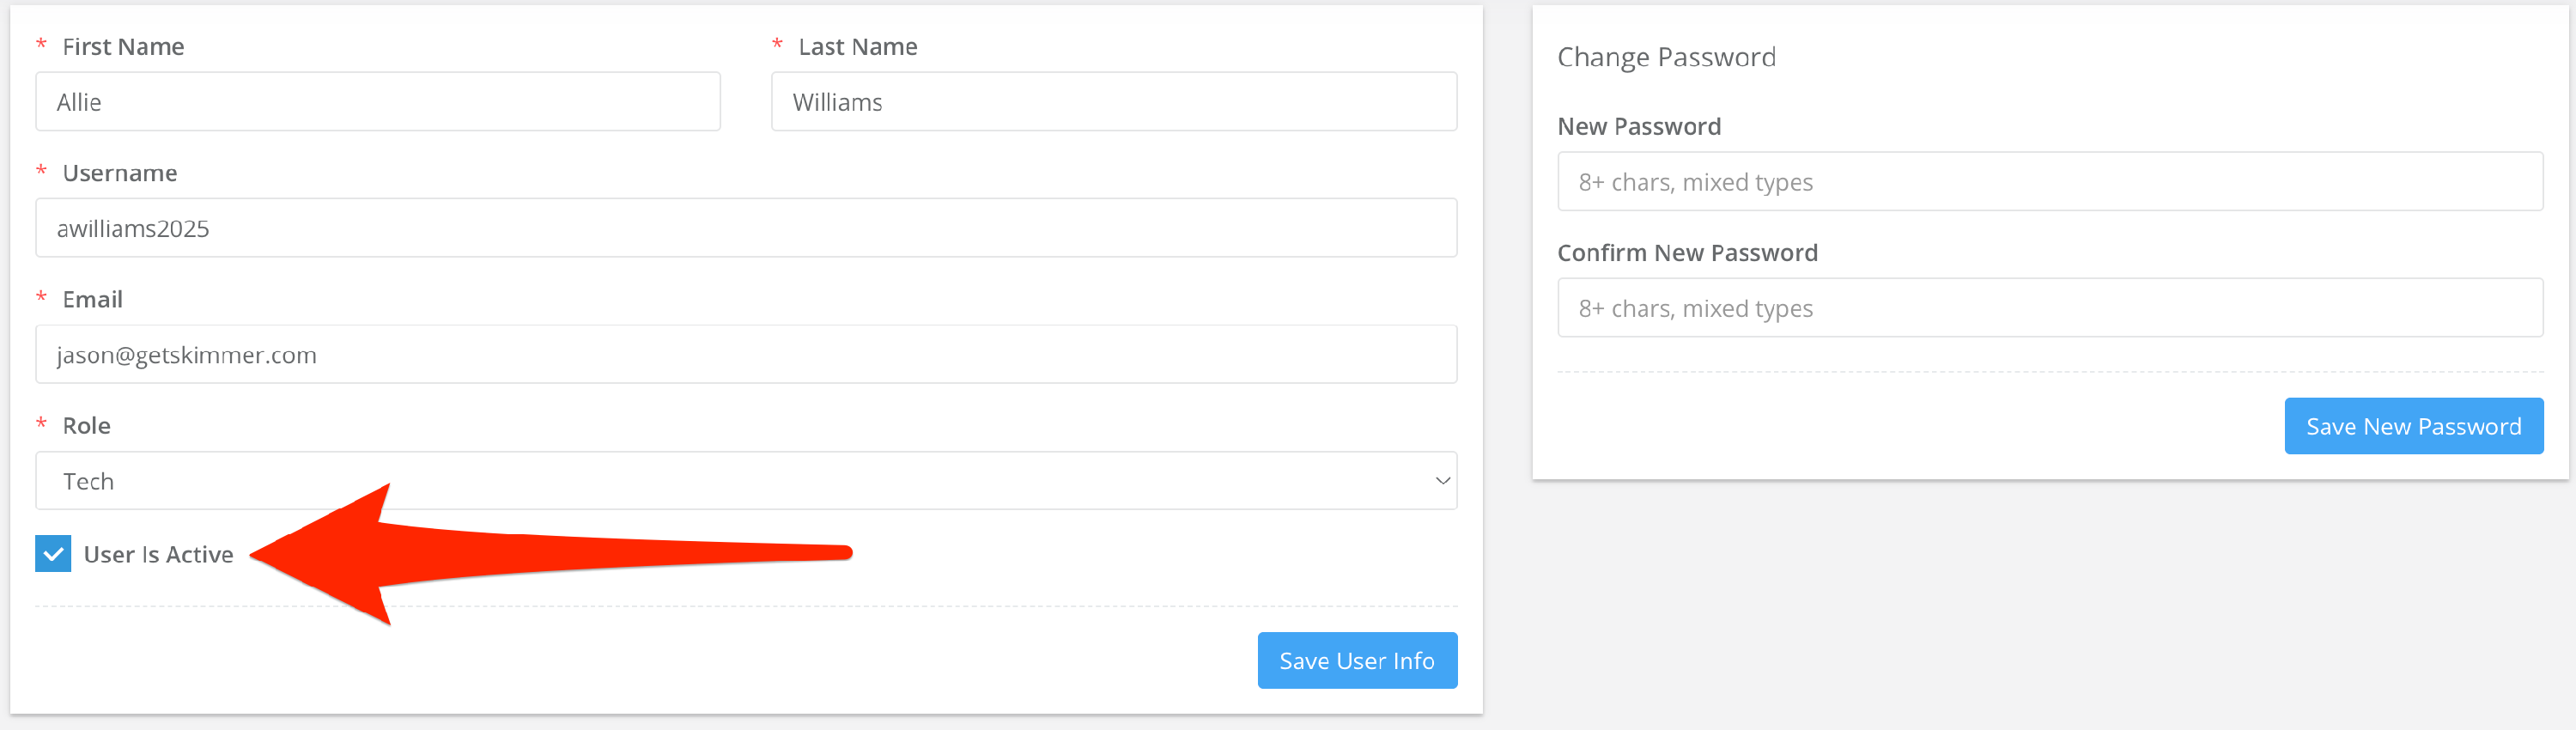
If you have the required access, you can click the Edit button for any current user and make changes to their account, such as phone number, address, and email. You can also reset their password or change their assigned role, which will change the features and functions they have access to.
What if the user is leaving the company and no longer needs access to Skimmer? Find the “User Is Active” checkbox, uncheck it, and click Save. This will revoke Skimmer access immediately.