Invoice Report – Invoice Details
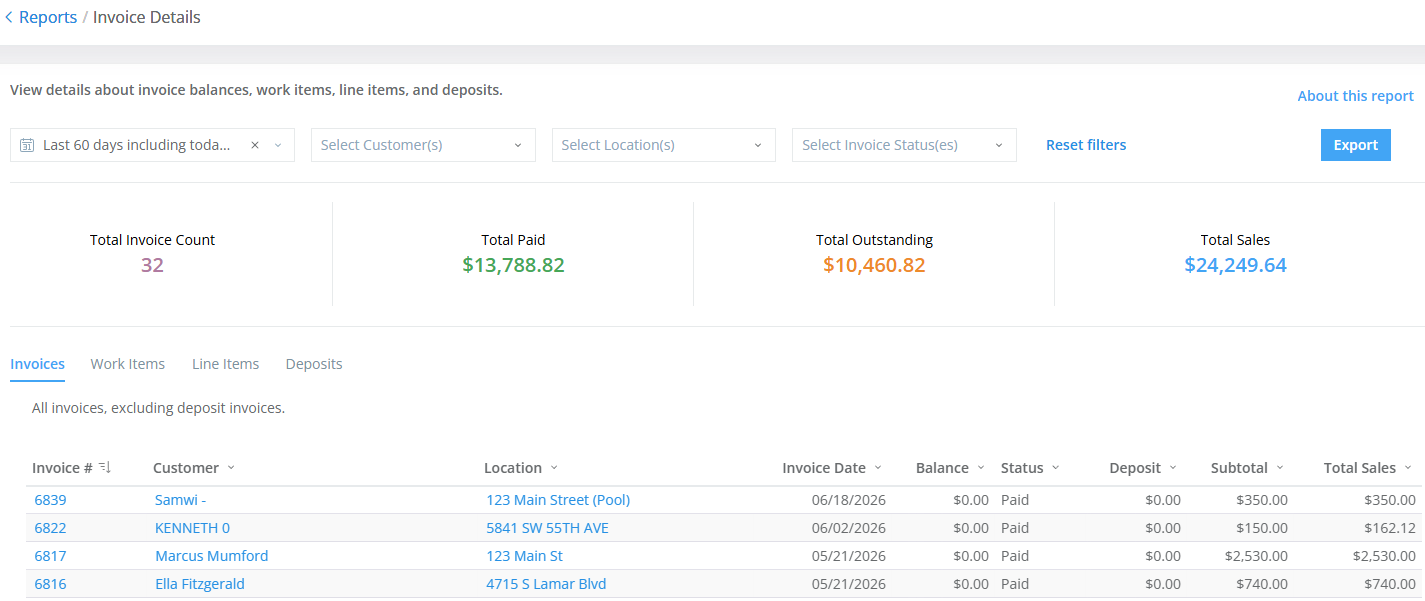
The Invoice Details report lists totals and details for invoices created during a selected date range, including balances, work items, line items, and deposits. The upper section shows grand totals; the lower section breaks them down by invoice number.
The report covers all service activity completed for customers in the selected date range, along with the total amount due for services rendered, not including installed items.
The report is organized into four tabs:
- Invoices - shows invoices sent during the date range, including total sales, invoice date, and service location.
- Work Items - shows a high-level count of completed stops, dosages, installed items, and work orders per invoice.
- Line Items - breaks down each invoice to the individual line item level.
- Deposits - shows information for deposit invoices only.
Report totals
The Invoices, Work Items, and Line Items tabs display the same summary totals:
- Total Invoice Count - the total number of invoices sent during the date range.
- Total Paid - the money paid to you from those invoices. This includes whole and partial payments.
- Total Outstanding - the total amount still owed on the invoices.
- Total Sales - the combined total of Outstanding and Paid. This is the total amount you can expect to collect from the invoices.
The Deposits tab focuses on invoices generated to collect deposit payments on future services, so it displays summary totals relevant only to deposit invoices:
- Deposit Count
- Deposit Paid
- Deposit Outstanding
- Deposit Total
When to use this report
The Invoice Details report provides a high-level summary of your billing while giving you the option to drill down into the details. Common uses include:
- Billing and Revenue Review
- Checking which invoices have been paid, are outstanding, or are overdue
- Reviewing total revenue for a specific time period (weekly, monthly, end of quarter)
- Reconciling income against what was actually invoiced
- Customer Inquiries
- Looking up a specific customer's billing history if they dispute a charge
- Verifying what work items were included on a particular invoice
- Bookkeeping and Accounting
- Exporting data to share with an accountant or bookkeeper
- Comparing invoiced amounts to actual payments received
- Deposit Tracking
- Reviewing deposit invoices alongside regular invoices for a complete picture of customer billing activity
- Franchise/Multi-location Owners
- Reviewing billing across locations
Tips and tricks
- Date filters - for the most reliable date filtering, use the Last, Current, or Between date filter types. The On, Before, and After options may not work as expected.
- Drill down - click a column value to view more information. For example, clicking 22 in the Invoice column opens invoice 22 in a new tab.
- Color coding - grand totals are color-coded: green for positive or paid amounts, amber/orange for outstanding or at-risk amounts, and gray for neutral totals.
Filter options and report details by tab
The following table lists the filter options and report columns for each tab. Use these options to narrow and sort your report results.
| Invoices Tab | Work Items Tab | Line Items Tab | Deposits Tab | |
|---|---|---|---|---|
| Filter Options | ||||
| Date | ✔ | ✔ | ✔ | ✔ |
| Customer | ✔ | ✔ | ✔ | ✔ |
| Location | ✔ | ✔ | ||
| Invoice Status | ✔ | ✔ | ||
| Item | ✔ | |||
| Category | ✔ | |||
| Report Columns | ||||
| Invoice # | ✔ | ✔ | ✔ | ✔ |
| Customer | ✔ | ✔ | ✔ | ✔ |
| Location | ✔ | ✔ | ✔ | |
| Invoice Date | ✔ | ✔ | ✔ | |
| Balance | ✔ | ✔ | ||
| Status | ✔ | |||
| Deposit | ✔ | |||
| Stops | ✔ | |||
| Dosages | ✔ | |||
| Installed Items | ✔ | |||
| Work Orders | ✔ | |||
| Total Sales | ✔ | |||
| Item | ✔ | |||
| Description | ✔ | |||