Configure Office Alerts and Issues
Watch the video or scroll down for step-by-step instructions.
Access: All

Step-by-step instructions . . .
- 1
-
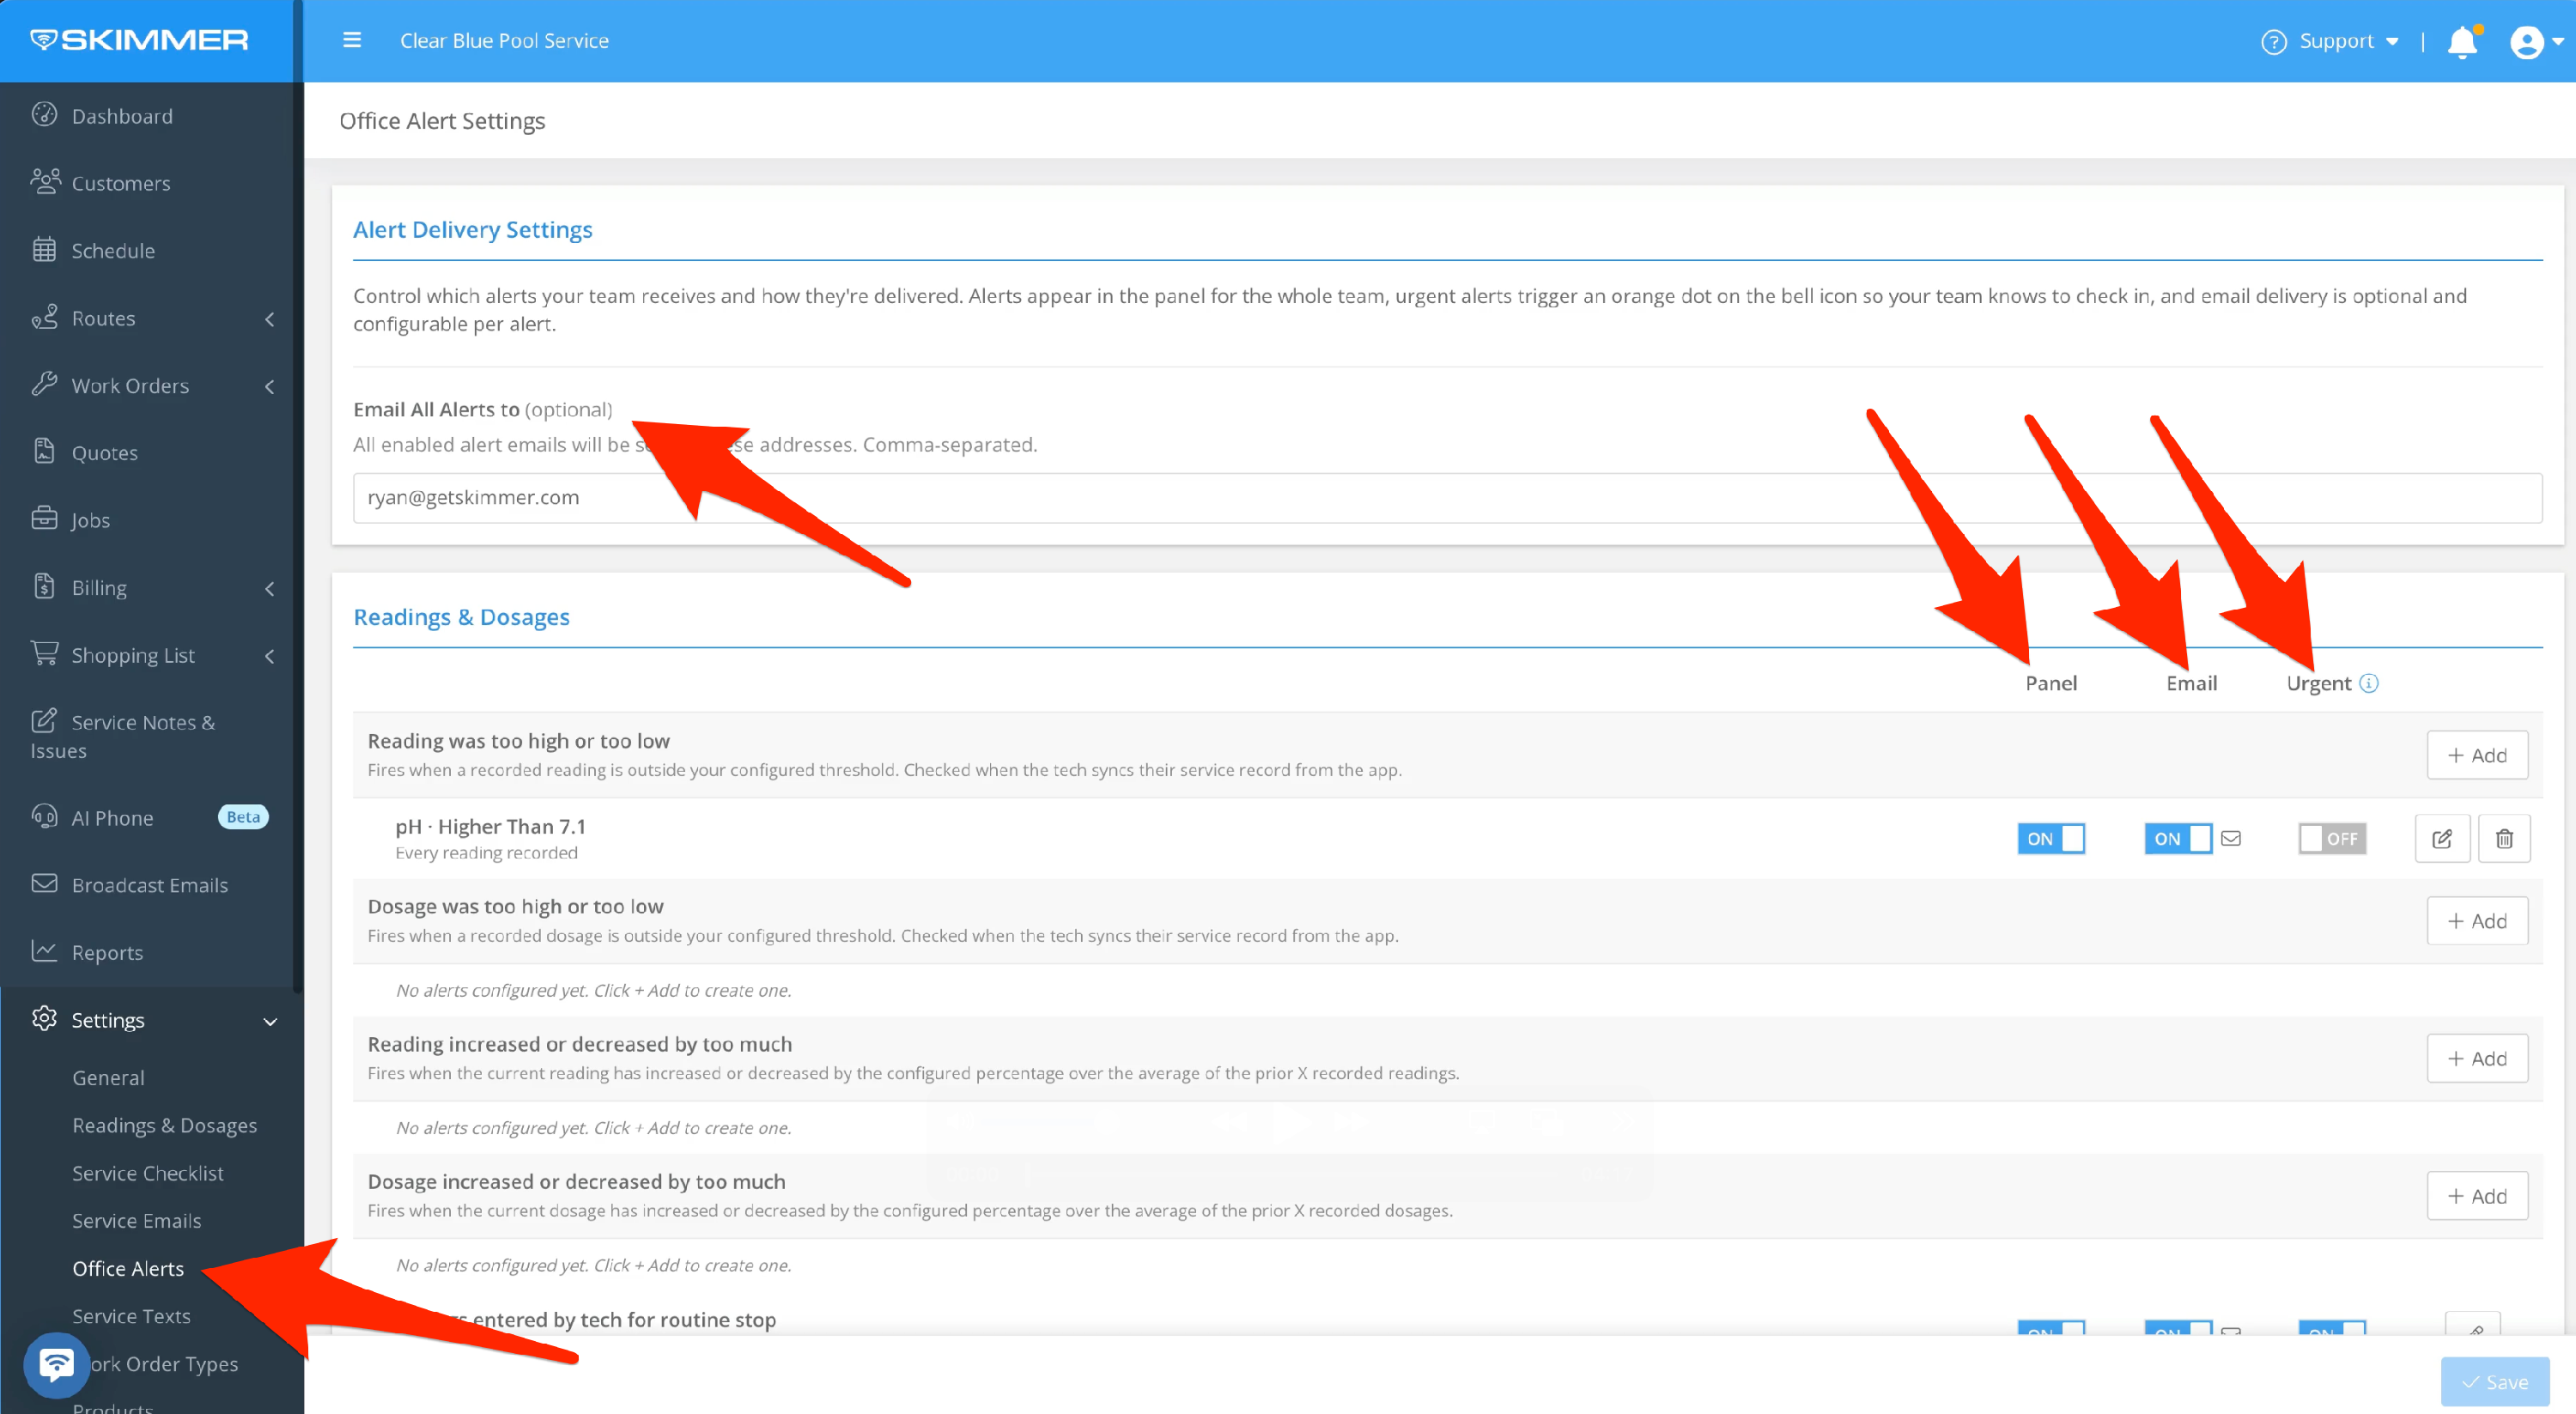
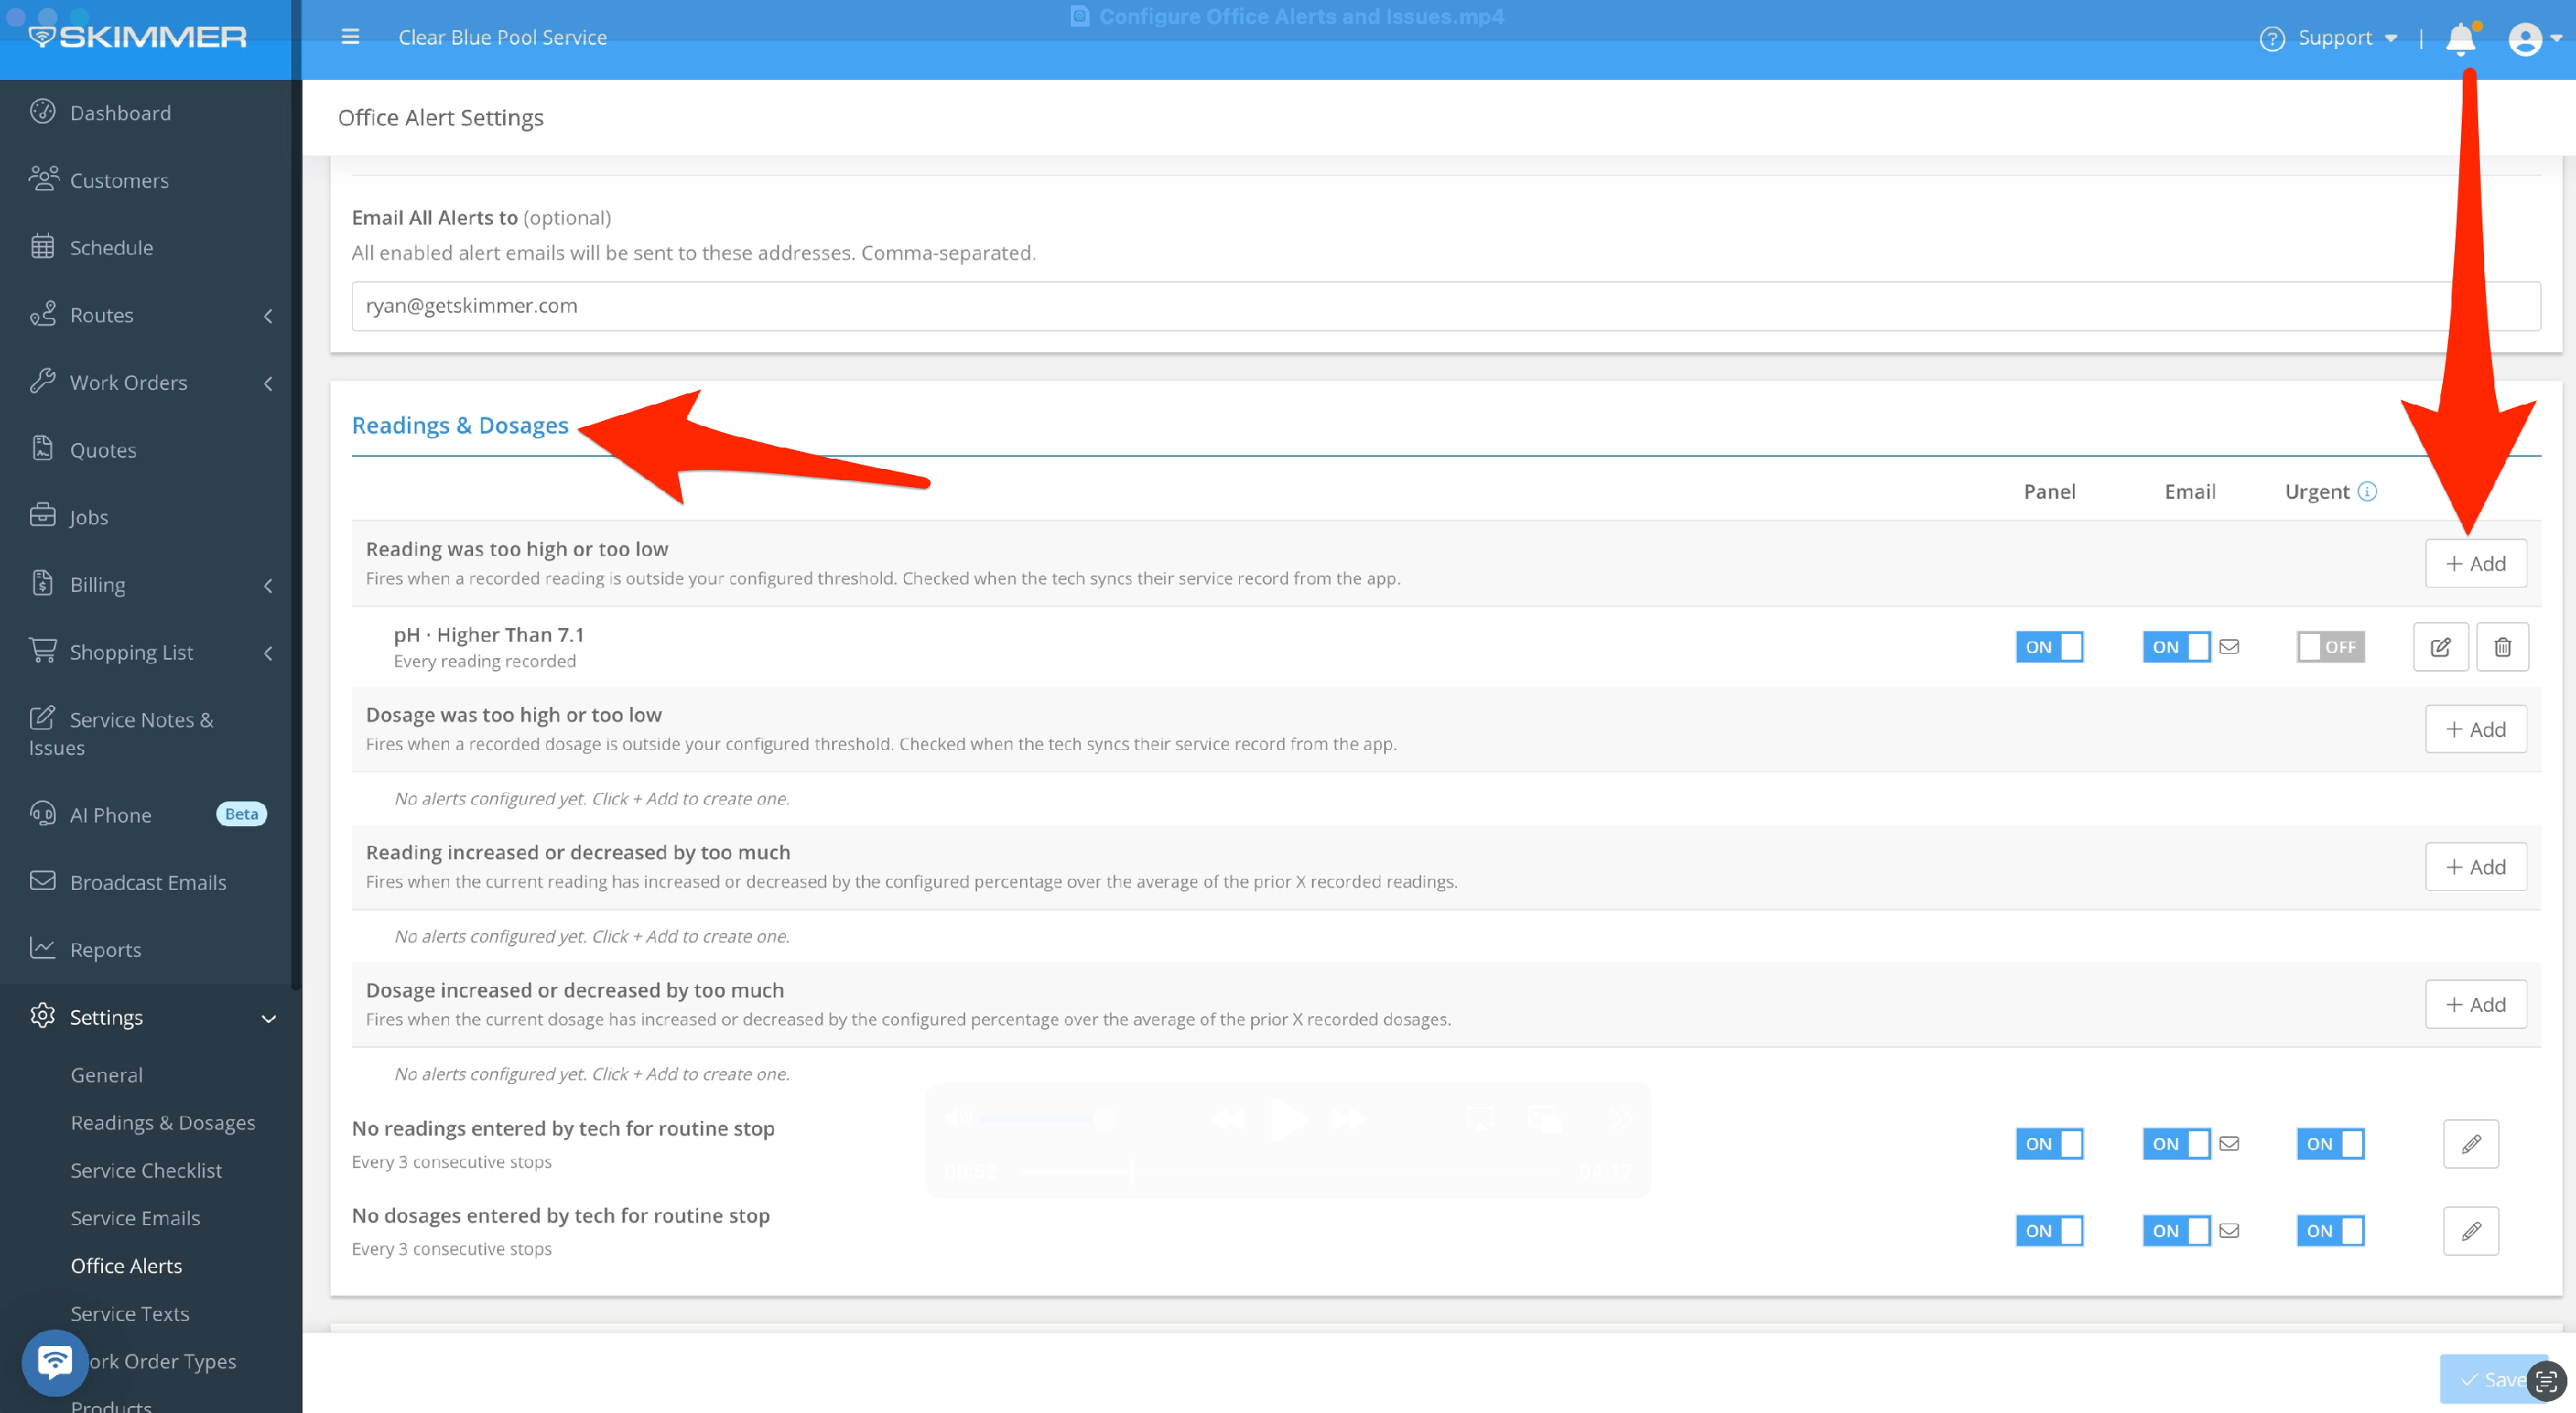
First, you’ll need permissions that give you access to set up alerts. Then go to Settings and Office Alerts. At the top, your first choice is where to email alerts, if you choose to send them as an email. You can add multiple addresses, separated by a comma.
You have three choices for receiving alerts. The Panel, which you can access by clicking the bell at the top right, and that will display results in chronological order with the most recent at the top. You can receive them by email. Or choose both. You can also choose which alerts are marked as Urgent.
- 2
-
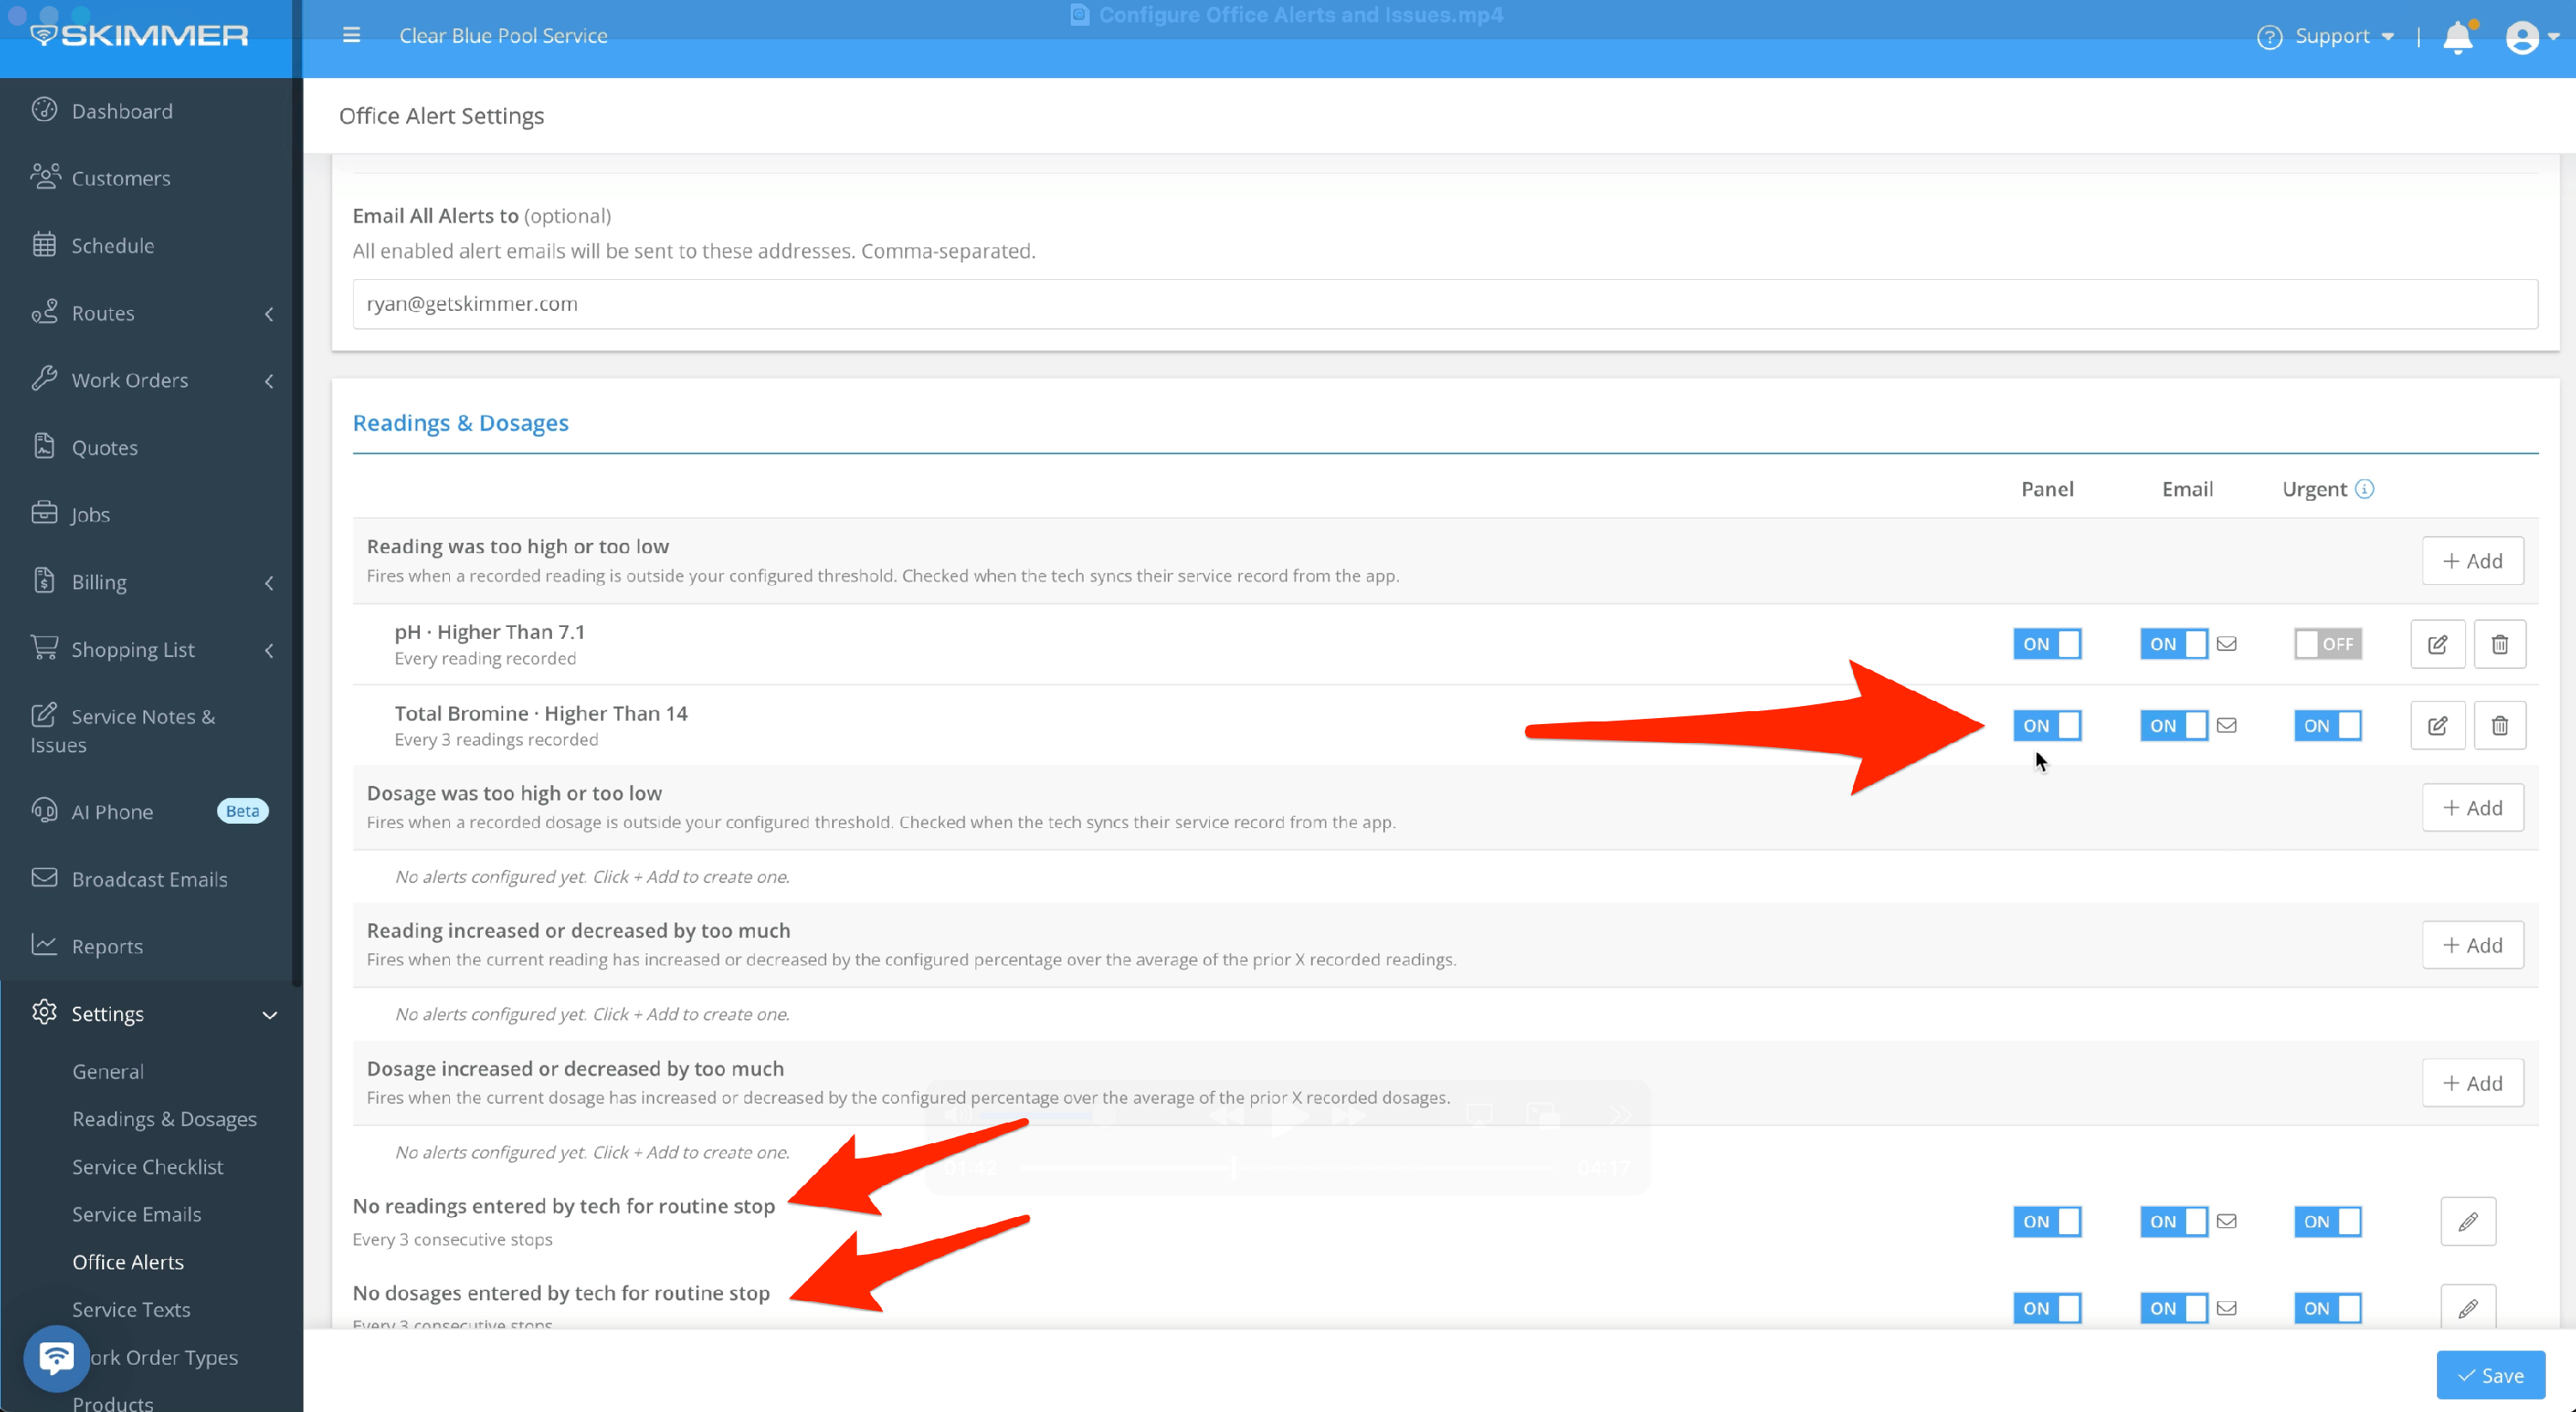
You can set up alerts specifically about readings and dosages. Click Add. In the pop-up window, select the reading, the condition and value that you want to trigger the alert, and choose whether you want an alert every time or if there’s a specific number of times that will trigger an alert. Next, choose where to receive the alert – the panel, an email, or both, and whether you want this alert marked as Urgent. If there are additional email addresses you want to receive this alert, add them to the box. When you’re ready, click Apply. From the main screen, you can edit the conditions of the alert or delete it entirely if you no longer need it.
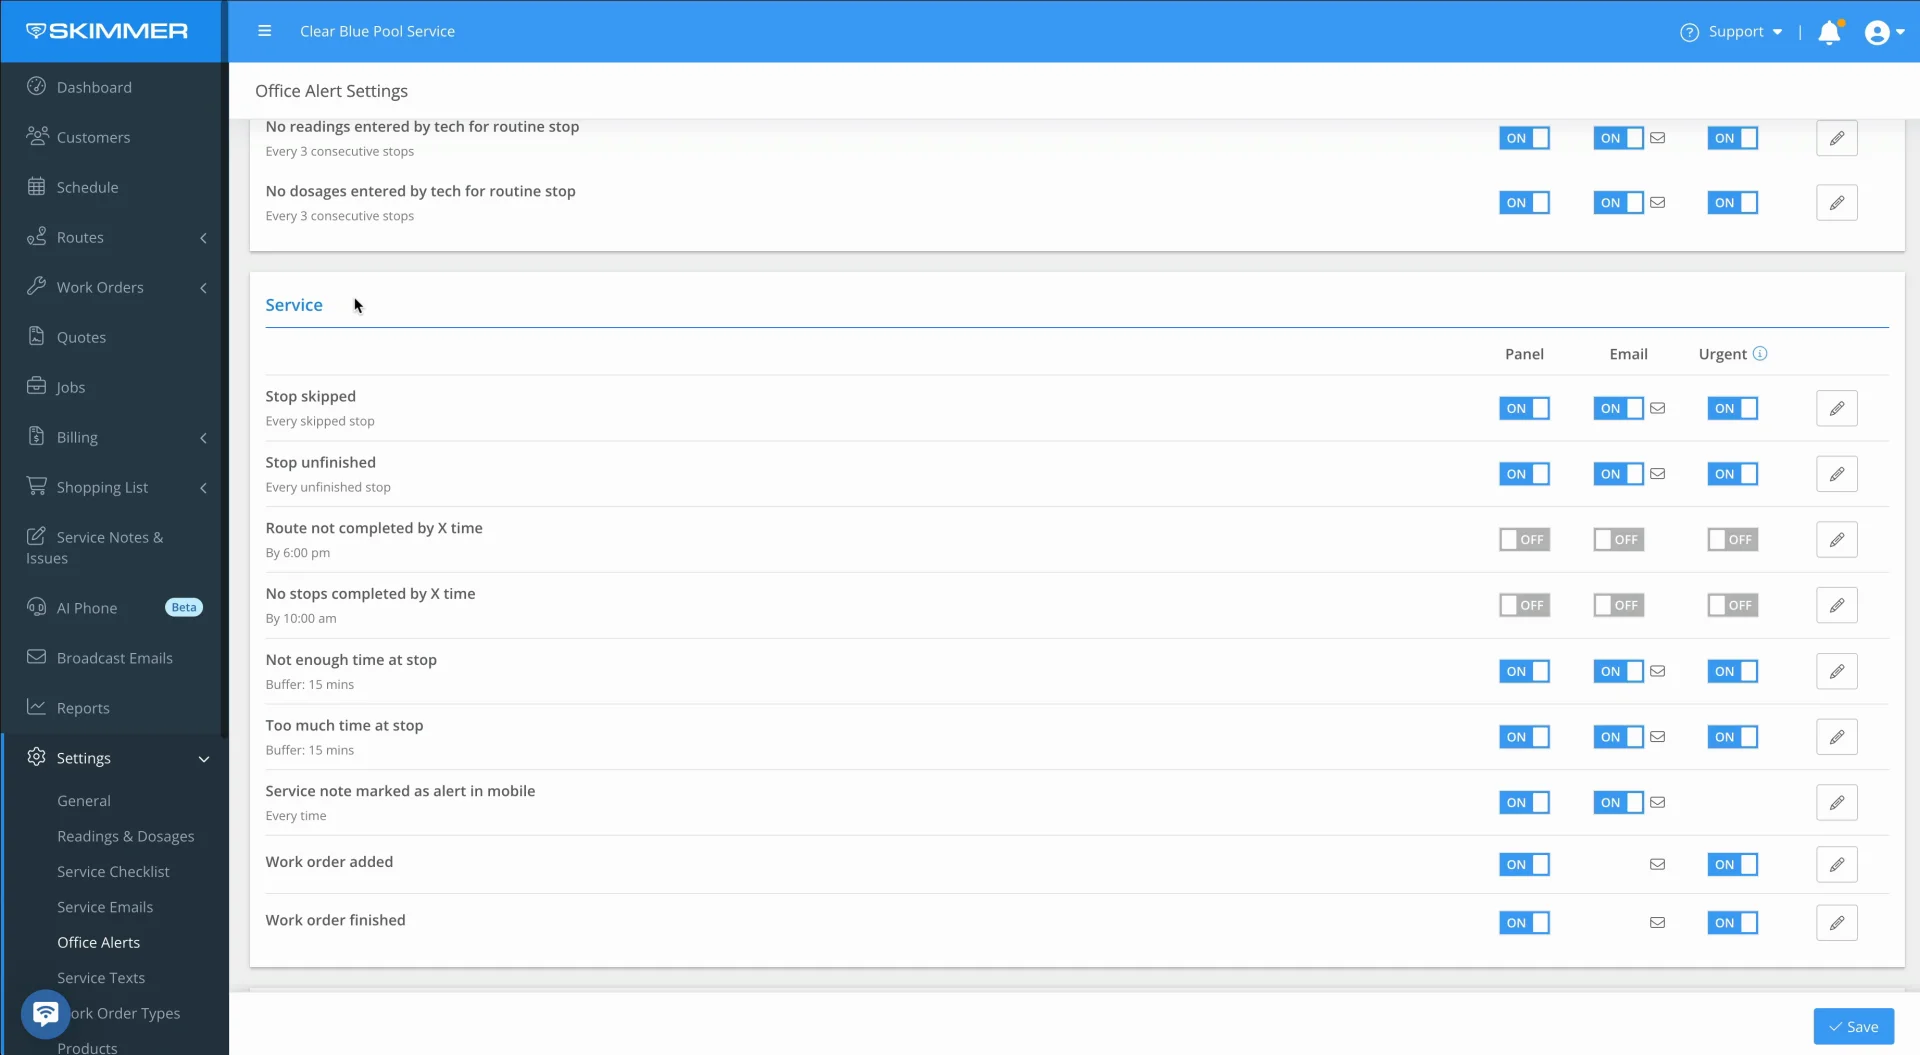
You can add multiple alerts under each category. The exception is the last two, which apply universally to any route stop when activated. These two are more about tech performance, so you can make sure they’re entering readings and dosages without having to go check every route stop.

- 3
-
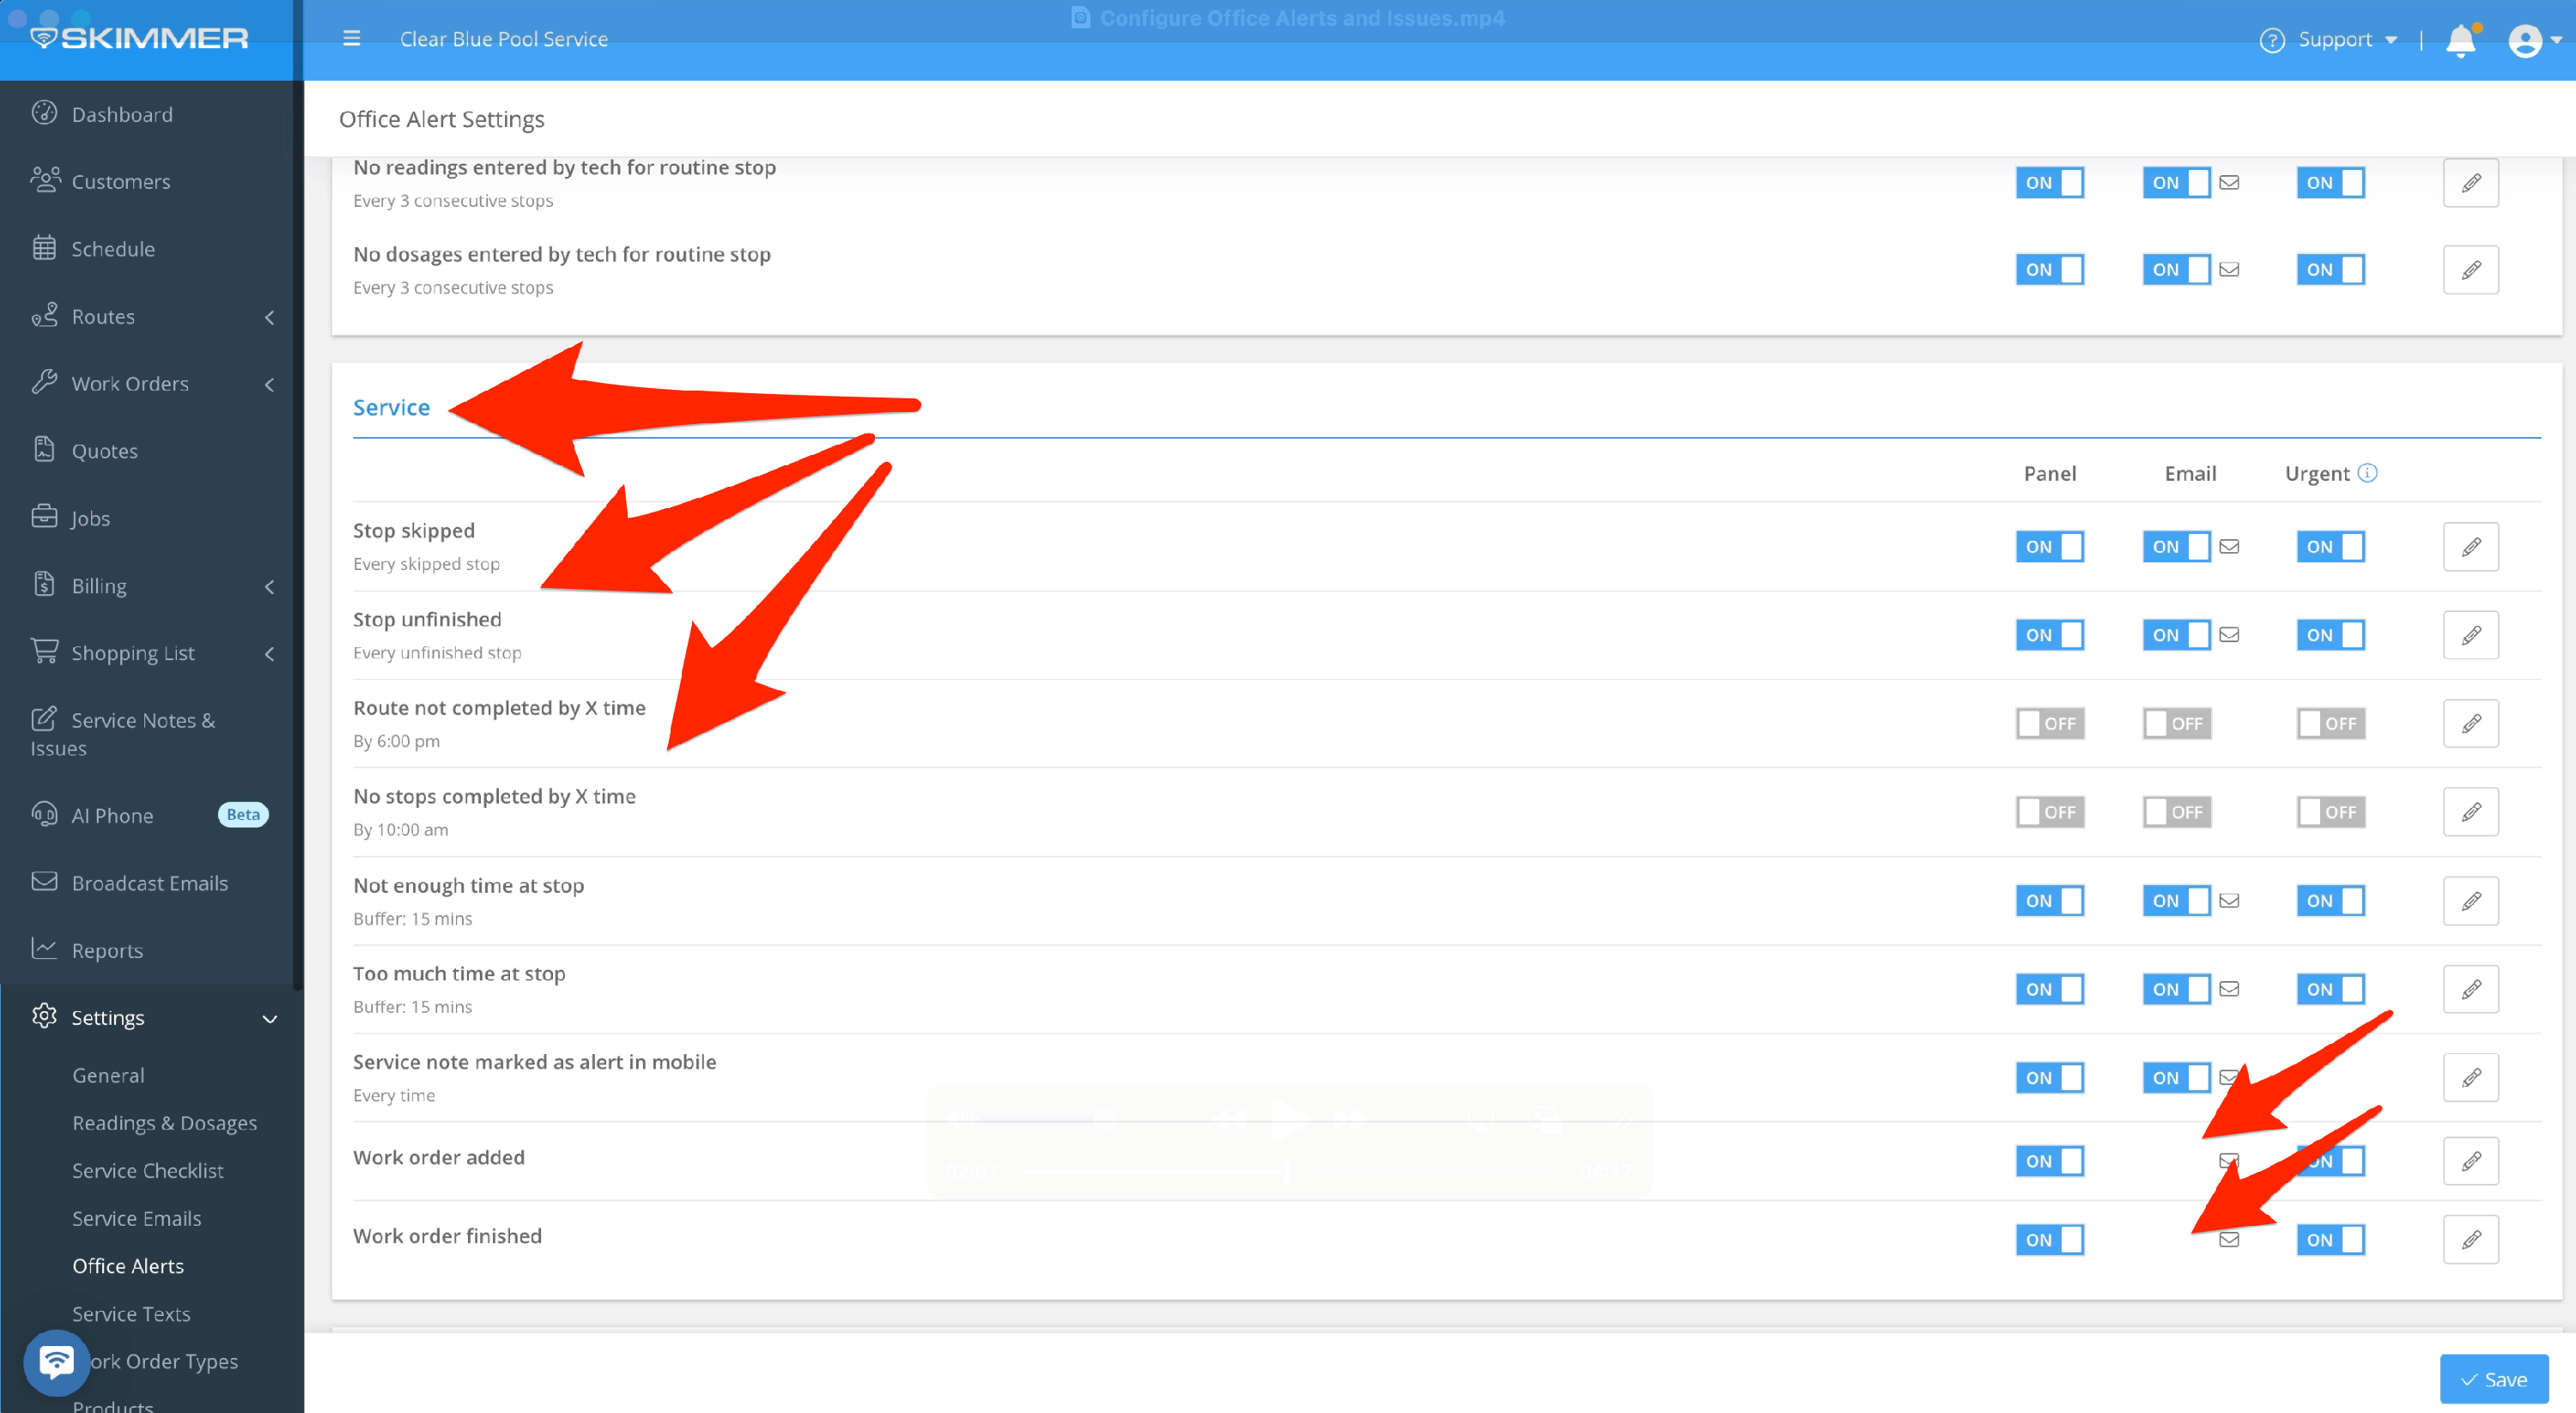
You have alerts related to overall service. You can choose when and how to receive alerts, and you can change these settings at any time. One exception is for the work order alerts, which don’t include an email option. That’s because work order email settings are controlled with the work order type.
- 4
-
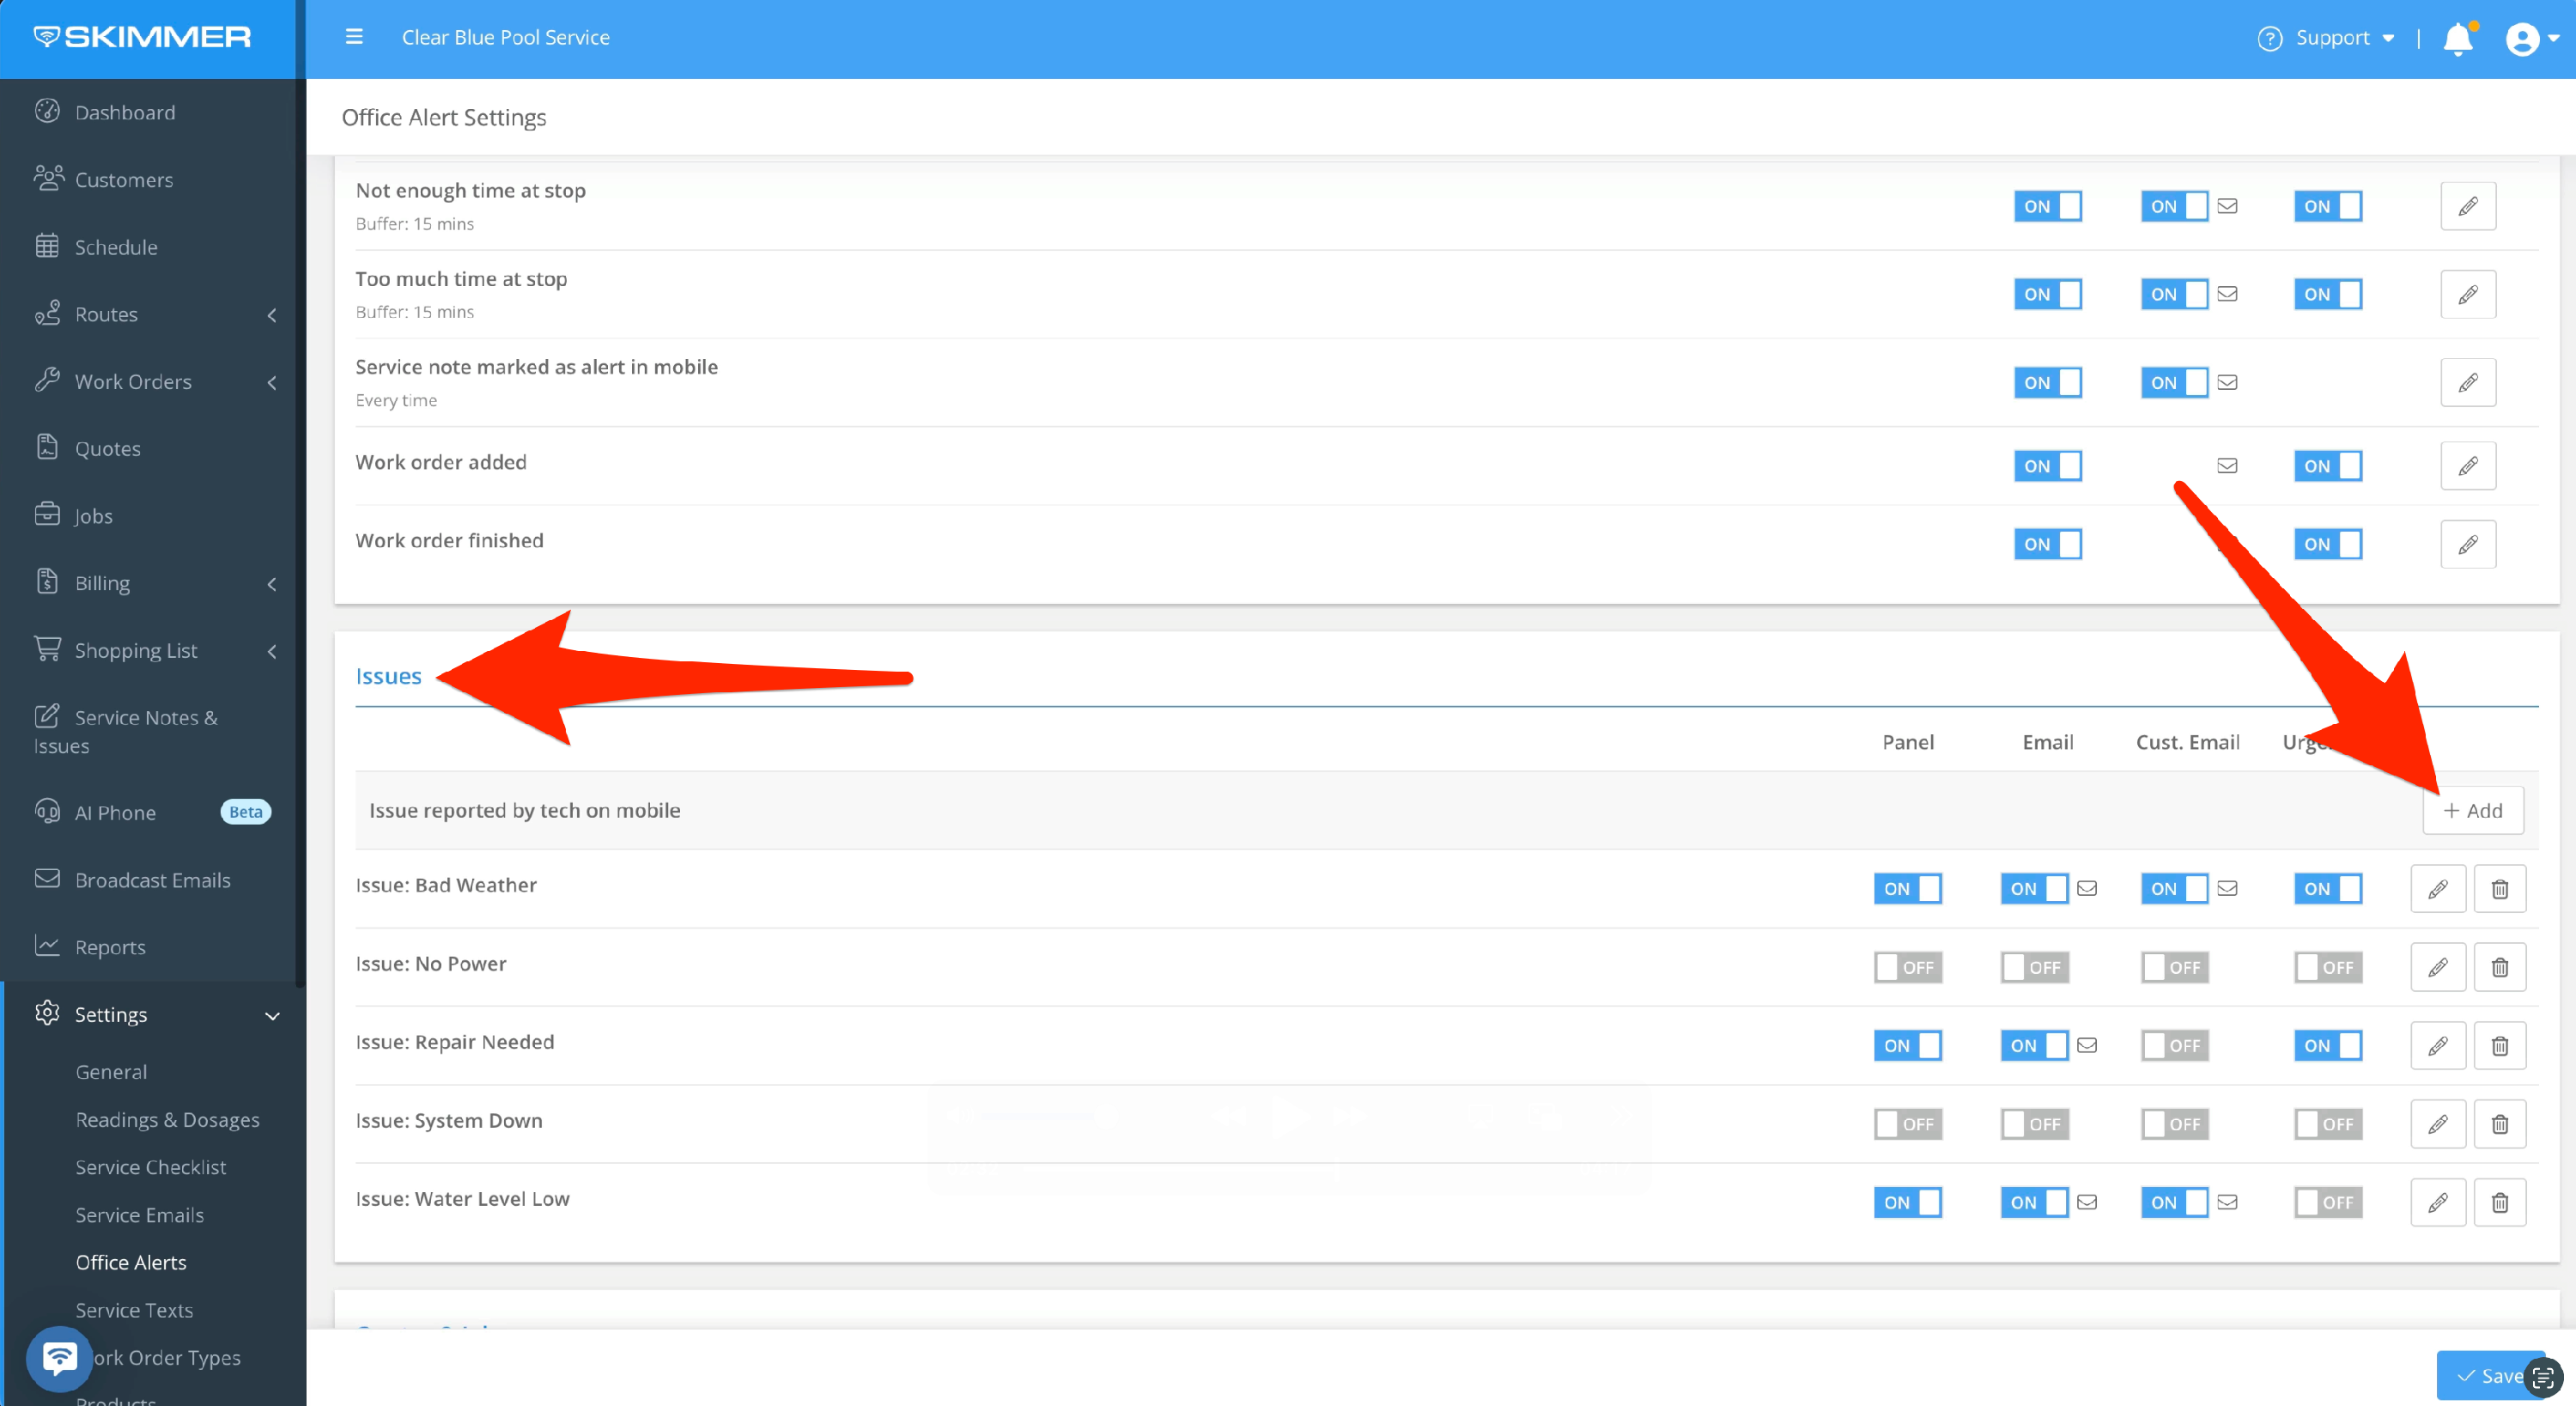
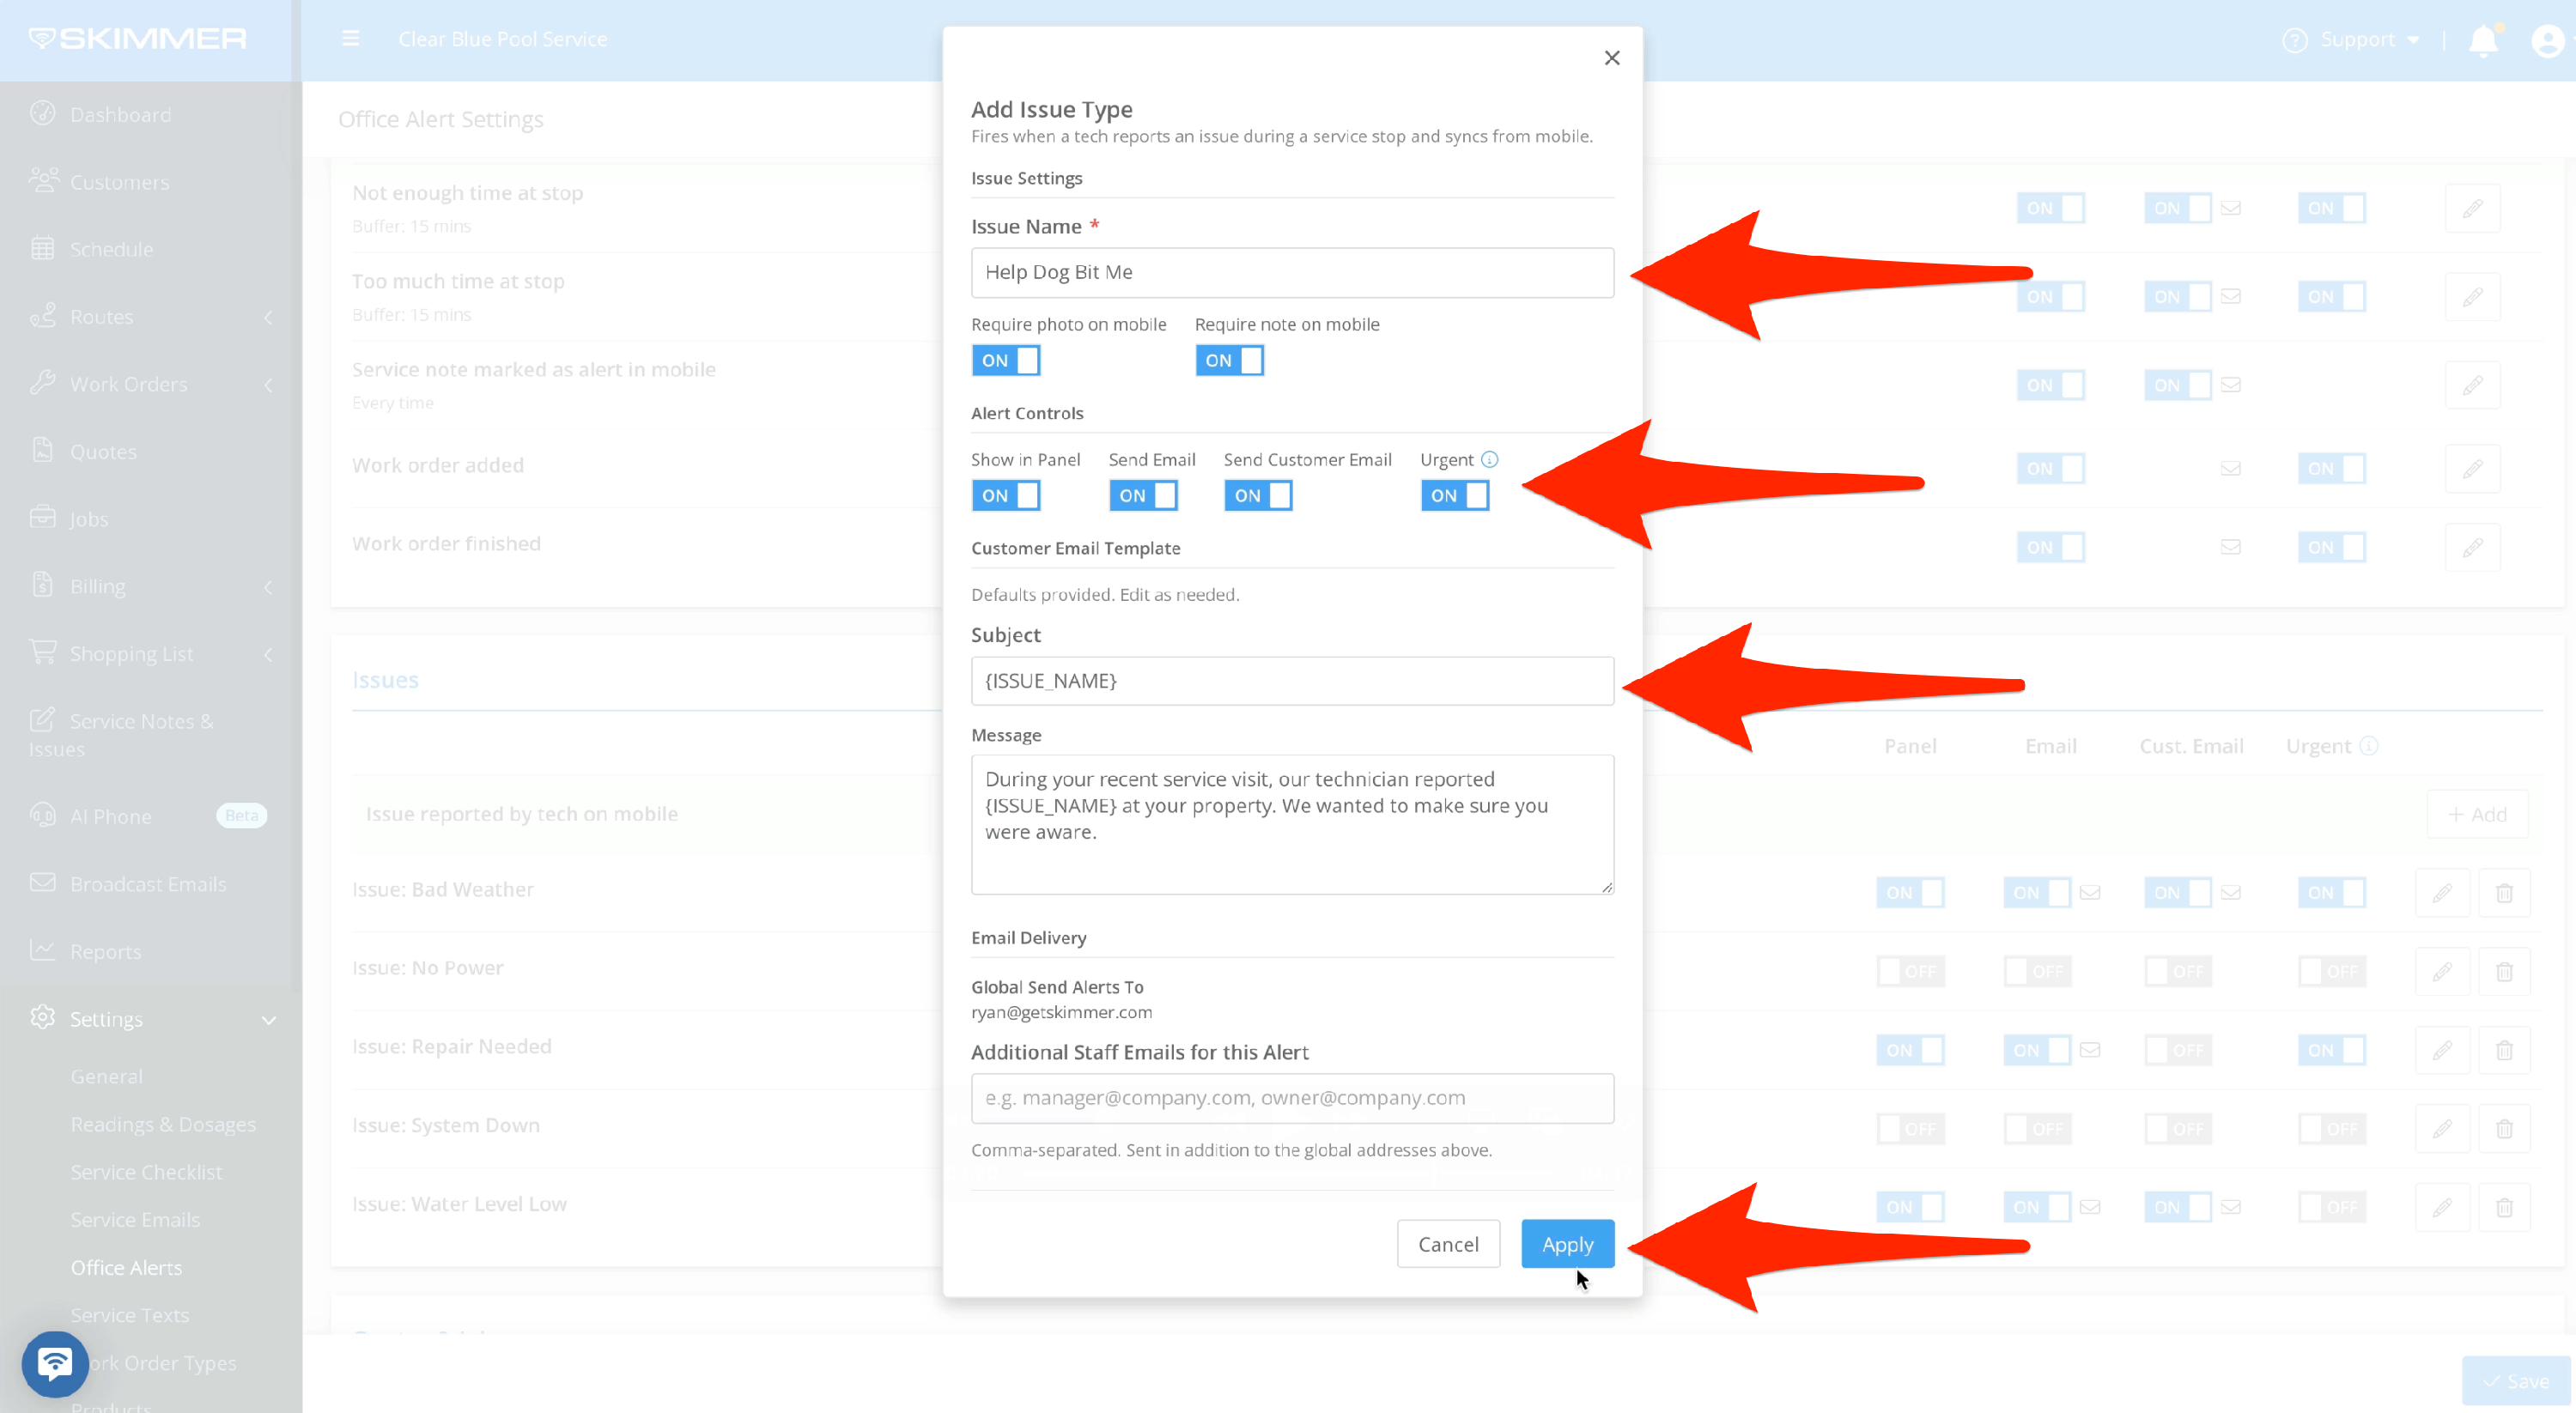
Alerts for Issues are triggered by the tech in the field. Skimmer gives you some template issues to start. You can also add your own custom Issue alerts. Click the Add button and the pop-up window gives you options. Give the issue a name, require a photo or note from the tech, and how the alert will be sent. This includes the option of sending an alert email for this issue to the customer. If you choose to send a customer email, you can also manage the template for what this specific email will say. Note that, if the tech attached a photo to the alert, the photo will not automatically transfer to the email the customer receives. Whatever you set up here will be an option for techs in the field, in the Notes and Issues box on the route stop or work order. In the office, Notes & Issues can be managed on their own screen on Skimmer’s website.
- 5
-
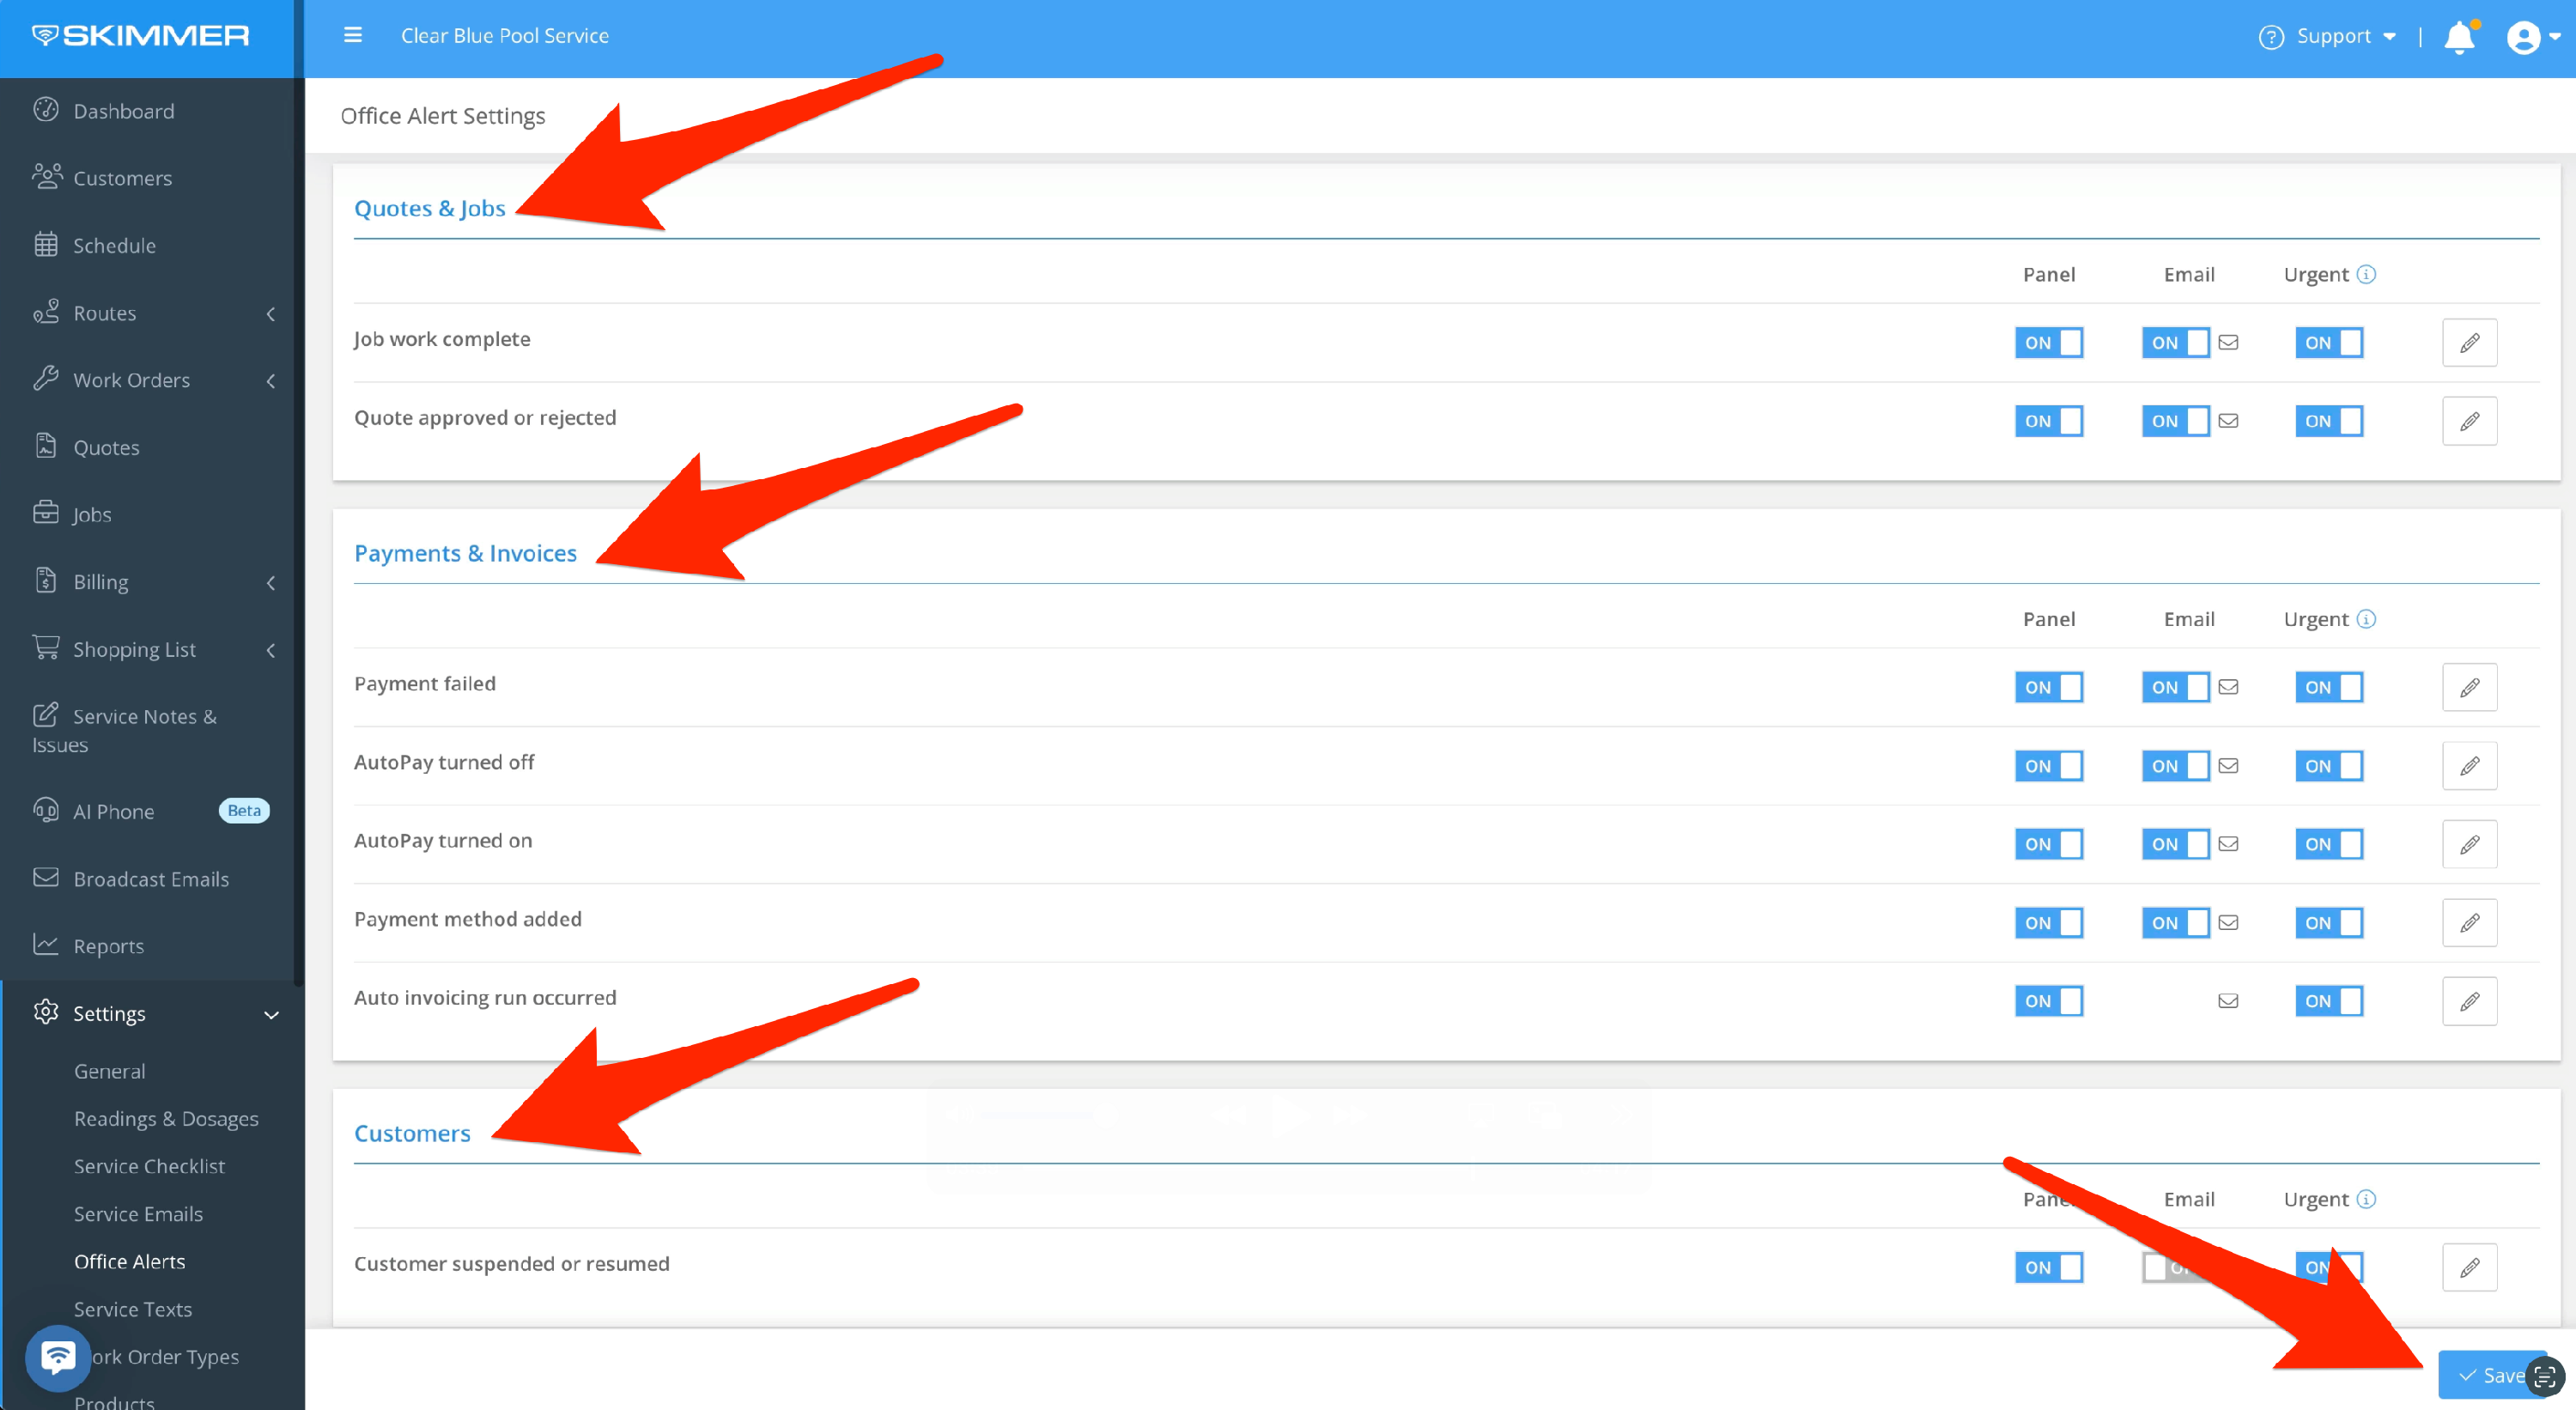
You can receive alerts when a job is complete, when quotes are approved or rejected, and you can track multiple events related to payments, payment methods, and invoicing. In the Customers box, there’s currently one alert option. However, these are all living options that will grow, so you can expect to see more in the future. When your alerts settings are what you want, click Save.
- 6
-
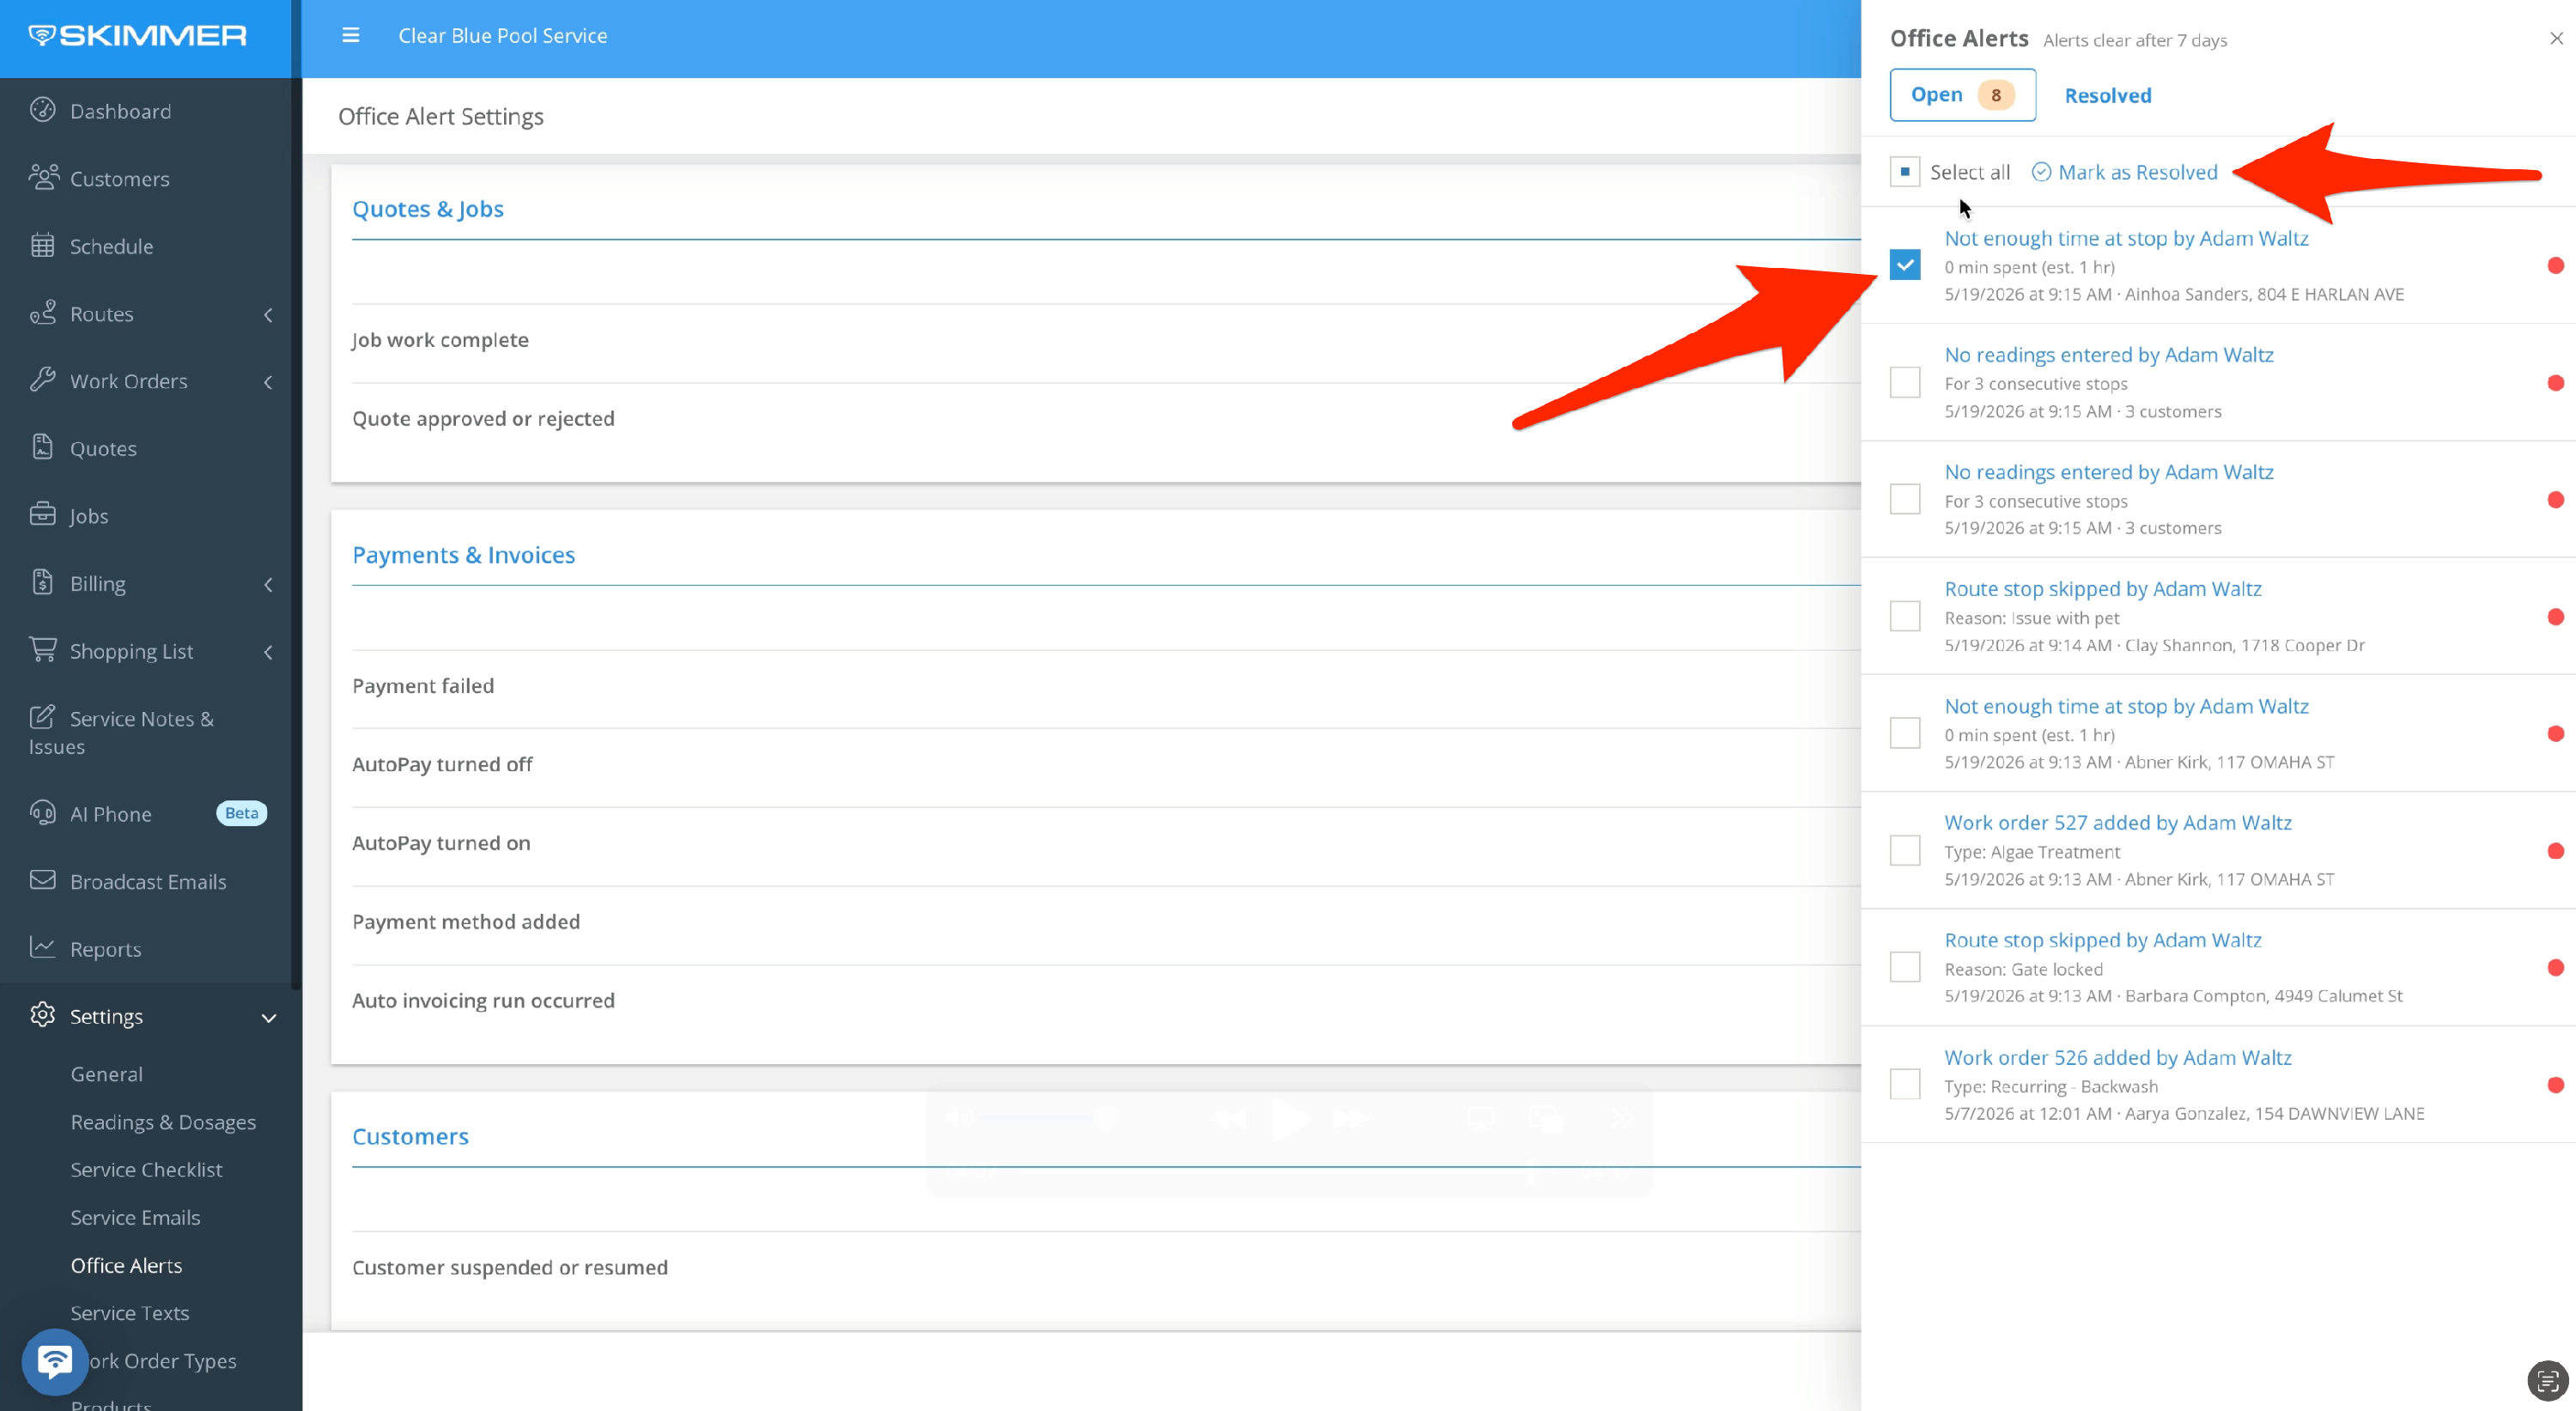
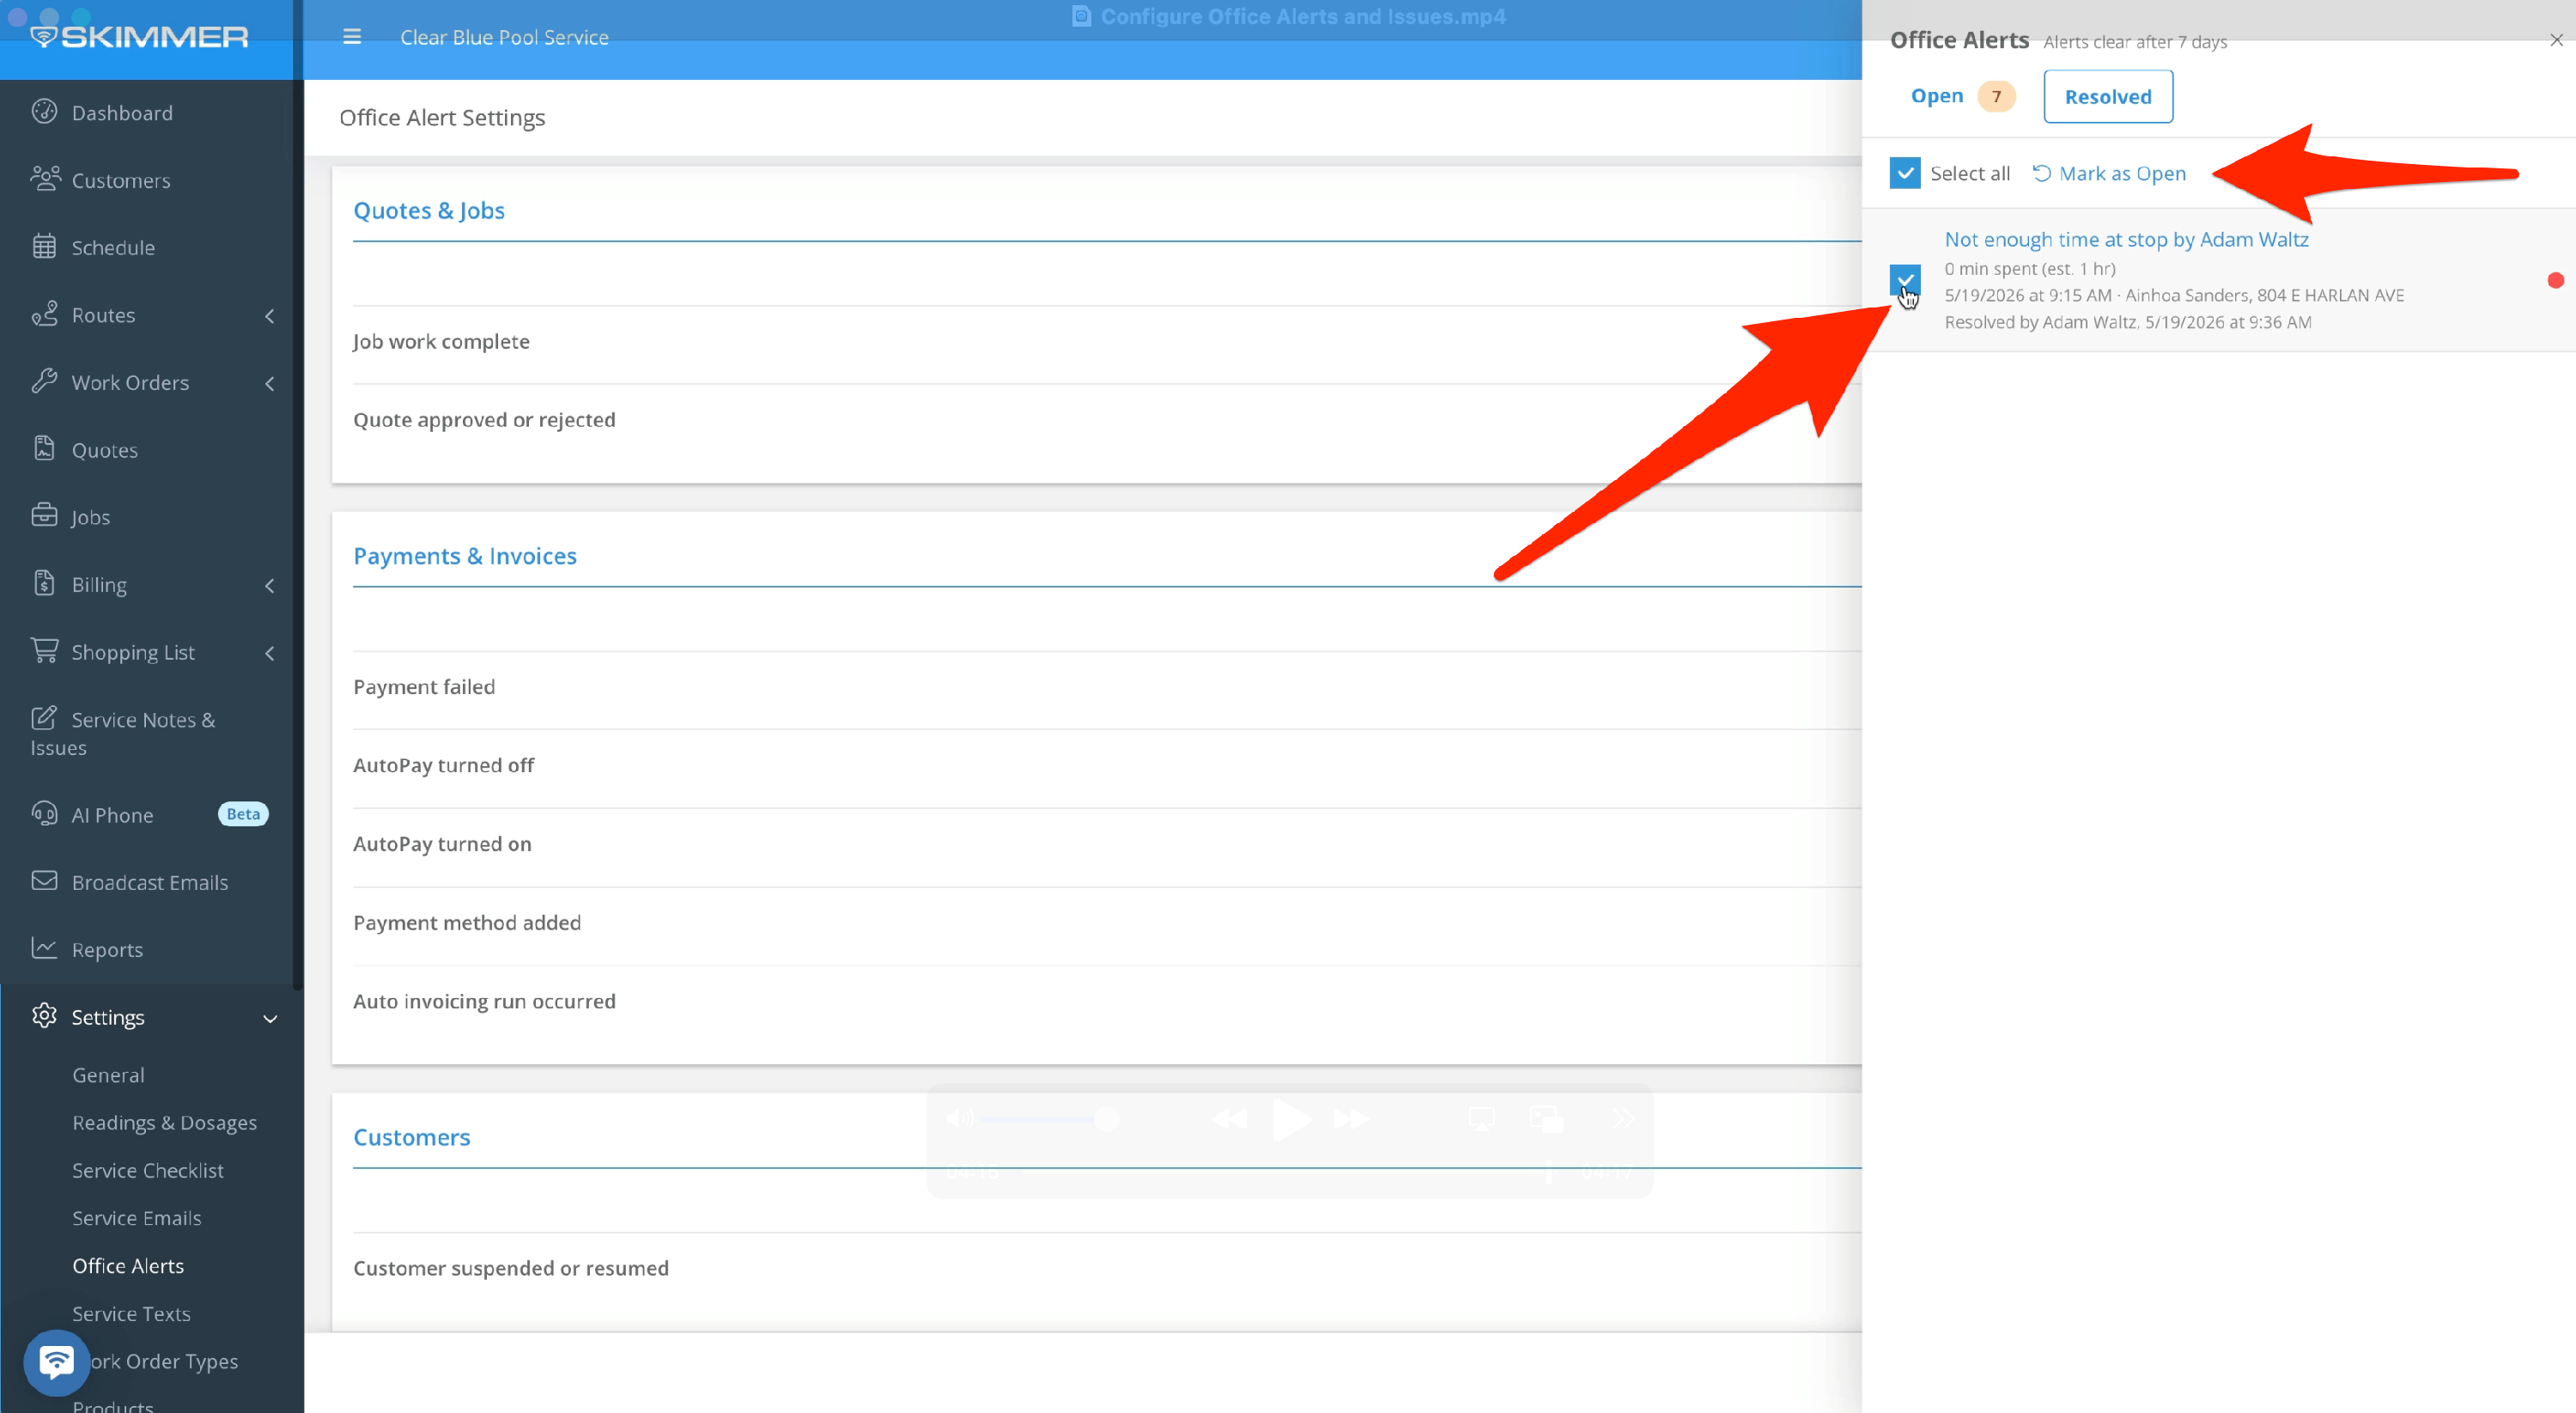
On the Alerts Panel, to resolve an alert, check the box next to it and then click Mark as Resolved. If you did this by accident or you need to reopen an issue, go to the Resolved panel, check the box again and then click Mark as Open.