Customize and Enable Service Emails (Web)
Watch the video or scroll down for step-by-step instructions.
Tiers: All


Step-by-step instructions
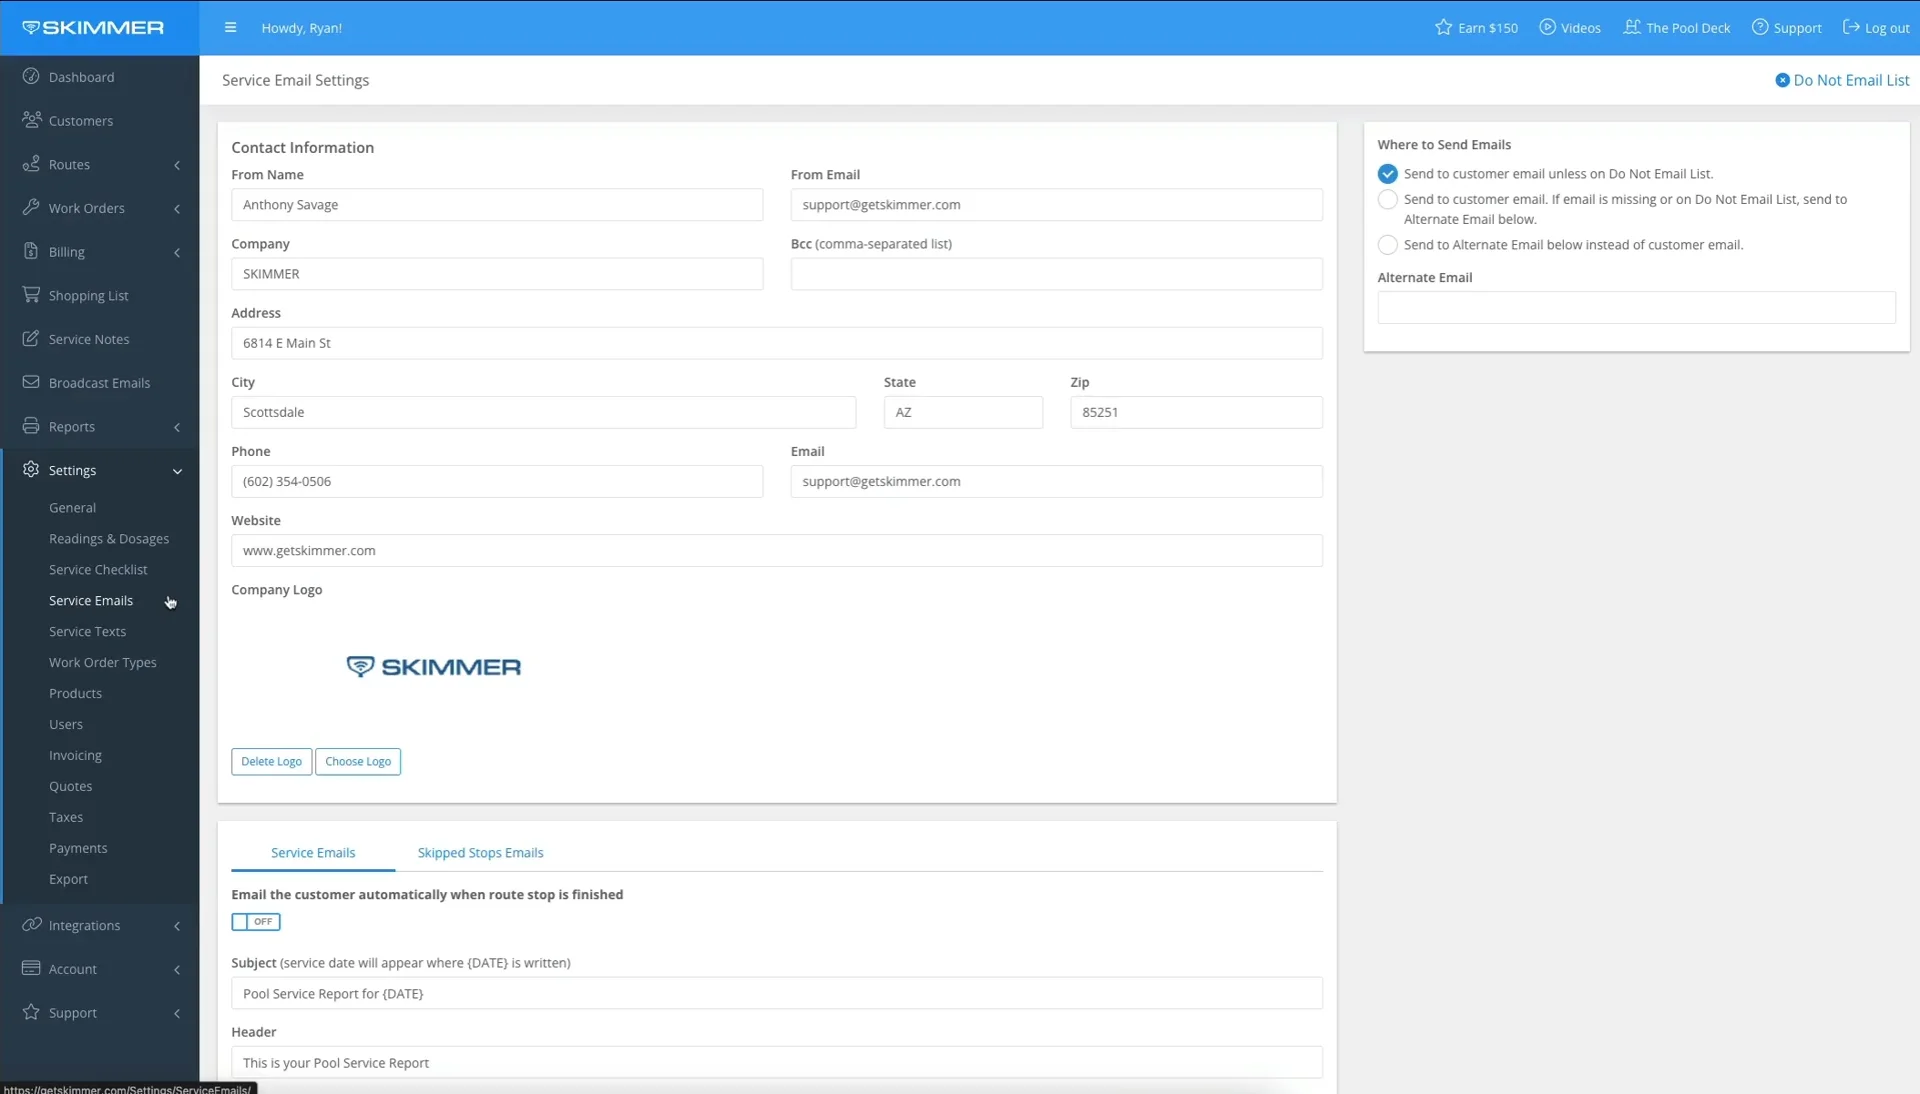
Select Settings > Service Emails.

Complete all fields under Contact Information.
- The Bcc field is optional. If you add an email address to the Bcc field, you will receive a copy of your customers' service emails to the email provided.

To add a company logo, select Choose Logo.
- Click Save at the bottom of the page for logo to appear after adding.


Select Where To Send Emails.
Send to customer email unless on Do Not Email List.
- Service emails will only be sent to the customer if there is an email included in the customer profile.

Send to customer email. If email is missing or on Do Not Email List, send to Alternate Email below.

Send to Alternate Email below instead of customer email.
- Enter an alternate email in the field below this option.


Customize the Subject (optional) > Header (optional) > create a Default Message > select and click the checkboxes related to service(s) performed (optional) > customize the Footer (optional).
- The selected checkboxes will be included in the service email

- This step is optional, and/or can be completed at a later time.

Click Add Message > Save.


Click Service Email Settings to return to the main service email settings page.

Select Skipped Stops Emails.
- This step is optional, and/or can be completed at a later time.

Toggle ON skipped stops emails settings, and create/keep default message settings (optional).

Click Add & Edit Reasons to create additional skipped stop emails (optional).

Click Add Reason > Save.

 Click Service Email Settings to return to the main service email settings page.

- The test email will be sent to the email associated with your log in credentials

