Create, Edit, or Delete a Work Order Type (App)
To learn how to add, edit, and delete Work Order types in the Skimmer app, see the video below. Or, if you prefer, scroll past the video to view our step-by-step text instructions.

Step-by-step instructions . . .
- 1
-
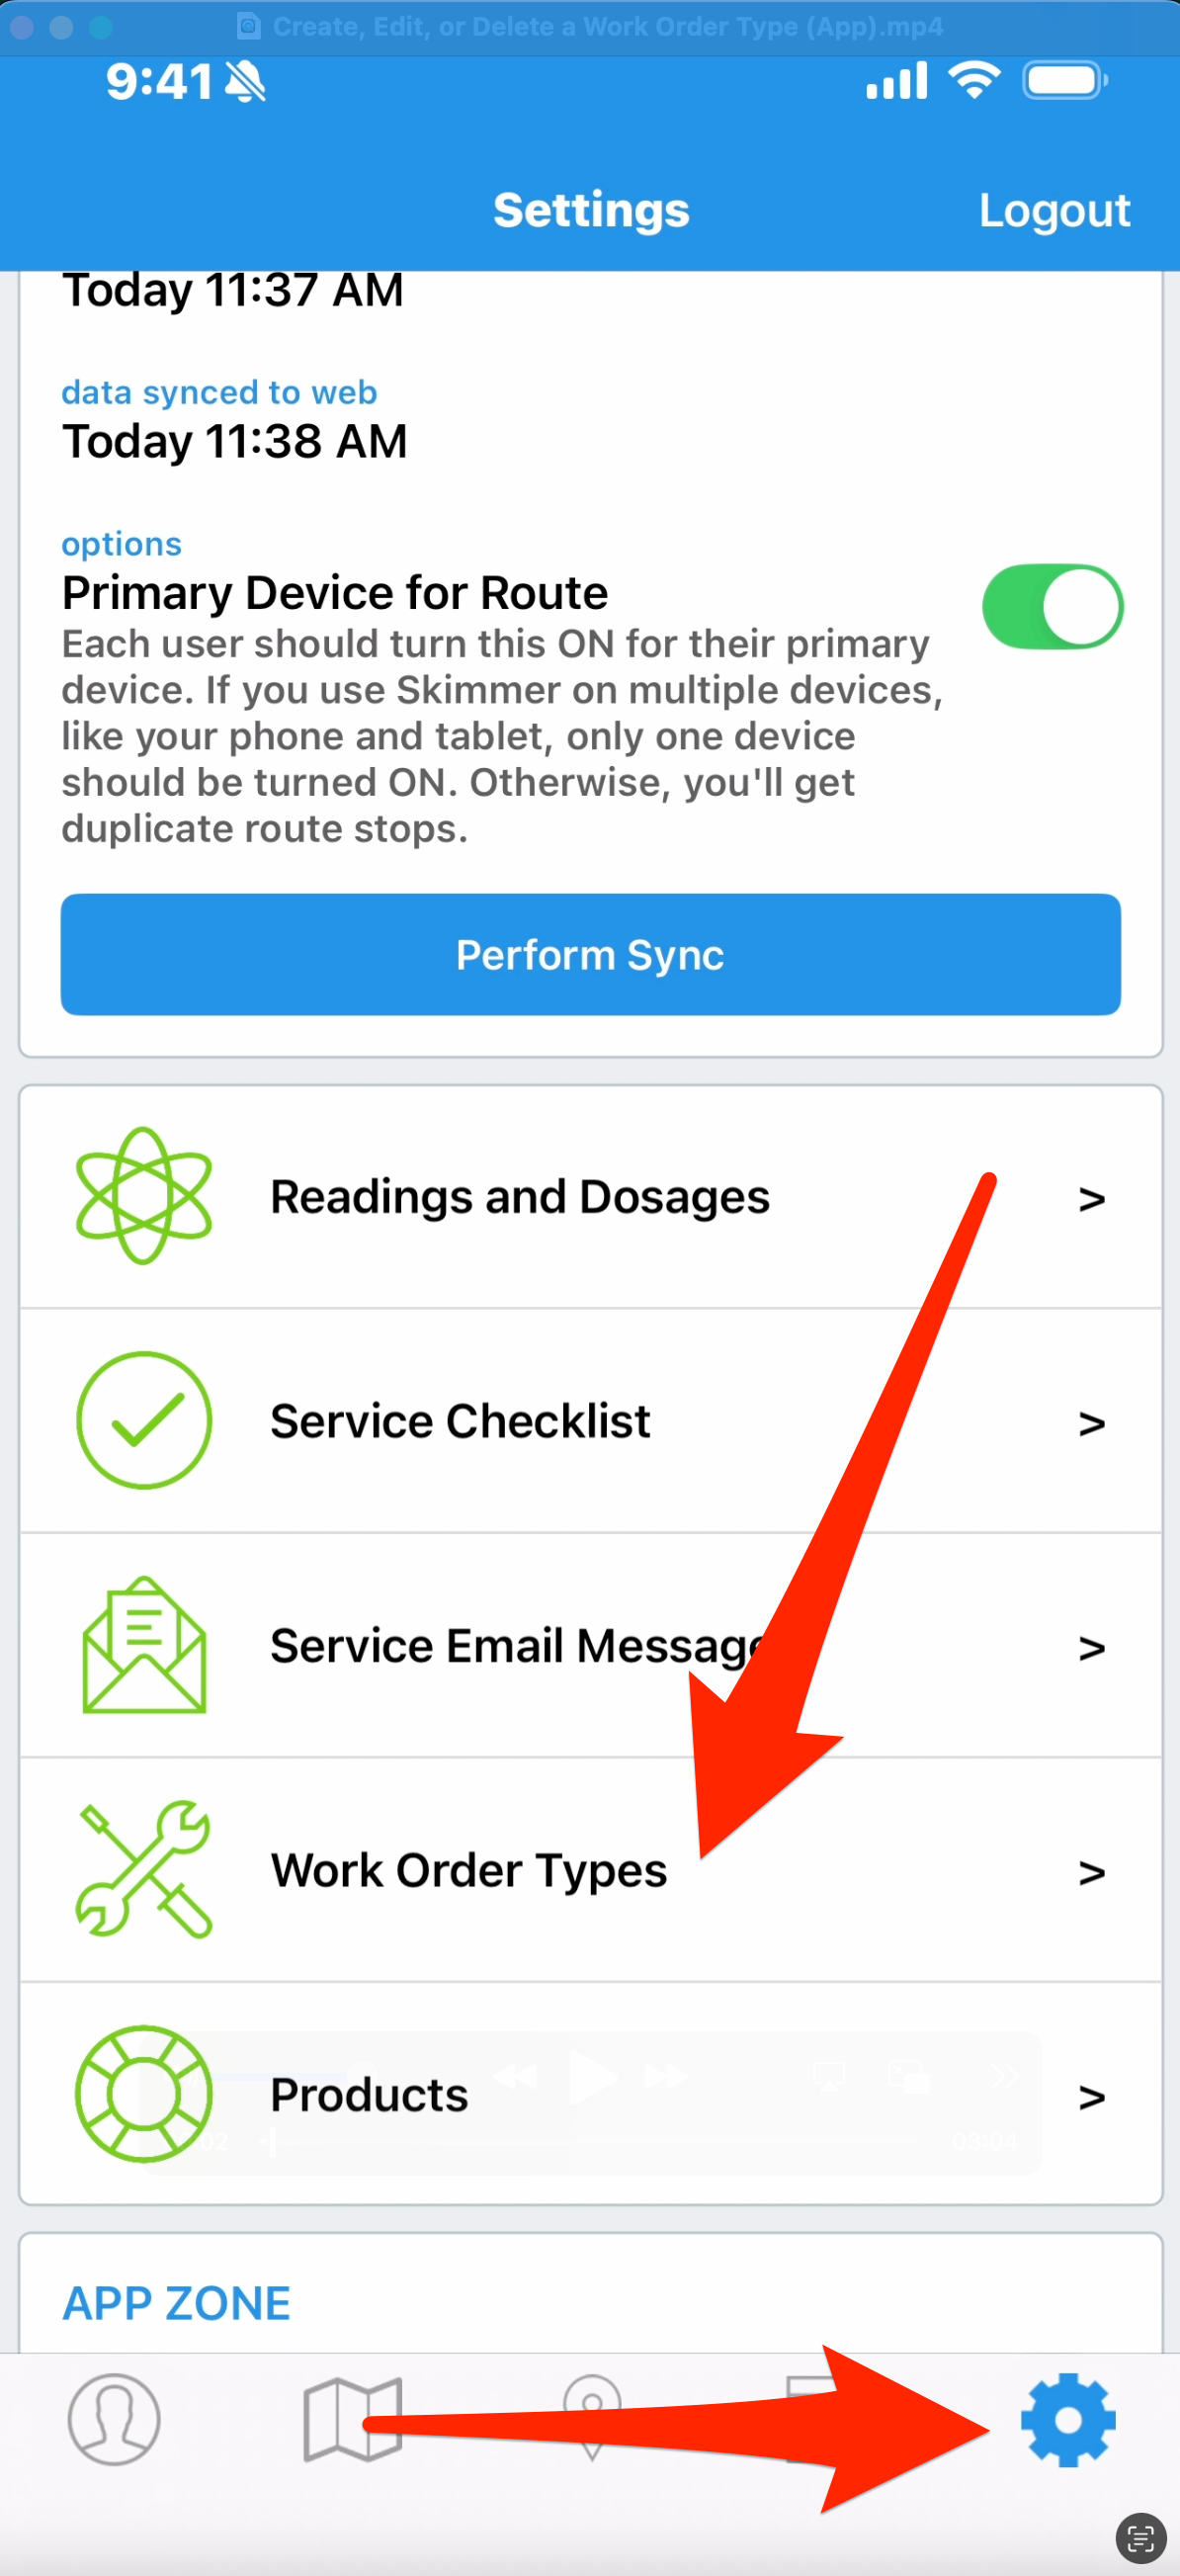
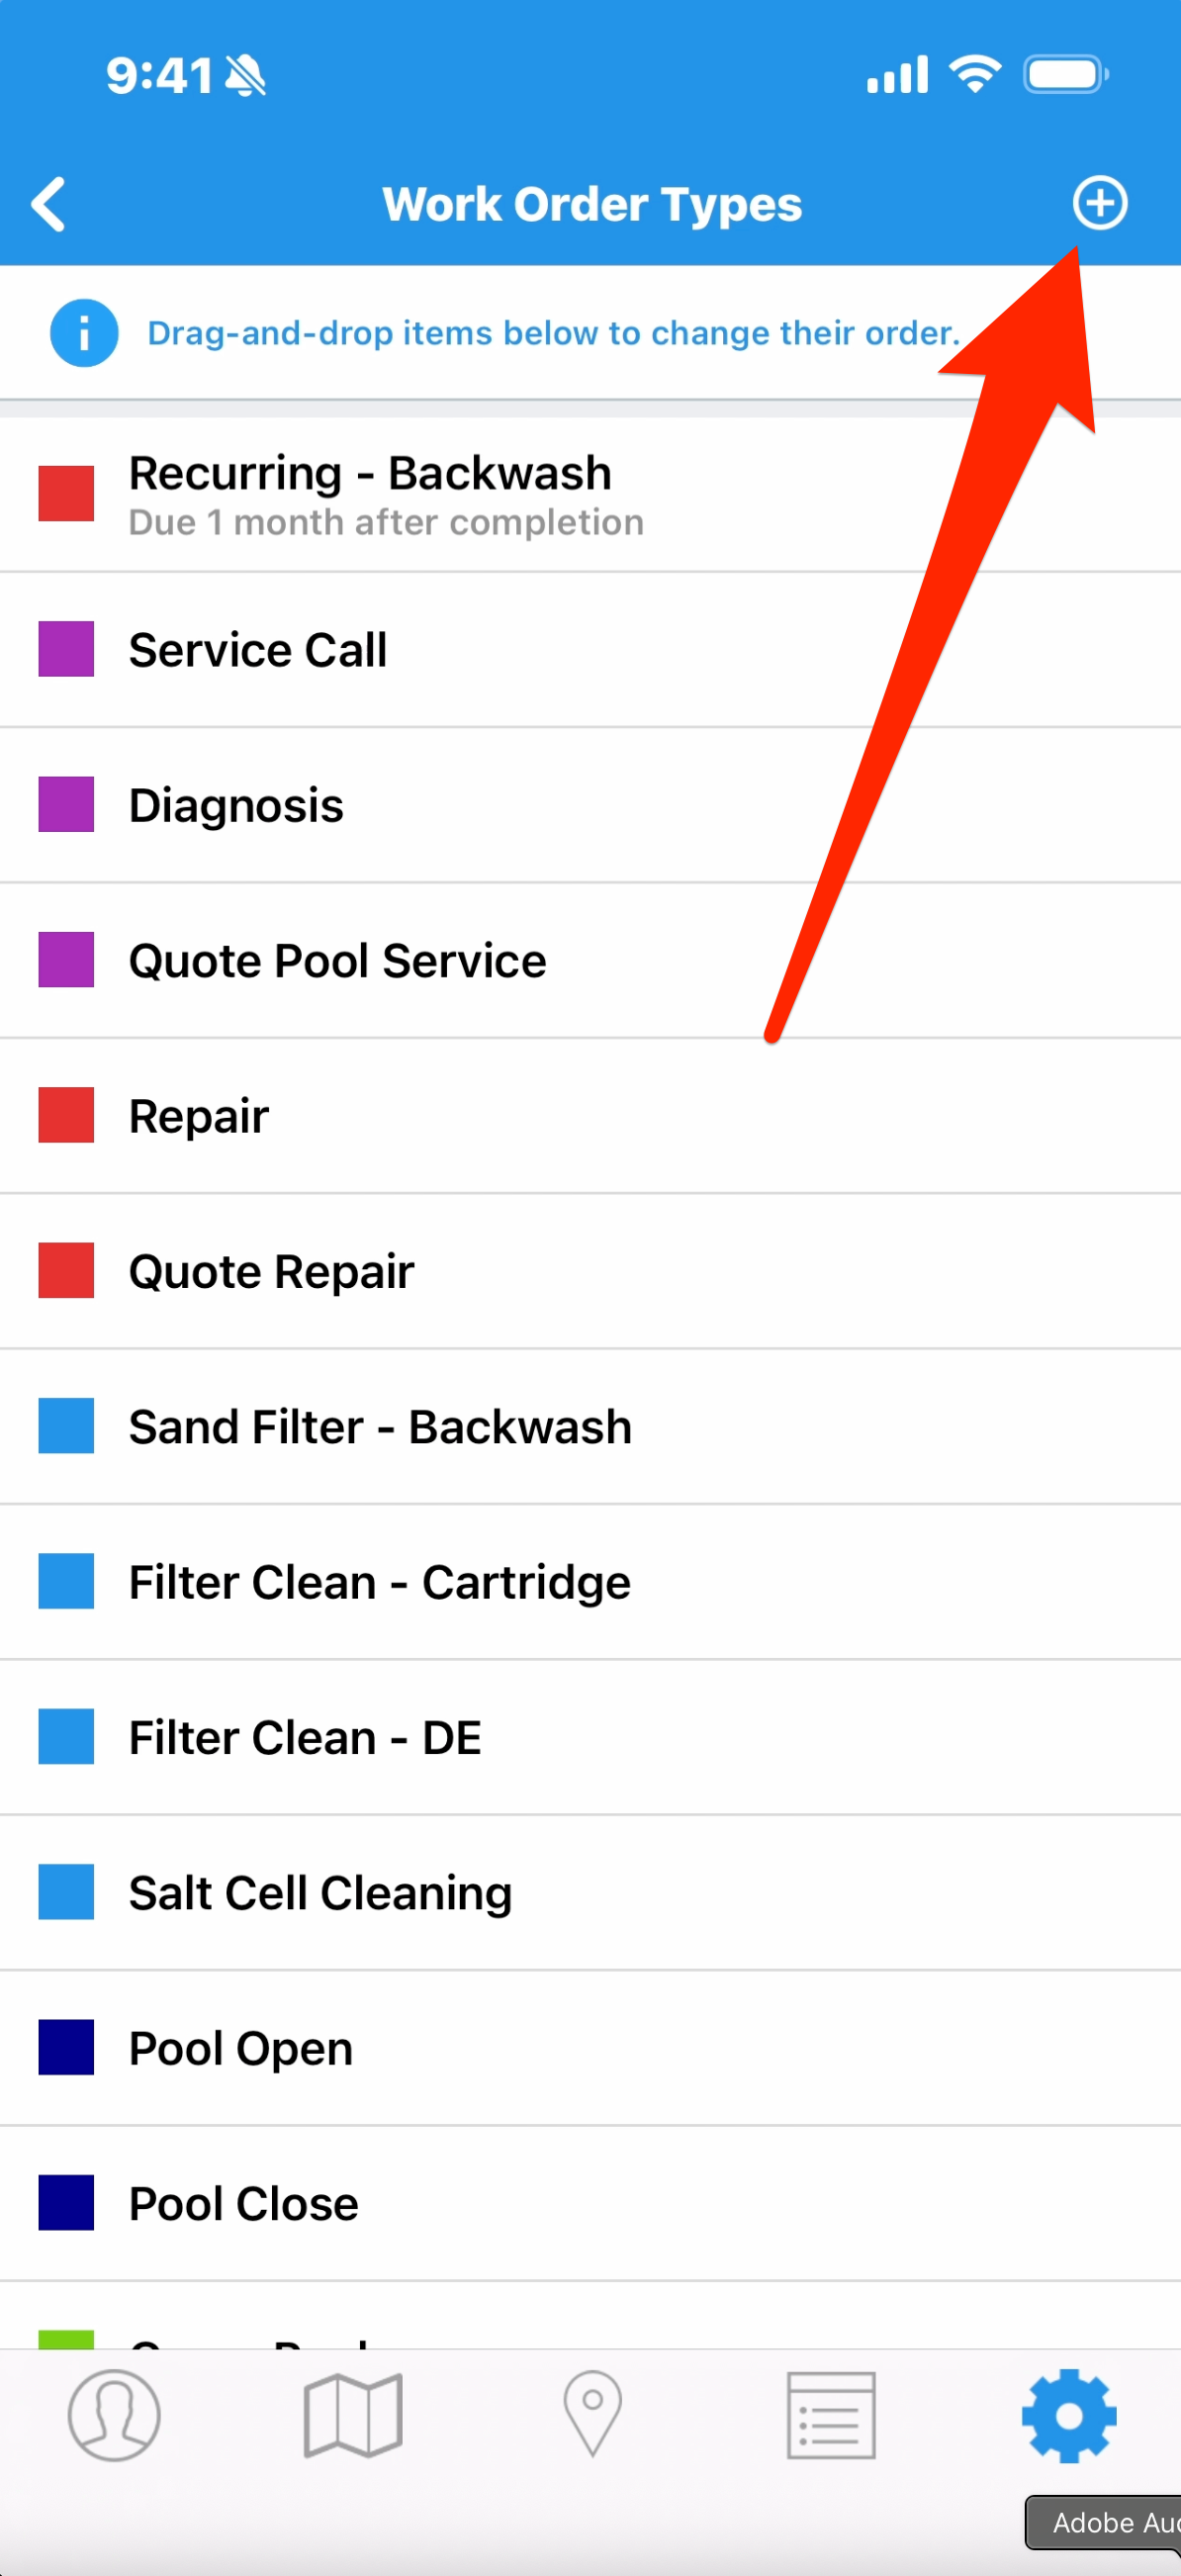
To manage work order types on the Skimmer app, go to Settings > Work Order Types. There you’ll find a list of available work order types, which function like templates for specific kinds of jobs. To create a new one, tap the Plus in the top right corner.
- 2
-
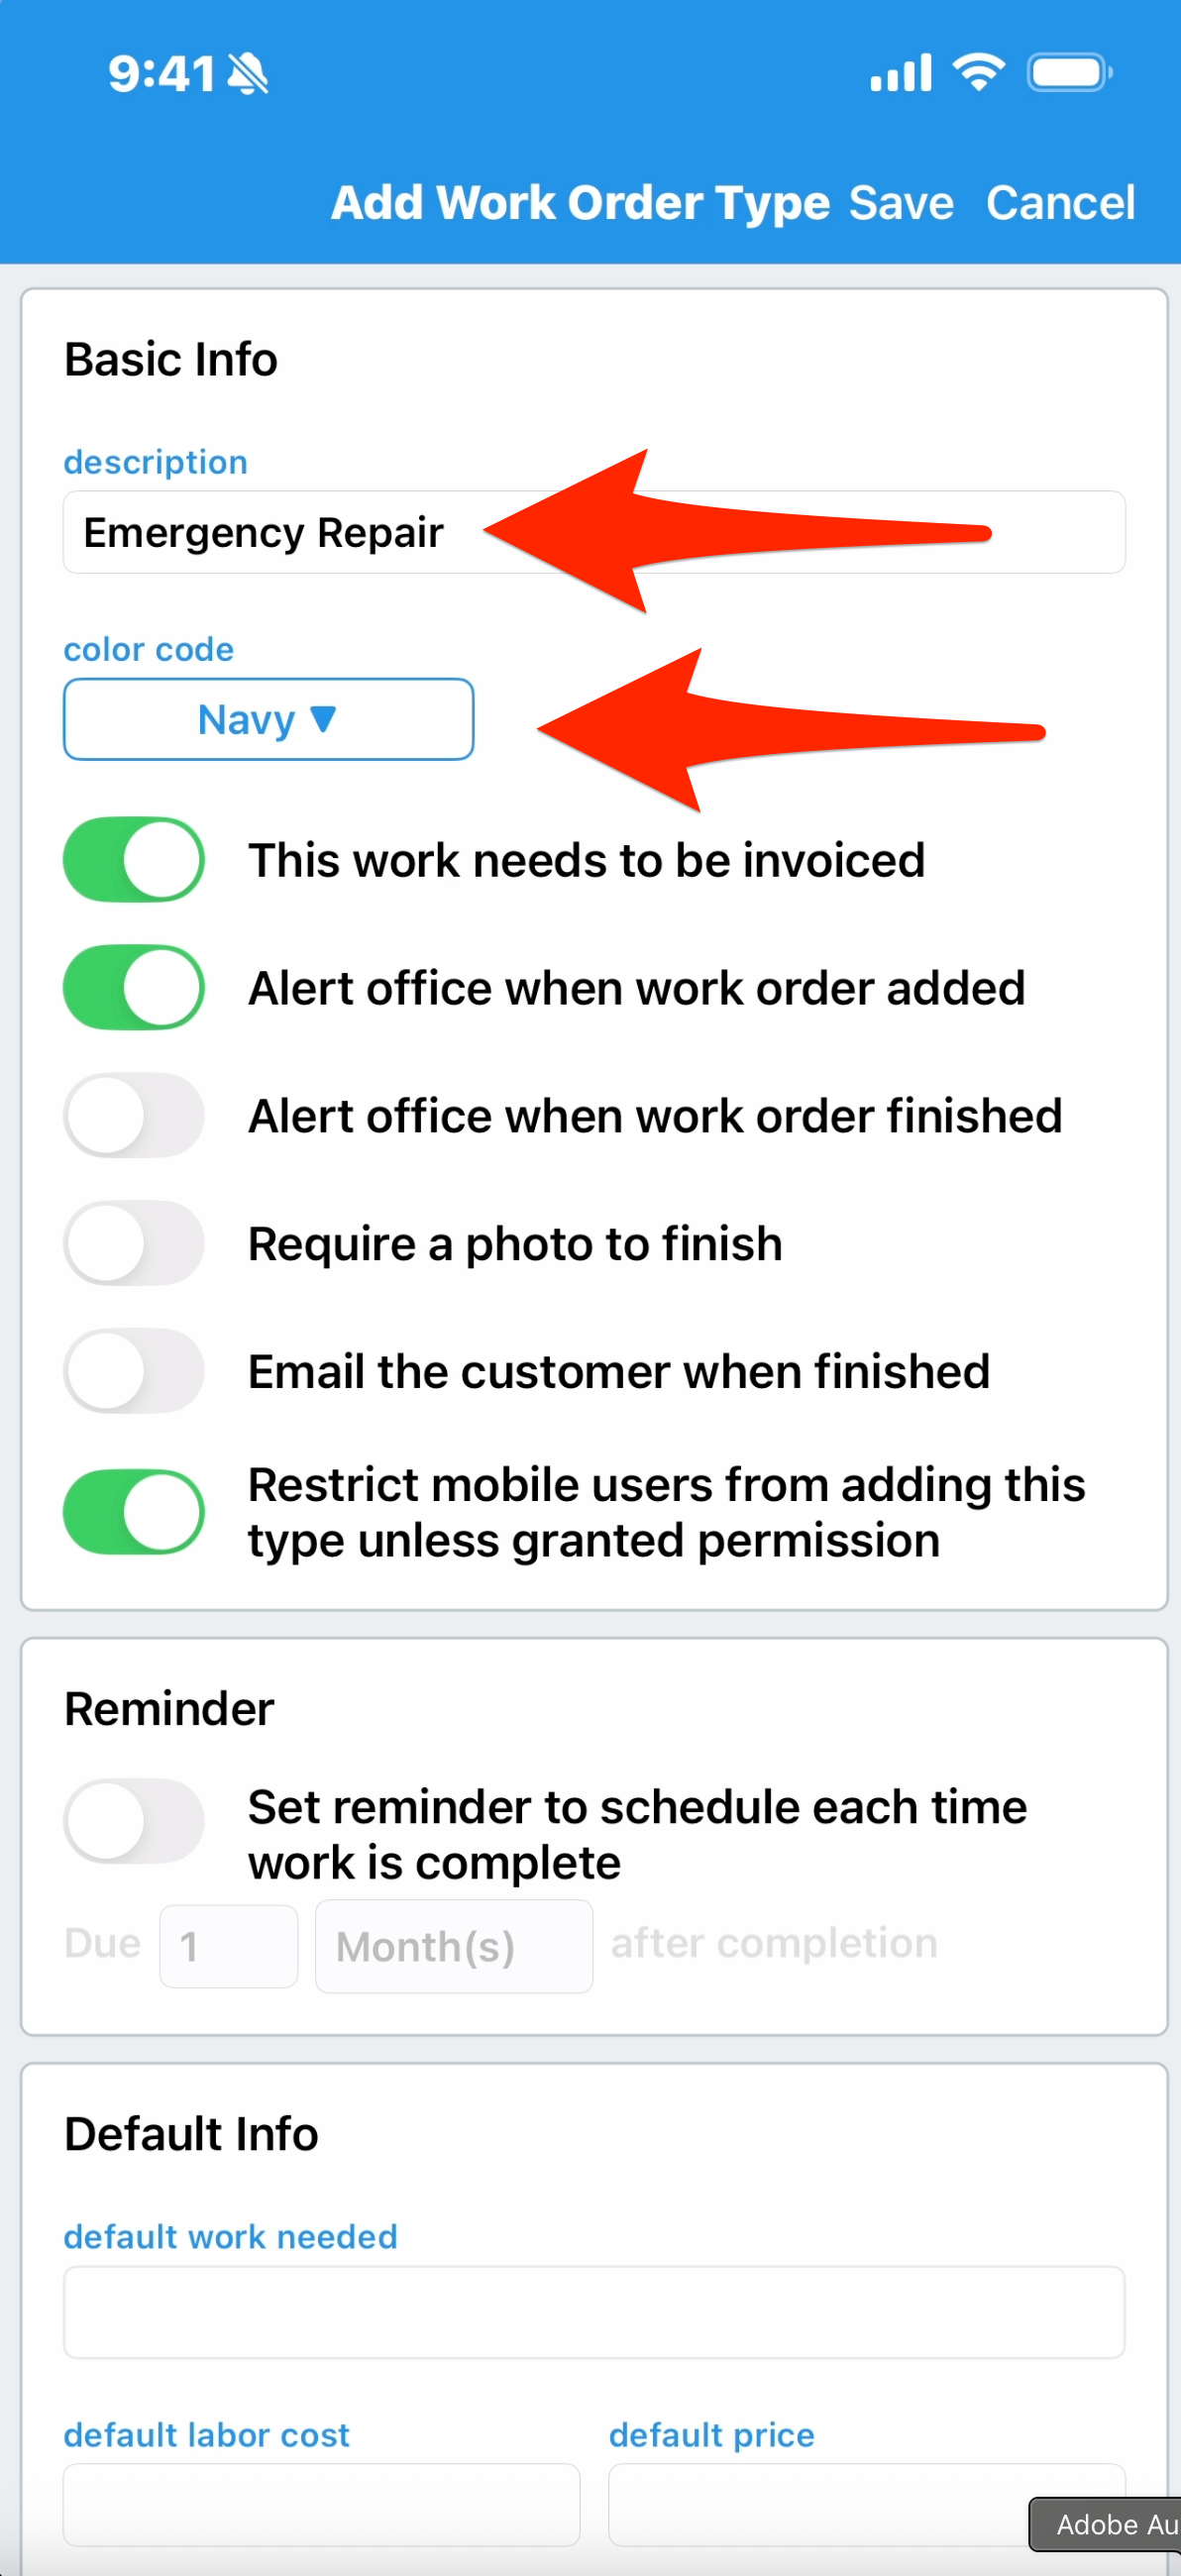
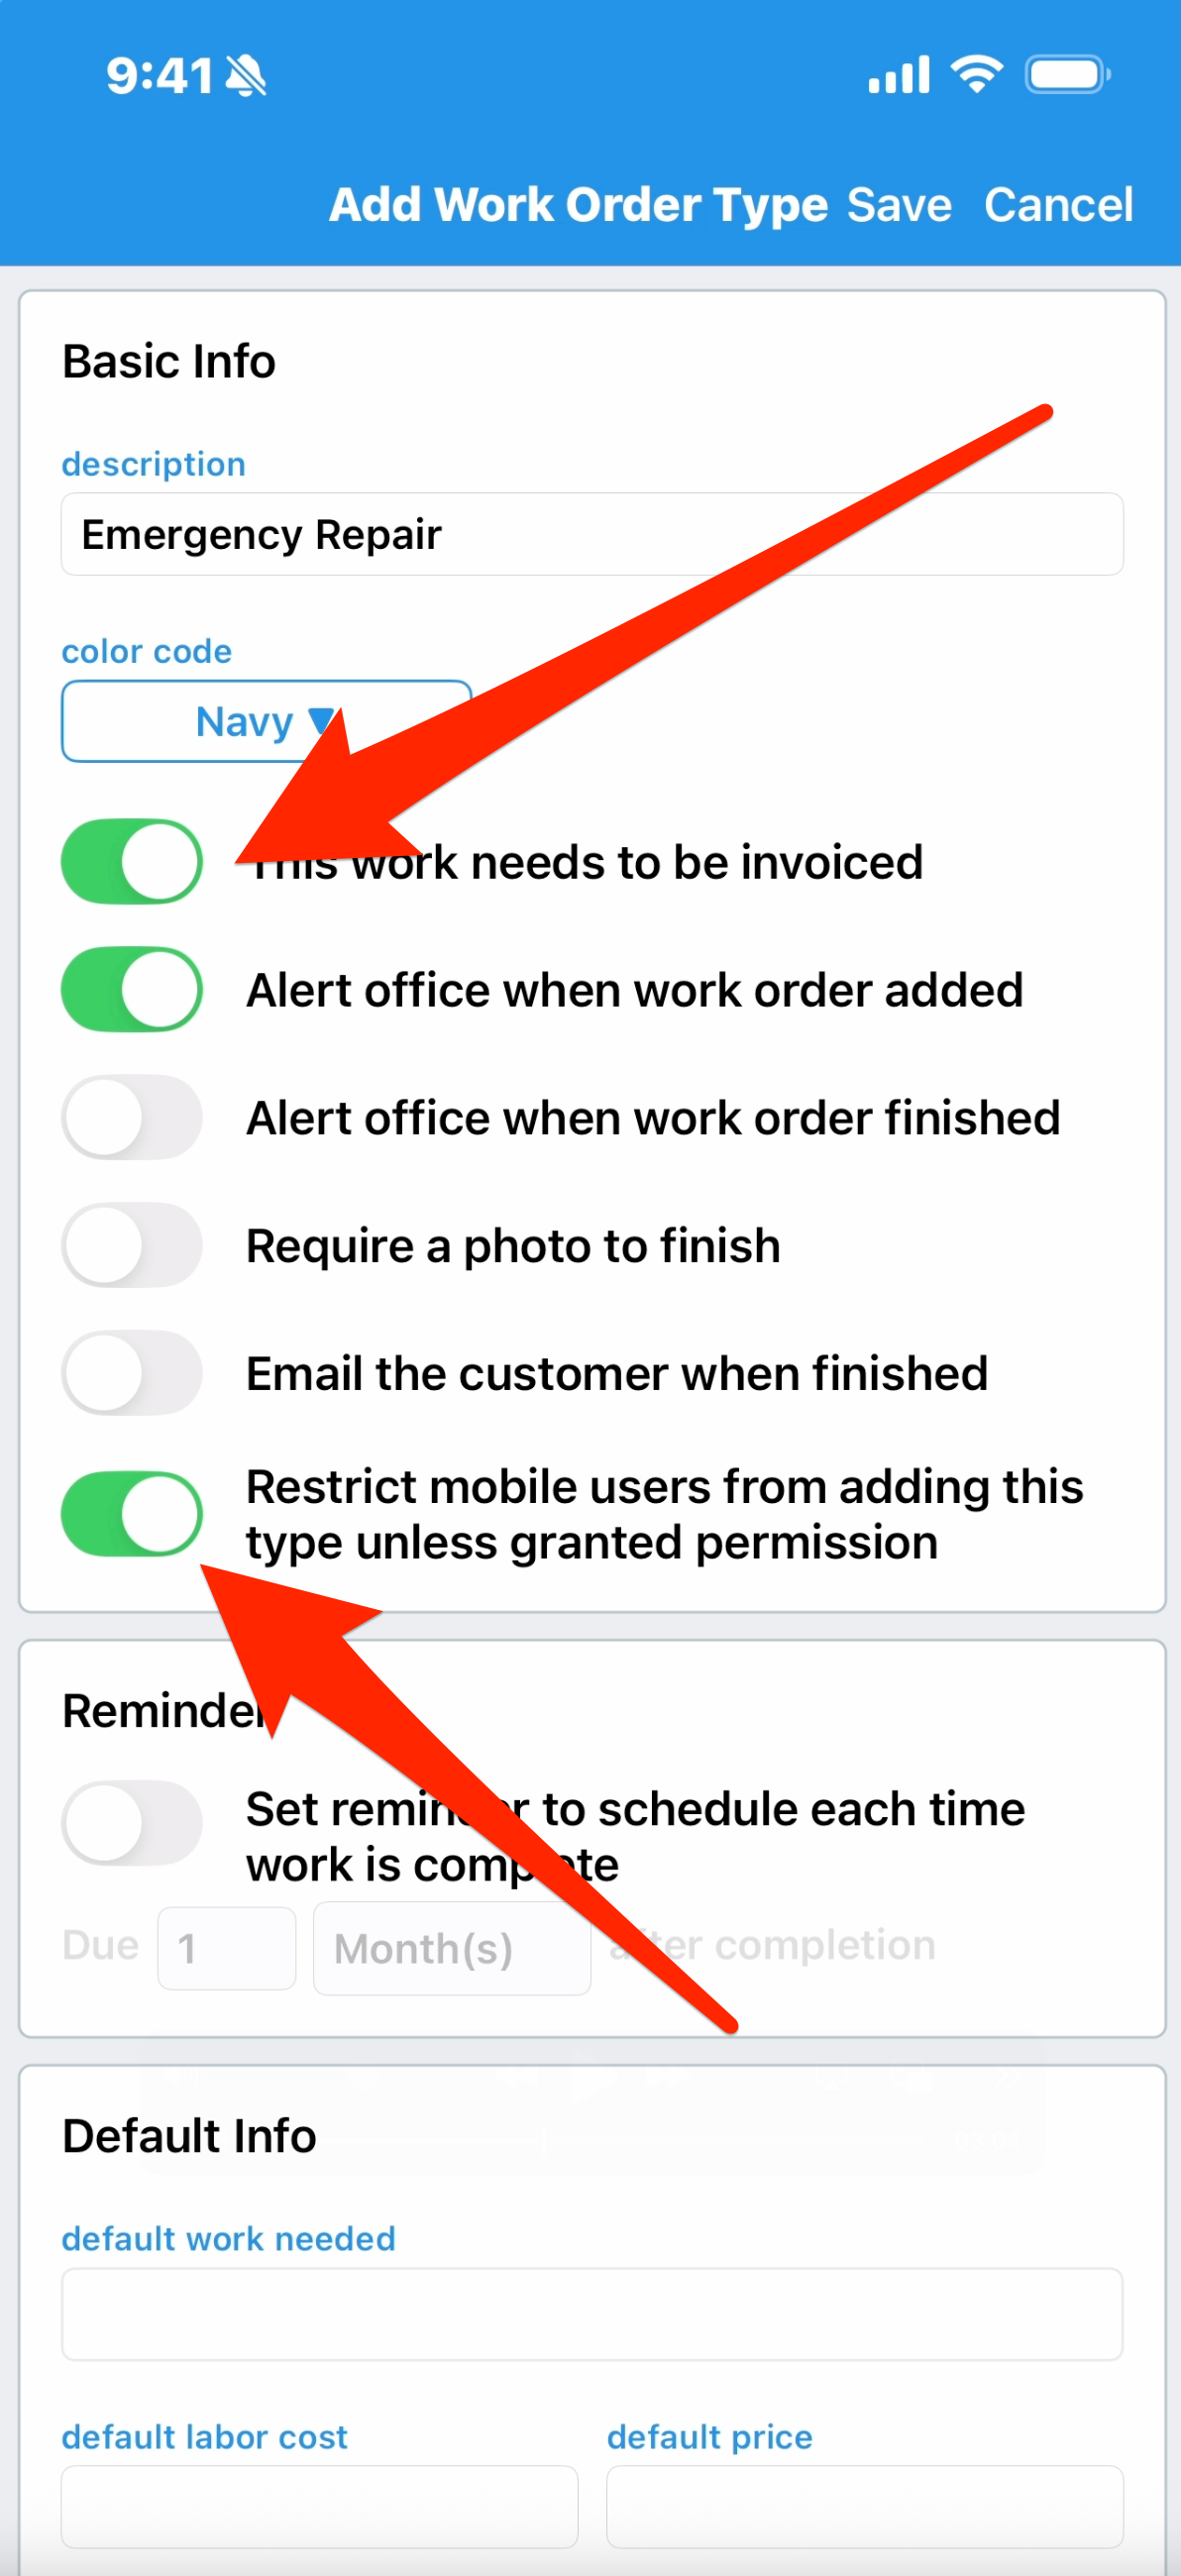
What you set up can be adjusted for individual jobs. Here you’re choosing the standard information that will be attached to the work order. Start by giving it a name, and the color code helps to distinguish from other work order types.
- 3
-
Next, you have a list of options. Whatever boxes you check will activate the options for this work order type. Your options are to invoice this work when completed, alert the office via email when this work order is either created or finished or both, and require techs to add at least one photo before they can finish the job. You can also choose to send a service email when the work is completed. By default, mobile users are restricted from creating a job based on this work order type unless their account is specifically granted permission. We show you how to manage user access in another tutorial. However, if you want all mobile users to able to create this kind of job regardless of their access level, you can uncheck this box.
- 4
-
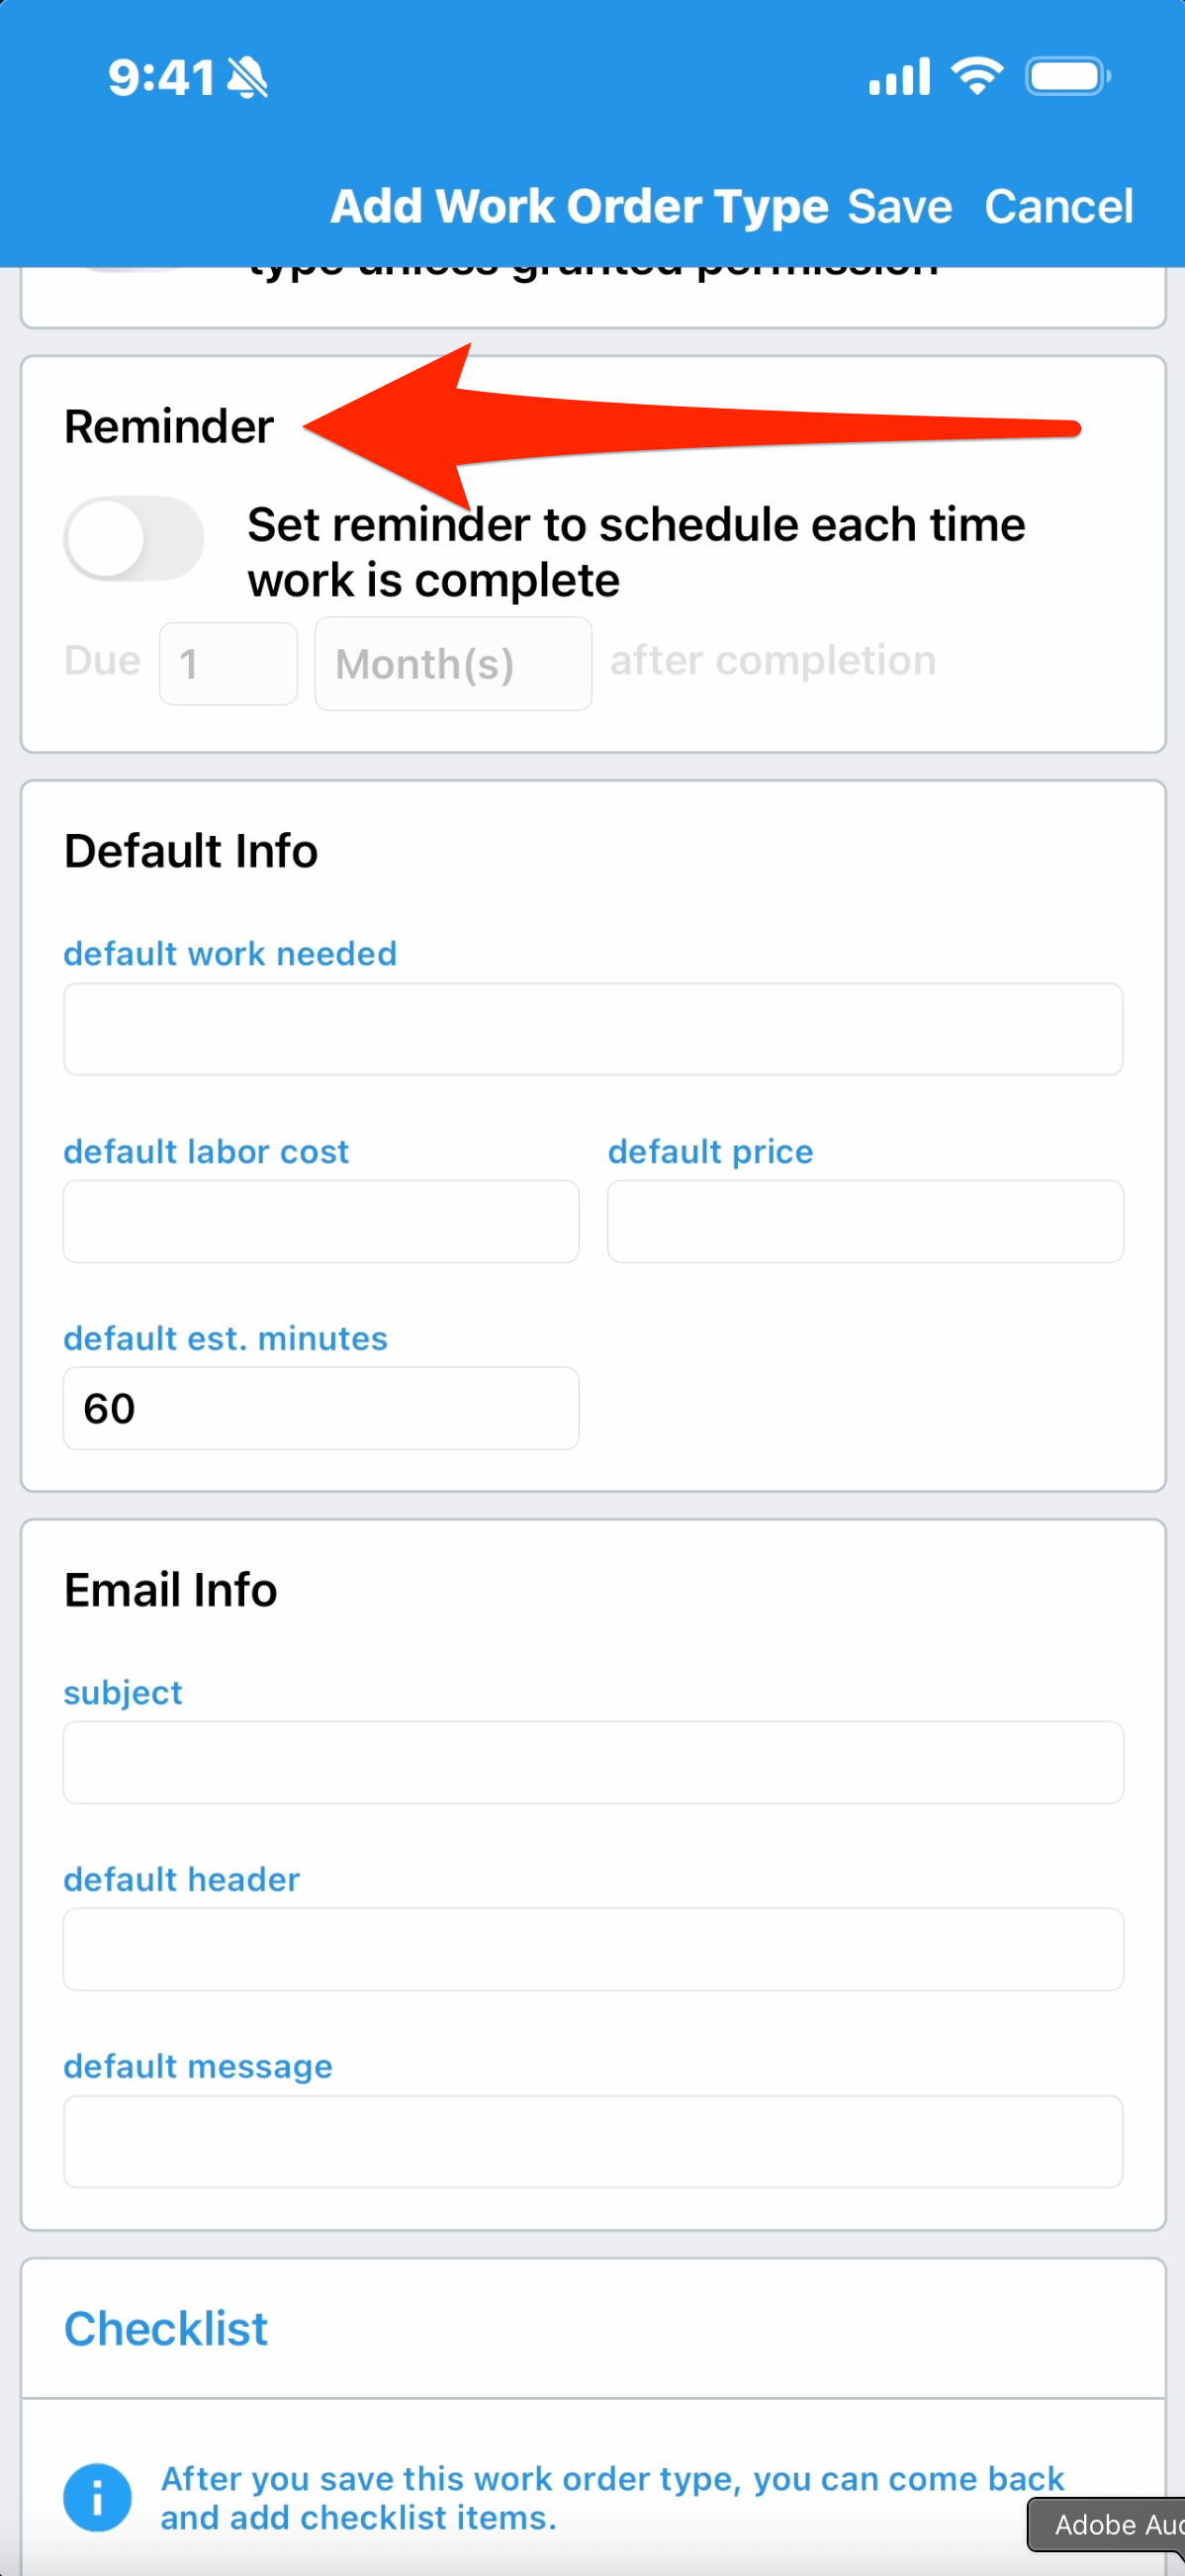
If you want Skimmer to periodically remind you to schedule this work order again, set that up under the Reminder box. Reminders also have their own screen on the Admin Panel where you can manage them. If you want a job to recur automatically on your schedule, similar to a route assignment, you can set that up in the Recurring screen on the website. We cover both of these options in detail in other tutorials.
- 5
-
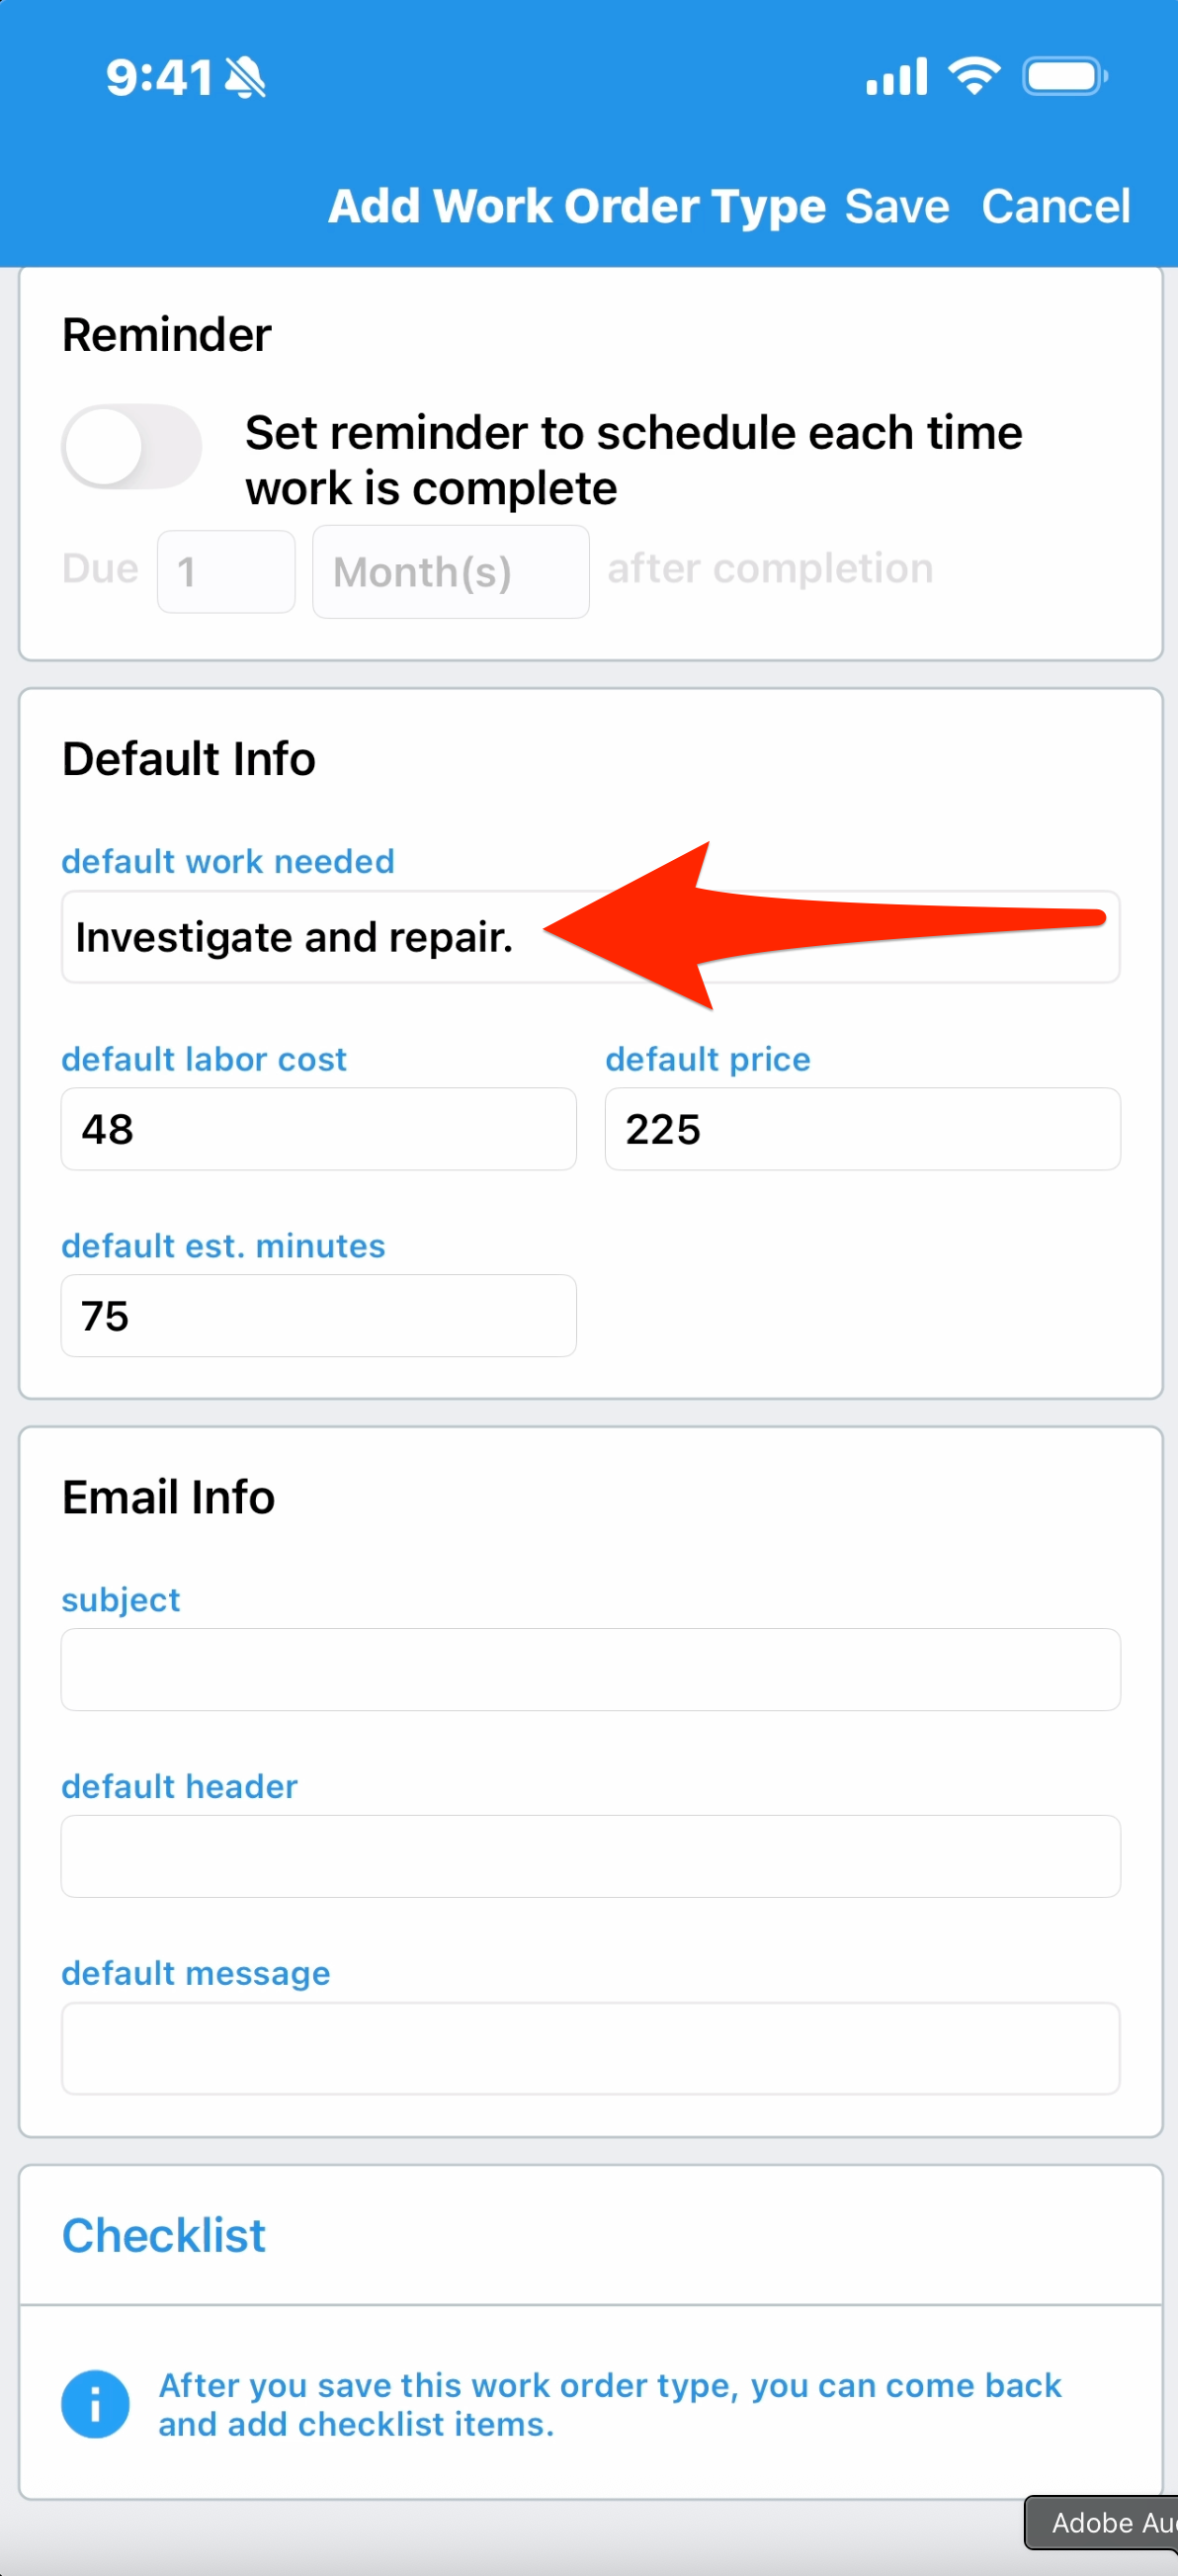
Under Default Info, include a description of the basic work that’s required when this job is scheduled. You can also choose a Default Labor Cost, which is what you pay a tech or techs to do this work, and a Default Price, which is the standard rate you want to charge the customer. If there’s a typical duration for this work, set that under Default Estimated Minutes.
- 6
-
If you’re sending a service email after job completion, the next box lets you choose what you want it to say. Tap Save.

- 7
-
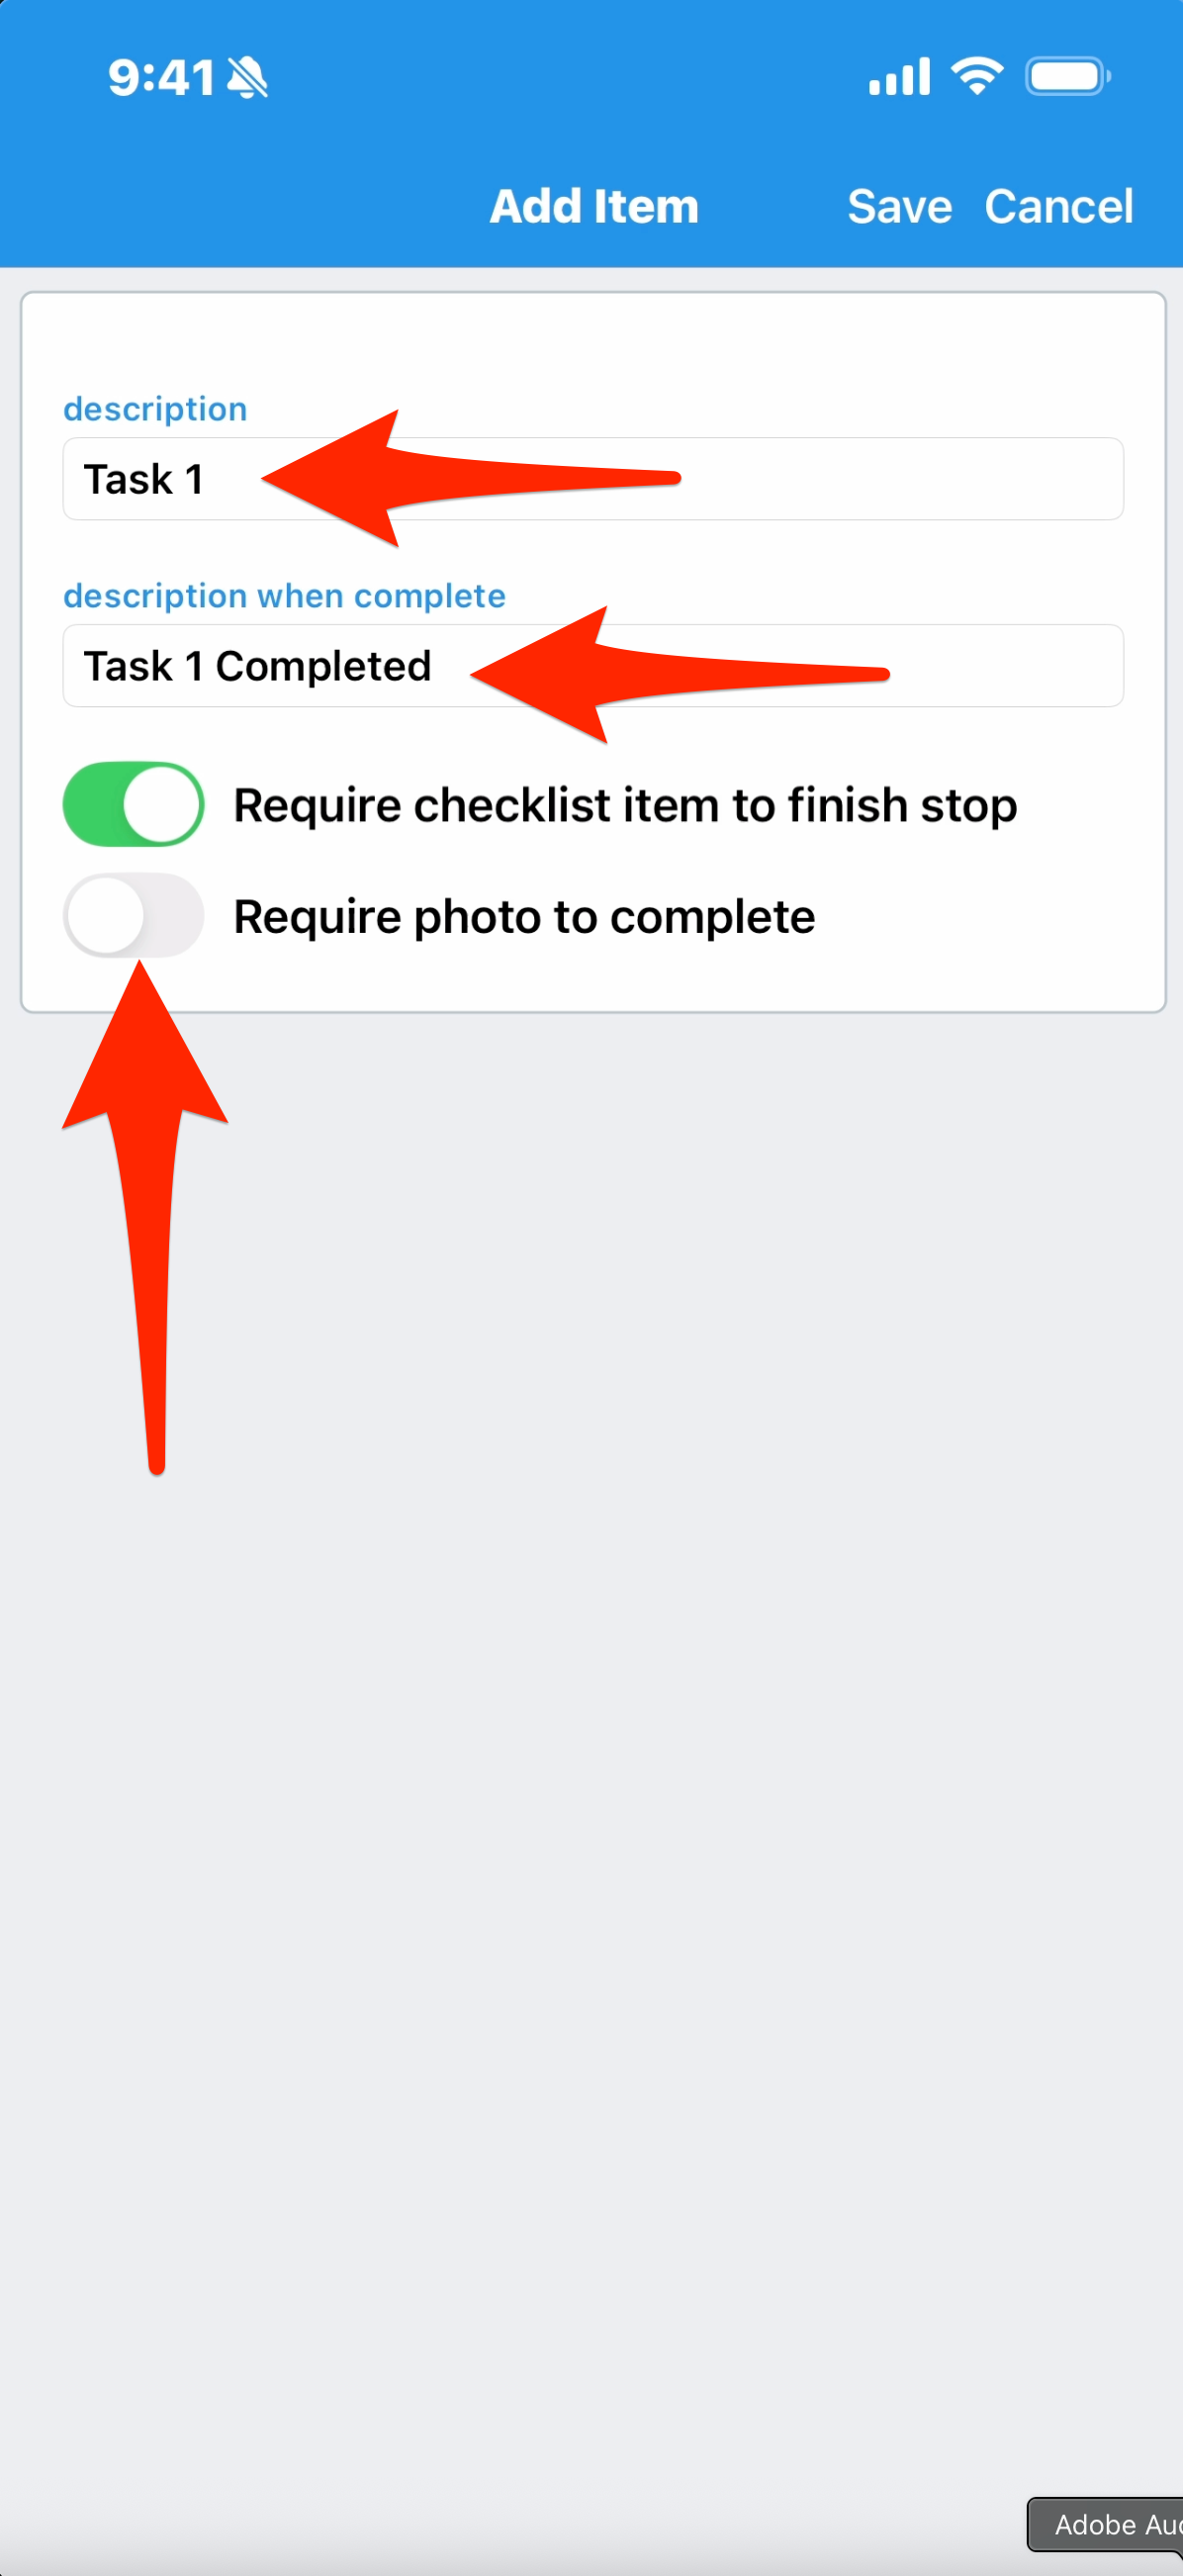
Once the work order type is created, you can create custom tasks required for this job. In the Checklist box, tap Add. Each task has two names, one for before it’s marked as completed, and one for after. You can choose whether to require techs to mark it as completed before they can finish the job, and whether to require a photo. Tap Save.
- 8
-
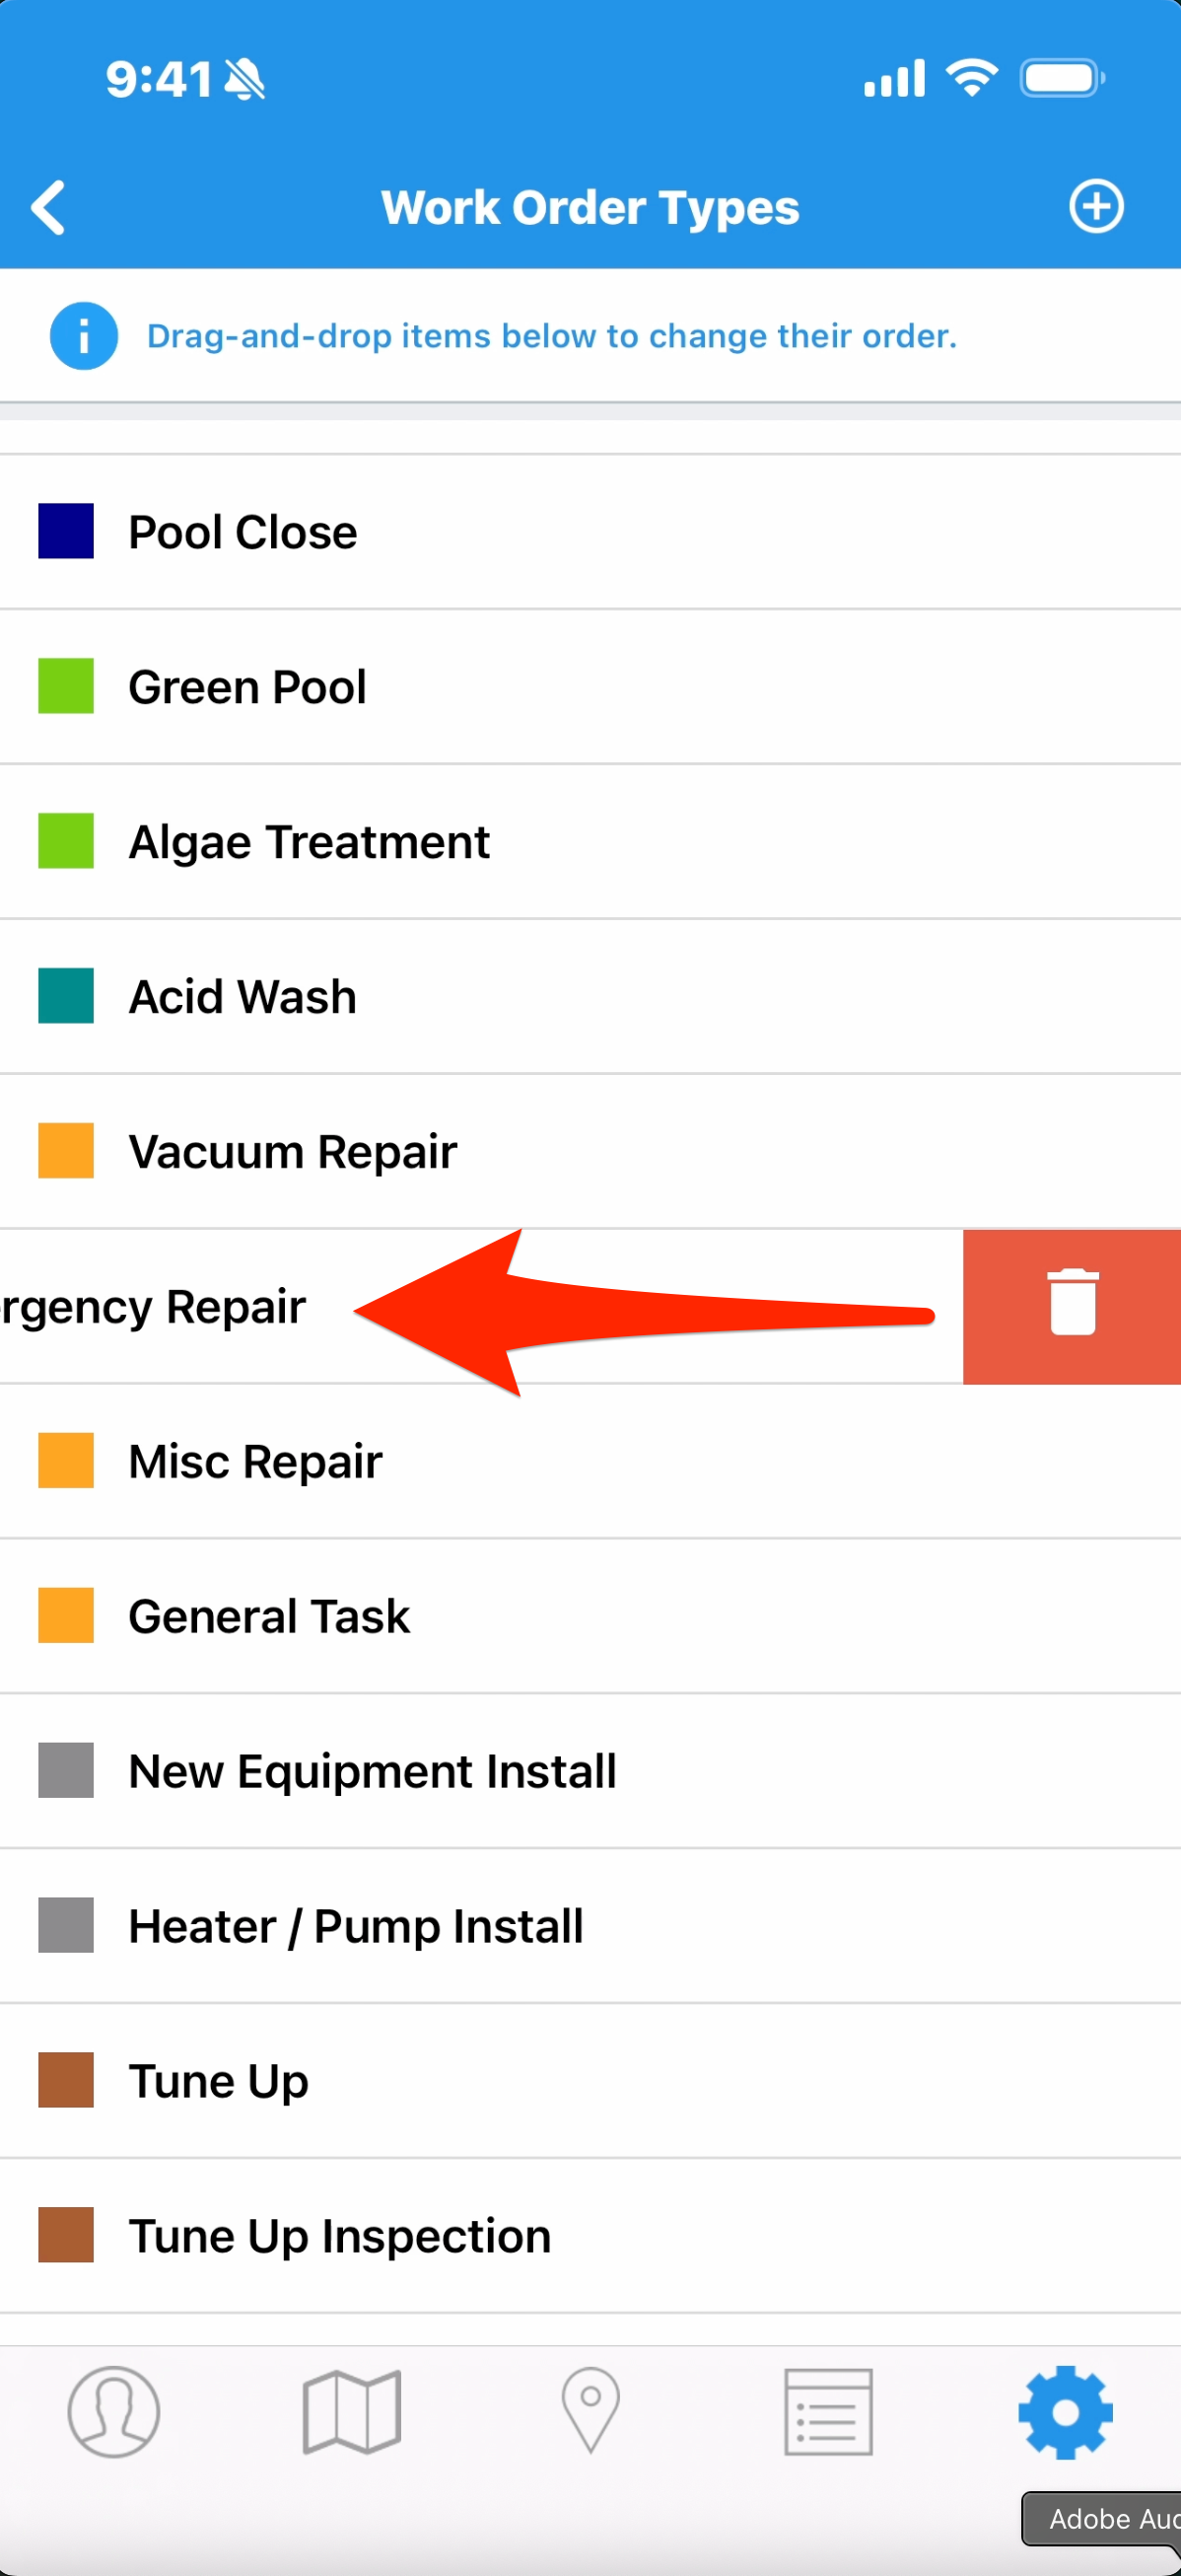
If you want to change something, tap it and you’ll be taken back to that same screen we just viewed. If there’s a work order type you no longer need, swipe left to reveal a trash can icon, tap and confirm, and it’s gone.