Create, Edit, or Delete a Work Order Type (Web)
Tiers: All
Before You Start:
- All work order type settings can be adjusted.
- Any edits made to a work order type will be applied to future work orders moving forward.


Step-by-step instructions . . .
- 1
-
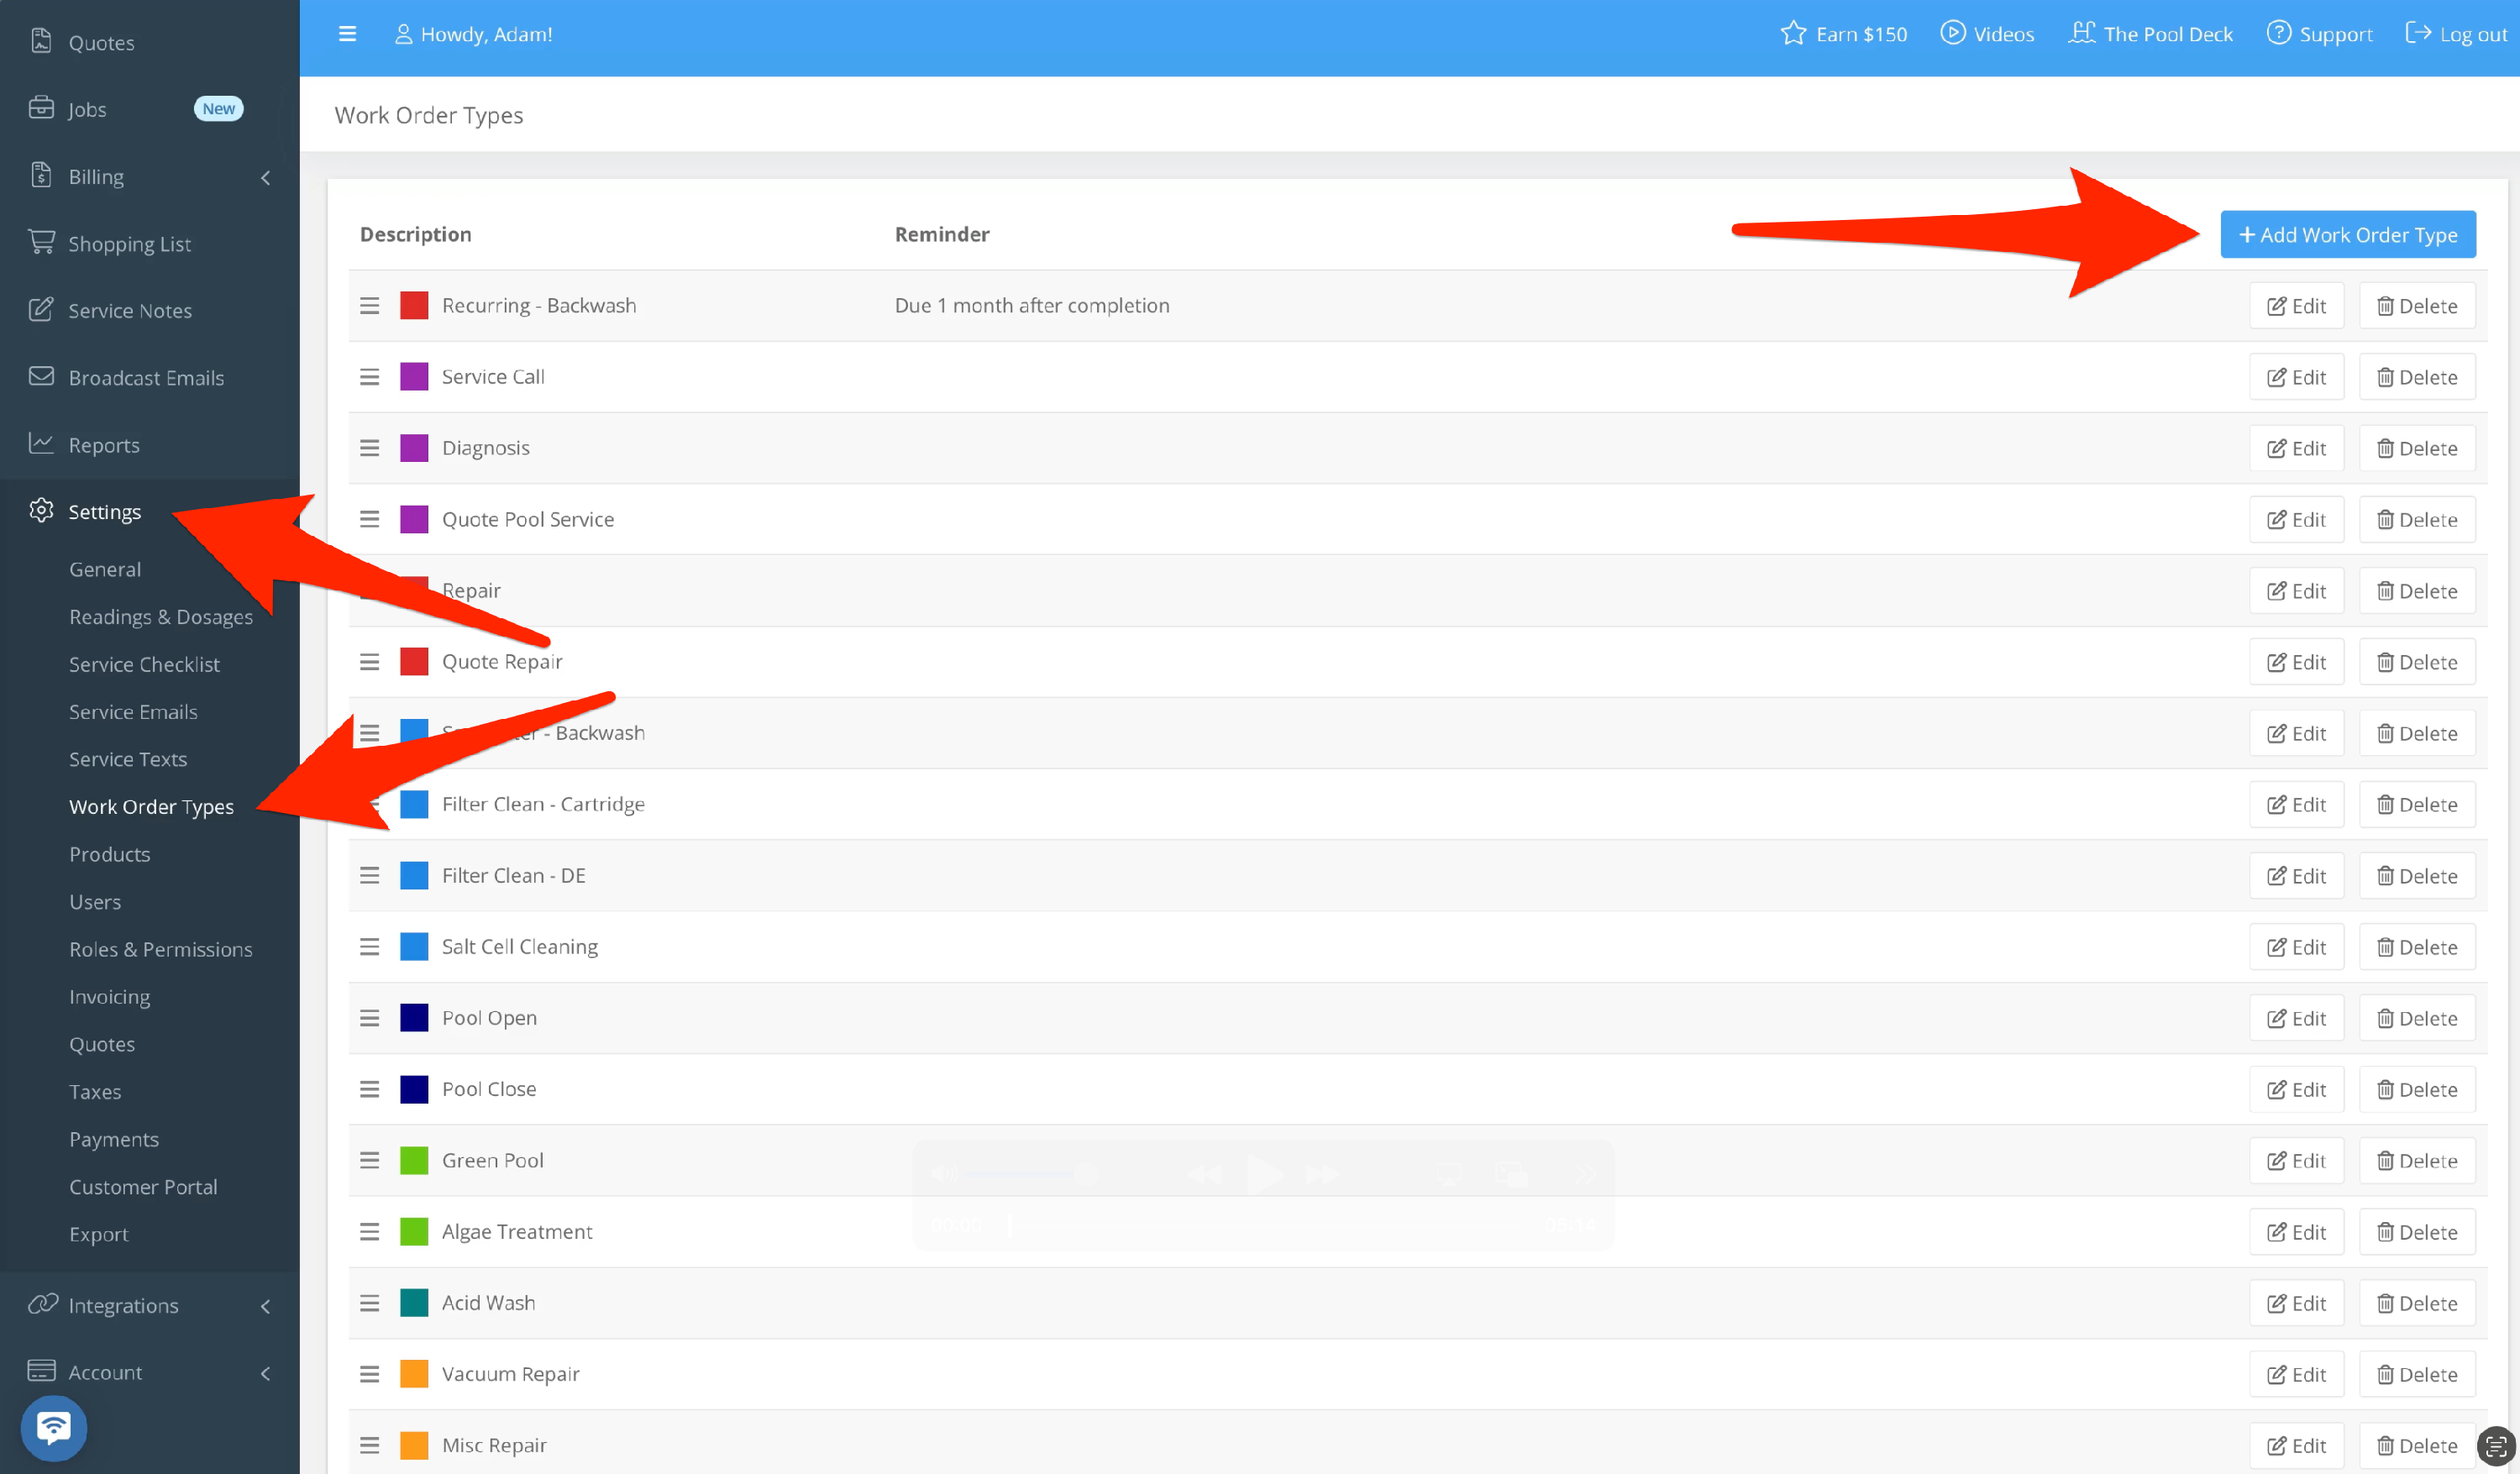
On Skimmer’s website go to Settings > Work Order Types. Work order types function like templates for specific kinds of jobs. To create a new one, click Add Work Order Type in the top right corner.
- 2
-
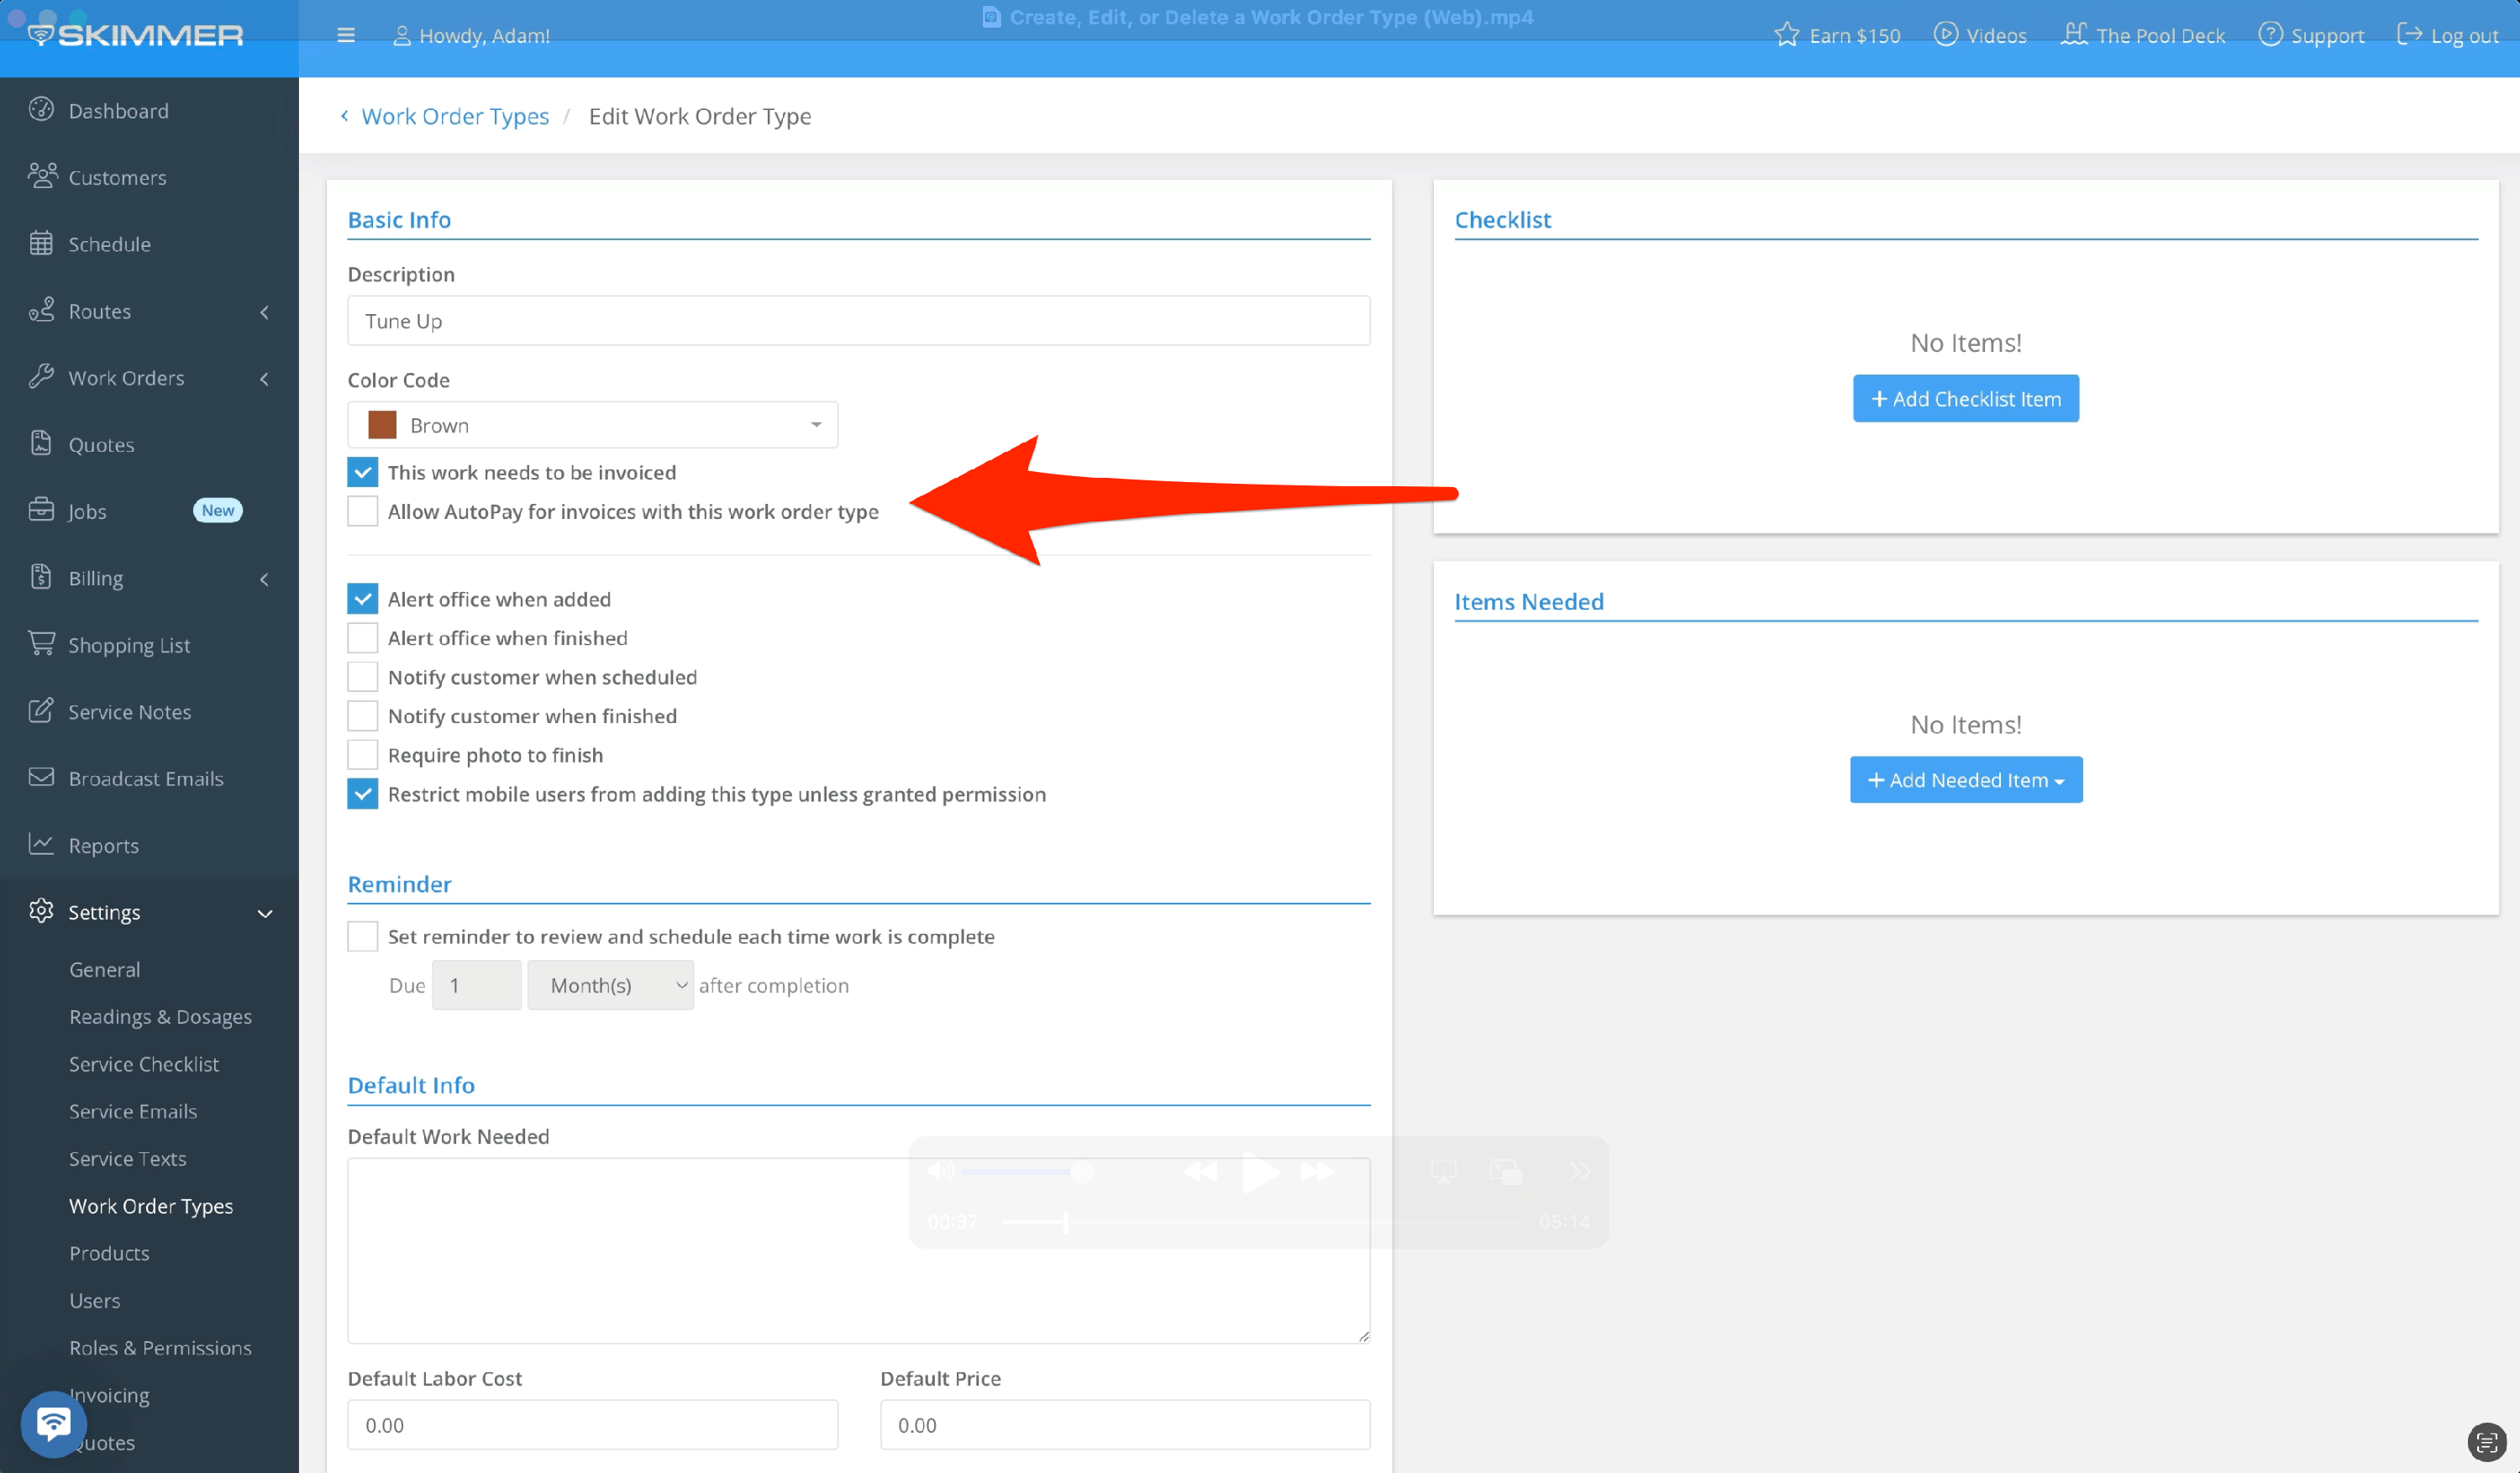
What you set up on this creation screen can be adjusted for individual jobs. Here you’re choosing the standard information. Start by giving it a name, and the color code helps to distinguish from other work order types.

- 3
-
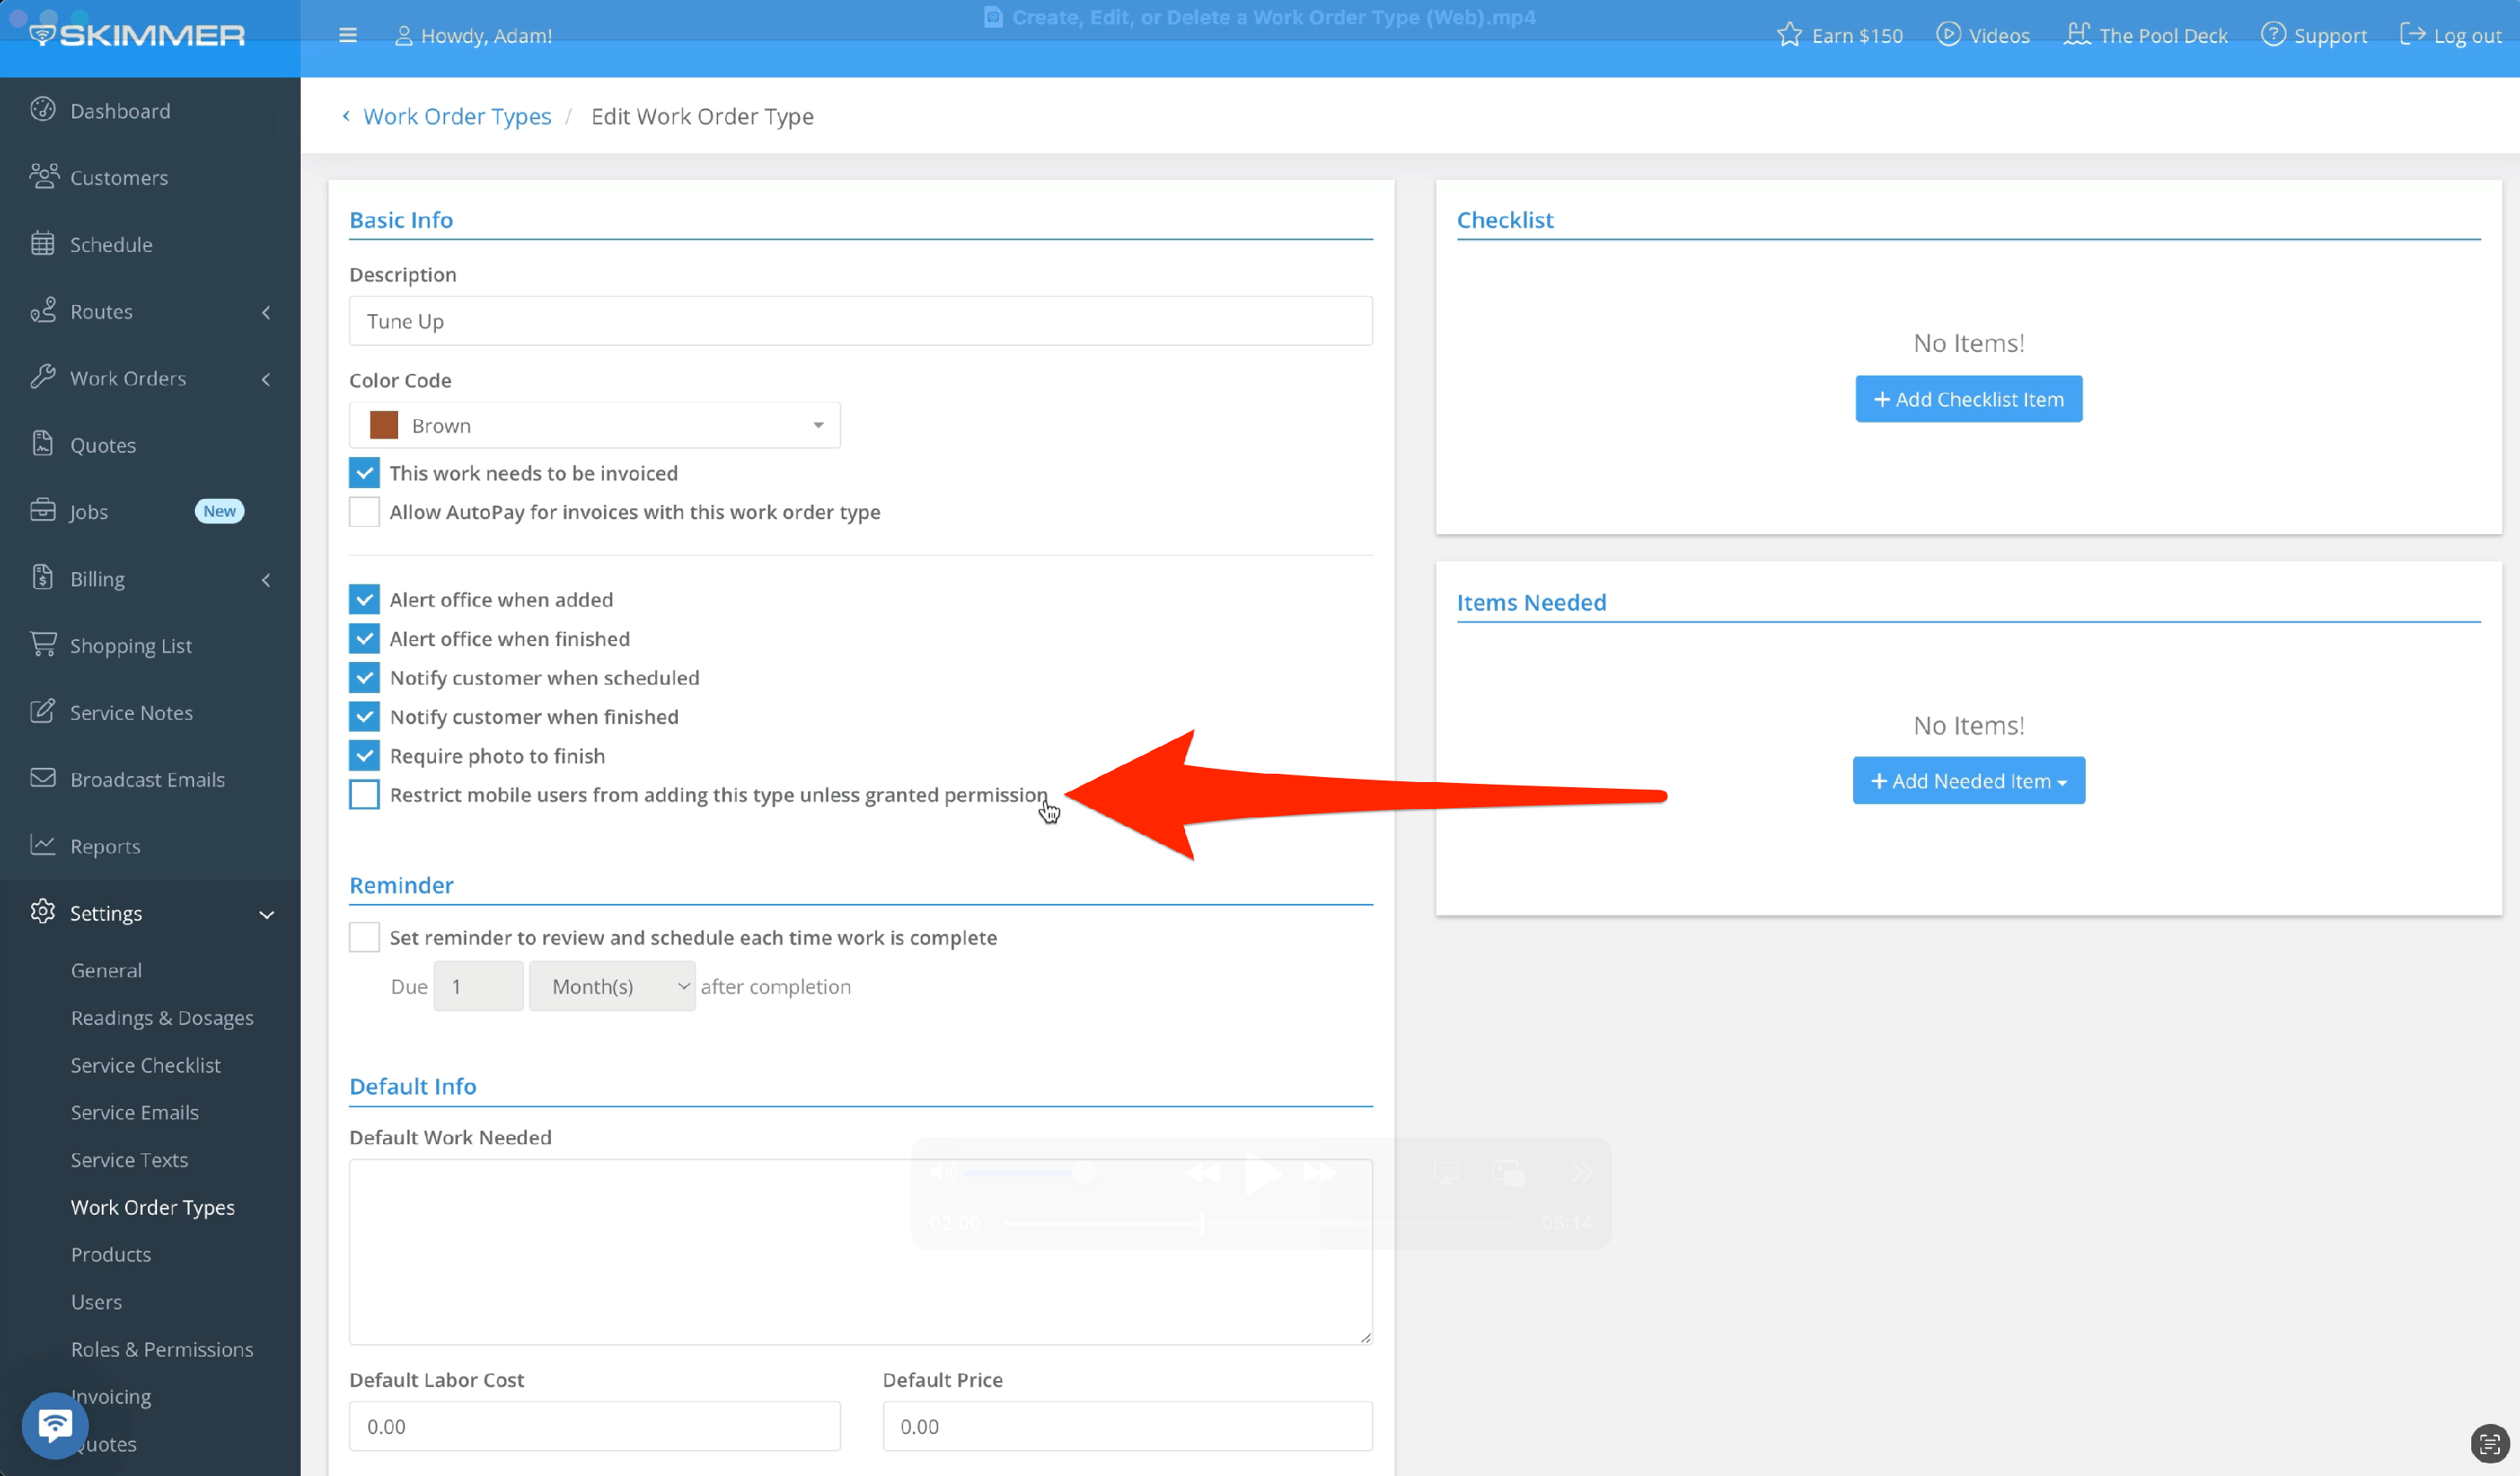
Whatever boxes you check will activate the options for this work order type only. Your options are to invoice this work when completed, allow AutoPay to apply to this job, and alert the office via email when this work order is either created or finished or both. You can require techs to add at least one photo before they can finish the job.
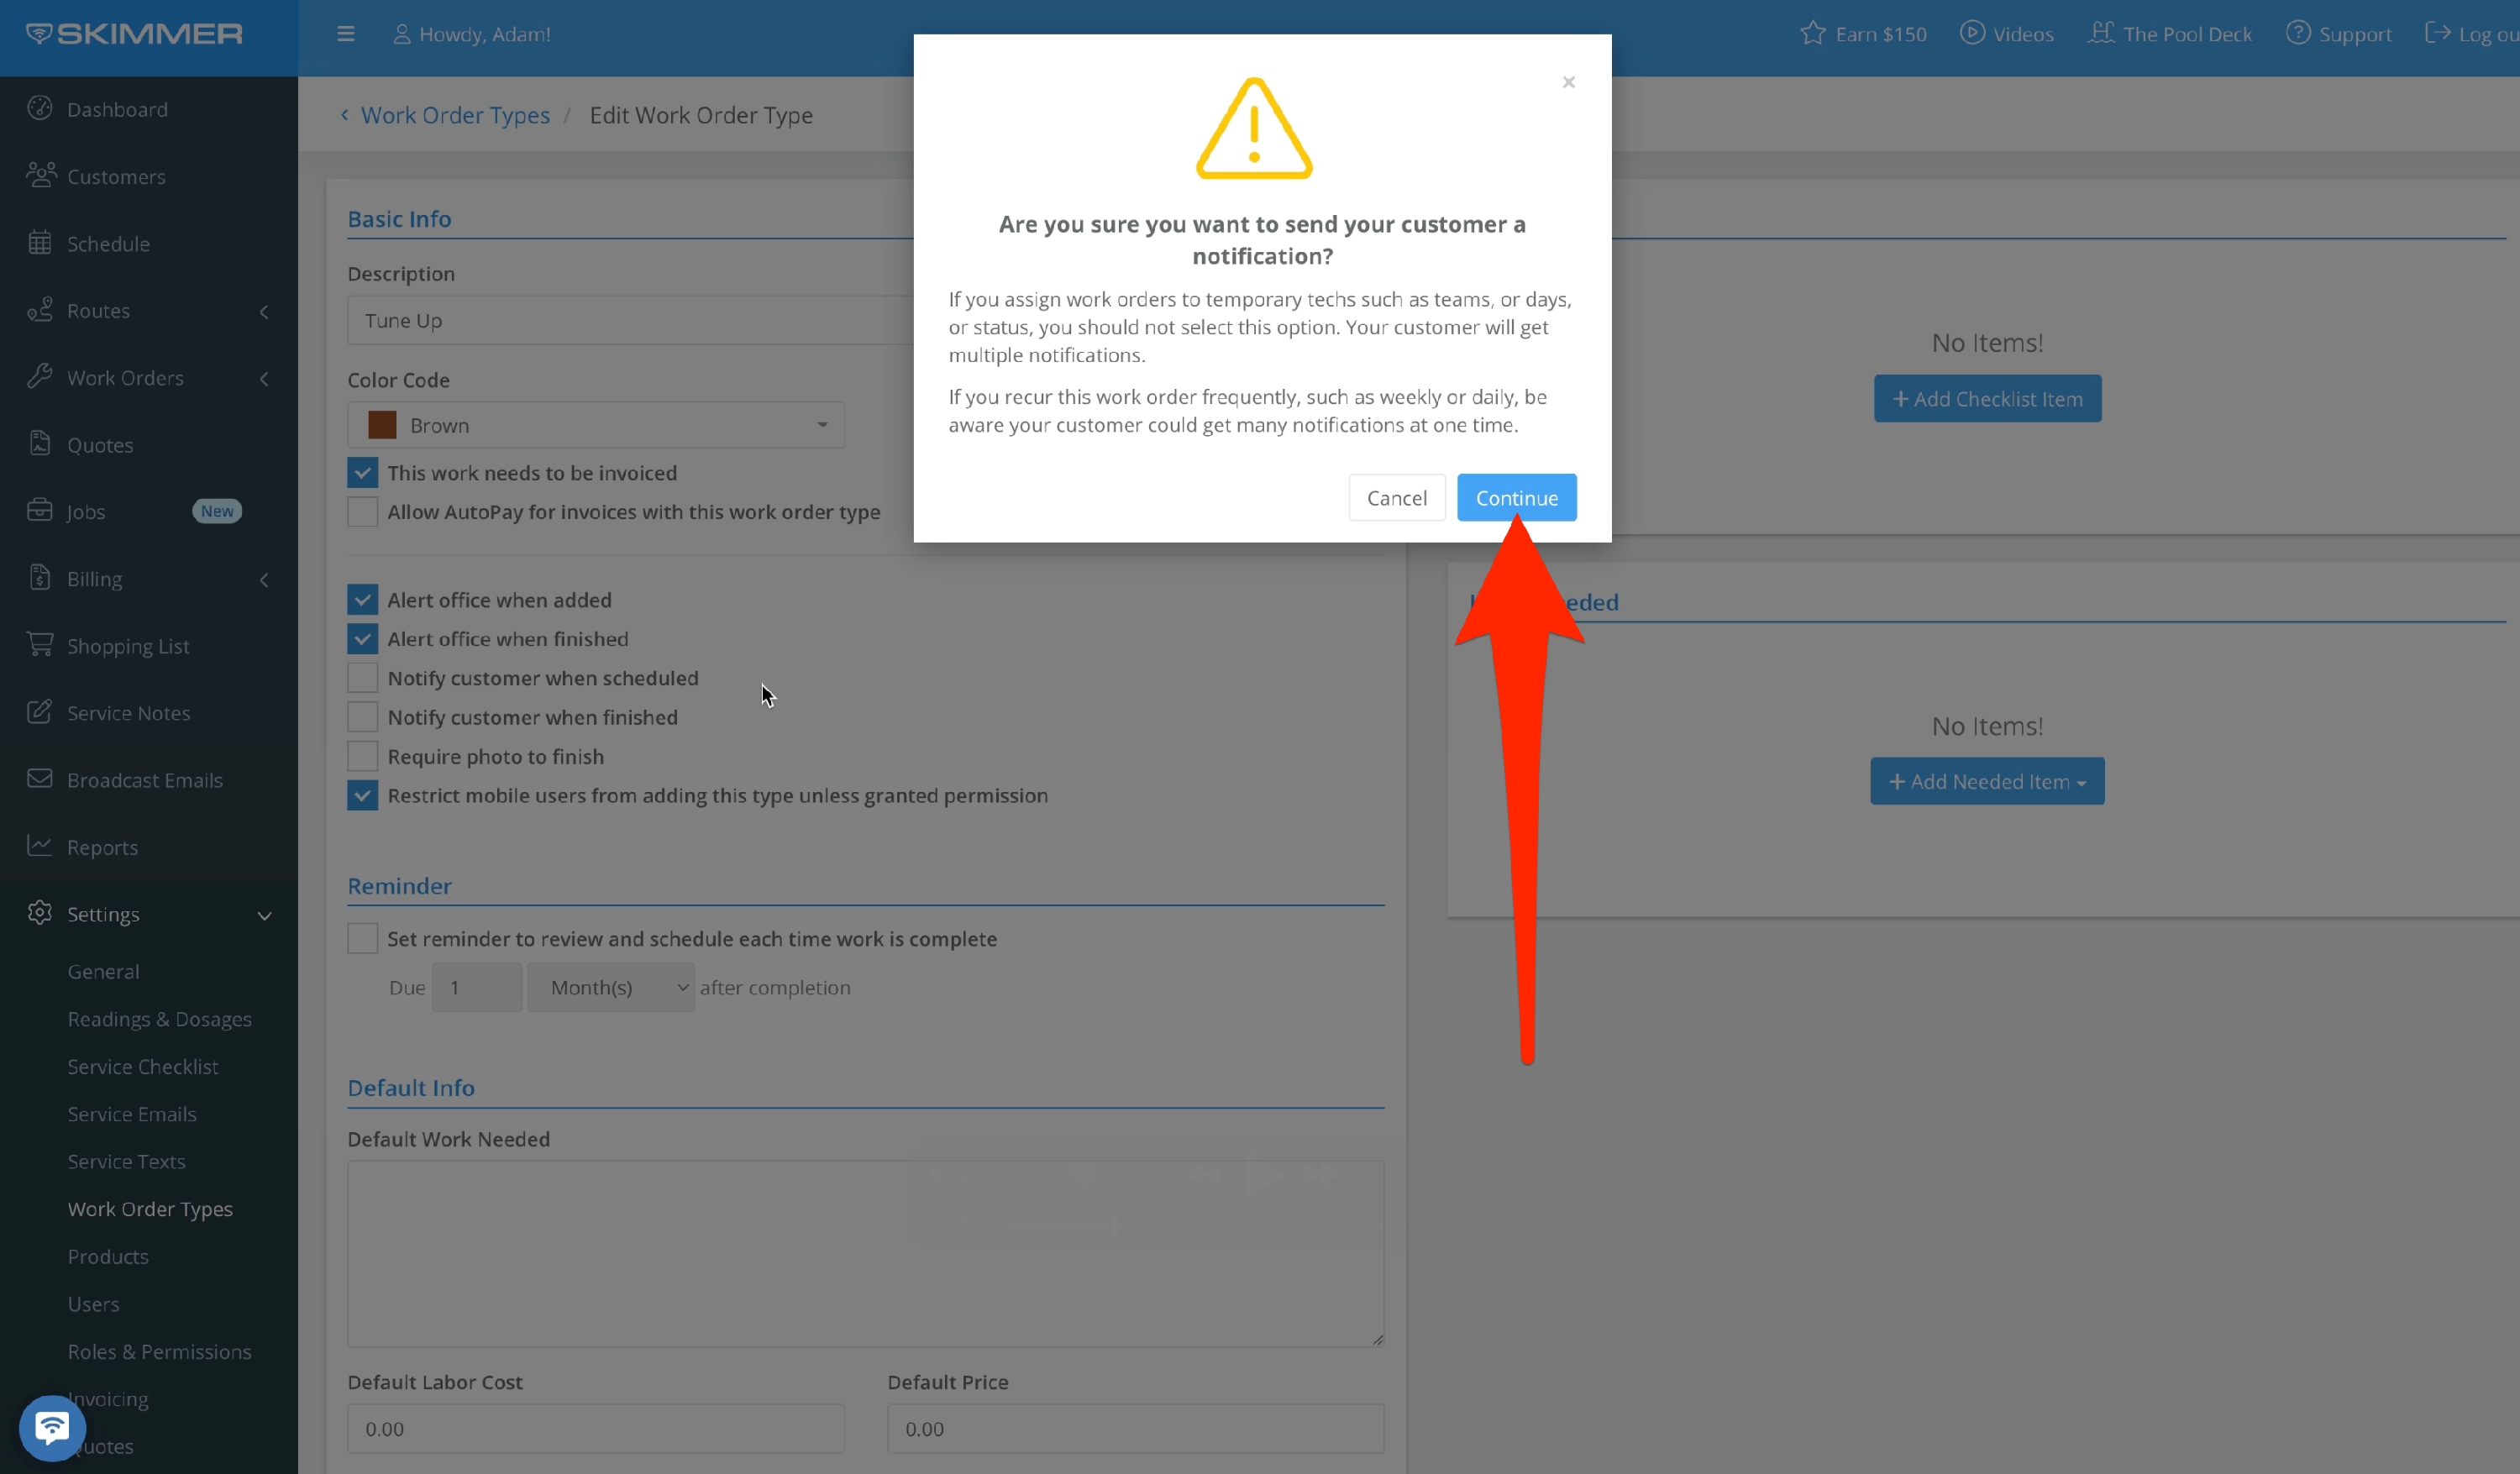
You can send emails to the customer when work is scheduled. When you choose to notify them, an alert will pop up to ask if you’re sure. If you schedule work orders for a temporary tech or day as a placeholder, we don’t recommend using this because the customer will receive multiple alerts. Also, Skimmer populates ninety days of recurring work orders into the future, so depending on your frequency this may result in them getting lots of notifications. If neither case applies, click and the option will activate. You can also choose to send a service email when the work is completed.
By default, mobile users are restricted from creating a job based on this work order type unless their account is specifically granted permission to do so. We show you how to manage user access in another tutorial. However, if you want all mobile users to able to create this kind of job regardless of their access level, you can uncheck this box.
- 4
-
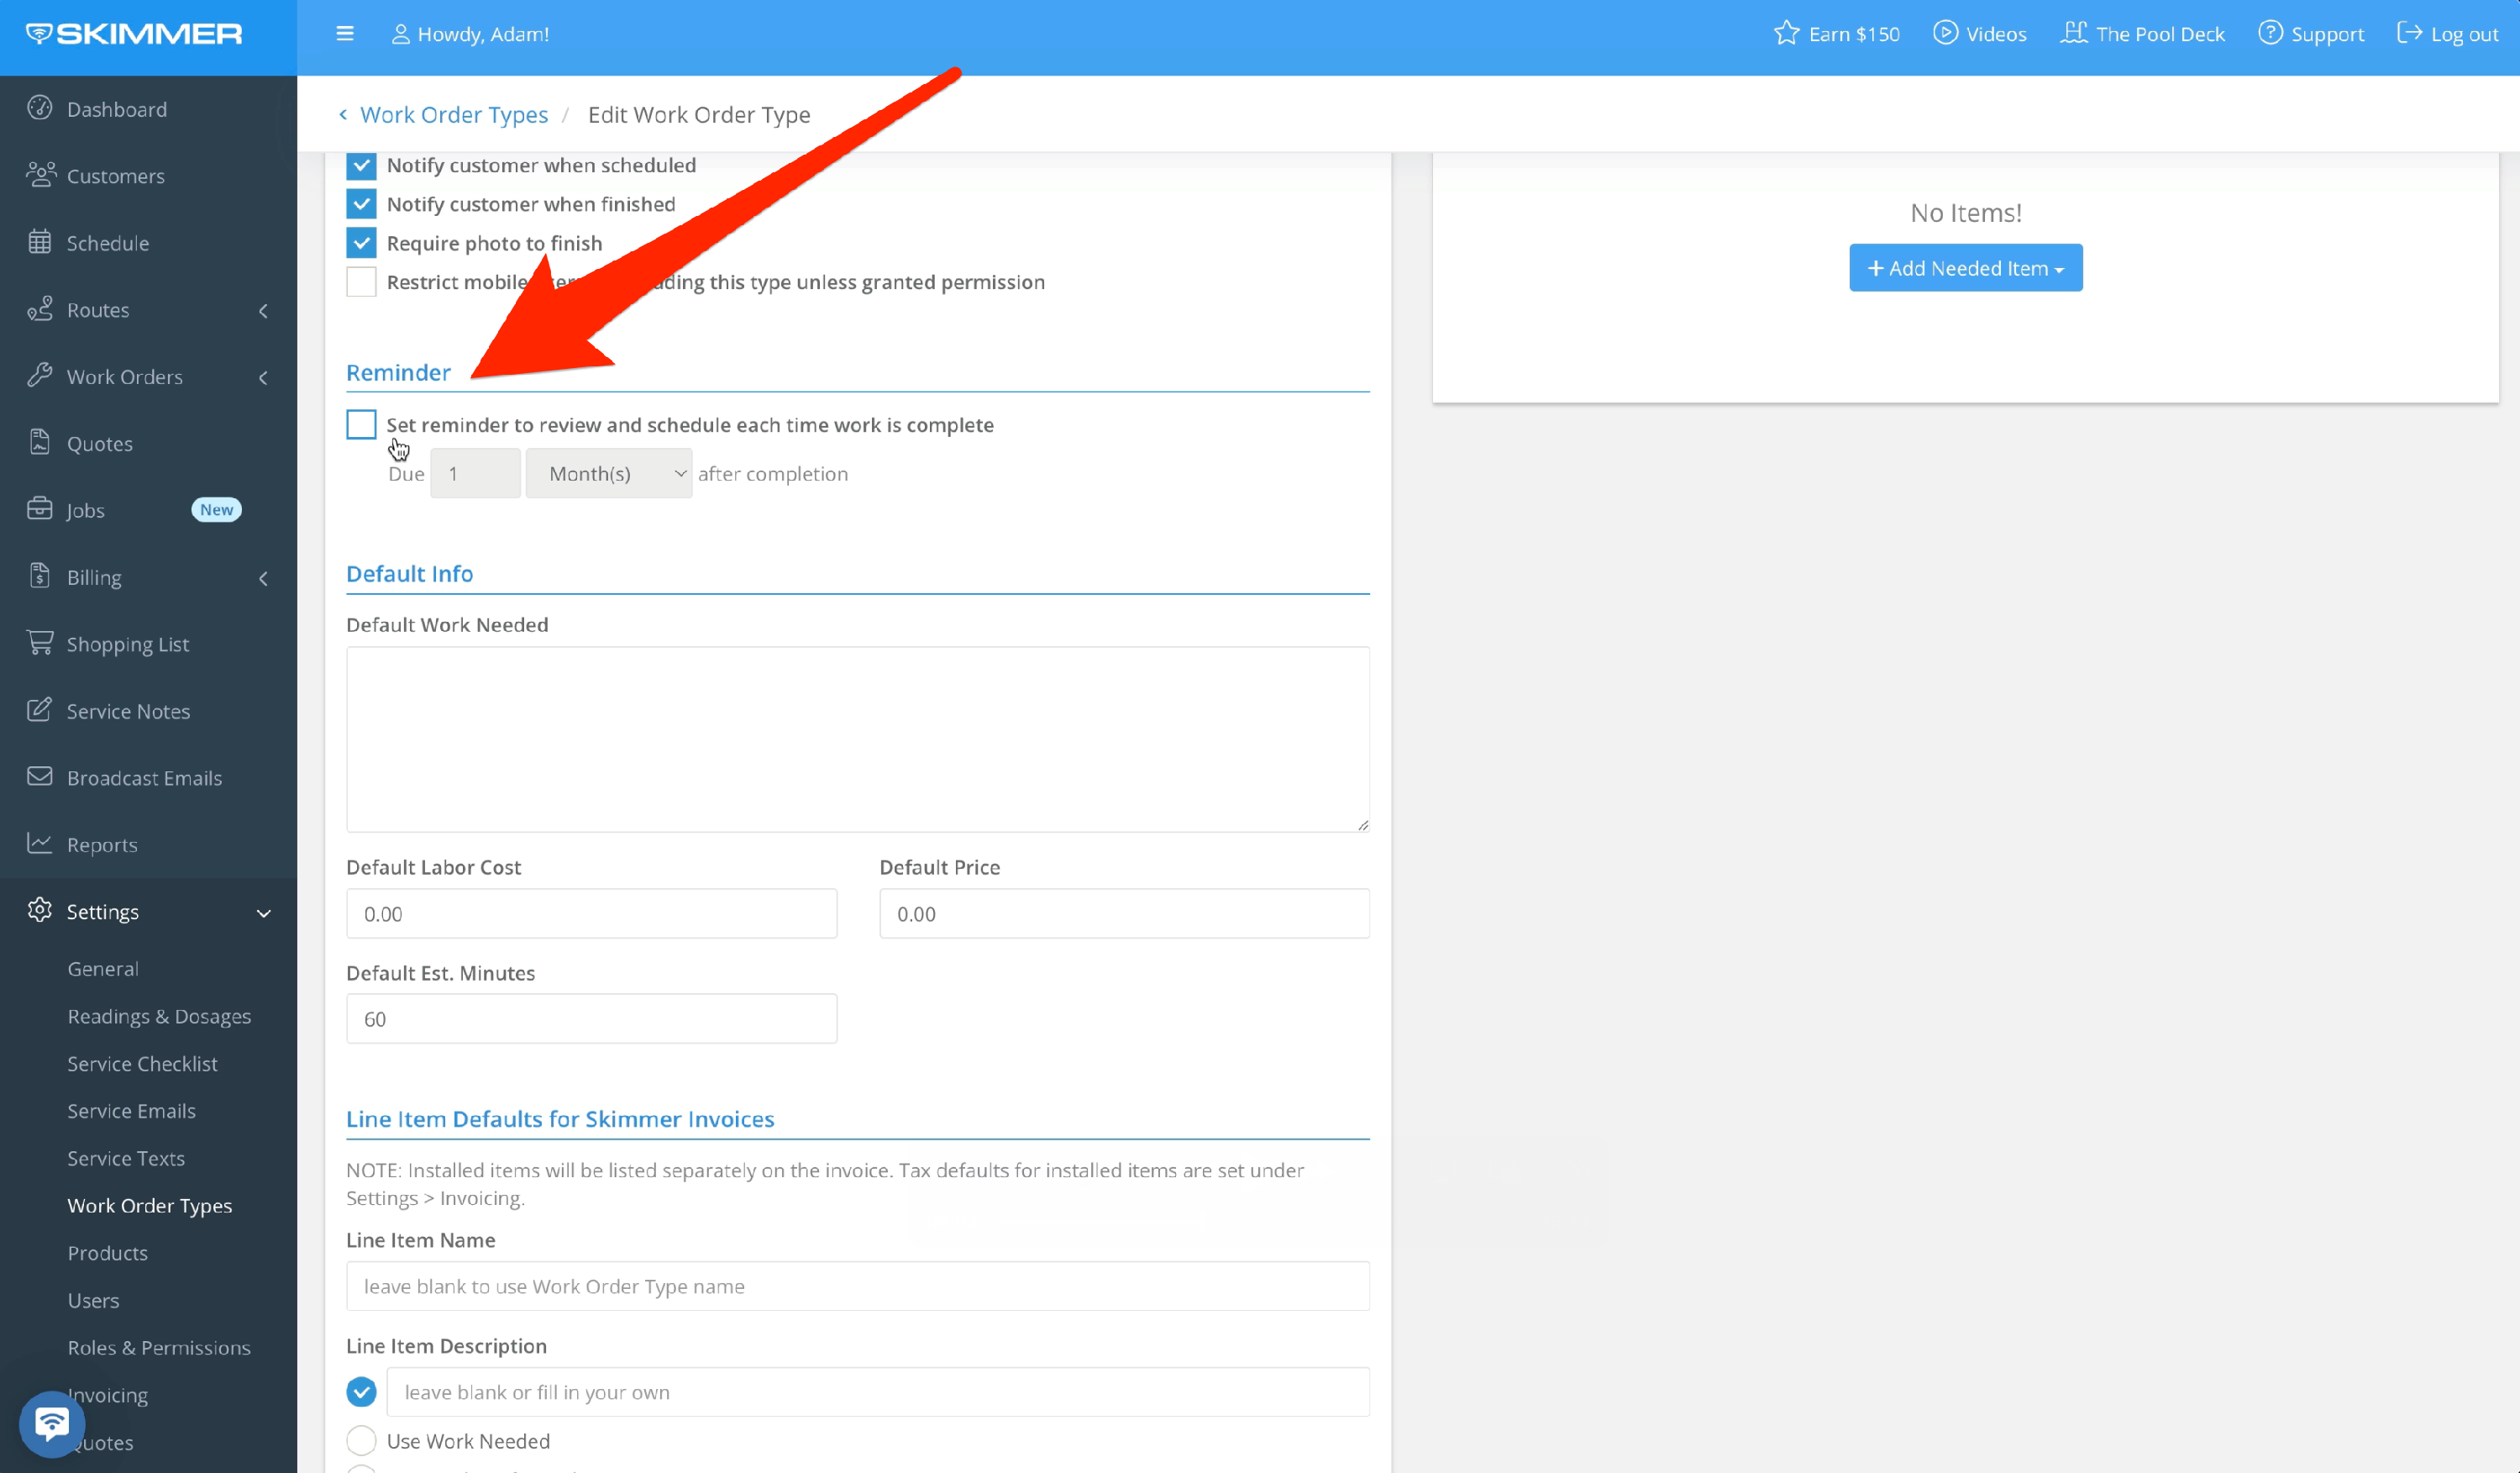
If you want Skimmer to periodically remind you to schedule this work order again, set that up under the Reminder box. All Reminders also have their own screen under Work Orders where you can manage them. If you want a job to recur automatically on your schedule, similar to a route assignment, you can set that up in the Recurring screen. We cover both of these options in detail in other tutorials.
- 5
-
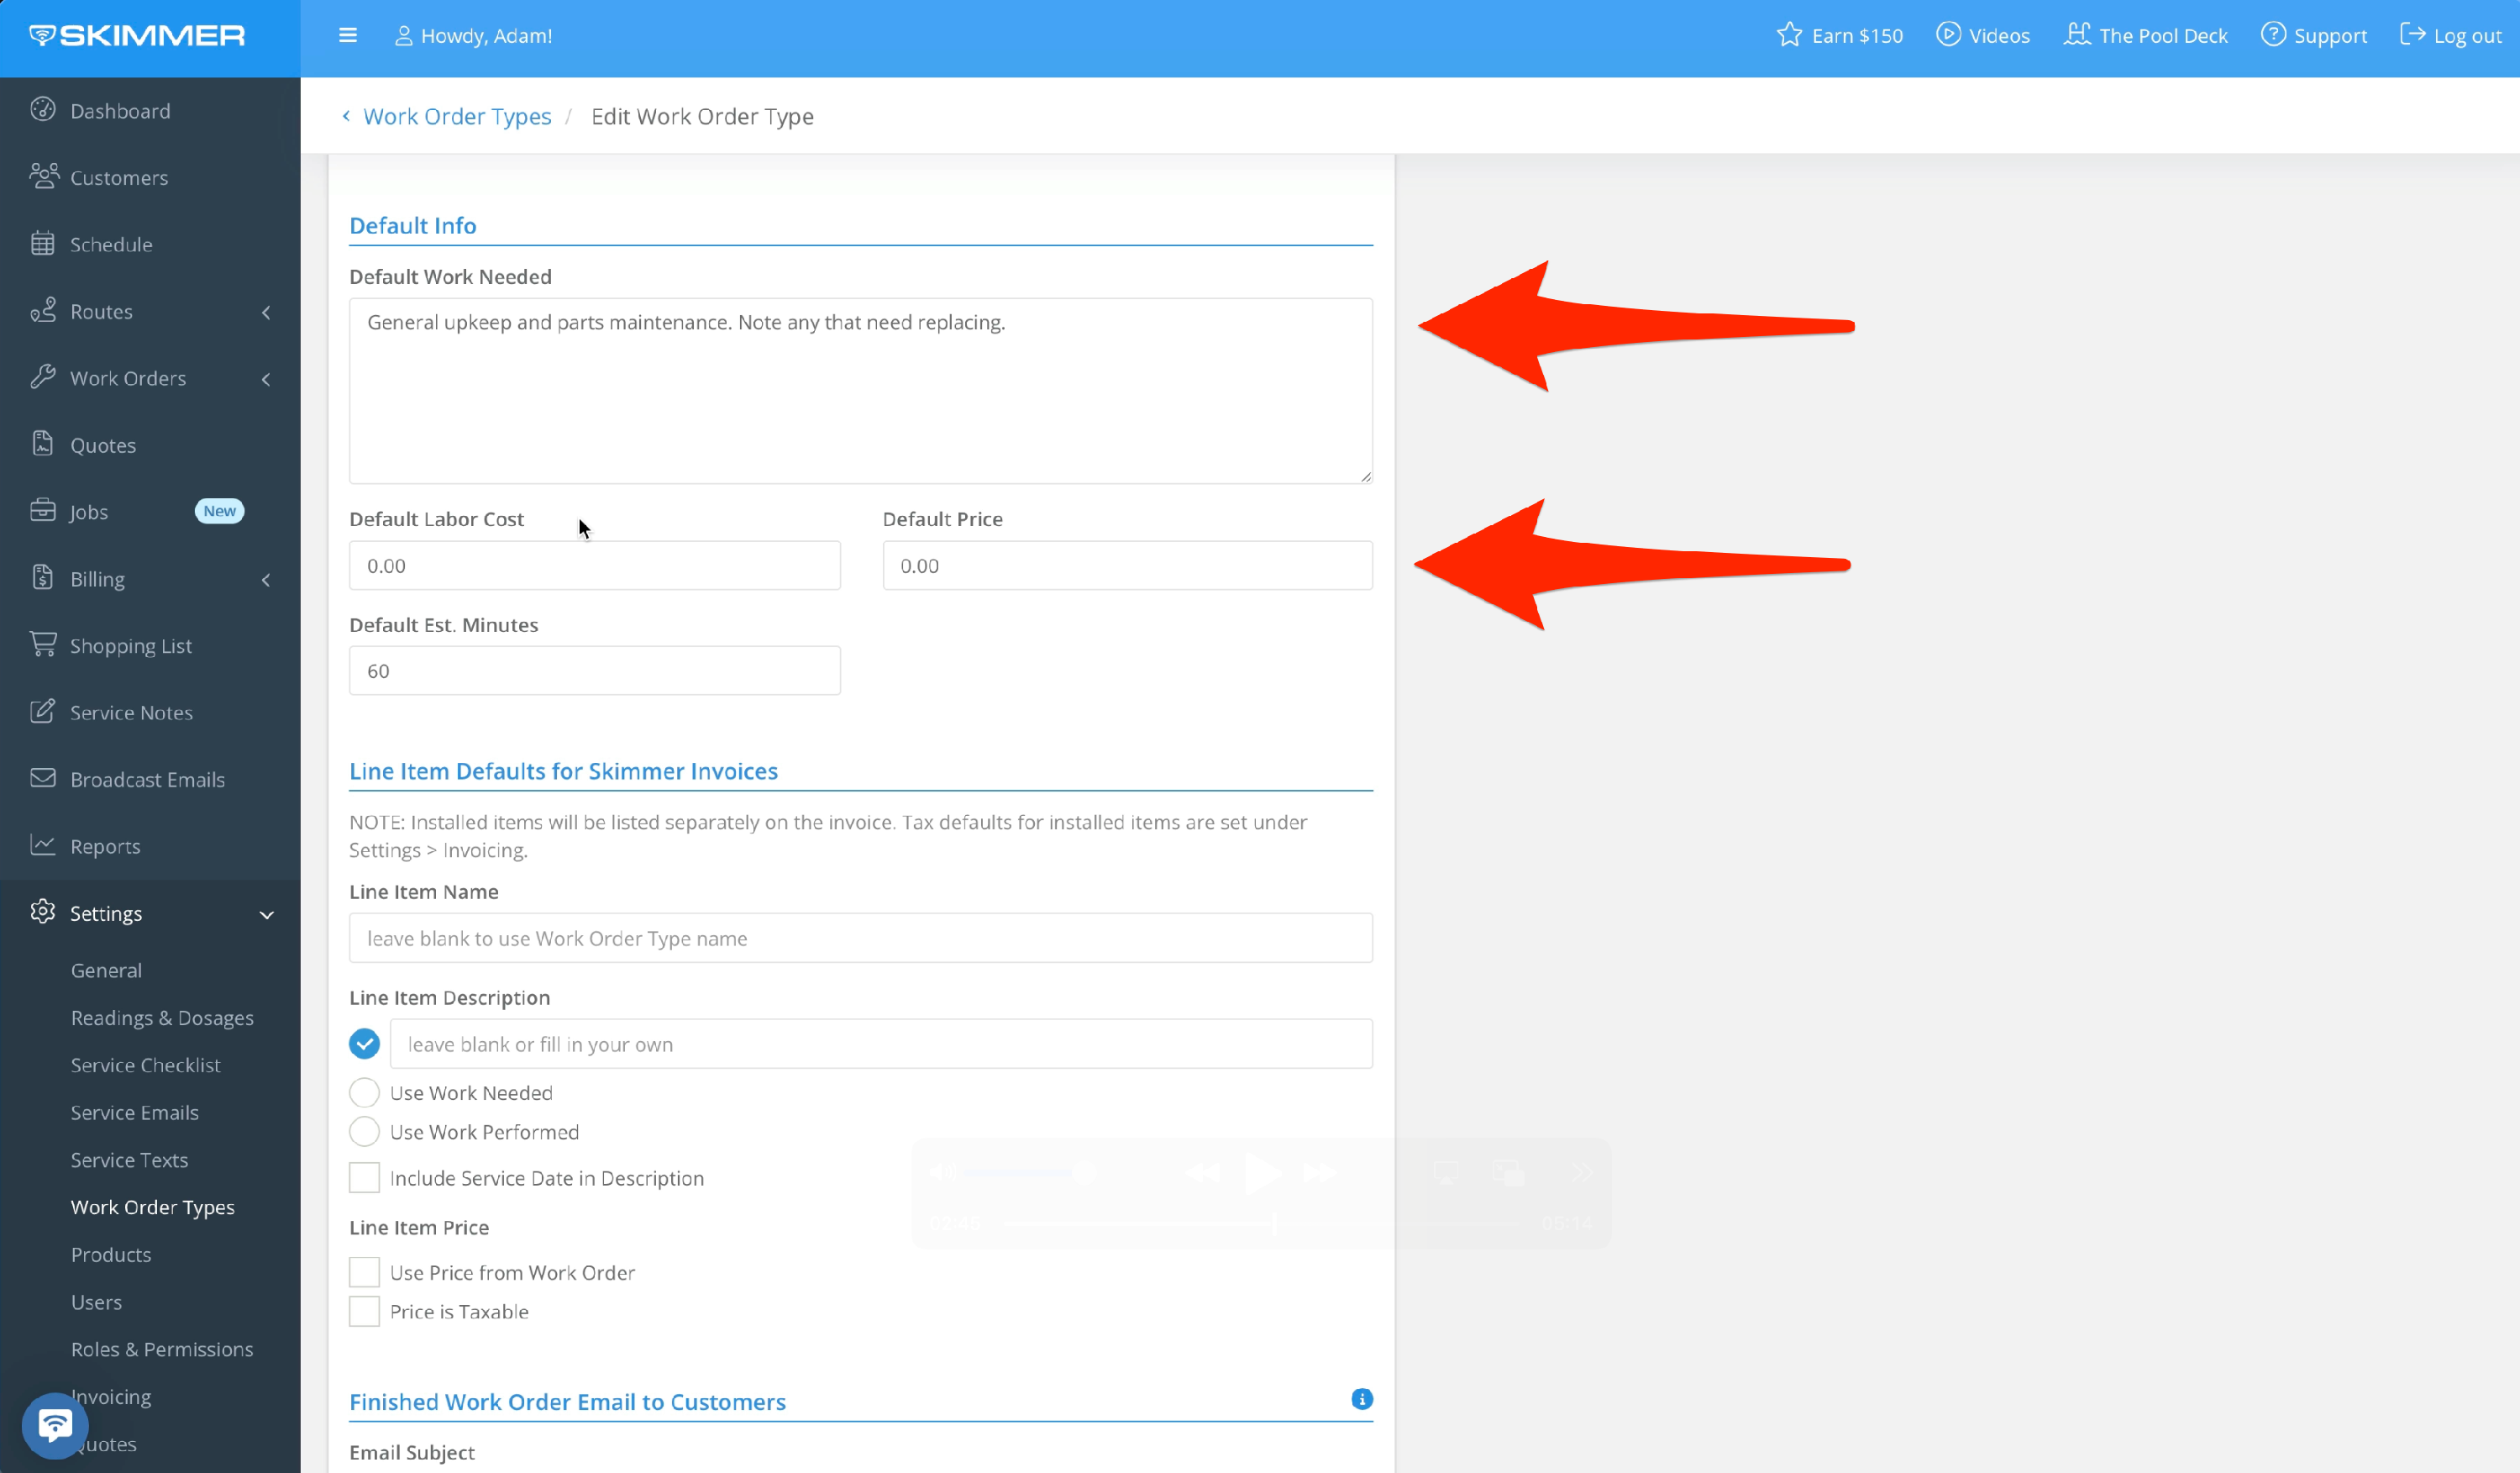
Under Default Info, include a description of the basic work that’s required. You can also choose a Default Labor Cost, which is what you pay a tech or techs to do this work, and a Default Price, which is the standard rate you want to charge the customer. If there’s a typical expected duration for this work, you can set that under Default Estimated Minutes.
- 6
-
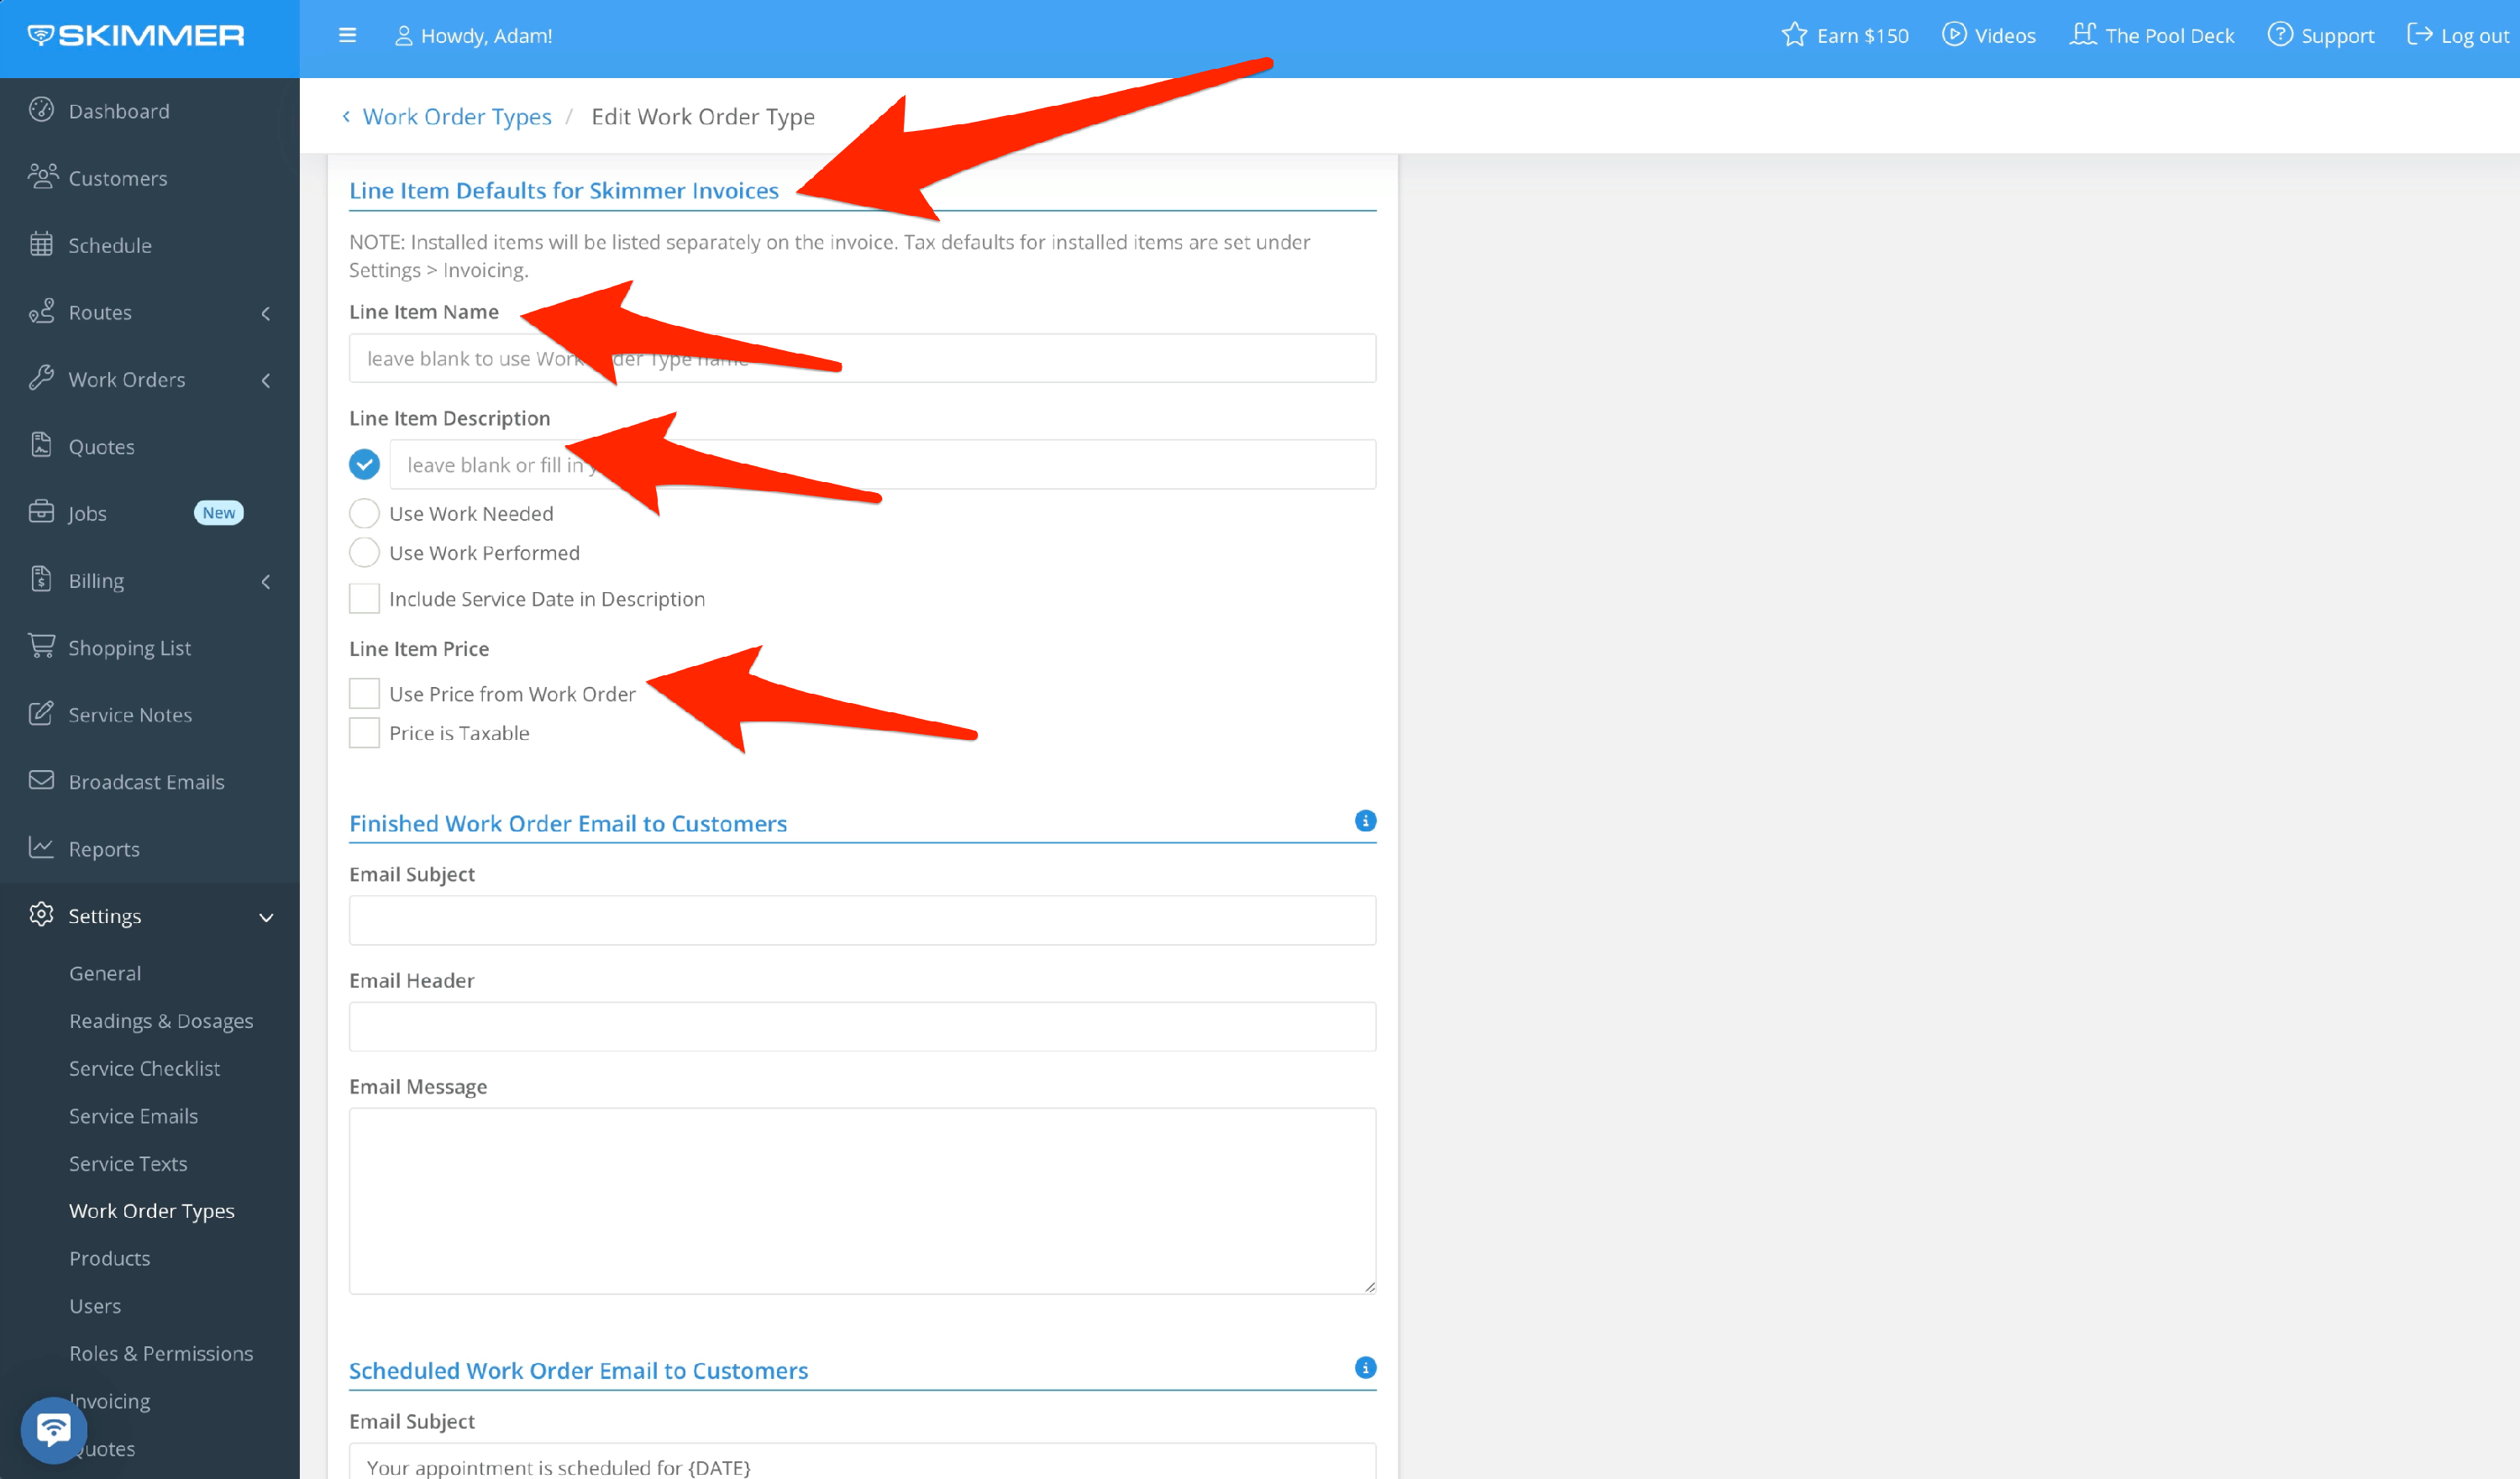
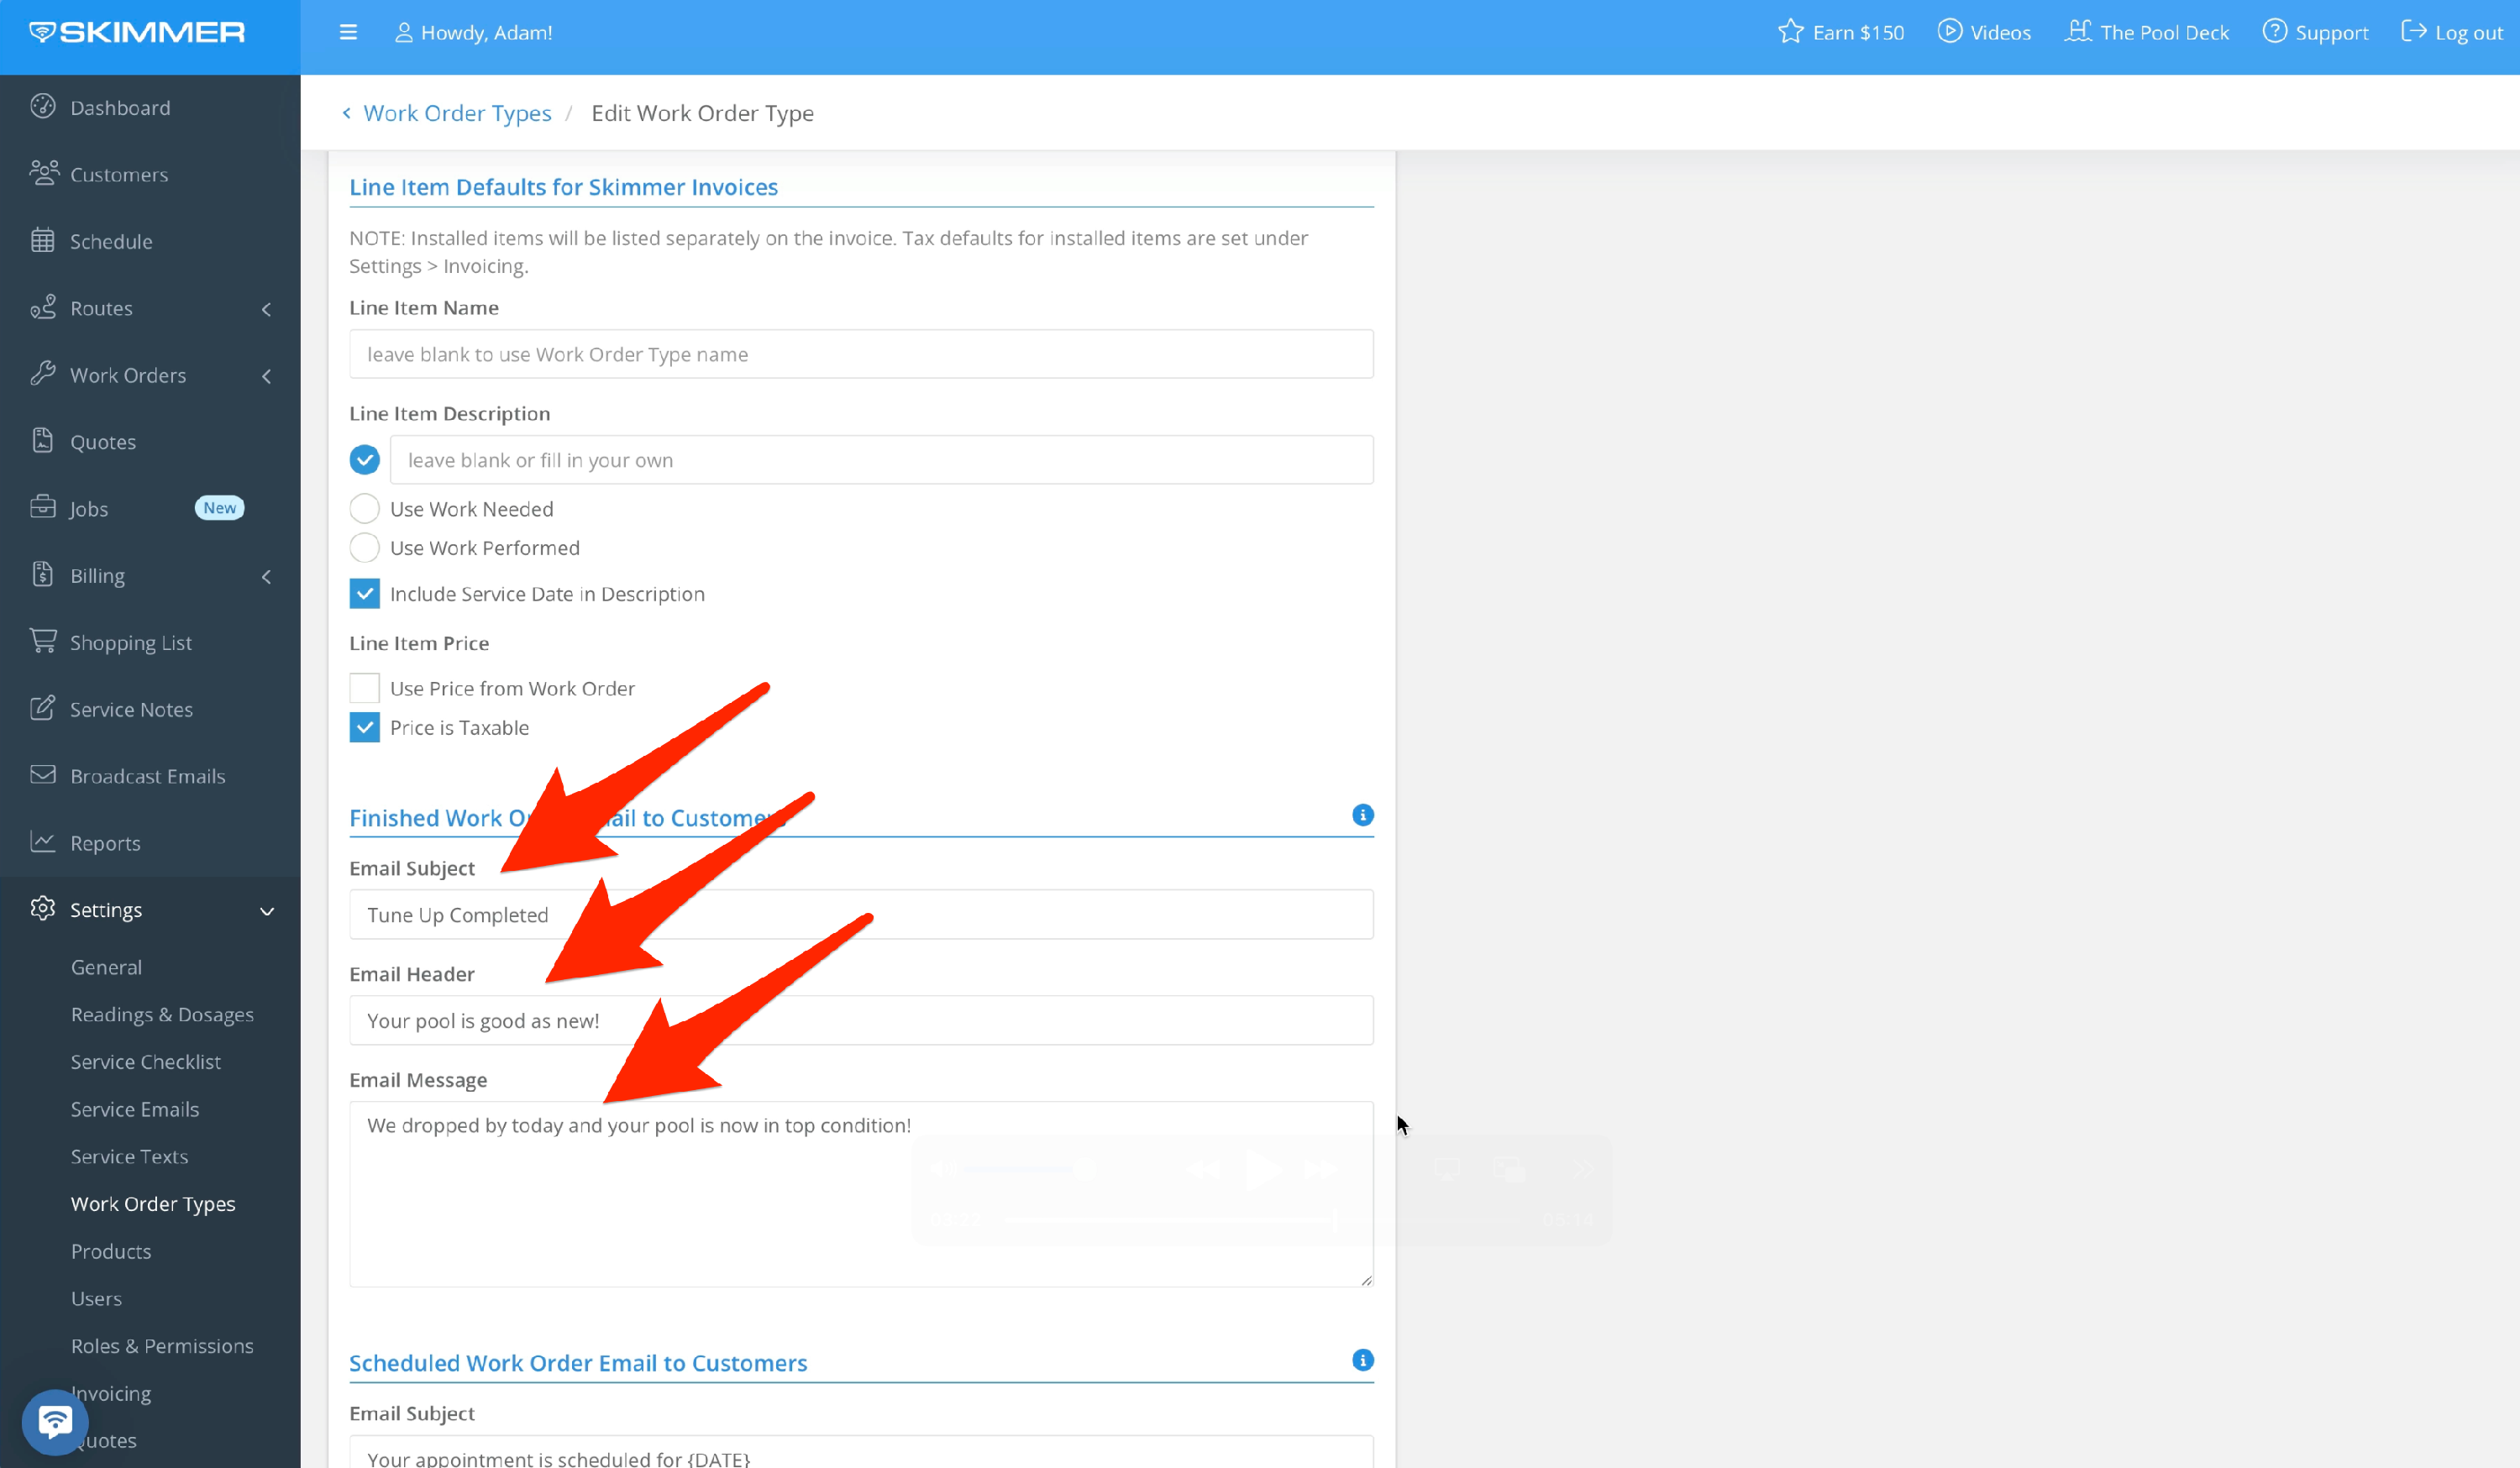
Next, choose how you want the completed work order to appear on the invoices that Skimmer generates. Line Item Name will appear on the list of what’s being charged for, which you can leave blank if you want to use the name of the work order type. You can also include a description, which will give basic information about the completed job, and you have options for what you’d like to use. If you want to include the date of service, select that here. You can also use the default price, and set whether that price is taxable.
- 7
-
If you’re sending a service email after job completion, the next box lets you choose what you want it to say.
- 8
-
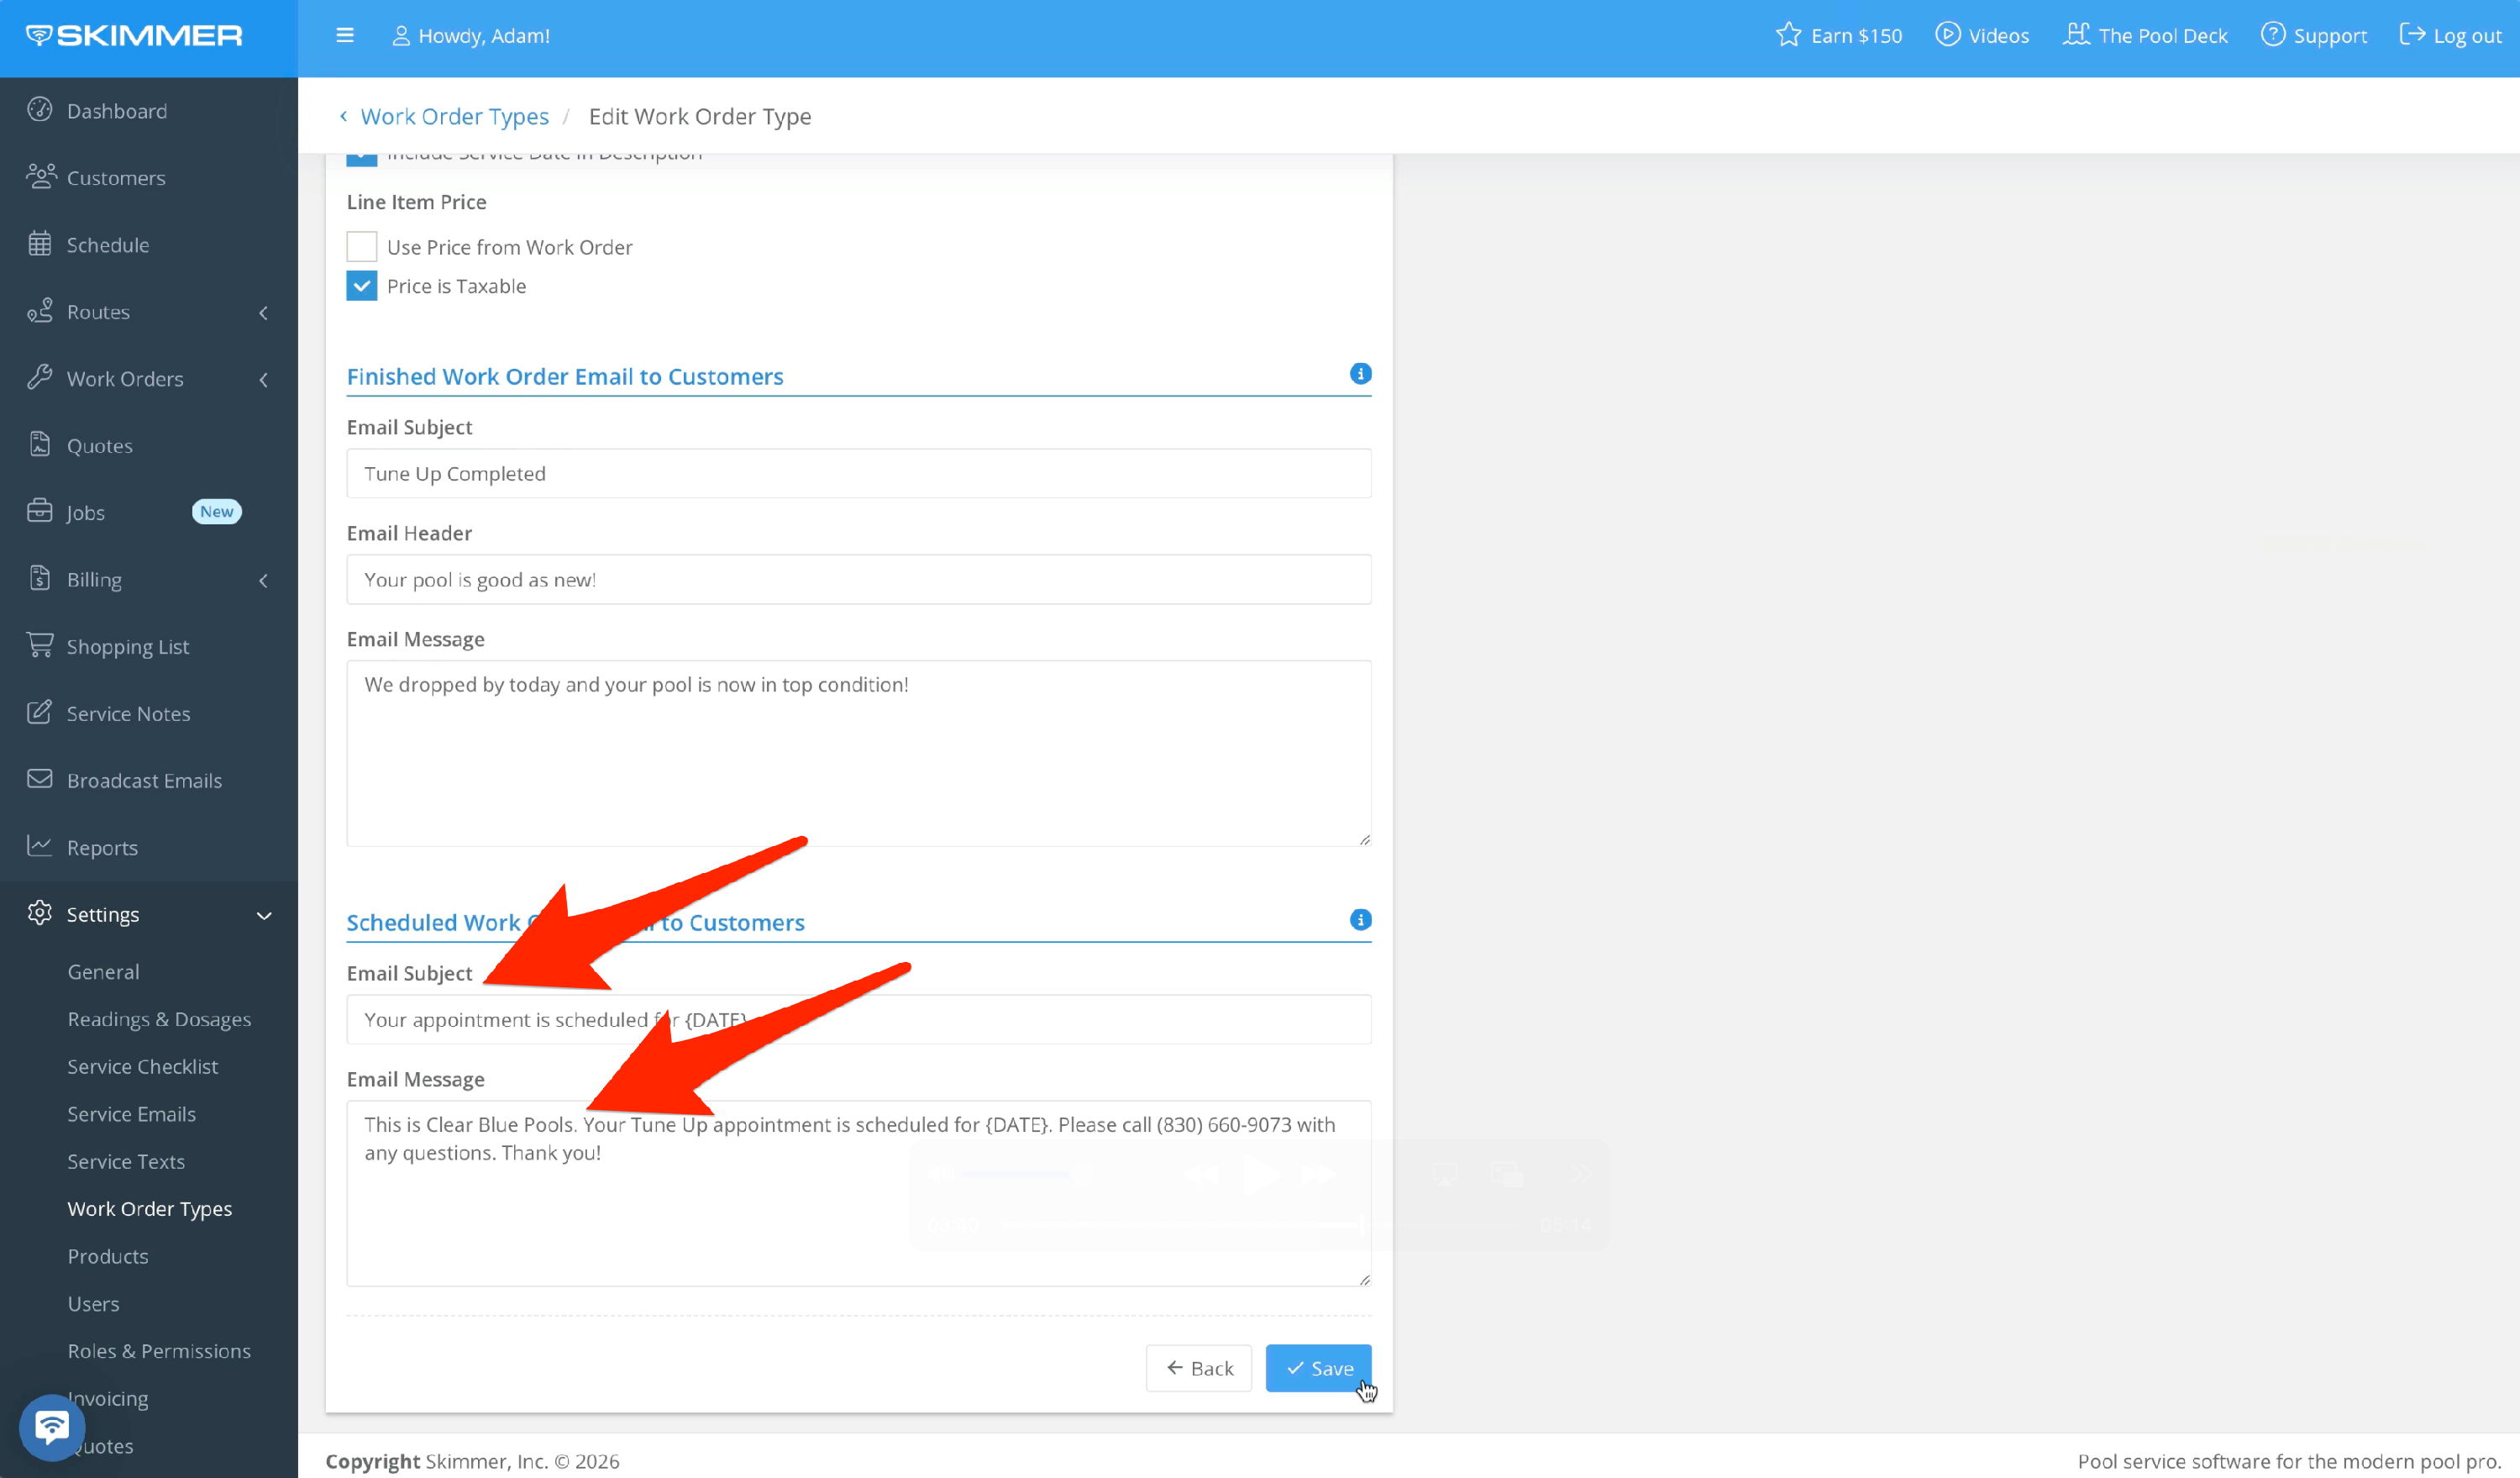
If you’re sending an email to alert the customer that the work order has been scheduled, you can set here what you want the subject line and message to say. By default, we give you options for auto-populating relevant details of the job, but you’re not tied to these.
When you’re ready, click Save.
- 9
-
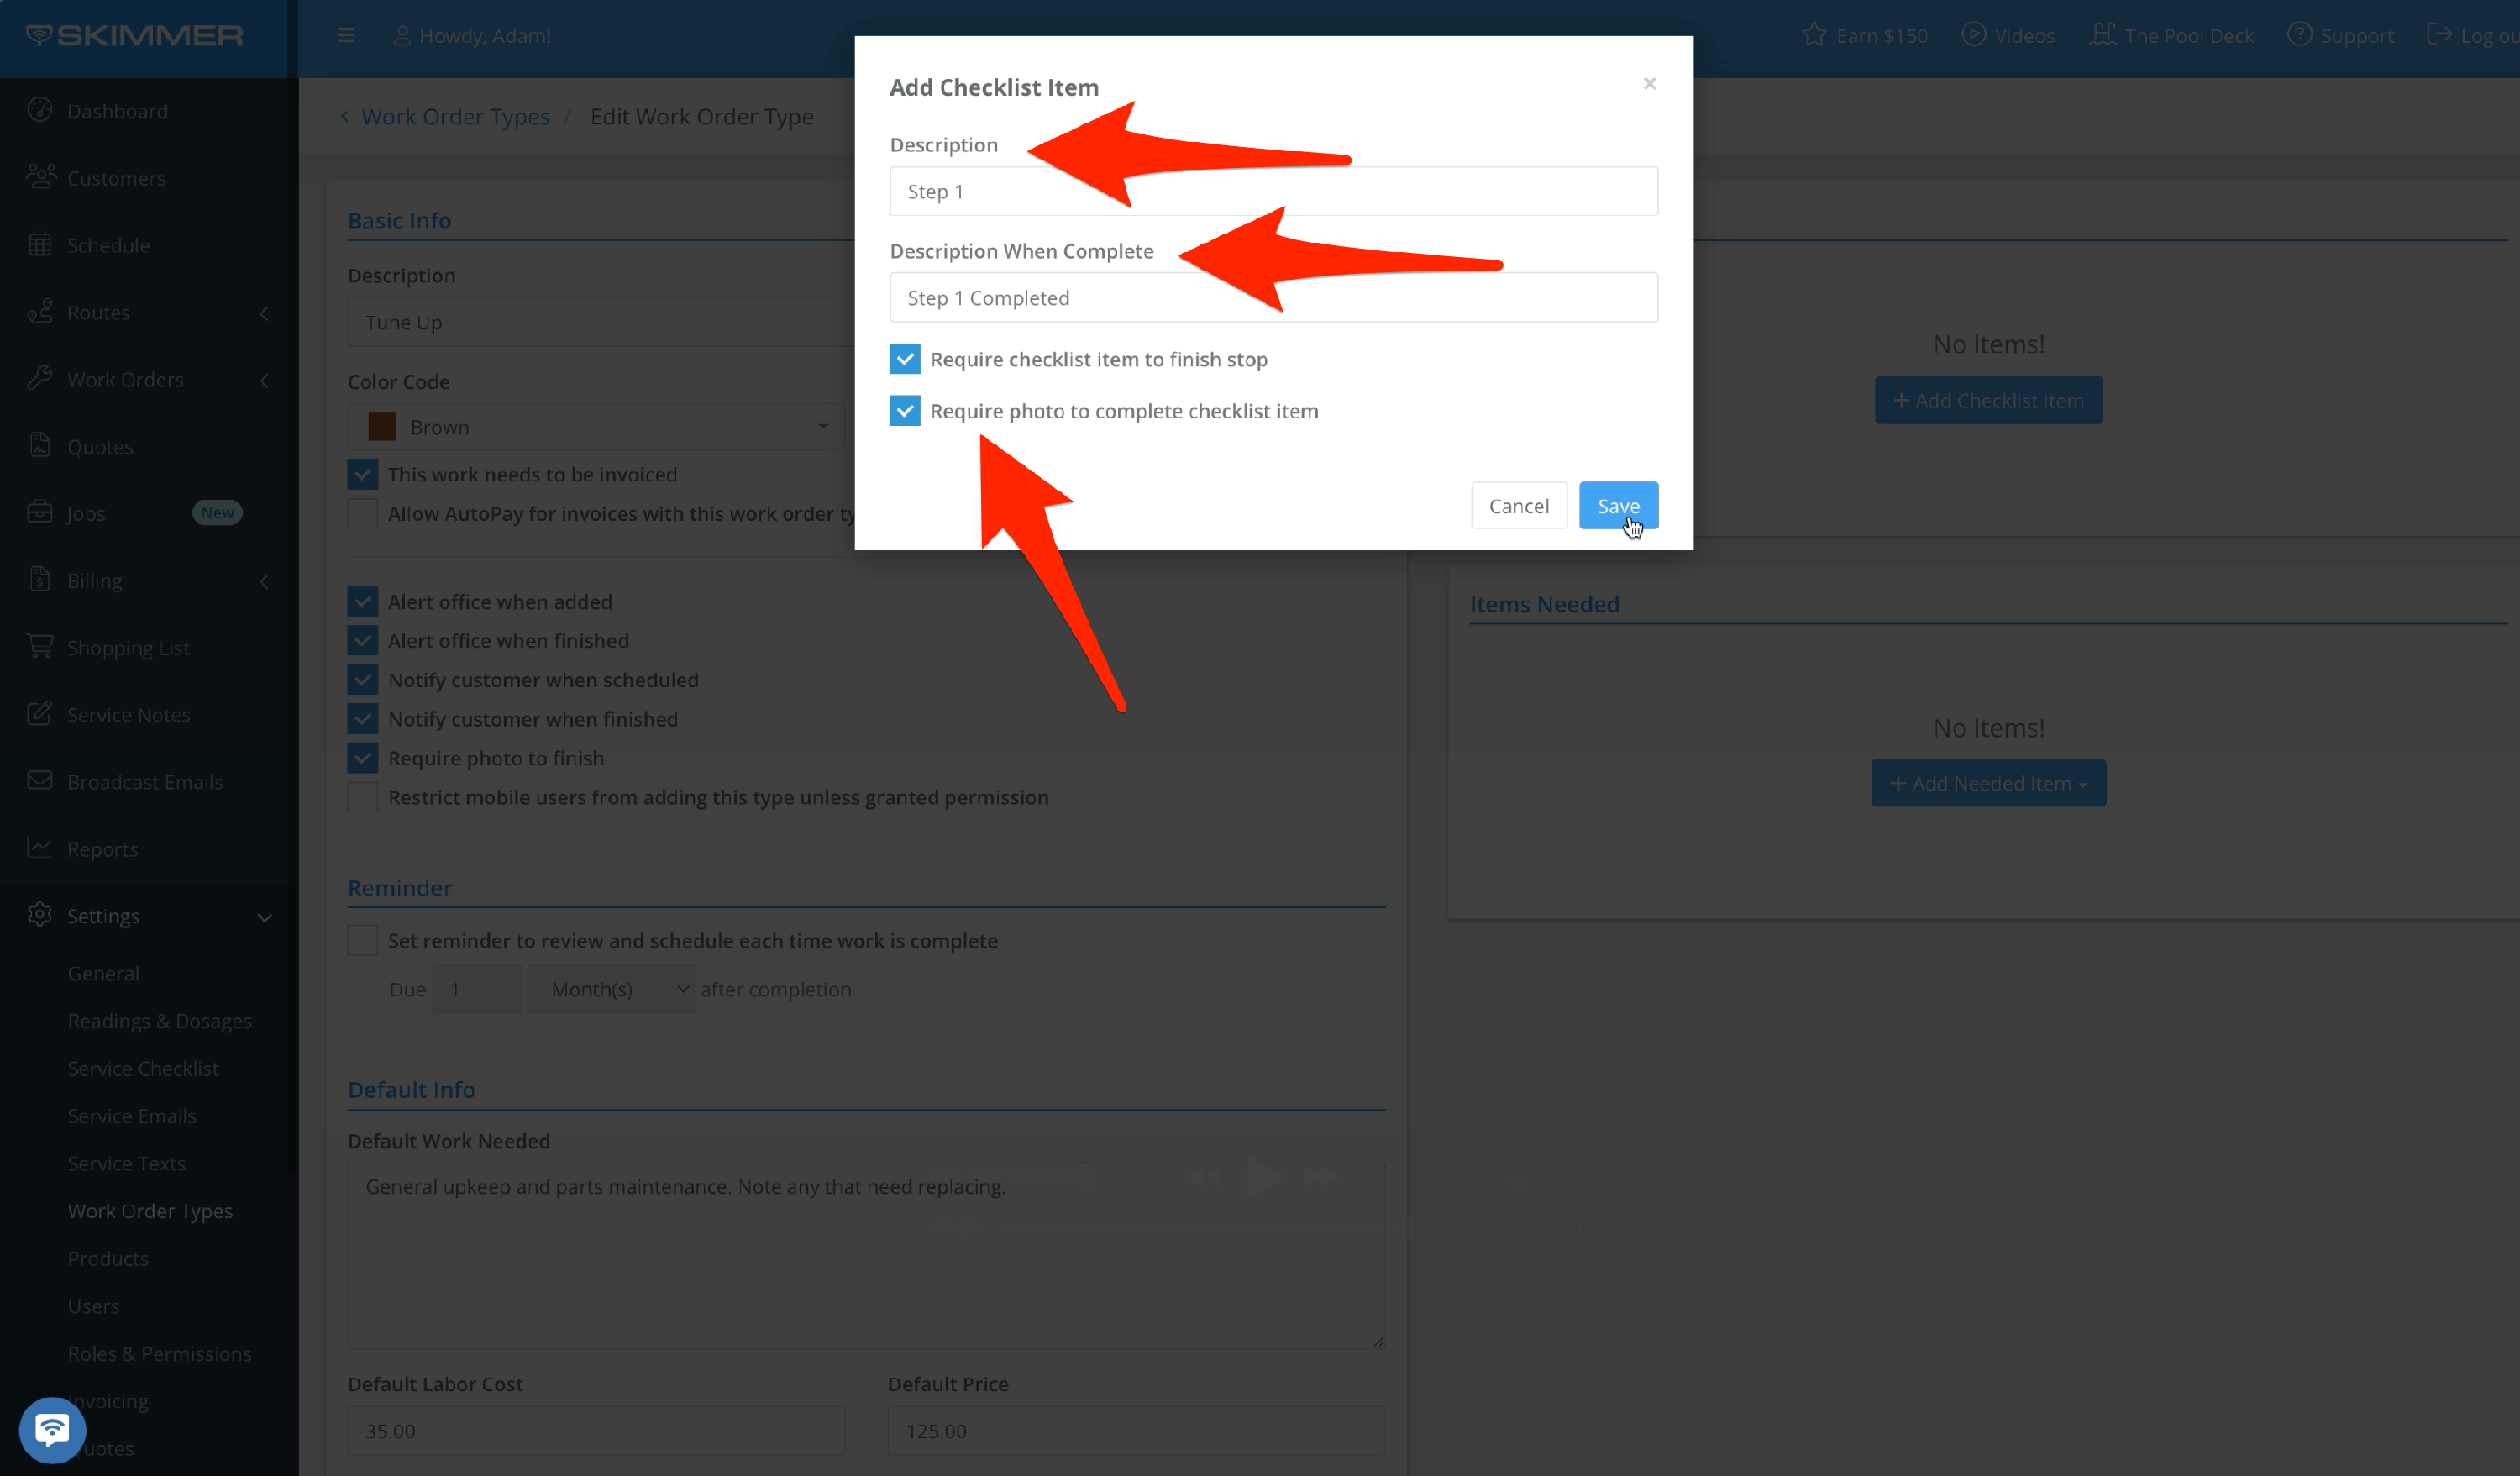
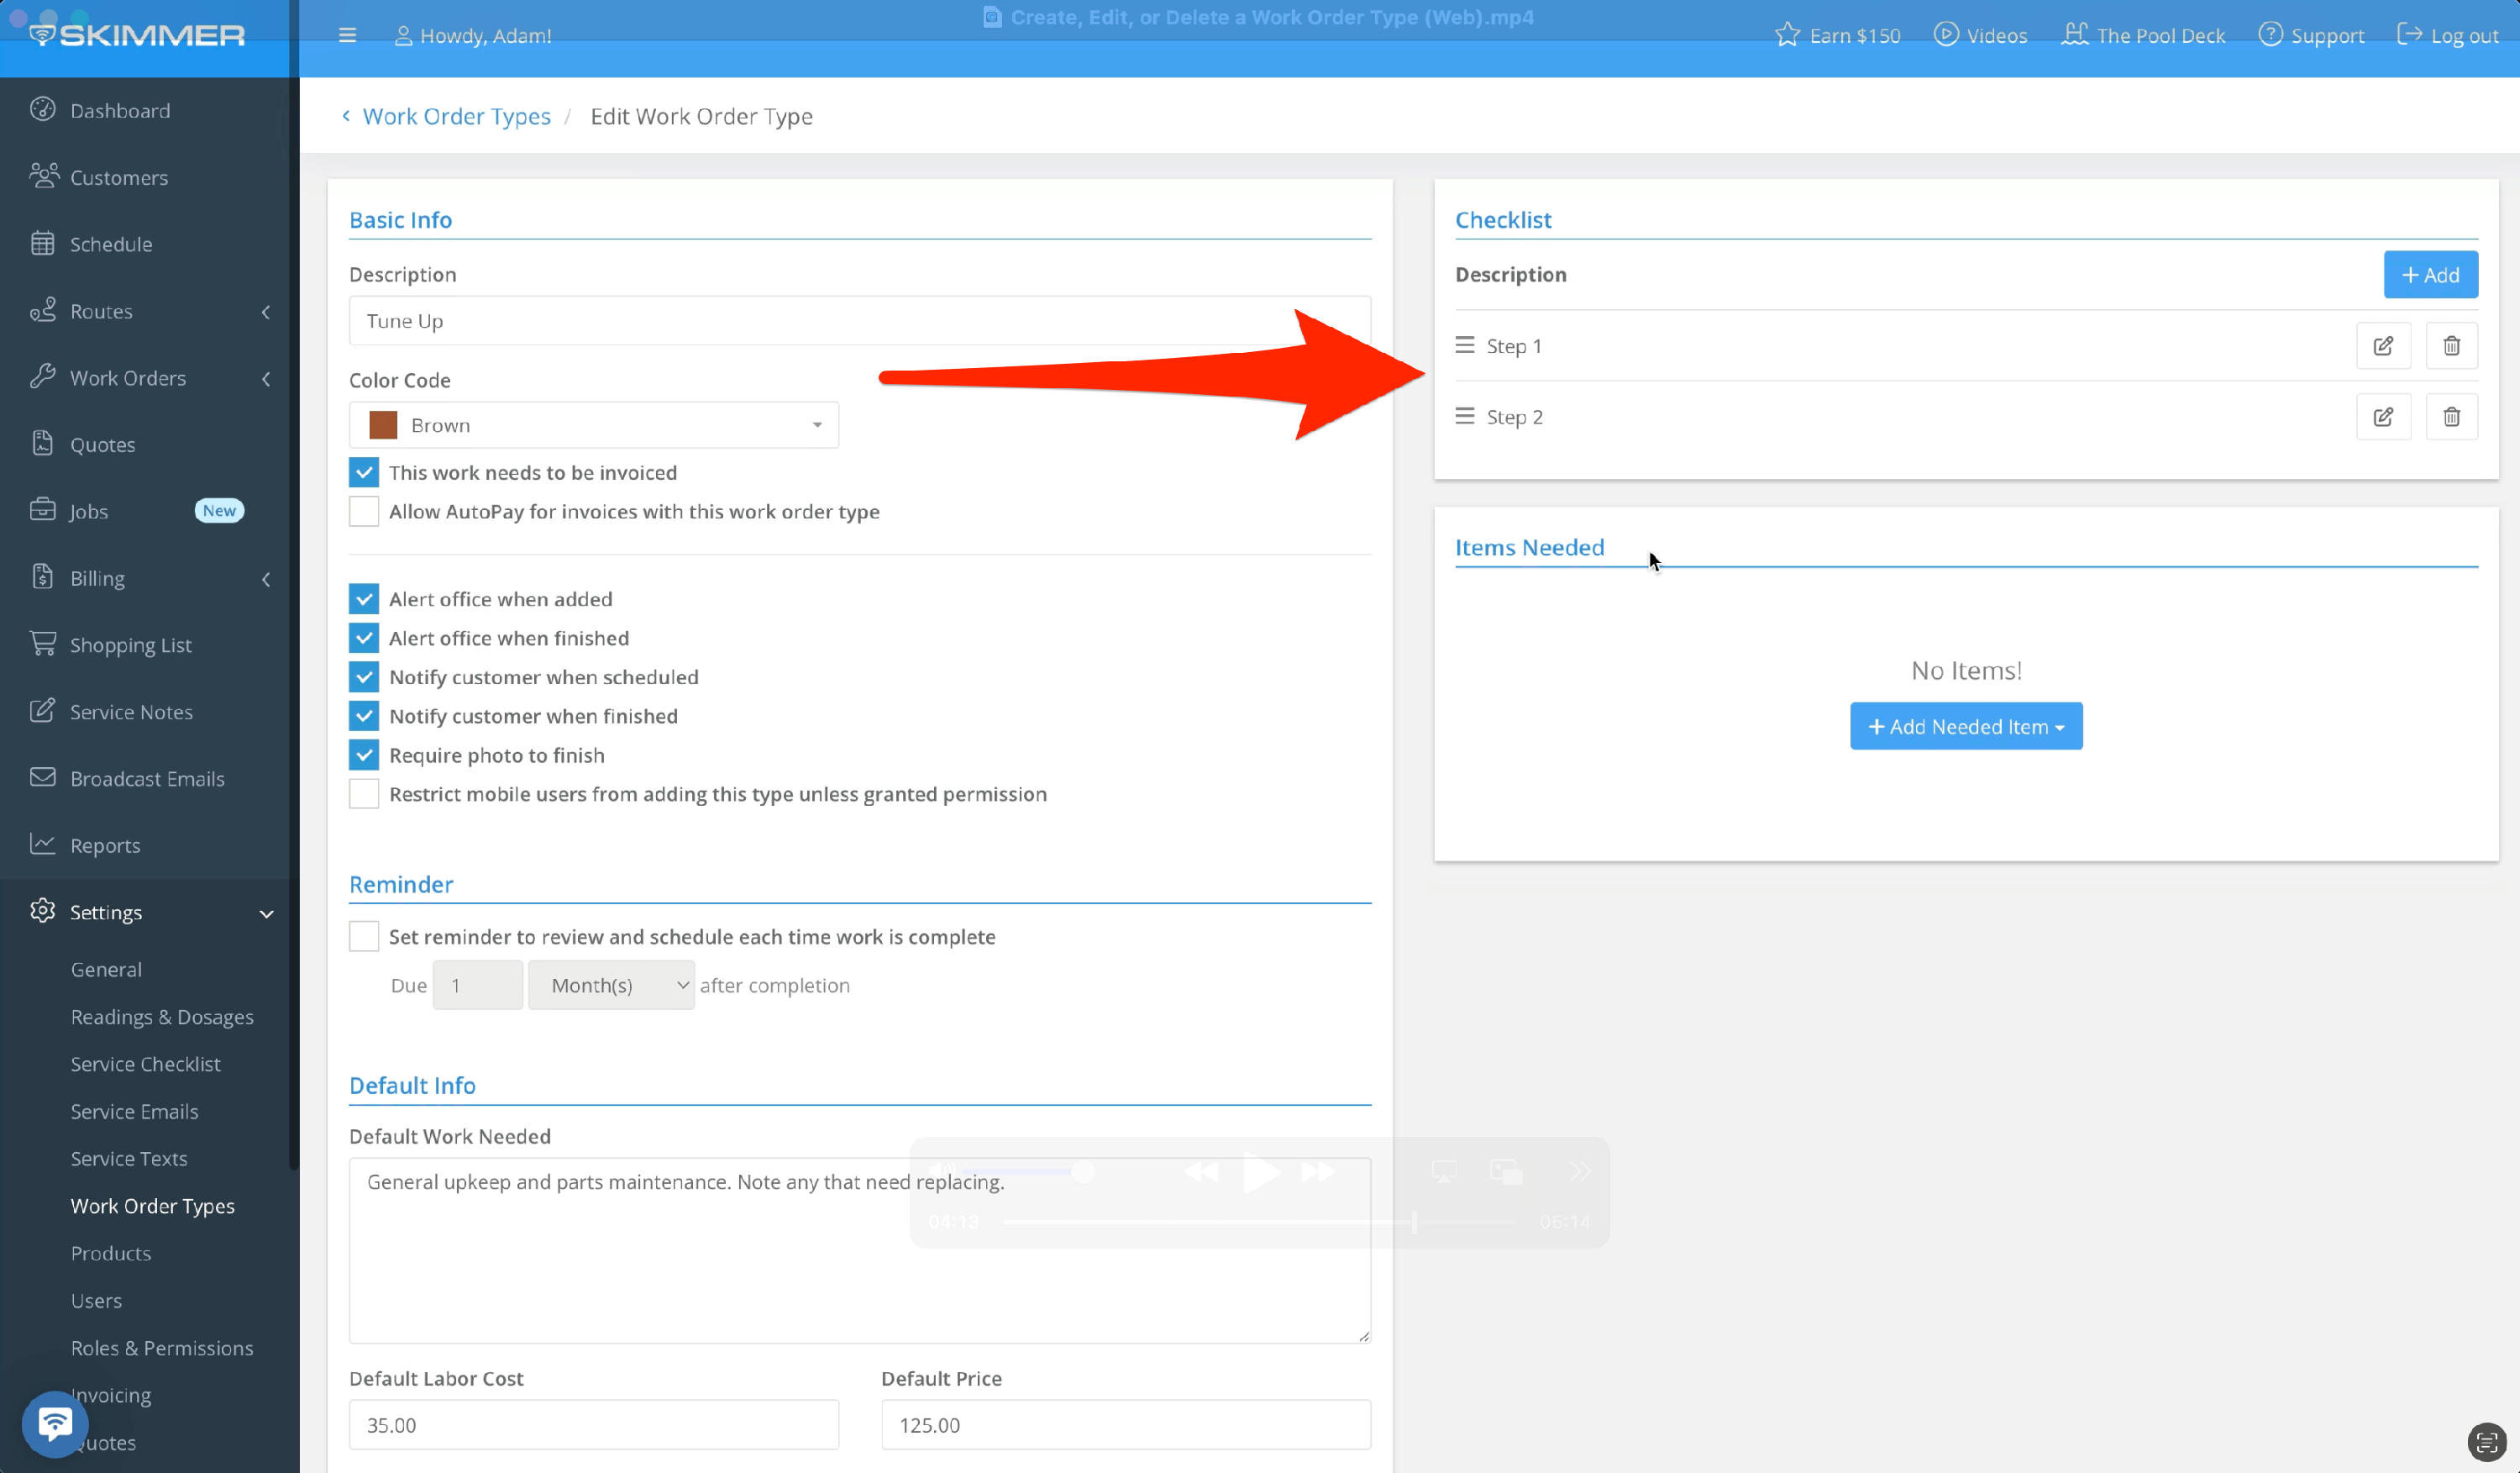
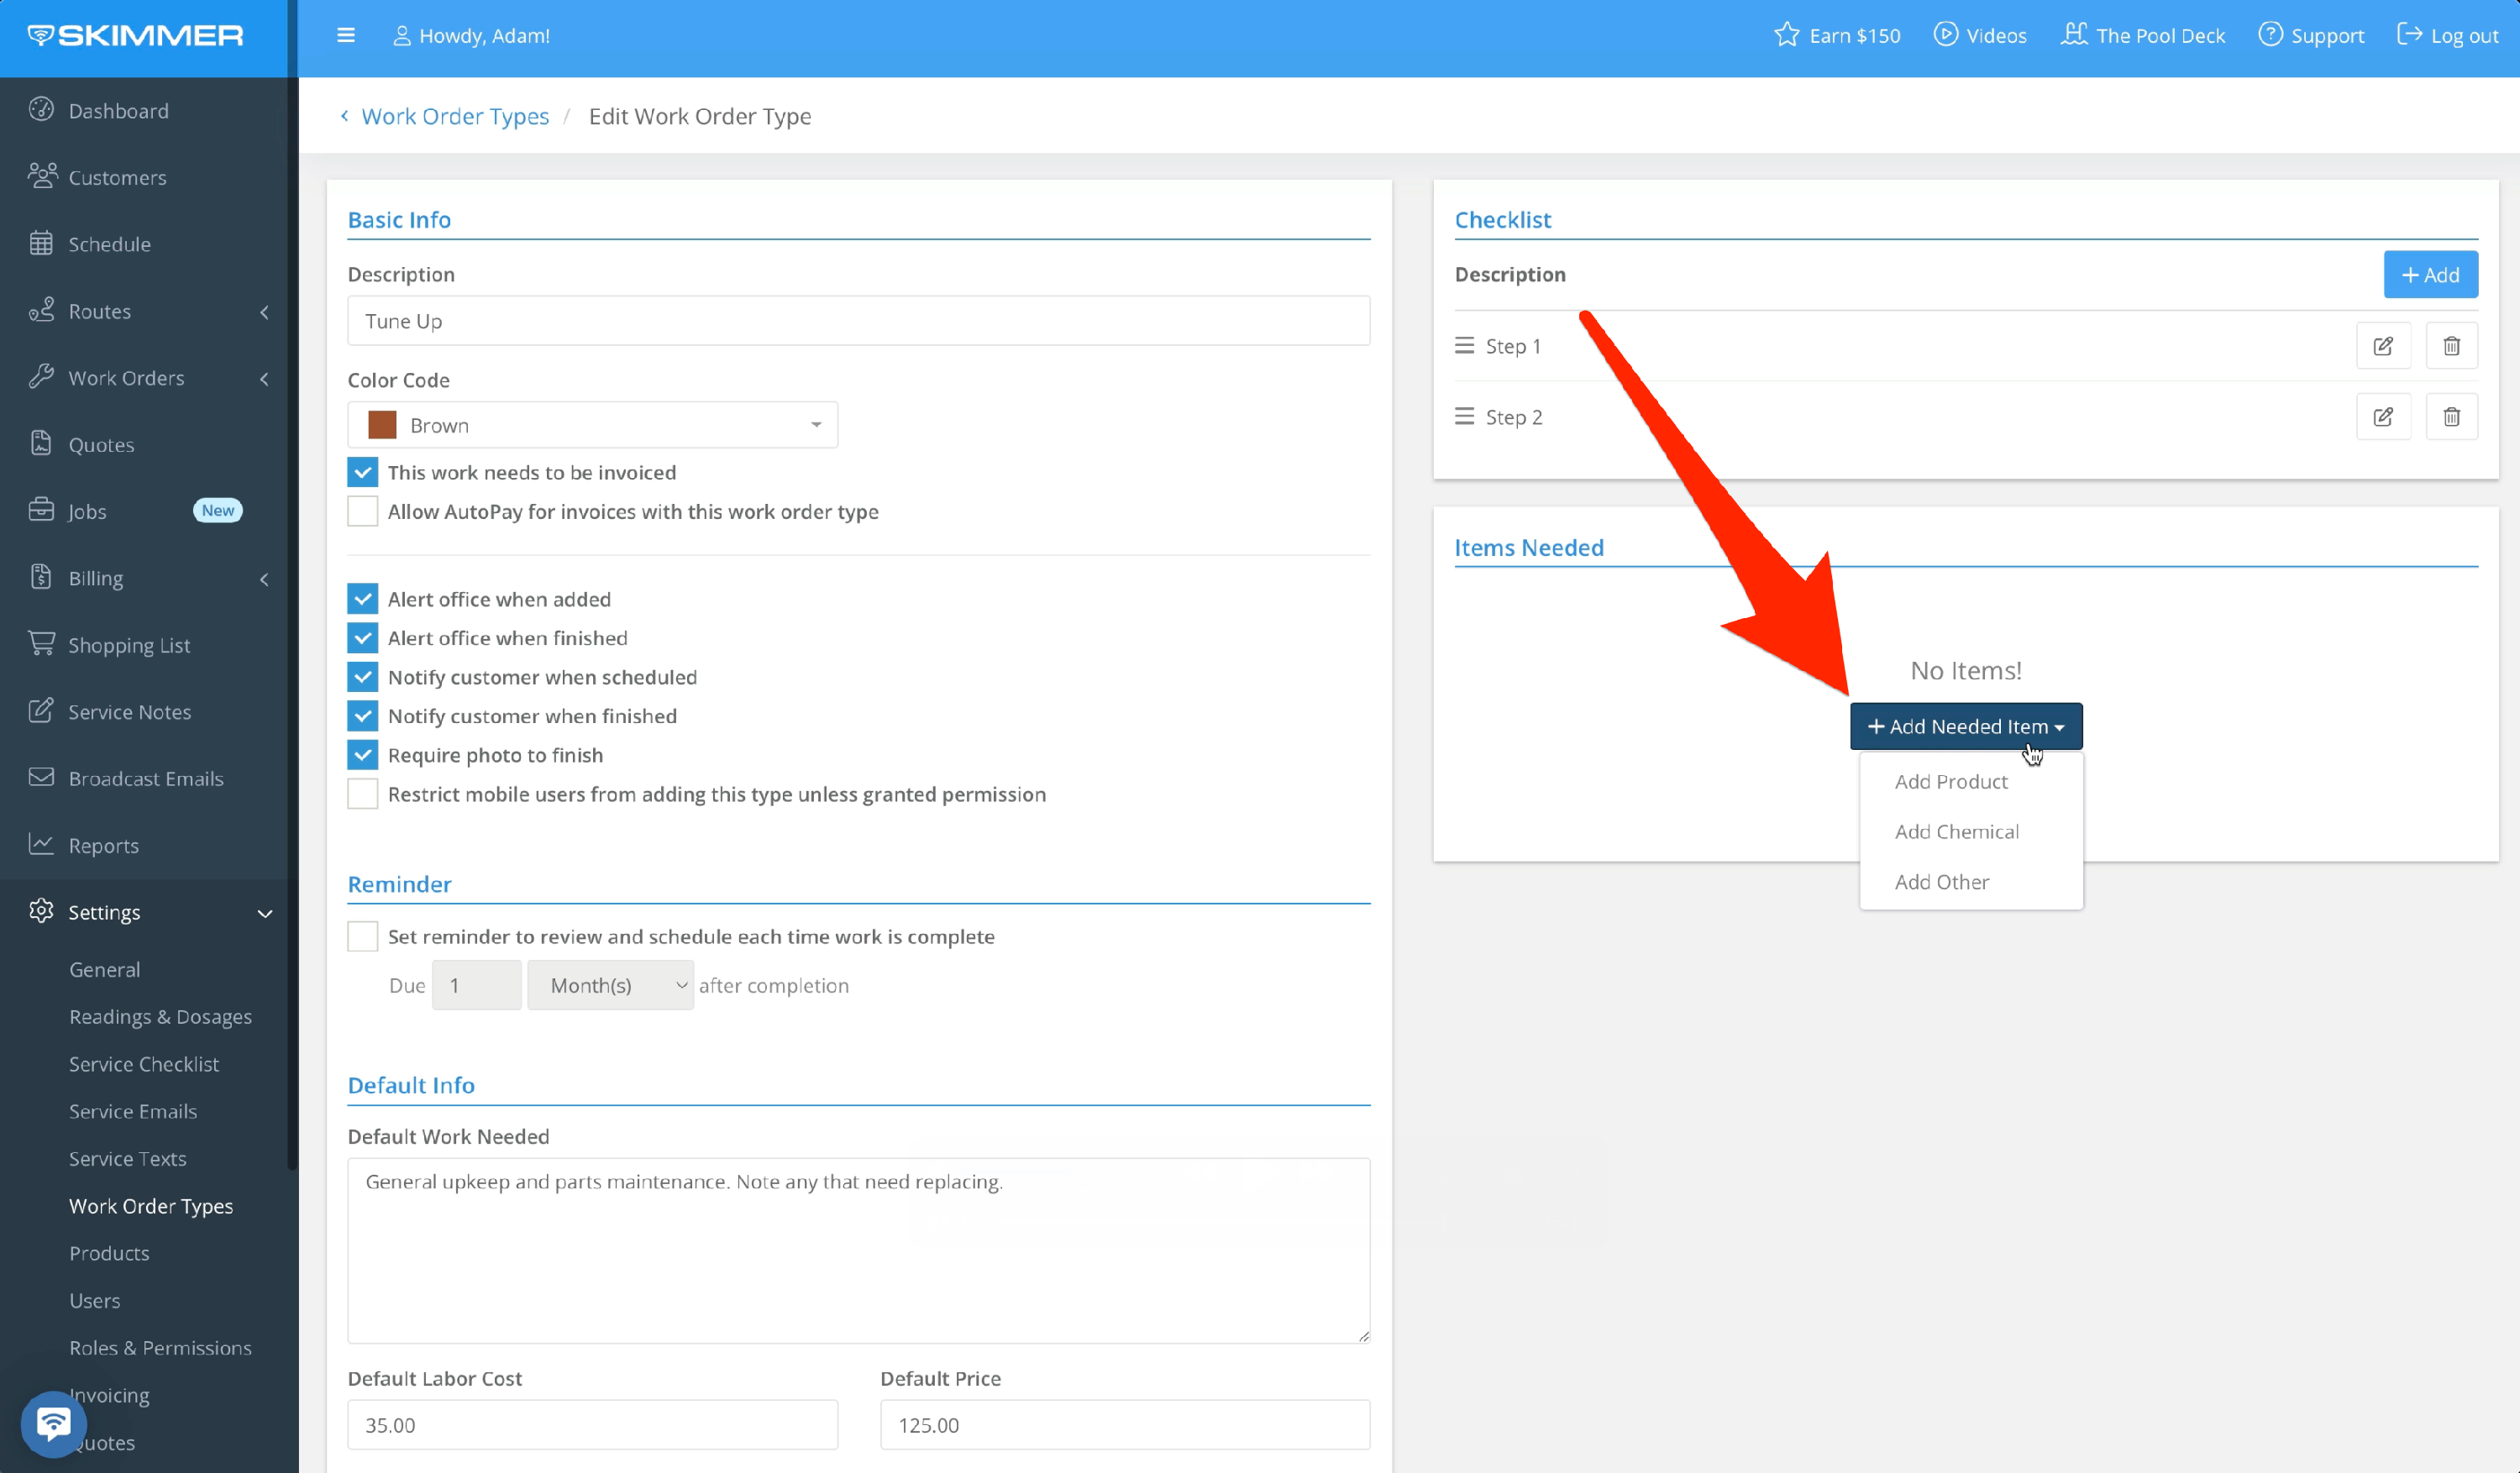
Once the work order type is created, more options become available. Each has its own unique service checklist, so you can create the custom tasks required for this job. Each task has two names, one for before it’s marked as completed, and one for after. You can choose whether to require techs to mark it as completed before they can finish the job, and whether to require a photo.
- 10
-
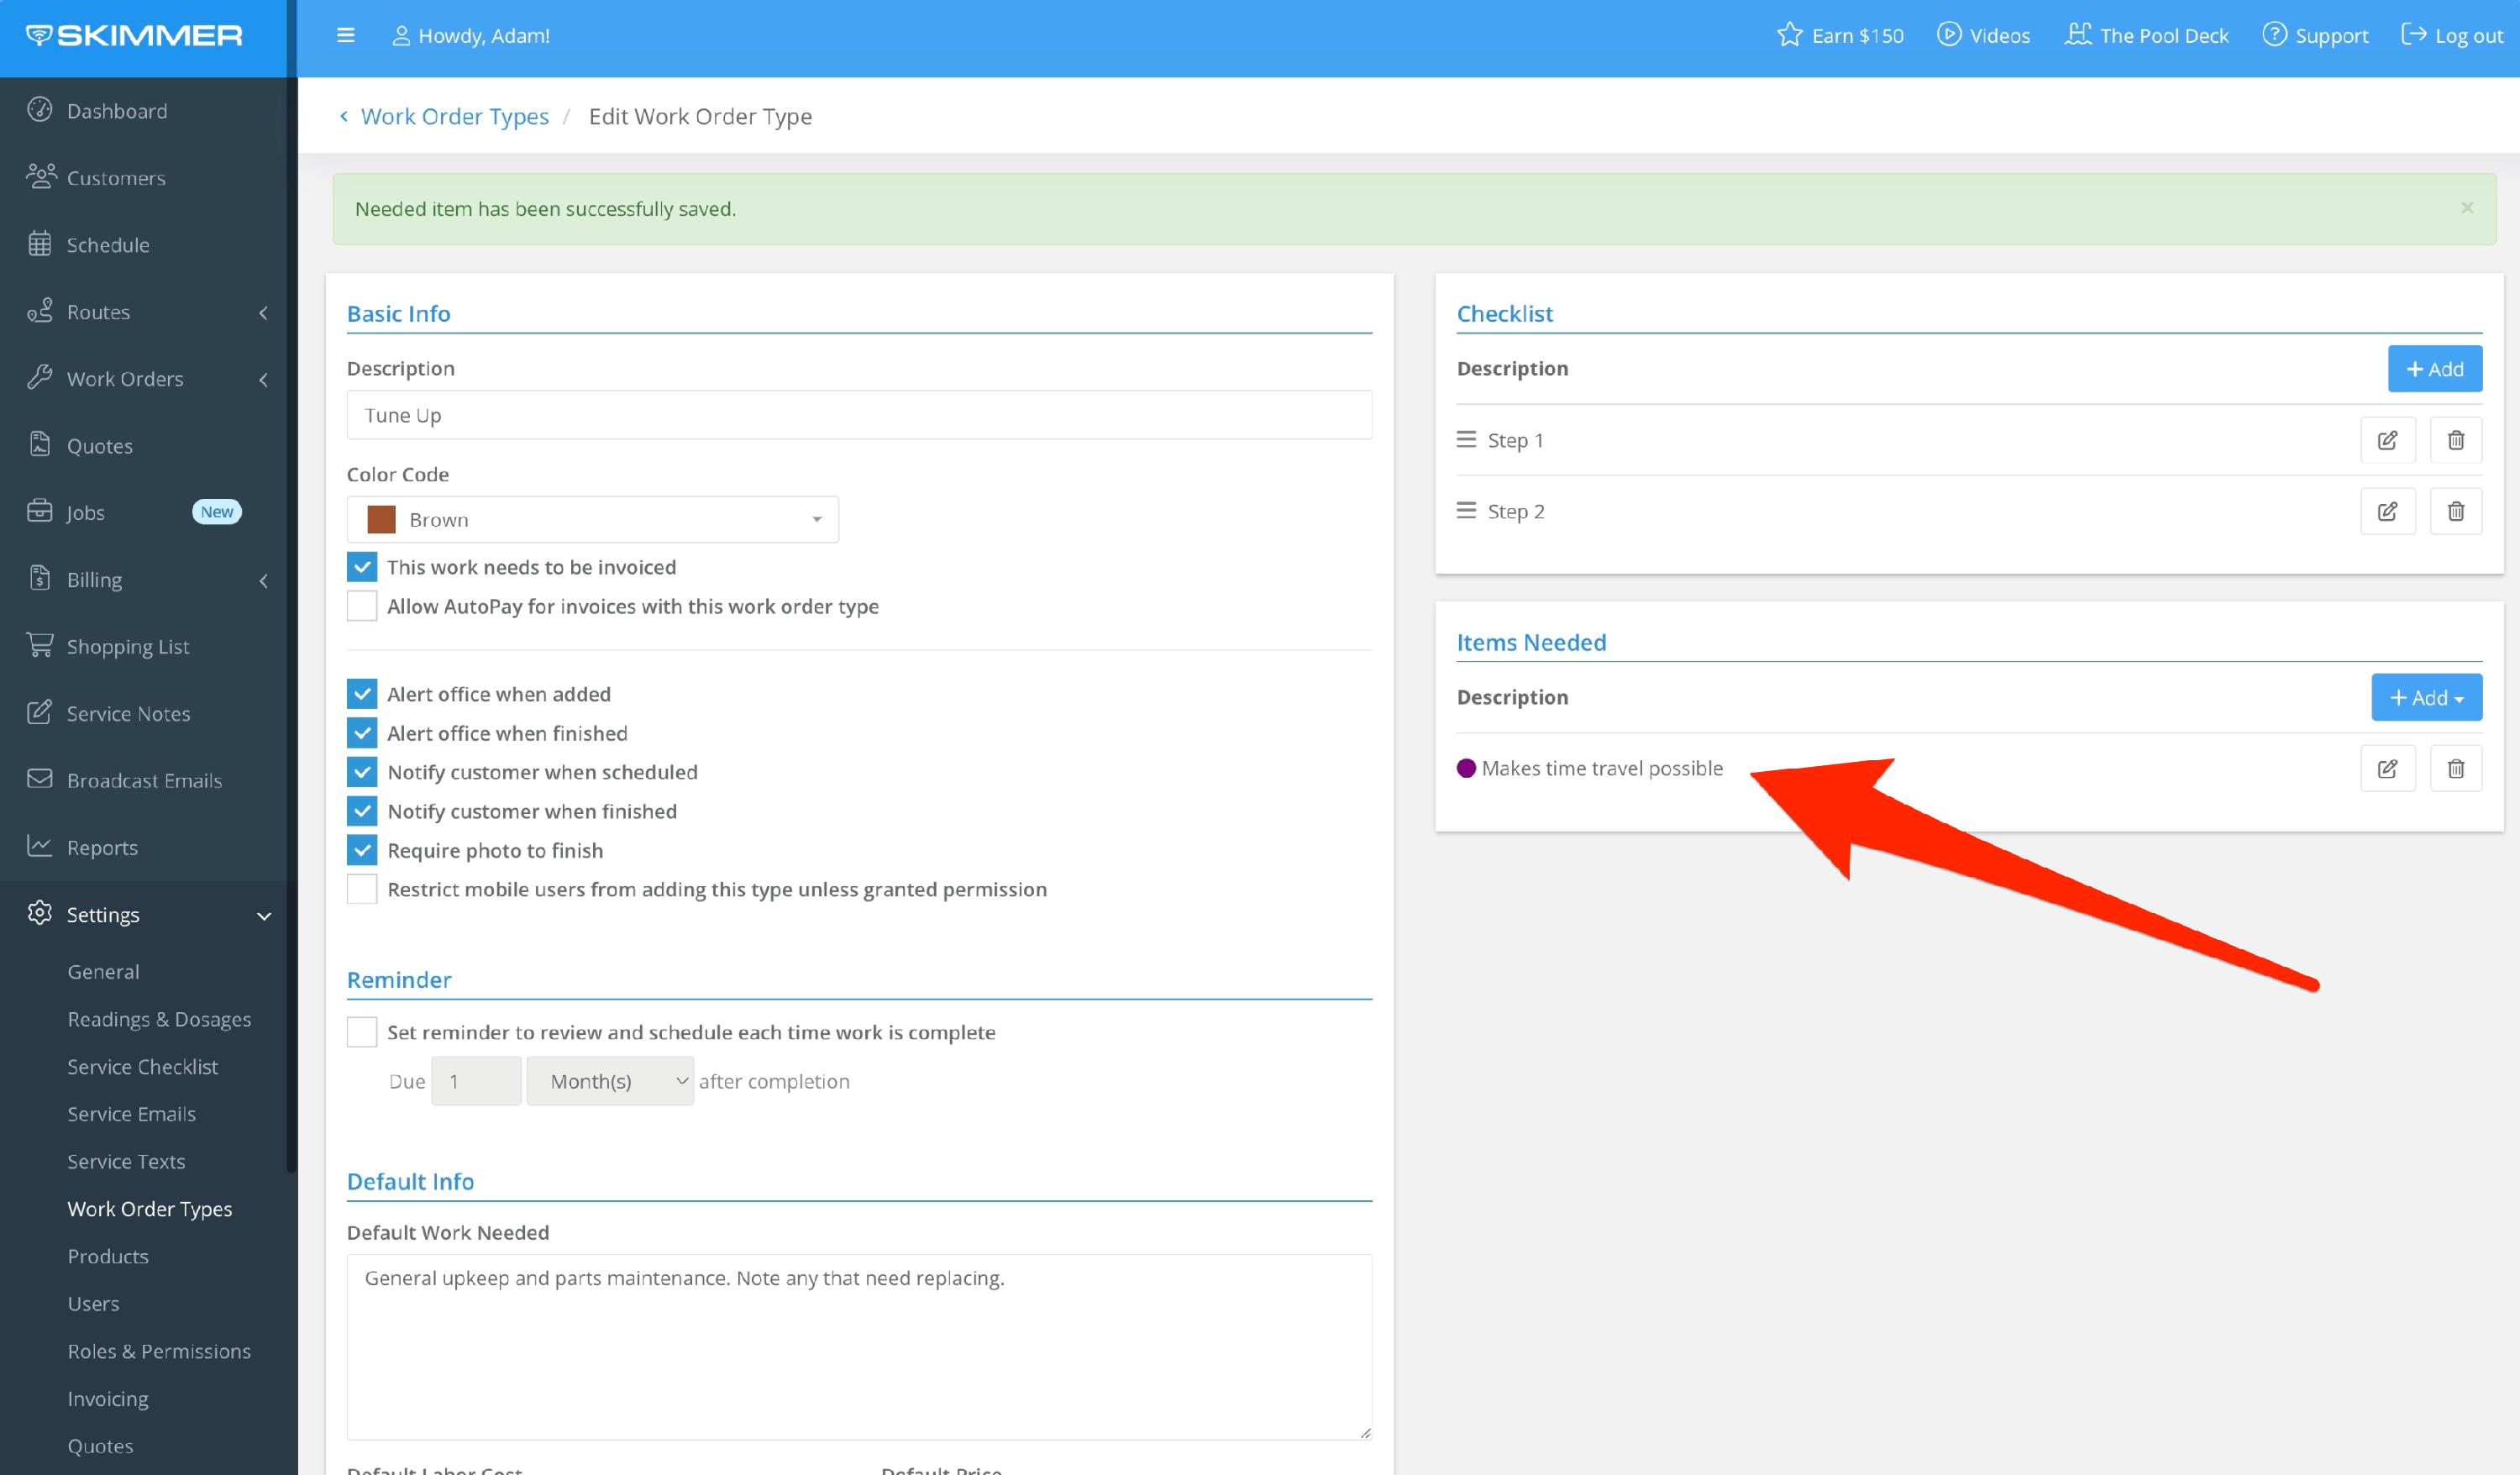
Items Needed allows you to attach items to this work order type. So, if this job requires the same items every time, you only have to add them here once. You can add from your products, a list of chemicals, or Add Other gives you an open text box.
Click Save. When you first schedule this work order, Skimmer will wait about 30 minutes before sending the alert. This means you can move it around between techs and dates to find the right spot on your schedule without worrying about sending multiple email alerts for this one job.
- 11
-
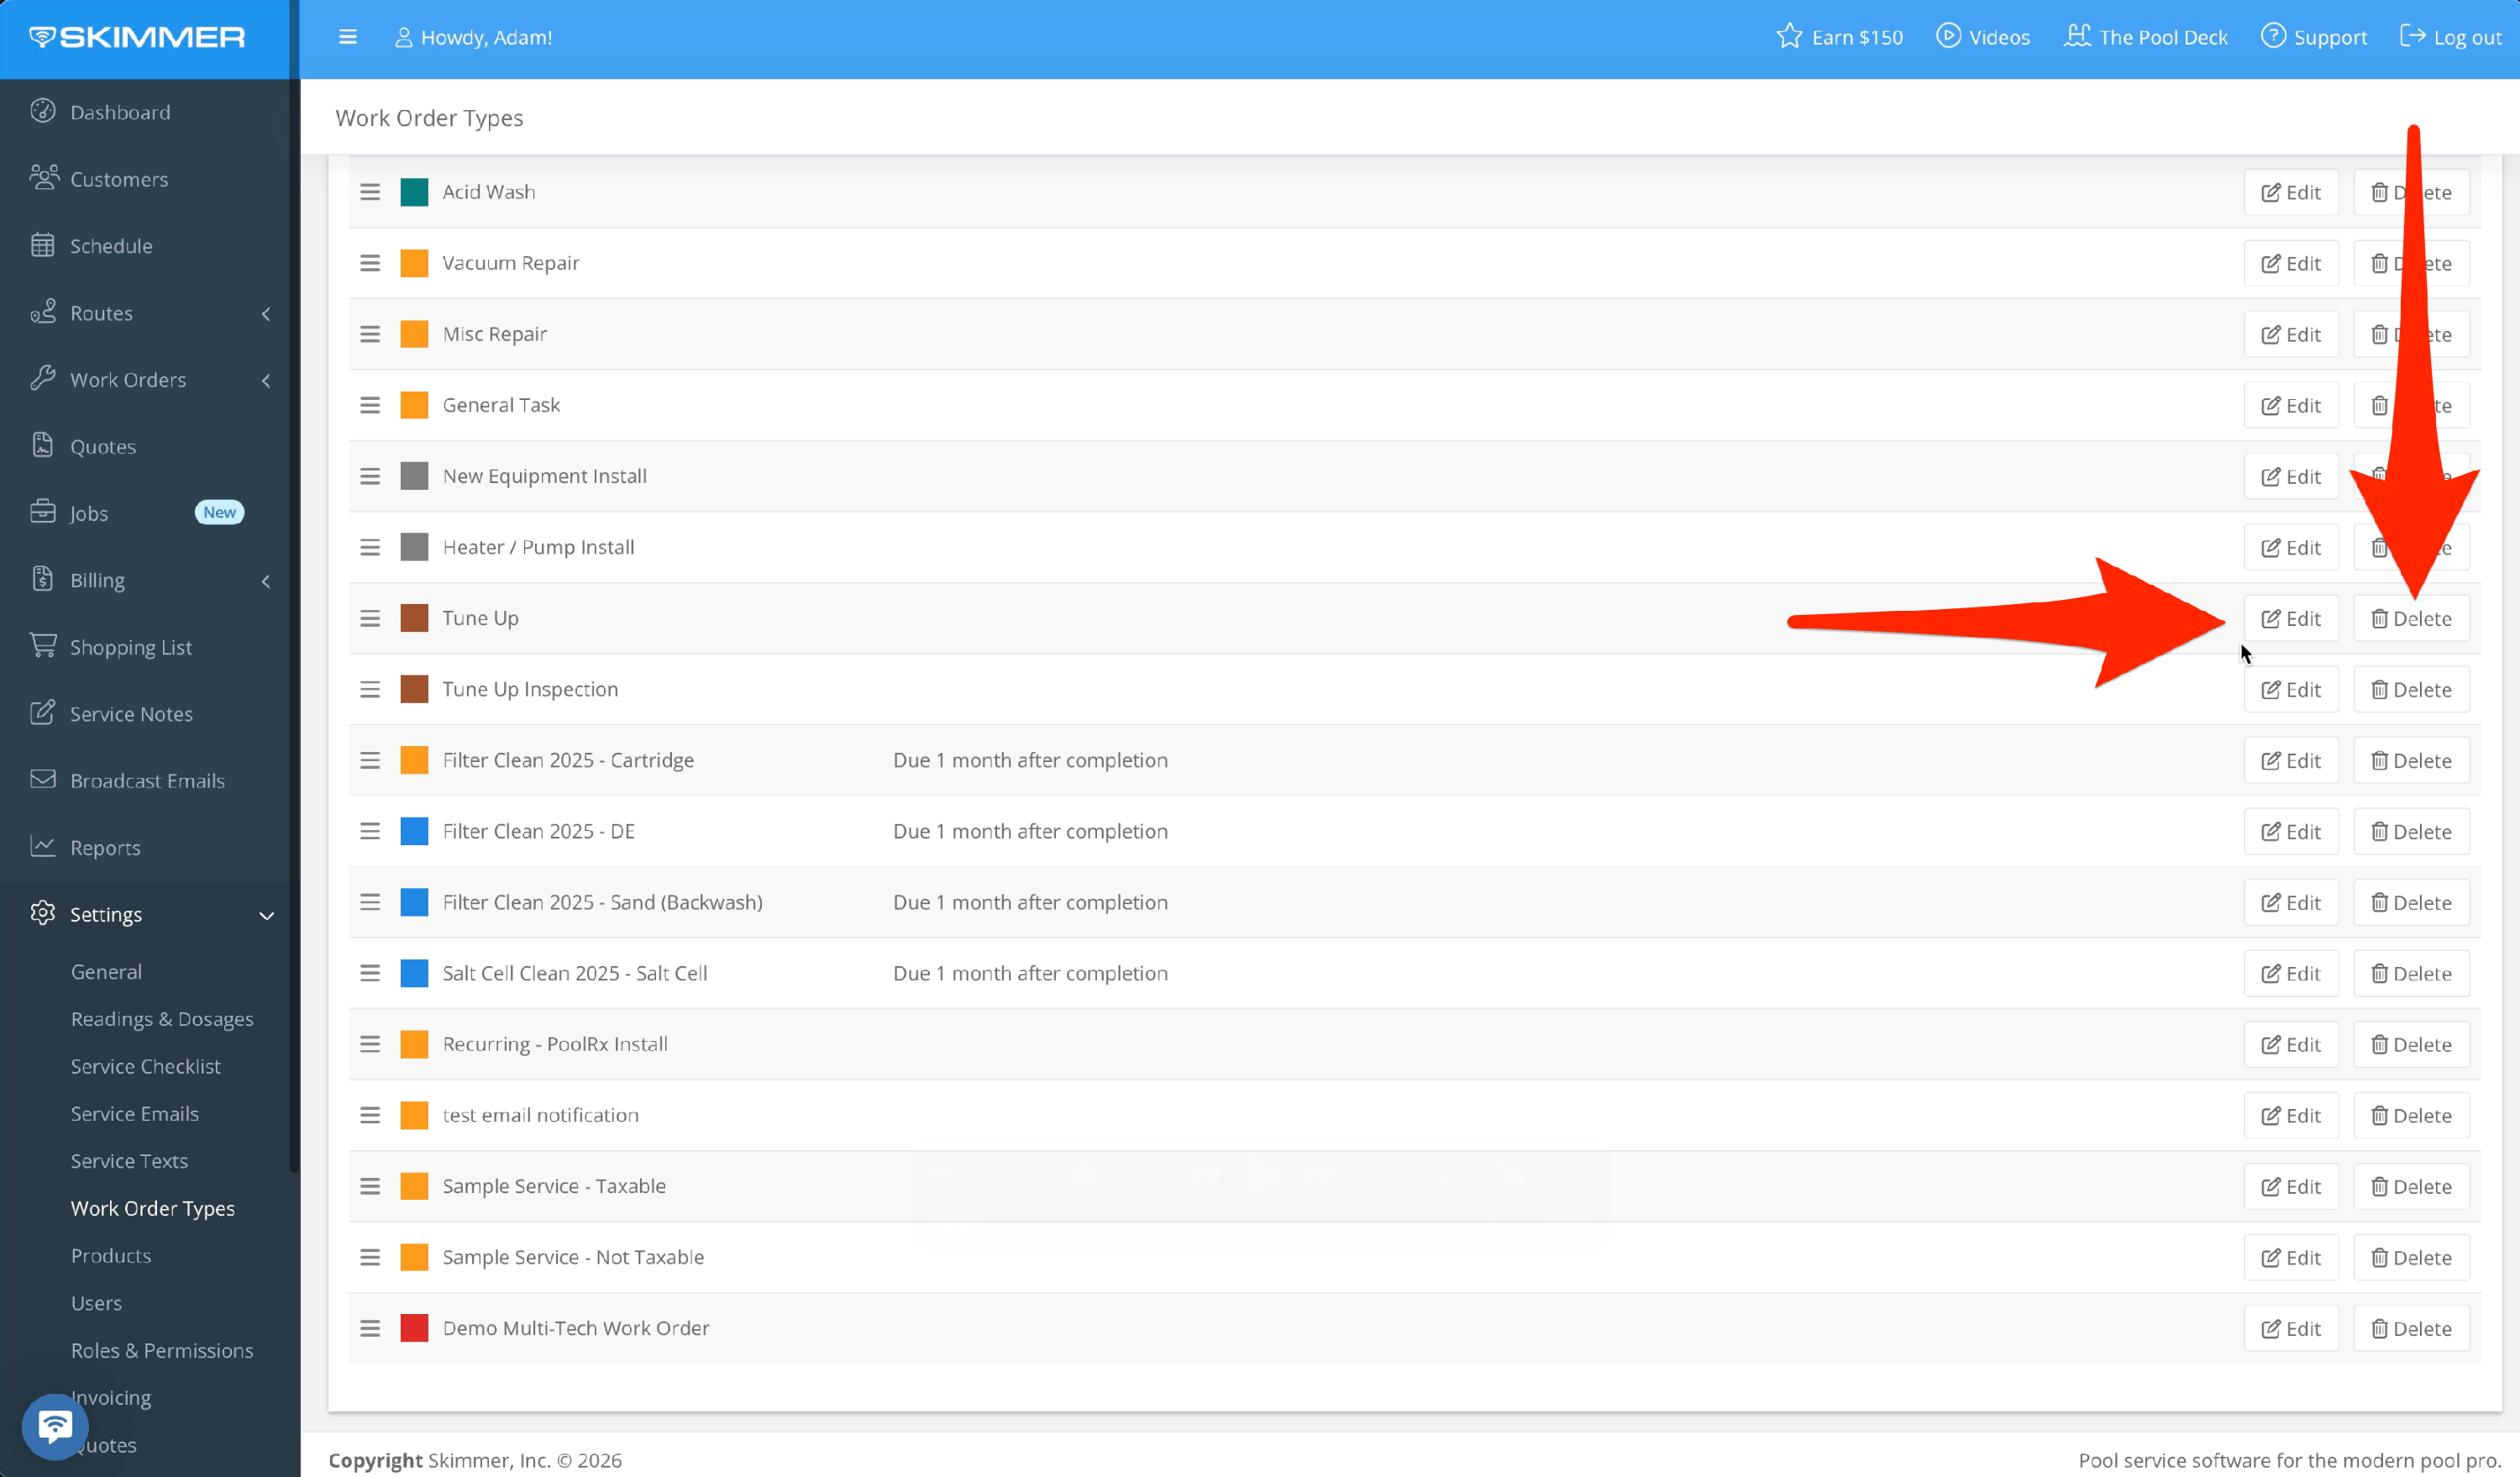
If you want to change something, click its name or the Edit button and you’ll be taken back to that same screen.
If there’s a work order type you no longer need, click Delete and confirm and it’s gone.