
Manage Service Notes and Issues (Web)
Watch the video or scroll down for step-by-step instructions.
Tiers: All

The Service Notes / Issues page has two tabs, Service Notes and Issues, that allow you to view and work with service notes and issues.

Access service notes and issues
- From the left navigation menu, click Service Notes / Issues.
By default, the Service Notes / Issues page displays the Service Notes tab. To view issues, click the Issues tab. From these tabs, you can:
- Filter and sort service notes and issues
- View and update service notes and issues
- Update service notes and issues
- Open a work order quote or job directly from a service note or issue
Filter and sort service notes
-
Use the available filters to narrow your view:
- Date range - limit notes to a specific date range.
- Status - filter by status: open or resolved.
- Service type - filter by service type: work orders, routine service, or all.
- Tech - filter by tech, or view notes from all techs.
- Customer - filter by customer and service location.
- To sort the list, click any column header. Click the column header again to reverse the sort order.
View and update a service note
From the Service Note window:
- Click the view icon next to the note's status to open the Service Note window.
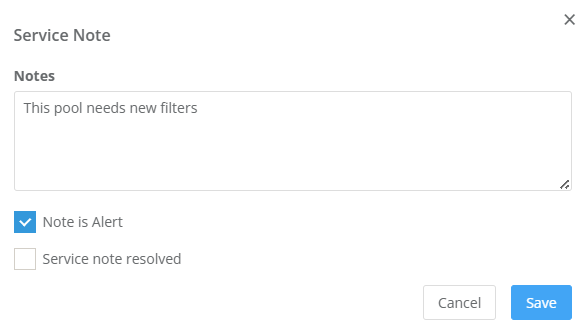
- From the Service Note window, you can:
- Review the full note and whether the note was submitted as a standard note or flagged as an alert
- Update the alert status by selecting or clearing the Note is Alert box.
- Mark the note as resolved by selecting or clearing the Service note resolved box.
- Click the Save button to confirm your changes.
From the action menu:
- Click the action menu icon next to the note.
- Click one of the following options:
- View - opens Service Note window.
- Mark as resolved/Mark as open - resolves or reopens the note in one click.
- Delete - permanently removes the note.
From the Service Notes tab:
- From the Service Notes tab, select the service note(s) you want to mark as resolved or mark as open. You can do this by checking one or more boxes or checking the top left box to select all notes.
- Click the Mark as Resolved or Mark as Open option.
- Click the Mark as resolved or Mark as open button in the confirmation window.
Create a work order, quote, or job from a service note
- Click the action menu icon next to the note.
- Click one of the following options: Create Work Order, Create Quote, or Create Job
Based on your selection, Skimmer opens the Add Work Order, Create Quote, or Create Job page with the customer and service location already filled in. - Follow the normal process for completing the work order, quote, or job. When you finish, you can click the Origin link on the finished transaction to access the original service note. In addition, you can continue creating work orders, quotes, or jobs from the original service note.
Print the Service Notes List
The Service Note list includes tech service notes. These notes are intended for use by the office and are not included in customer emails. They many include information you don't wish to share with the customer. Always review the Service Notes list before sharing it with a customer.
- From the Service Notes tab, click the Print option in the top right corner.
Skimmer opens the Print window which allows you to print the list or save it to PDF. - Click Save for a PDF copy or click Print for a hard copy.
The Service Notes list includes all the service notes information displayed in the Service Notes tab.
Filter and sort issues
- Use the available filters to narrow your view:
- Date range - limit issues to a specific date range.
- Status - filter by status: open or resolved.
- Service type - filter by service type: work orders, routine service, or all.
- Issues - select a specific issue type, such as Bad Weather or No Power.
- Tech - filter by tech, or view issues from all techs.
- Customer - filter by customer and service location.
- To sort the list, click any column header. Click the column header again to reverse the sort order.
View and update an issue
From the Issue window:
- Click the view icon next to the issue's status to open the Issue window.
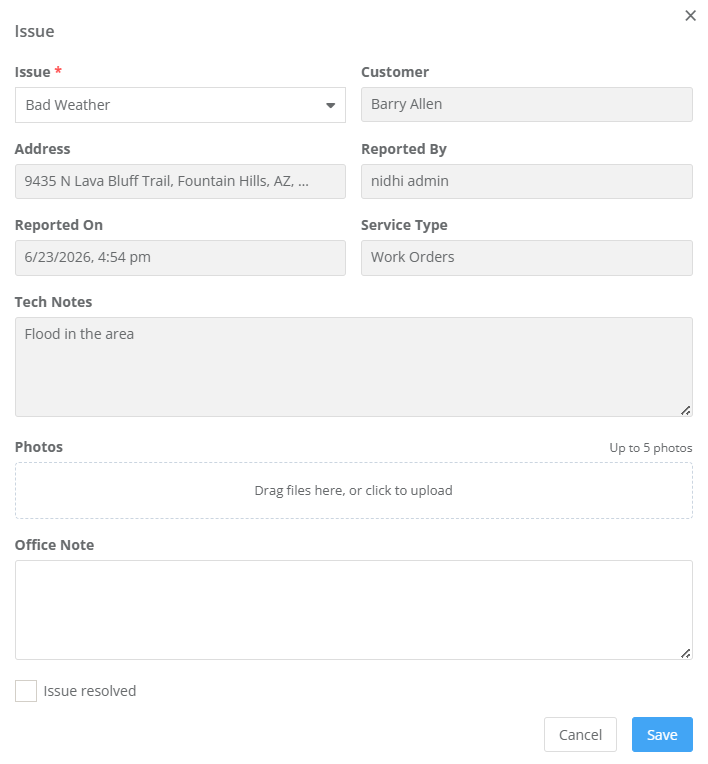
- From the Issue window, you can:
- Review the issue details.
- Change the issue type.
- Work with issue photos. The Photo section allows you to edit photo captions as well as add, download, view, or delete photos.
- Add or update an office note.
- Mark the issue as resolved, by checking the Issue resolved box.
- Click the Save button to confirm your changes.
From the action menu:
- Click the action menu icon next to the issue's view icon.
- Click one of the following options:
- View - opens Issue window.
- Mark as resolved/Mark as open - resolves or reopens the issue in one click.
- Delete - permanently removes the issue.
From the Issues tab:
- From the Issues tab, select the issue(s) you want to mark as resolved or mark as open. You can do this by checking one or more boxes or checking the top left box to select all issues.
- Click the Mark as Resolved or Mark as Open option.
- Click the Mark as resolved or Mark as open button in the confirmation window.
Create a work order, quote, or job from an issue
- Click the action menu icon next to the issue.
- Click one of the following options: Create Work Order, Create Quote, or Create Job
Based on your selection, Skimmer opens the Add Work Order, Create Quote, or Create Job page with the customer and service location already filled in.
Note: Photos attached to an issue are not carried over to the work order, quote, or job. - Follow the normal process for completing the work order, quote, or job. When you finish, you can click the Origin link on the finished transaction to access the original issue. In addition, you can continue creating work orders, quotes, or jobs from the original issue.
Print the Issues List
- From the Issues tab, click the Print option in the top right corner.
Skimmer opens the Print window which allows you to print the list or save it to PDF. - Click Save for a PDF copy or click Print for a hard copy.
The Issues list includes all the issue information displayed in the Issues tab.