Build a Pool Service Route Fast (Web)
Watch the video or scroll down for step-by-step instructions.
Tiers: All

Step-by-step instructions . . .
- 1
-
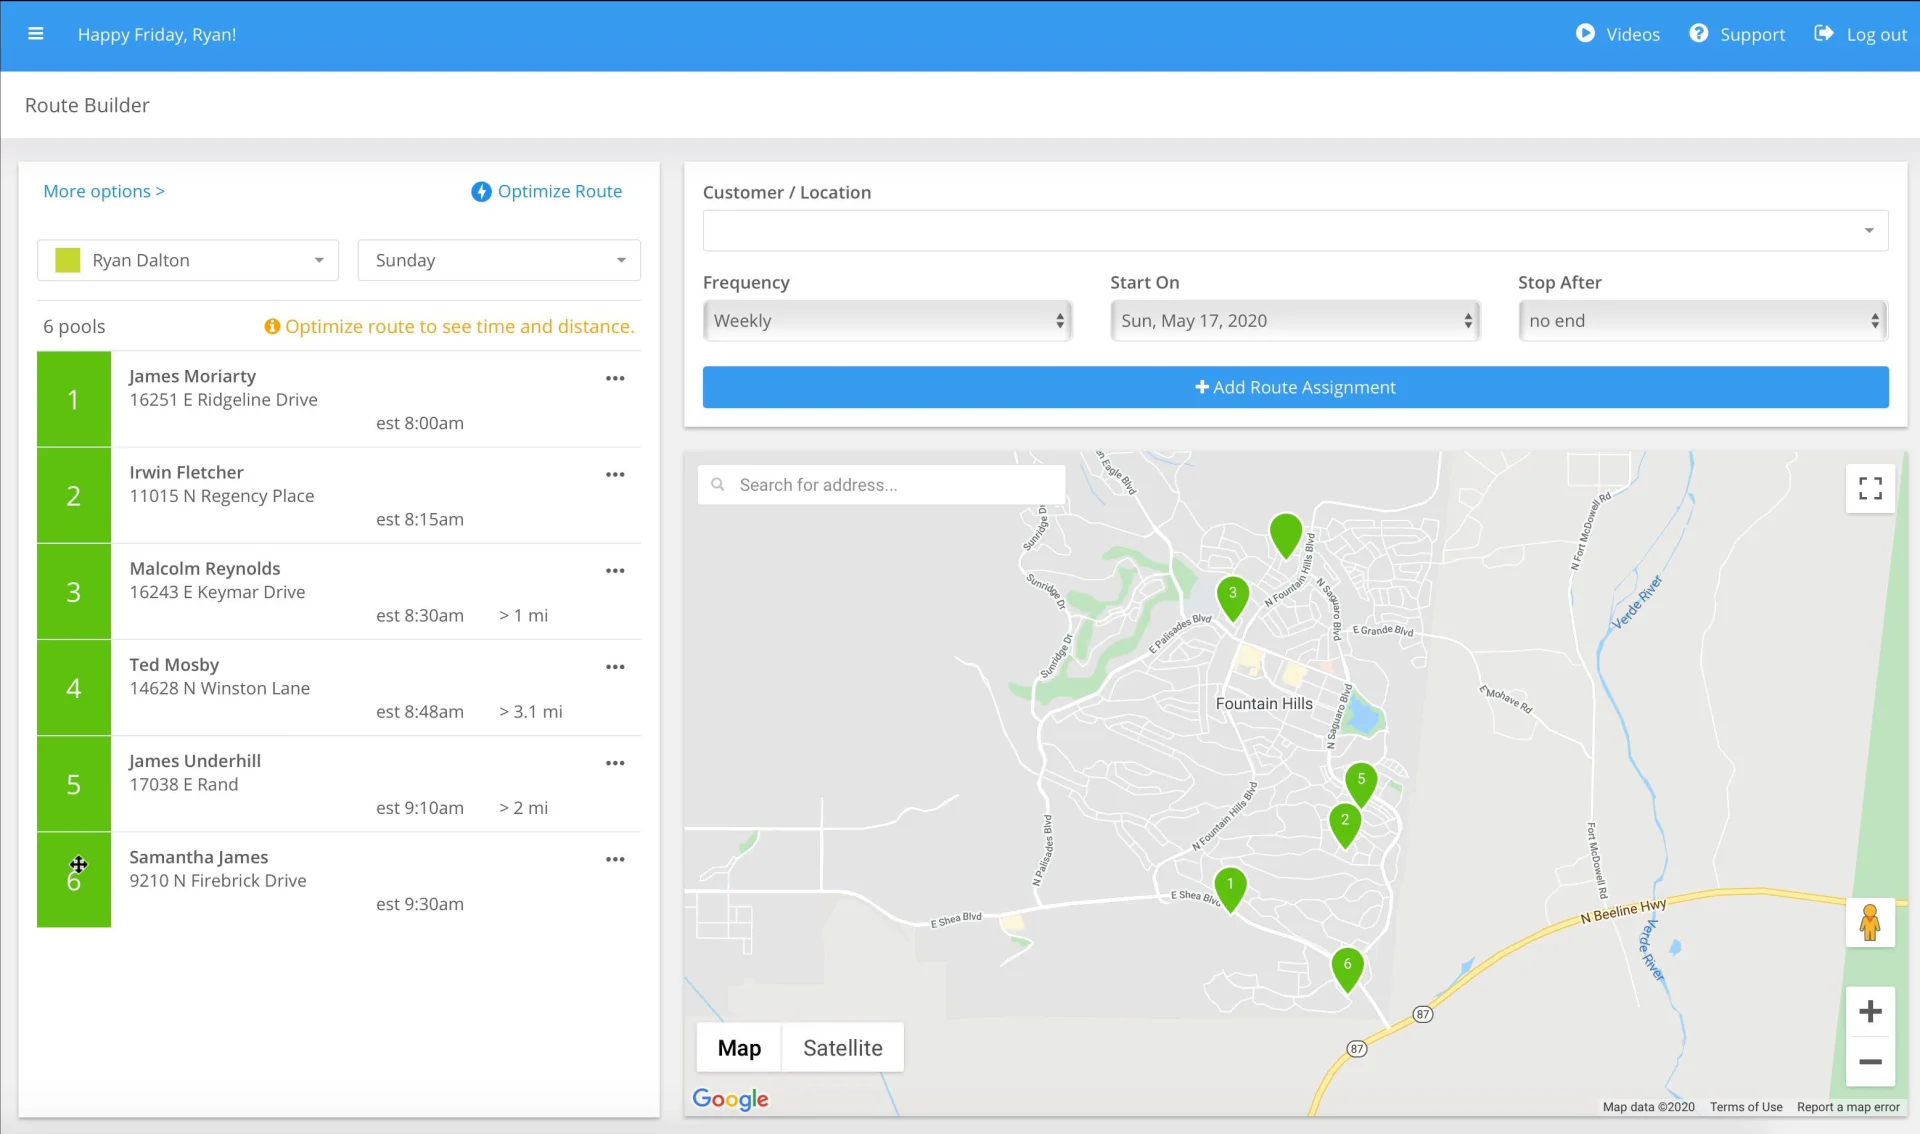
Select Routes > Route Builder.
-

- 2
-
Click and select from the Choose Tech dropdown to select a tech, and click and select from the Choose Day dropdown to select the day of the week.
-


- 3
-
Click and select from the Customer/Location dropdown to select the customer and location.
-

- 4
-
Select from the Frequency dropdown to choose how often the customer/location is serviced > select from the Start On dropdown to choose when service begins > select from the Stop After dropdown to choose when service ends > click Add Route Assignment.
- Select no end if there is not an exact date for when service will discontinue
-


- 5
- To delete a route stop, click on the three dots and select Delete Route Assignment.
-

- You can also delete a route drop from the map. Click the pin drop and select Delete > Delete.
-

-

- 6
- To Reorder, click and hold the stop number, and drag and drop the route where needed
-

-
- 7
-
To have Skimmer reorder the route assignment, click Optimize Route.
- This feature will only optimize up to 25 routes per route assignment, and is only available for Scaling Up and Skimmer for Enterprise accounts.
-

- Click and select where the route should Start From.
-
 Click and select where the route should End At, and click Optimize.
-

- 8
-
Click More Options to expand route building features.
- Click and select from the calendar to show only route assignments active as of the date selected.
- Selecting the checkbox will populate pin drops on the map, representing active customers without route assignments


 Click and select where the route should End At, and click Optimize.


