Billing - Connect to Stripe and Enable Payments
With Skimmer Billing, some setup is required before you send your first customer invoice and start getting paid. If you want to make customer payments as quick and easy as possible, setup includes connecting your Skimmer account to Stripe. You'll want to start this process as soon as possible, to make sure your Stripe account is ready to go when you are. Even if you already have an account with Stripe, you'll need to go through this onboarding process to receive payments through Skimmer. Your existing Stripe account will be separate from the one that you create here.
Here's how to do it . . .
Step-by-step instructions . . .
- 1
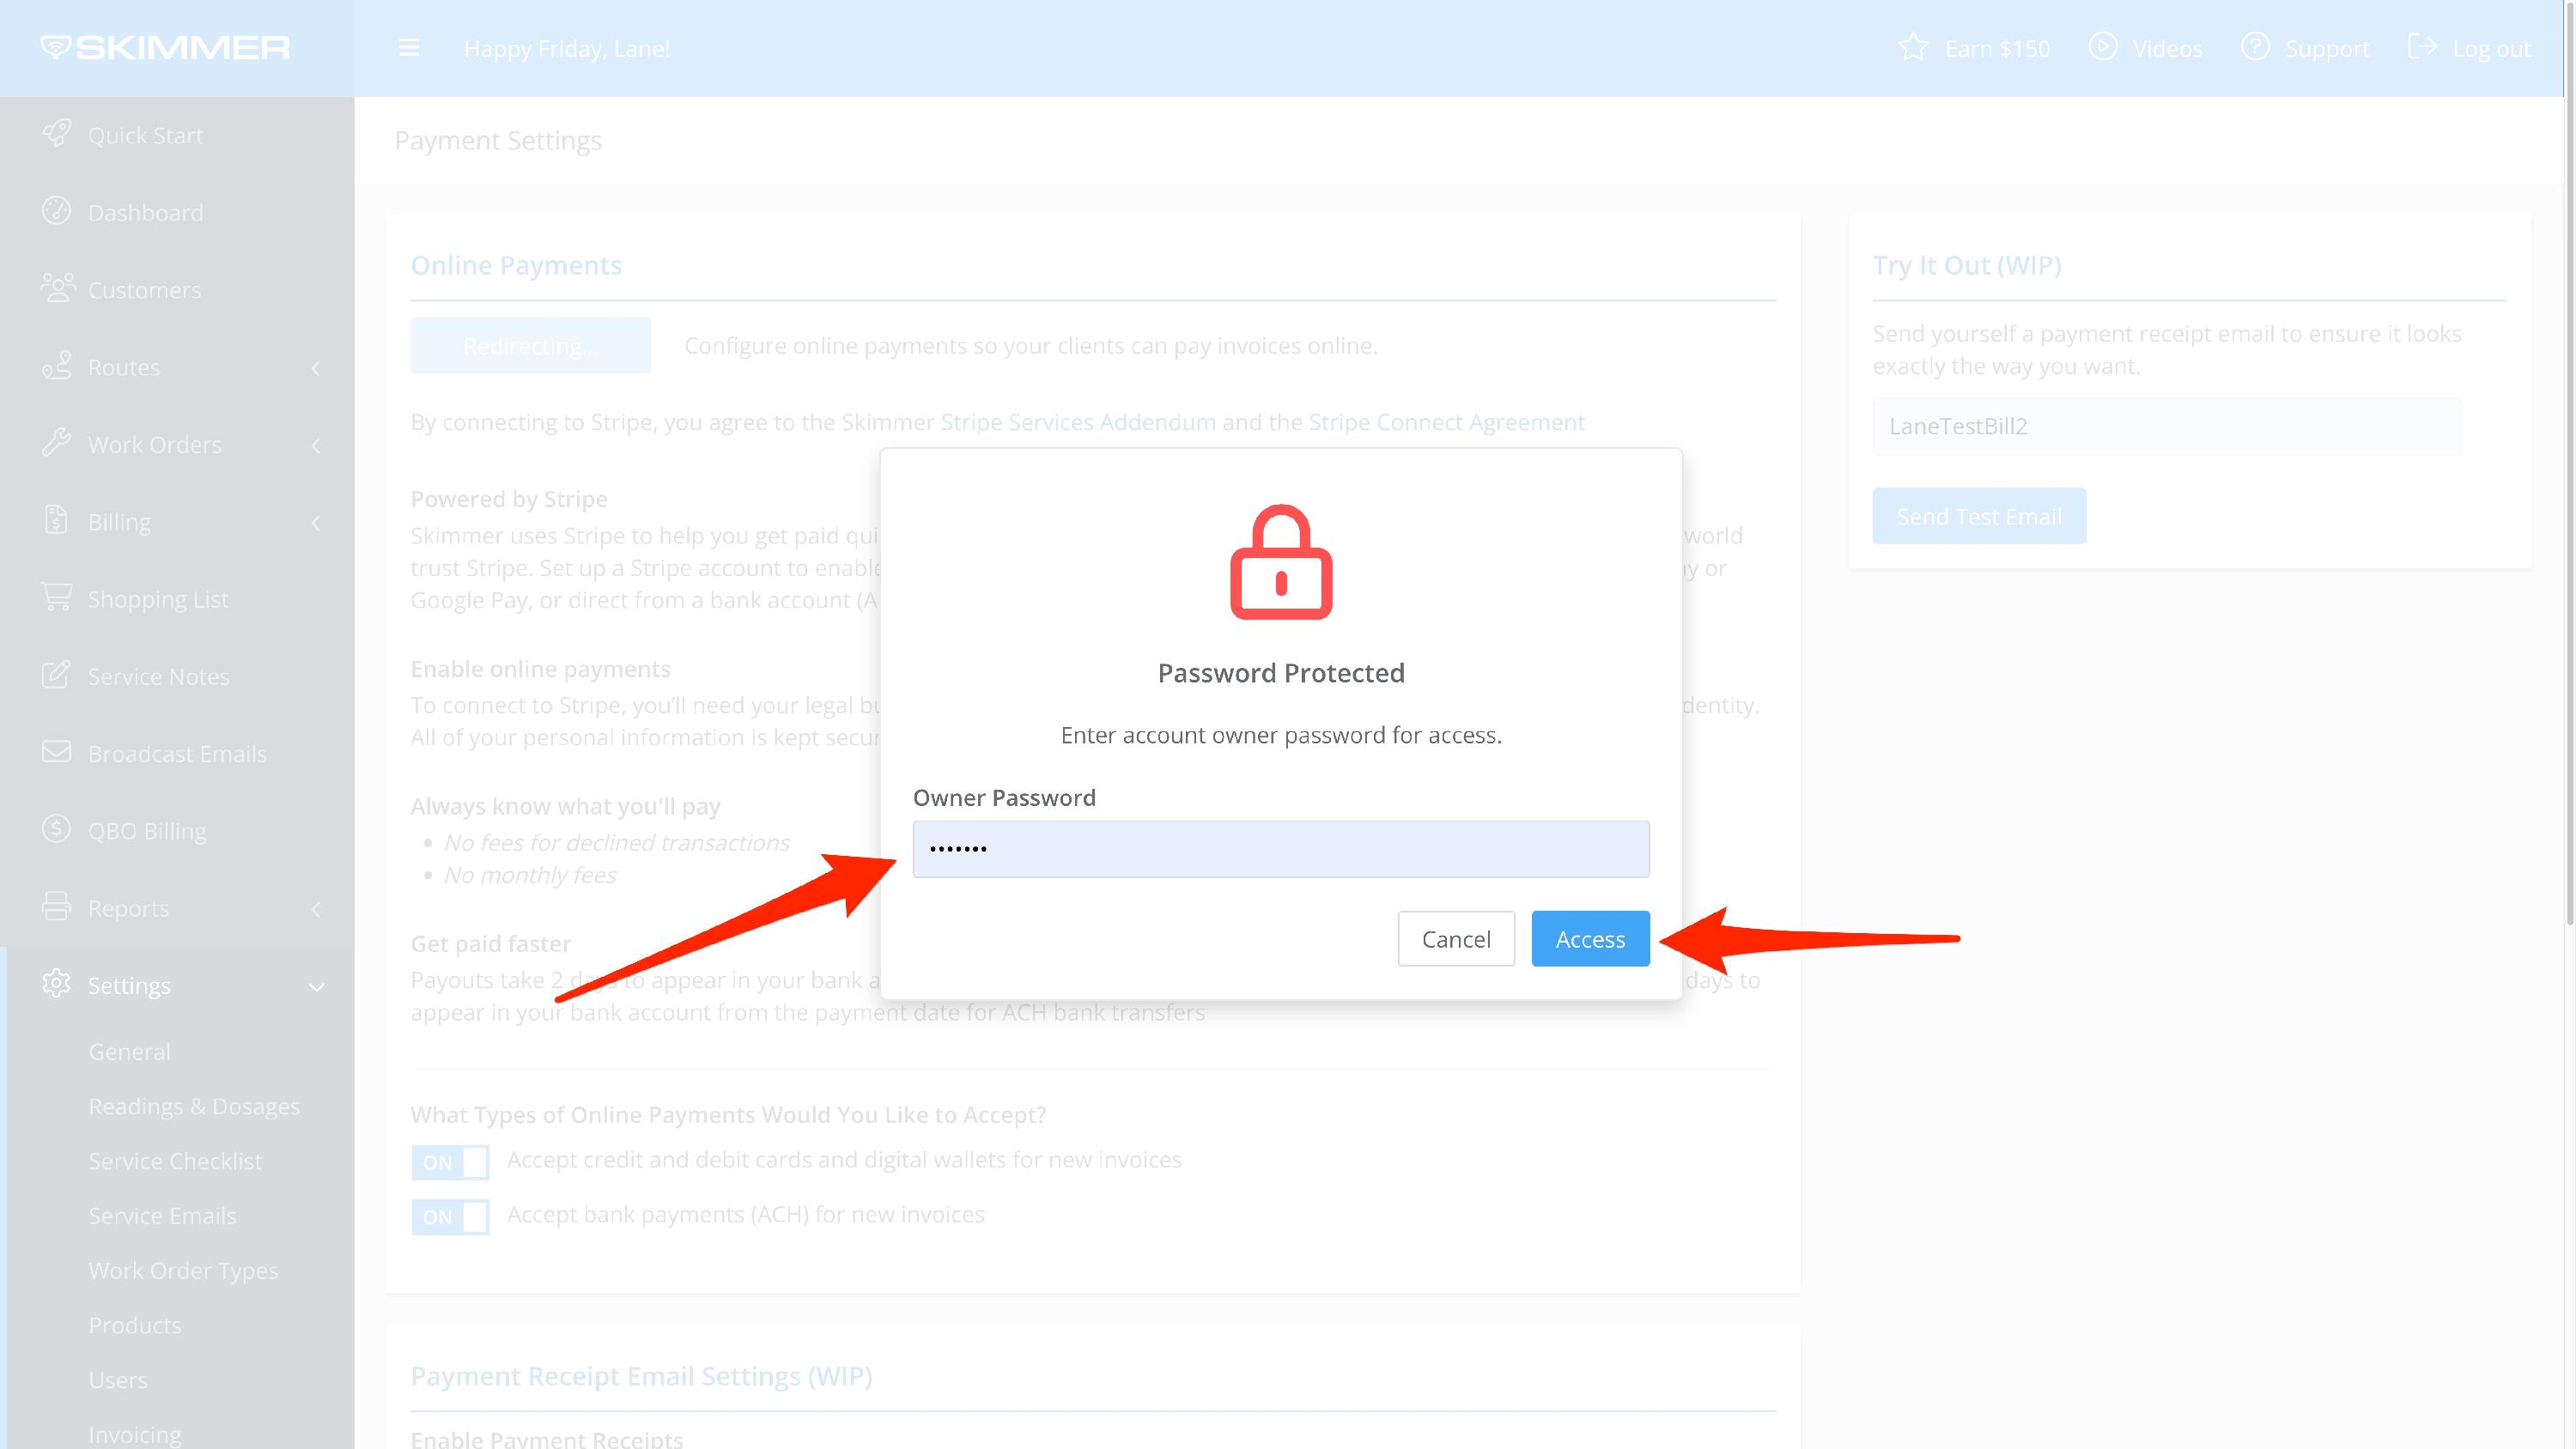
- On Skimmer's website, navigate to Settings and then Payments. If you have not connected to Stripe through Skimmer before, you will see a blue “Set Up Payments” button near the top of the screen. Start by clicking this button.
- 2
- Enter the password that the owner uses to log into Skimmer.
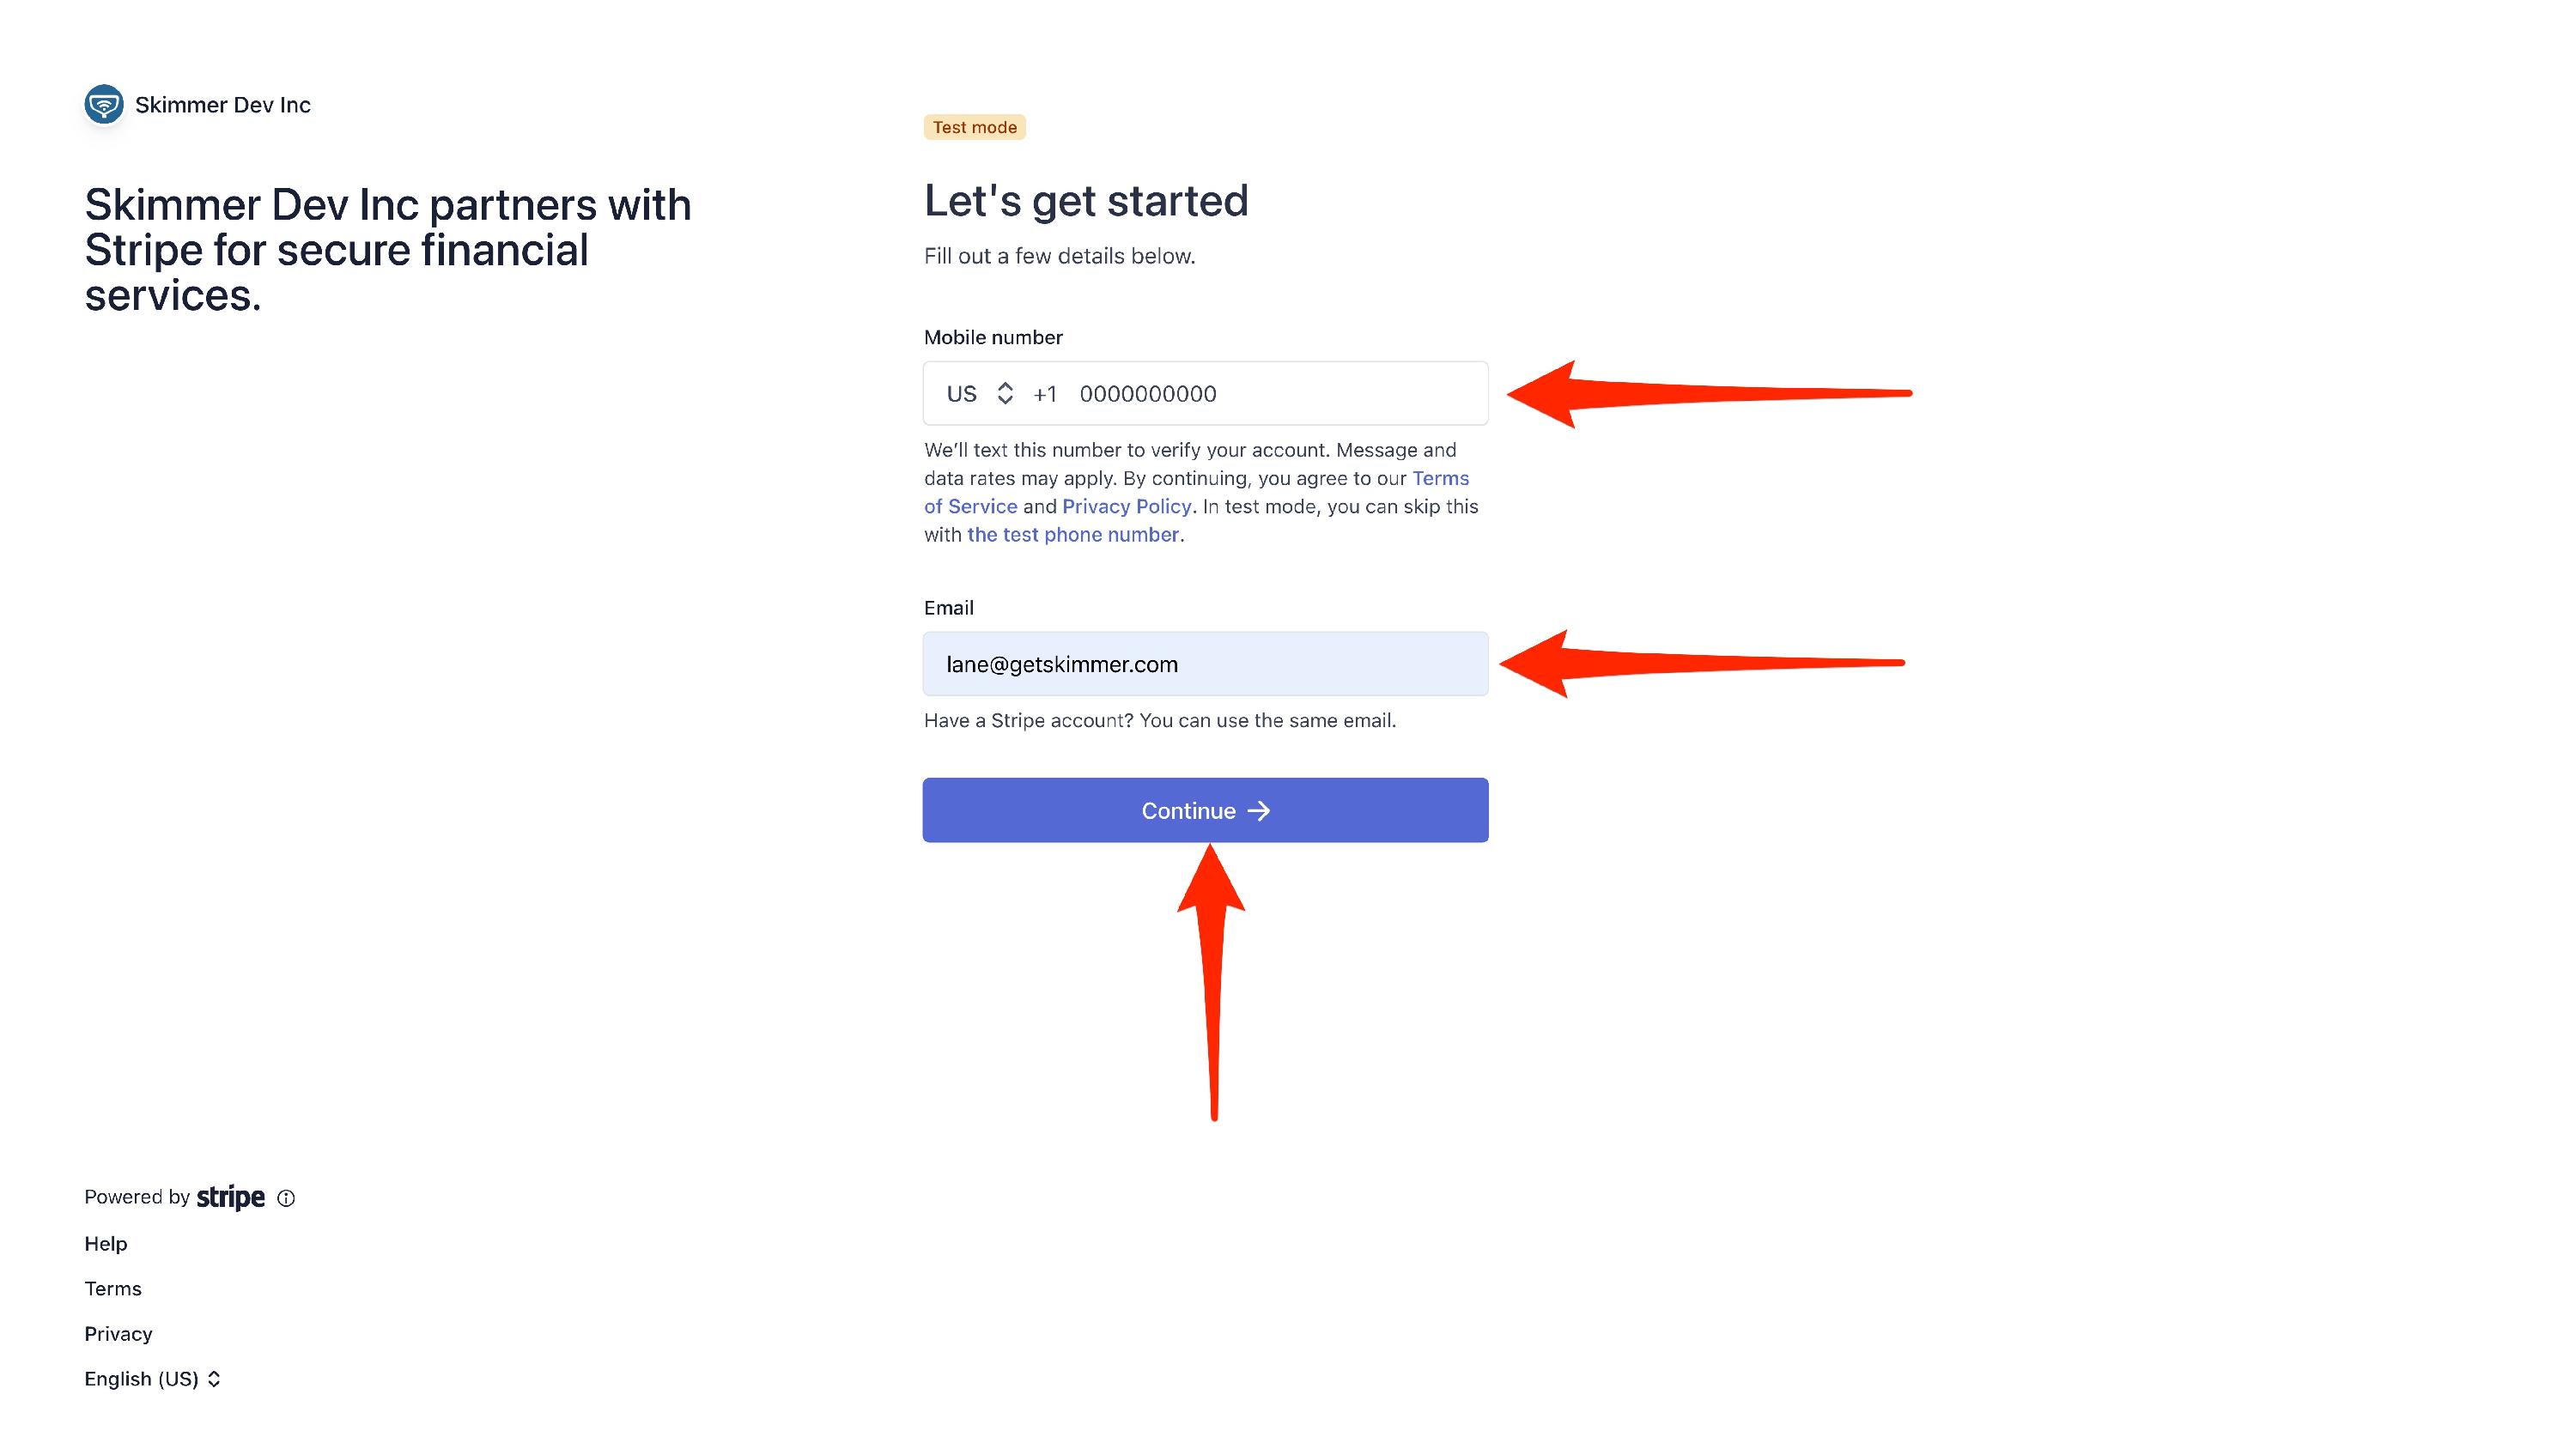
- 3
- Enter your phone number and email address. A test code will be sent to the phone number that was provided in the next step.
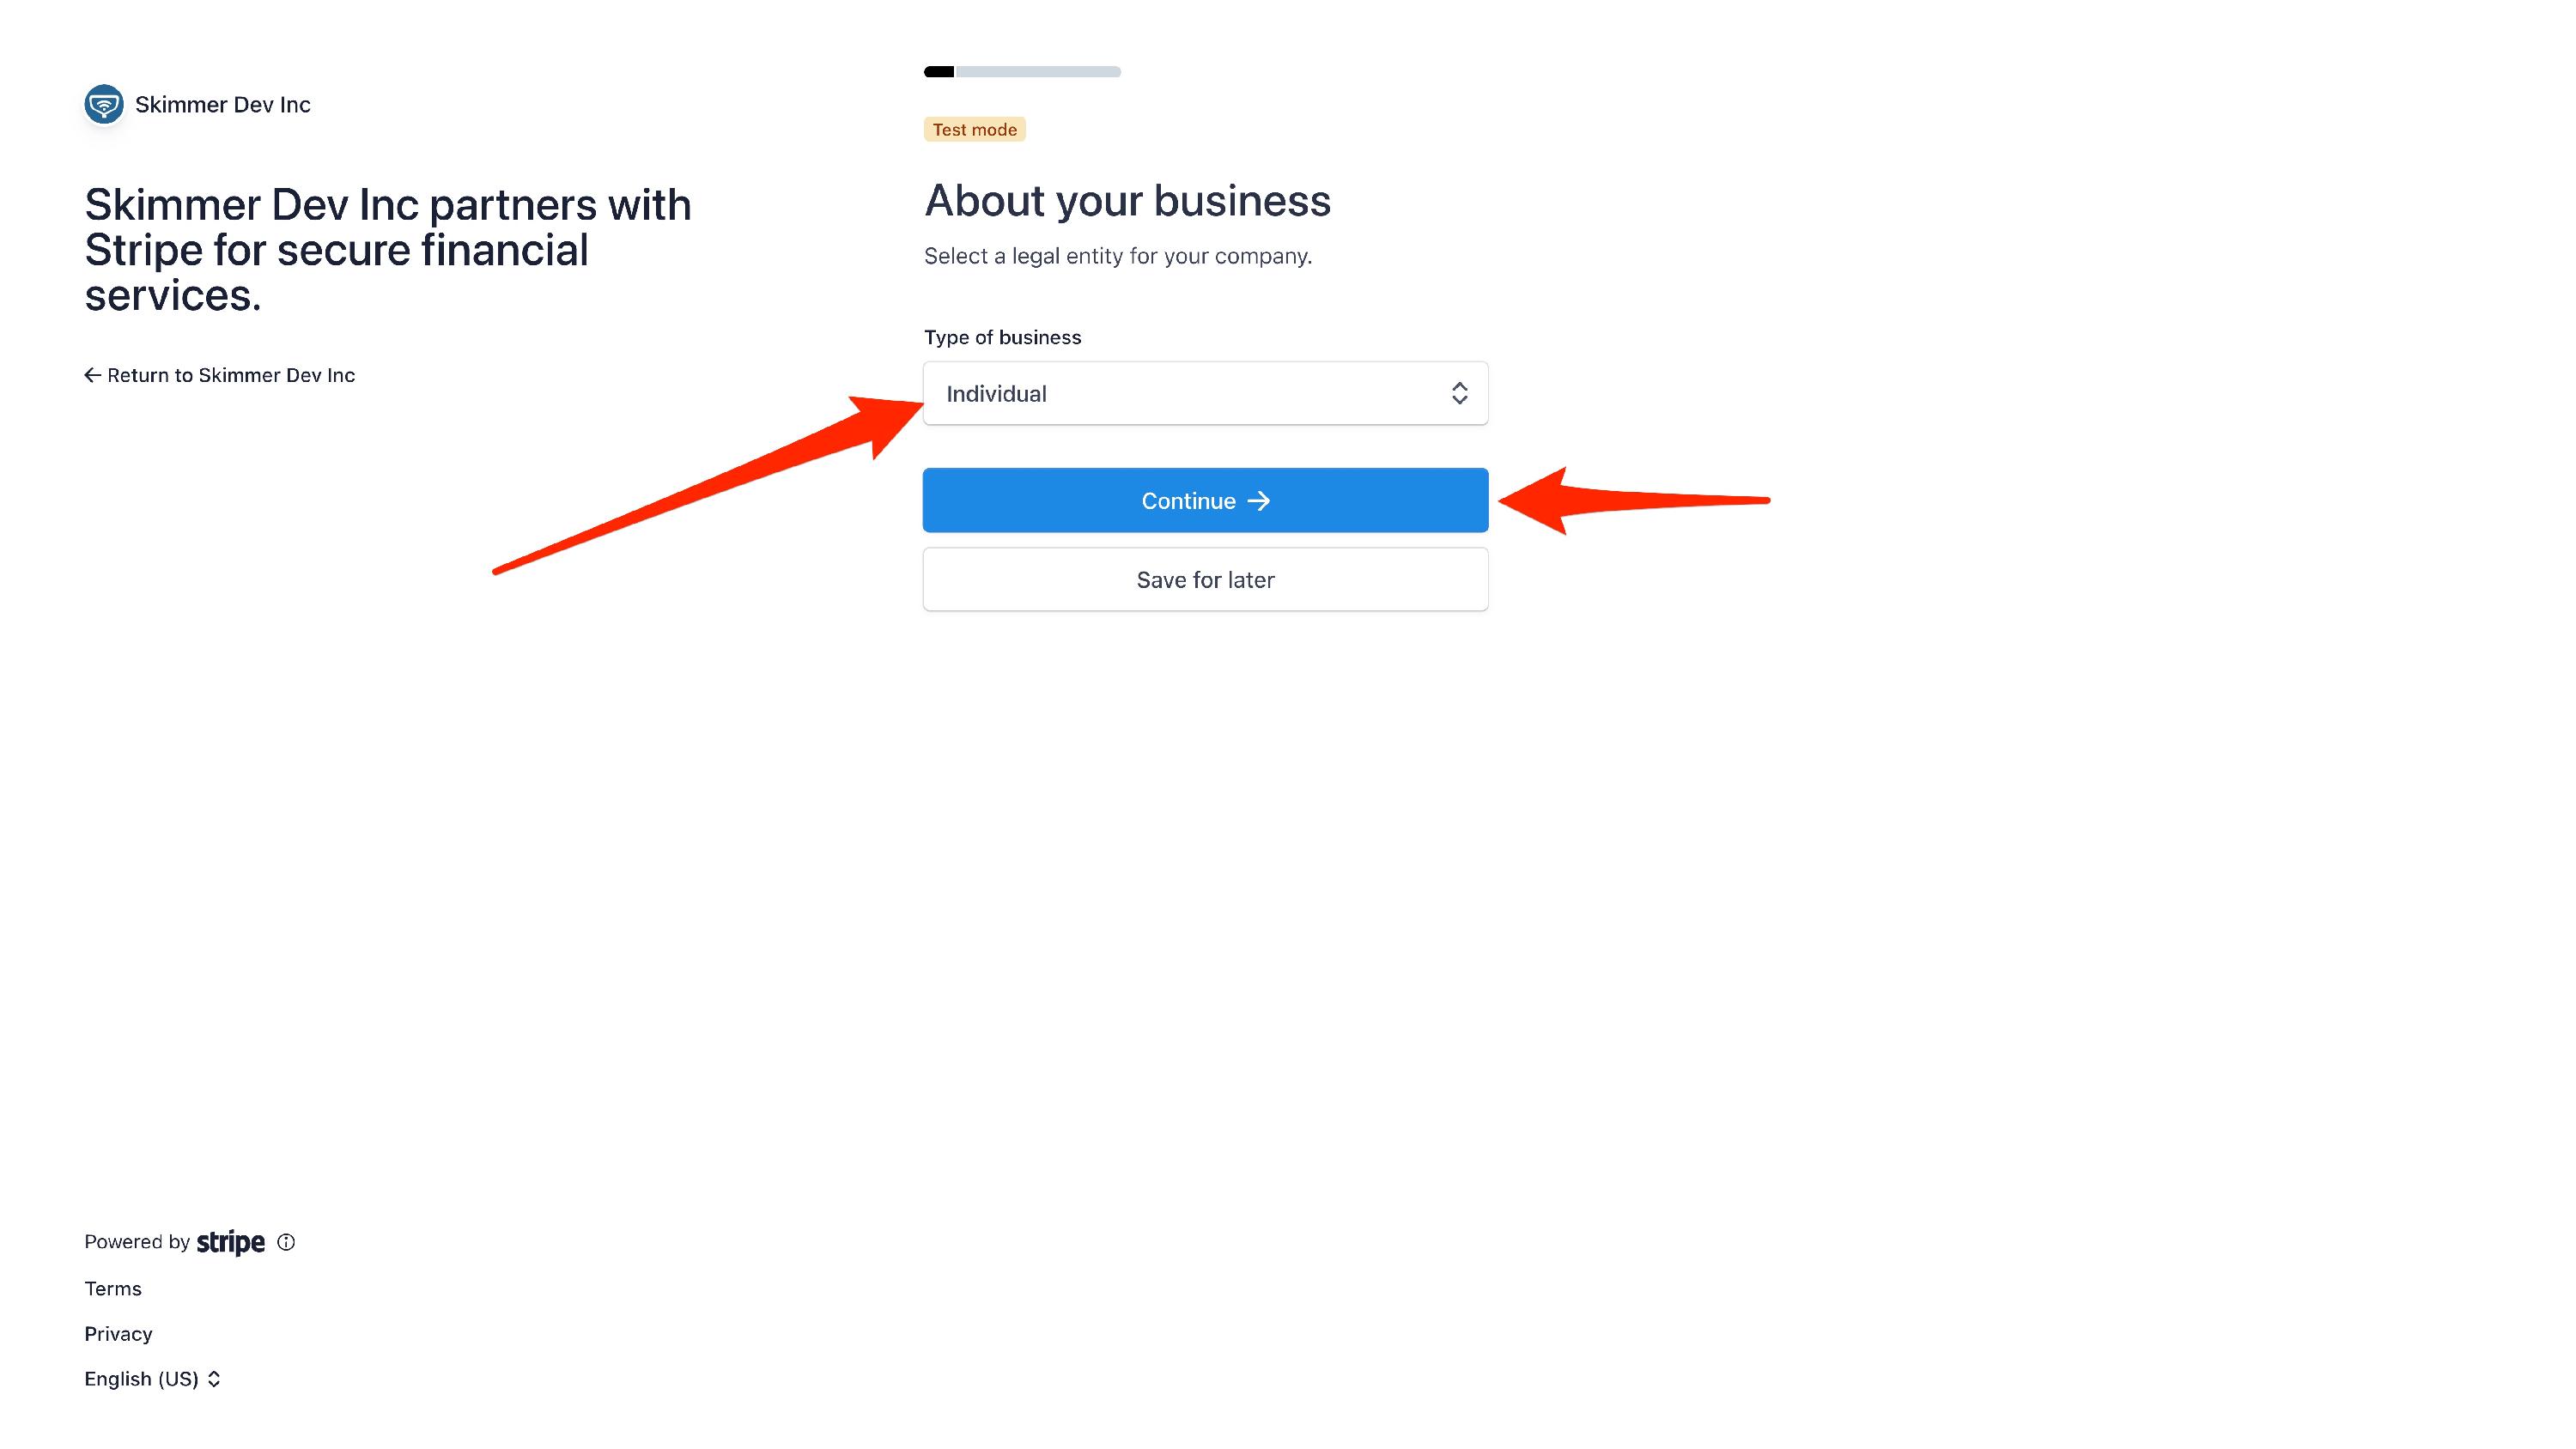
- 4
- Enter the code. Then answer the questions about your business. Then verify personal details, or "edit" personal details if you're returning to these screens later.

- 5
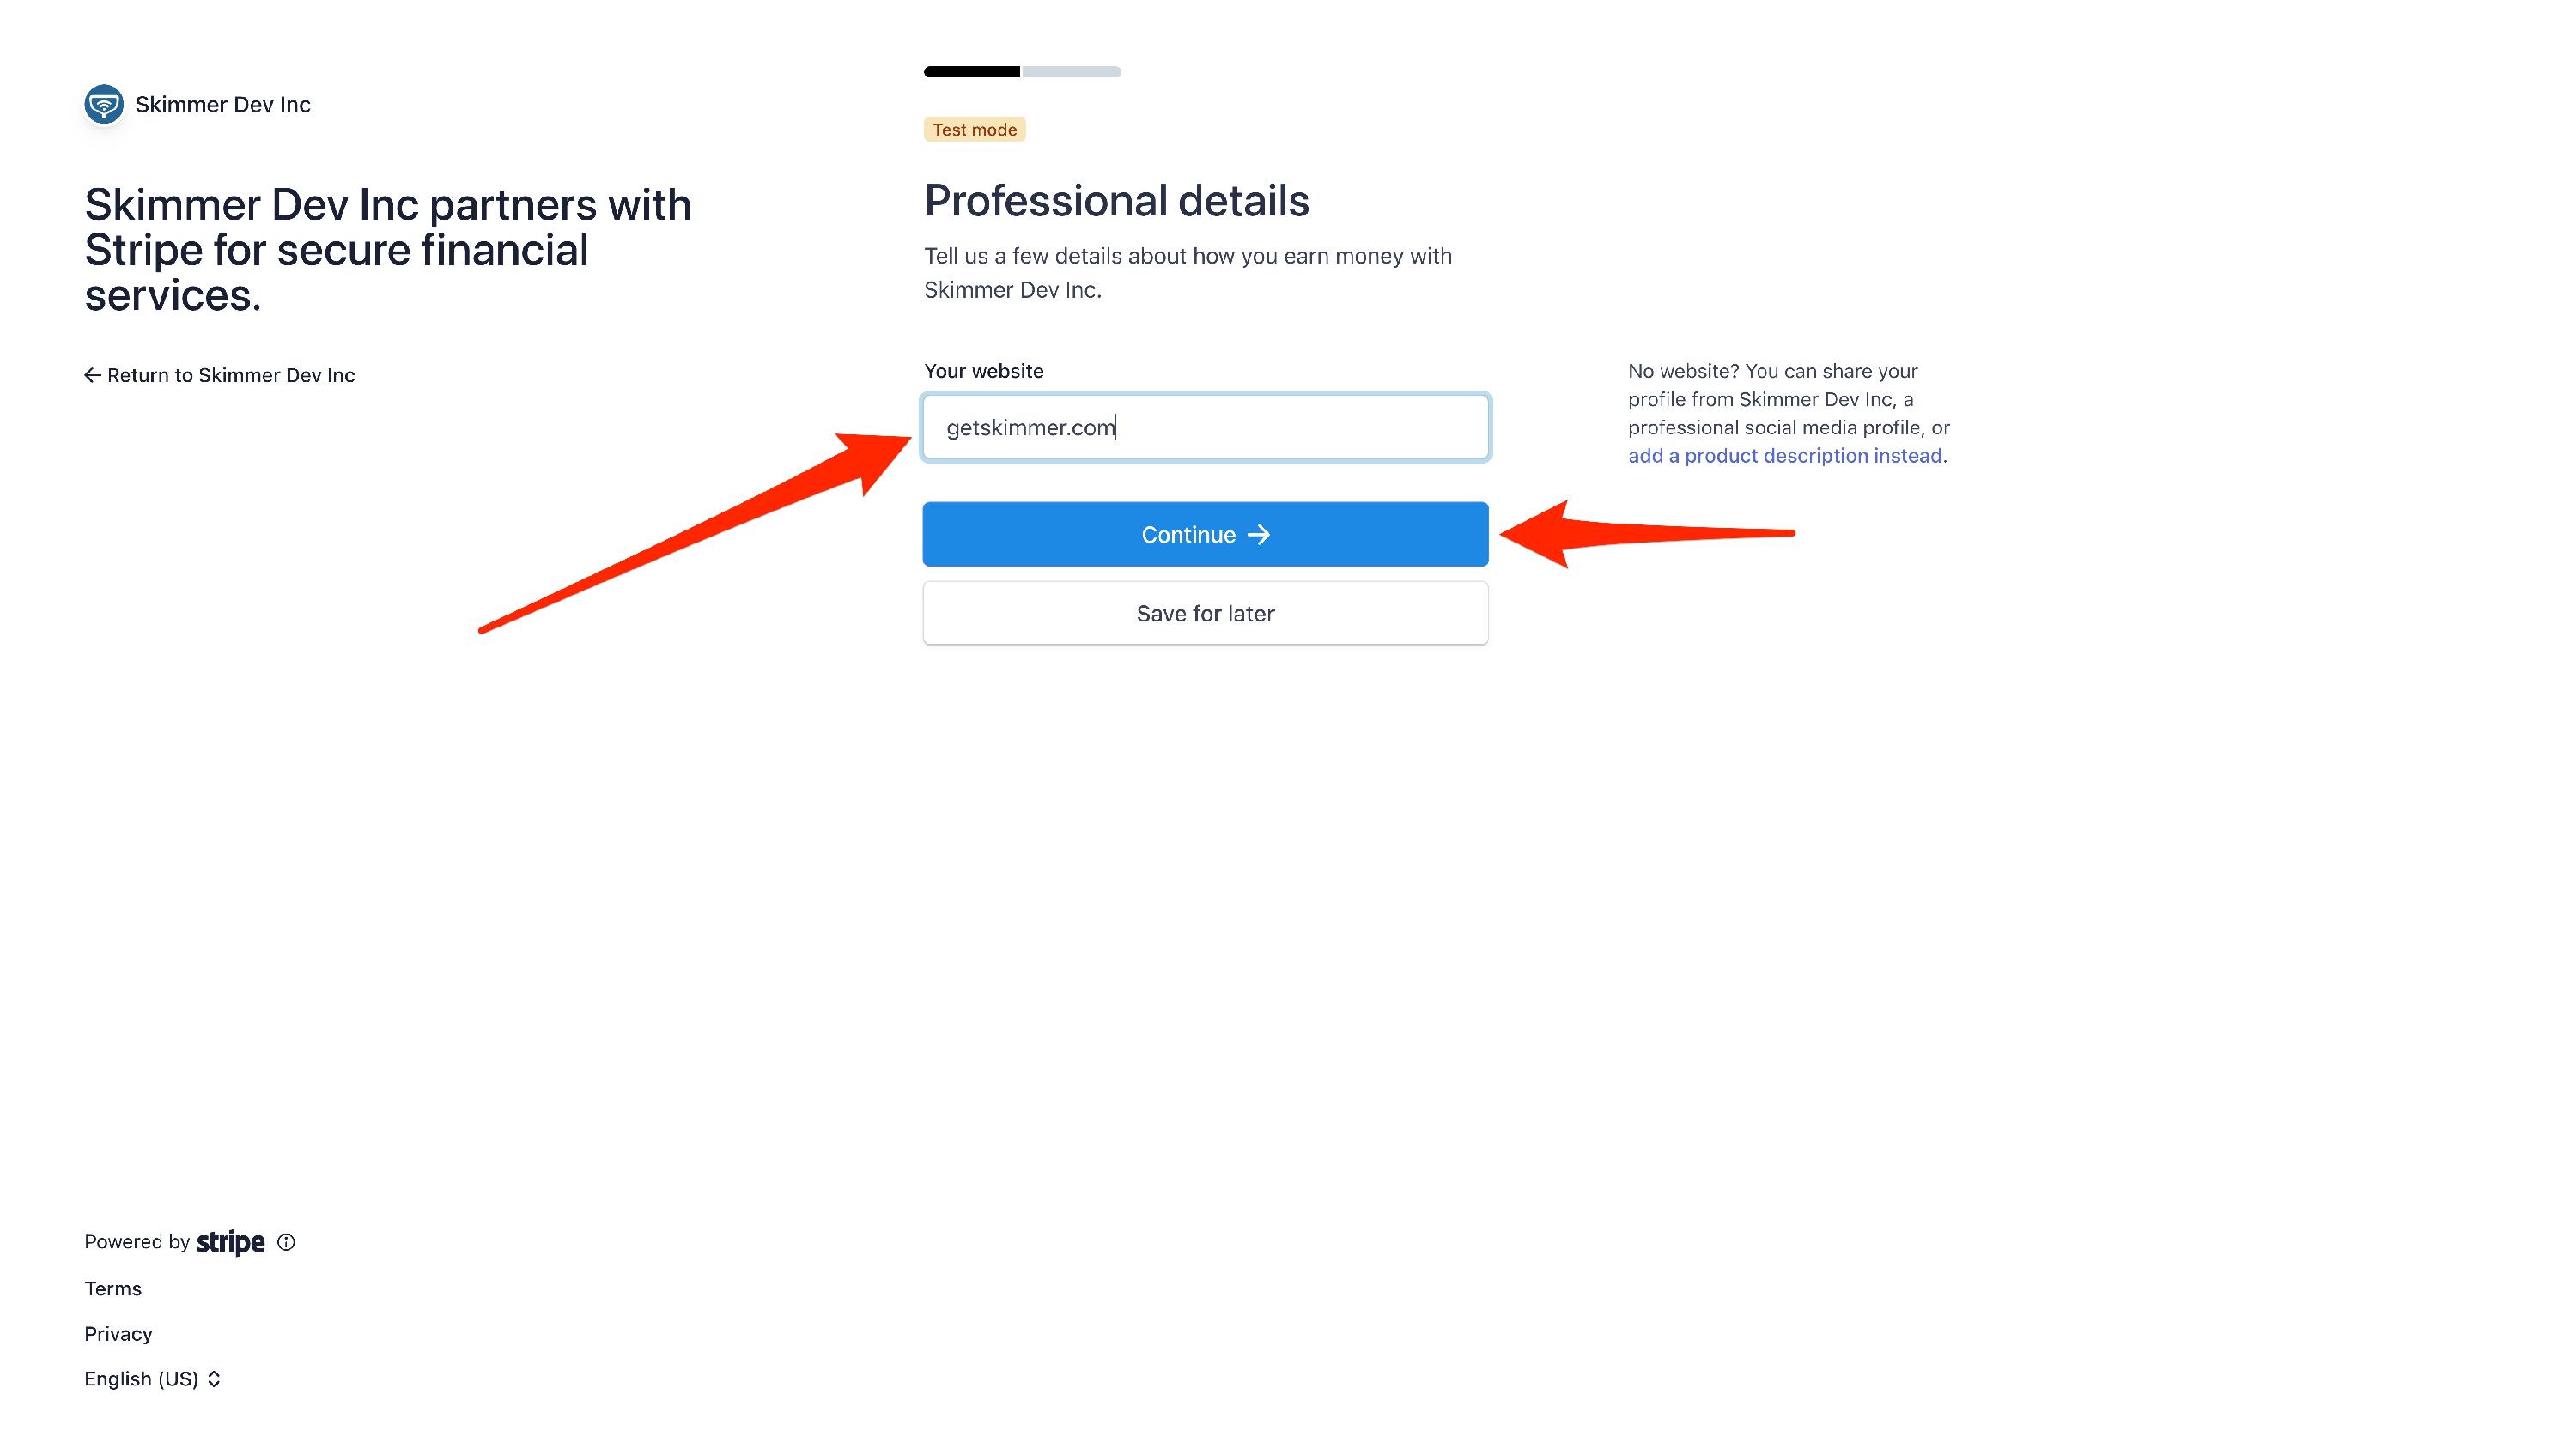
- Enter the website for your business. If you do not have a website, you can link to a social media profile or provide a description of your business.
- 6
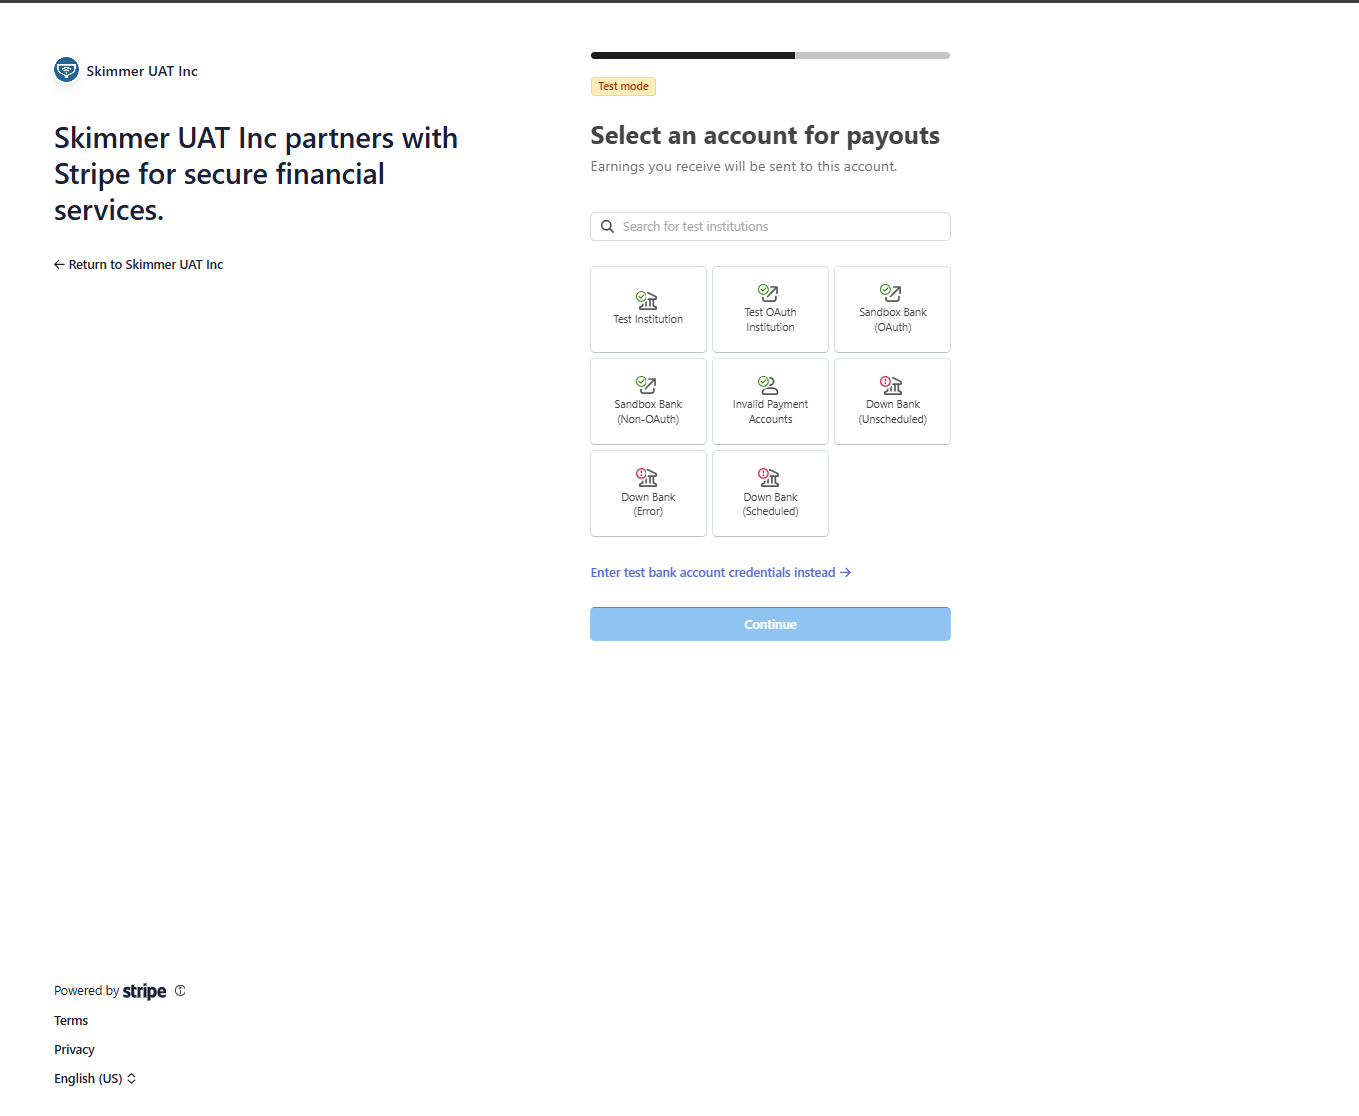
- Enter the bank account information for the account in which you’d like to receive payments (this can be changed later if your payment details change). Then enter public details that will be customer-facing.
- 7
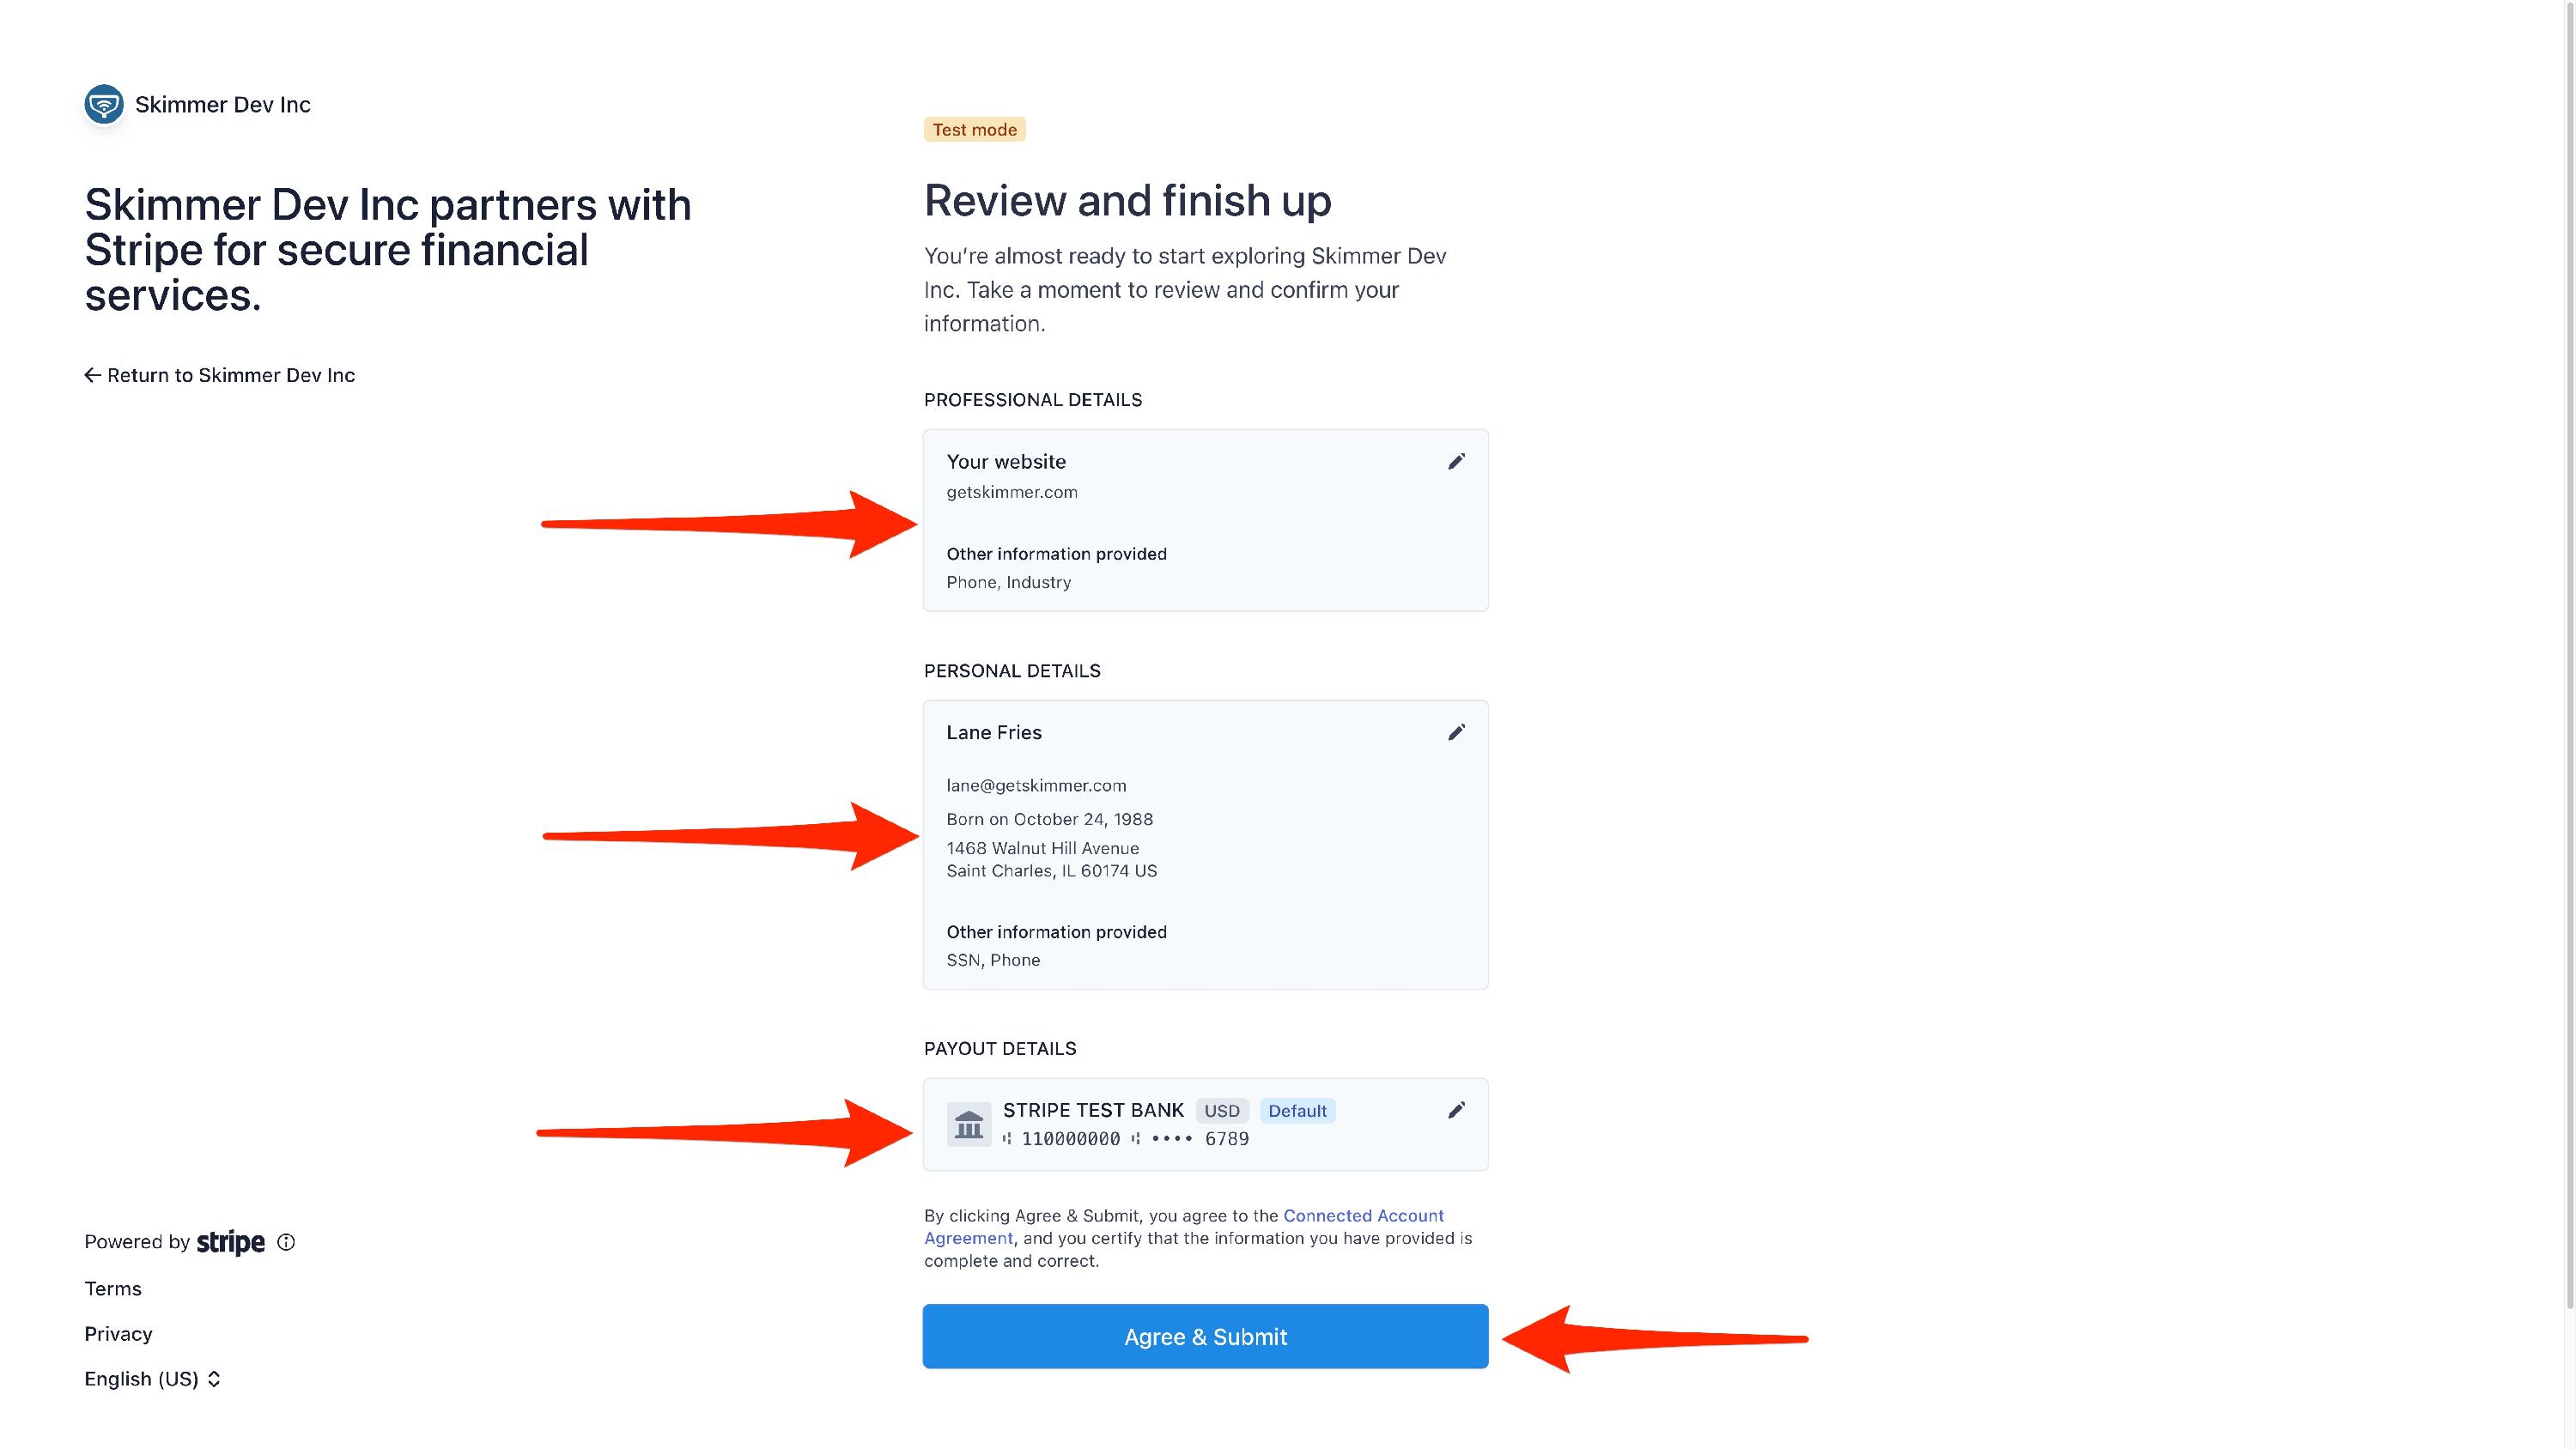
- Confirm that the details you entered are correct, then click Agree & Submit.
-
- 8
-
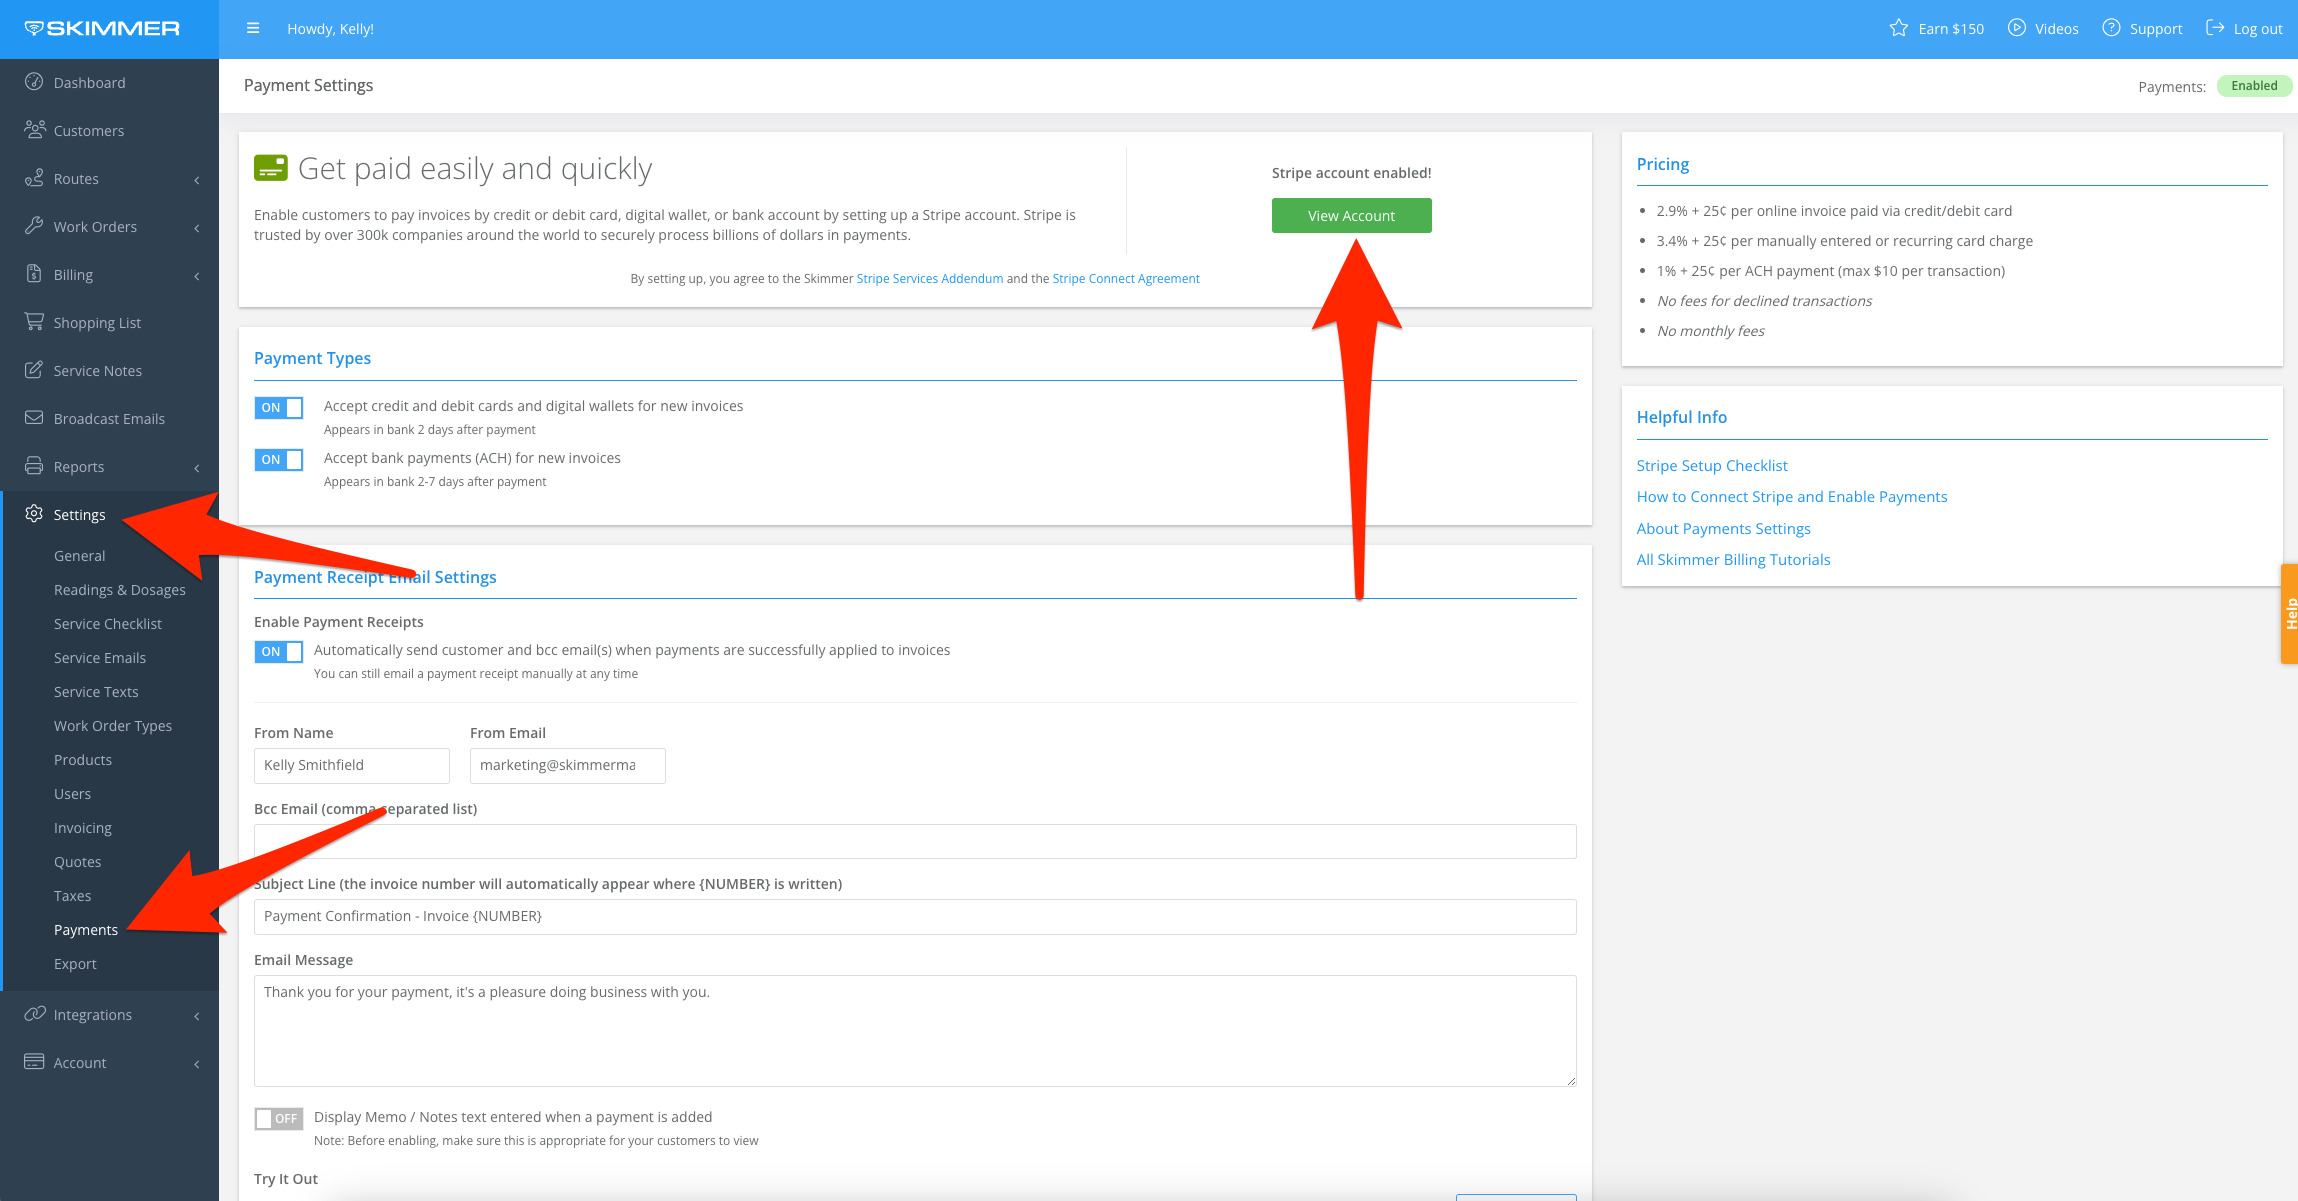
Stripe setup is now complete. You will be redirected back to Skimmer. In most cases, the Stripe account will be ready to process in just a few moments, however, some accounts may take up to 2 days to be approved. The status of your Stripe application will be shown on this page. Prior to seeing “Enabled” you should see a status of “Pending.” Once you see “Enabled” (as pictured below) you’re ready to go! If you ever need to edit your Stripe account details (such as your Bank Account), come back to this page and click on the “Enabled” button.
Why Does the Status Message Say: In Progress, Update Required, Restricted, or Disabled?
In Progress: You did not complete all of the required steps to setup your Stripe account. Click the button to continue.
Update Required: Some of the information you provided needs to be updated. Click the button to provide updates.
Restricted: Your Stripe account has been restricted because additional information is required. Click the button to provide updates.
Disabled: Your account has been disabled. Please contact Skimmer.

- 9
-
Once the Stripe connection is Enabled, see this tutorial for instructions on configuring your payment settings.
Then follow this link to view Skimmer Billing tutorials and learn how to configure your invoice and tax settings, as well as how to generate and manage invoices.