QuickBooks Online – Set Up Your Connection
To learn how to connect your Skimmer account to you QBO account and begin utilizing our data integration for billing information, see the video below. Or, if you prefer, scroll past the video to view our step-by-step text instructions.

Step-by-step instructions . . .
- 1
-
Skimmer lets you sync billing, customer, and product data to QuickBooks Online automatically. To set up your connection to QBO, go to Integrations and then choose QuickBooks Online. You will need to have admin rights in QBO. Once there, connect your Skimmer account to QBO and initiate the sync. Click Connect to QBO when ready. If you already connected Skimmer to QBO with the older version of this integration, you may not need to reconnect here. If you still need to, you’ll see this Connect to QBO button.
Confirm the QBO account you’re connecting through, and then you’ll be redirected back to Skimmer.
-

-

- 2
-
The sync is not active. We’ve only established the connection between Skimmer and QBO. The next step is to make sure customer and product information matches in both systems. If there are customers in QBO that aren’t in Skimmer, click to import them. The same goes for products.
Make sure customer names match in both systems. If you have a customer listed as The Smiths in QBO, but John and Jane Smith in Skimmer, edit one or both to make sure they say the same thing. Be sure to review active and inactive customers in both systems. If a customer is listed as inactive in Skimmer, ensure they’re also inactive in QBO, and the same goes for active.

-

-

- 3
-
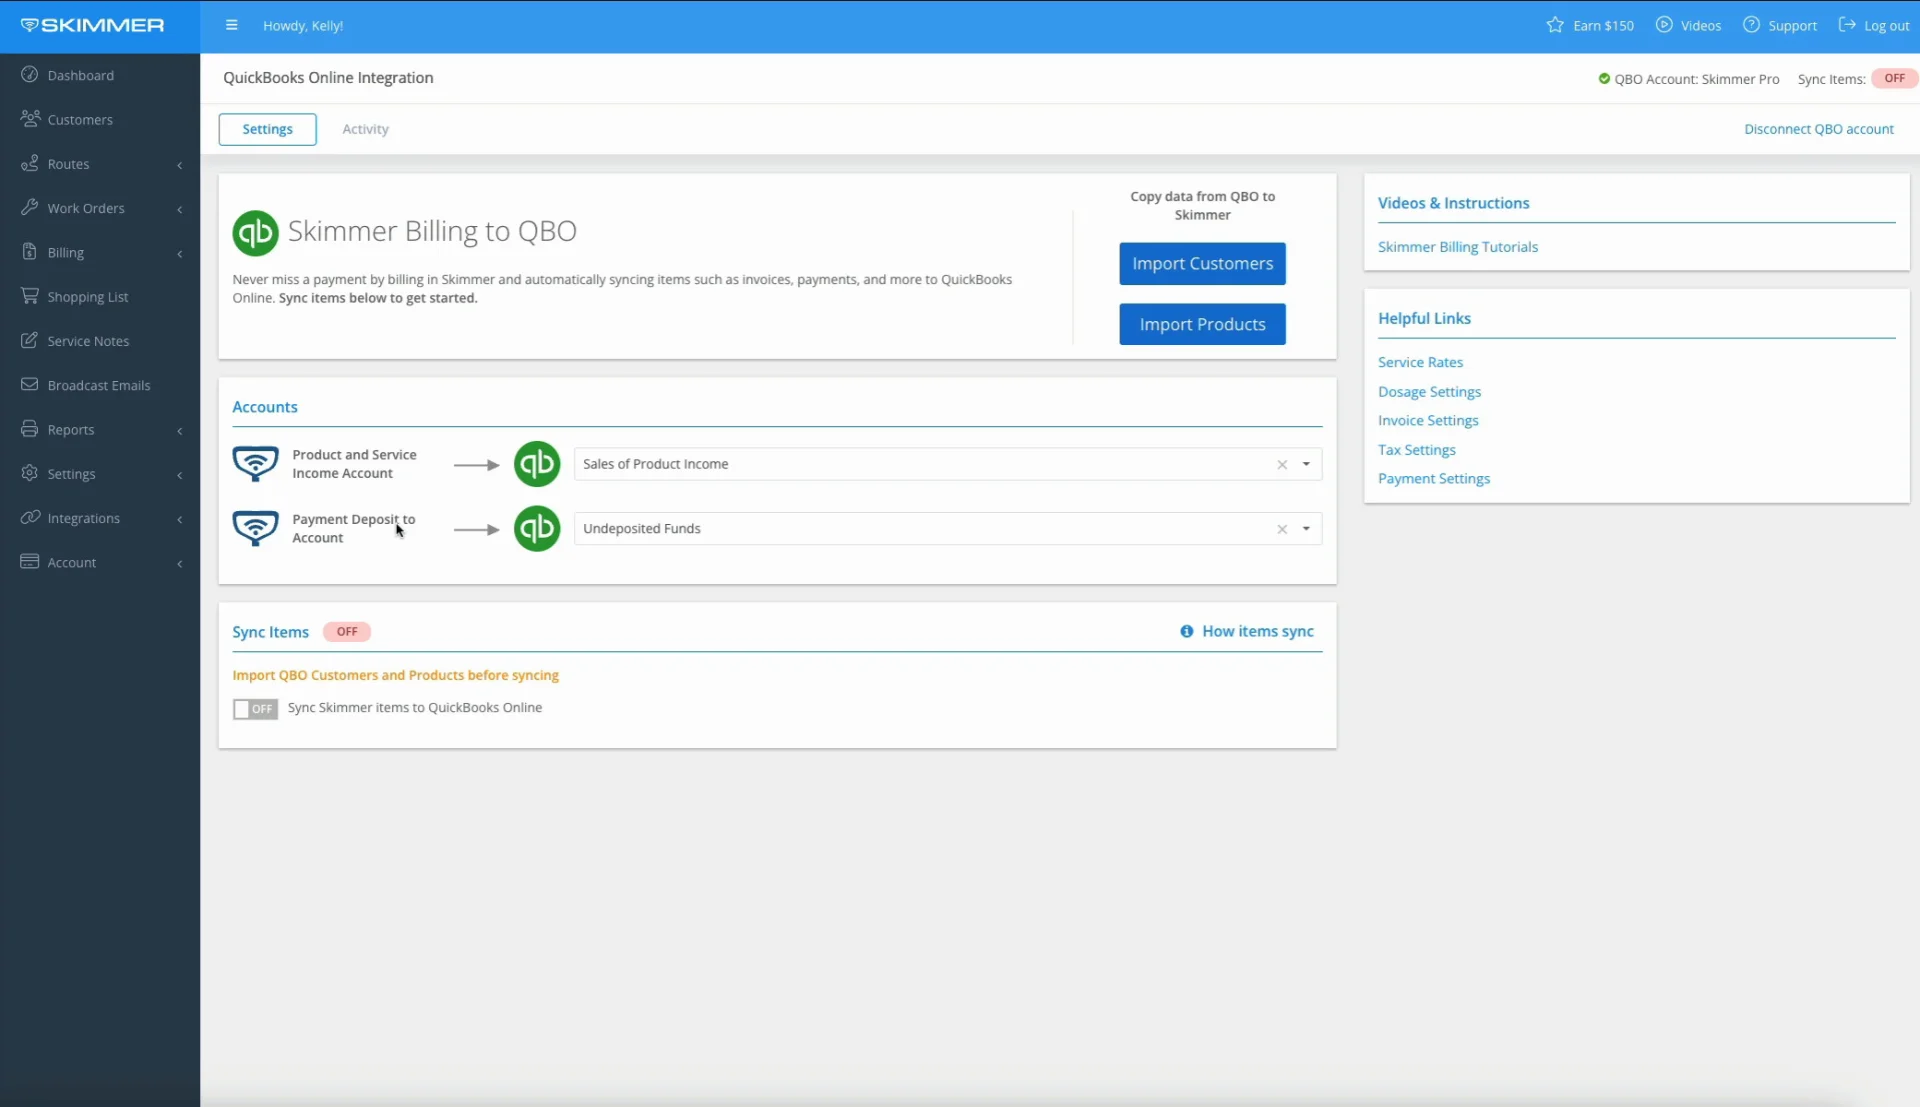
Once you have the connection and your data matches, Under Accounts, validate what’s listed in the dropdown boxes, which are populated by QBO. When a product or service is created in QBO, an Income Account must be chosen. With this integration, whenever you create a product in Skimmer, it will automatically sync to QBO and be created there. What you select in the first dropdown box determines which income account is assigned to those products.
What is Payment Deposit to Account? In QBO, when you collect a payment, that payment has to be deposited into an account. So the payment records Skimmer sends to QBO must also be associated with an account, and you’ll choose that here. Options in these dropdown lists come from what you have in QBO. When ready to initiate the sync, click the toggle box at the bottom.

- 4
-
When you toggle the sync ON, before it begins, you may get a pop-up alert that tells you Skimmer has noticed potential duplicates. You can resolve them now, or download the list of potential duplicates and look into them later, or depending how your info is organized you may have no problem with there being duplicates. Either way, Skimmer is just letting you know. Click Continue if and when ready.
If you have any credits applied to customer accounts in Skimmer, you may also get a pop-up alert for that. Again, it’s just letting you know so that you’re aware going forward with the sync.


- 5
-
Toggle the sync ON. You’ll get the Save & Sync pop-up, which just lets you know what’s about to happen between. When the sync is initiated, all of the customers, products, dosages, pool service, and work order types in Skimmer will be synced to QuickBooks Online, and will appear there as QBO Customers, Products, and Services.
Click Save & Sync, and the process will begin. Depending on how much information needs to be transferred, you may see the sync progress bar pause for up to a minute.

-

- 6
-
Once the initial sync is completed, you can check the Activity log, which will show actions performed during the sync. Now the systems are connected and the sync is live. Moving forward, Skimmer is the source of information for both systems. Data is created in Skimmer and flows to QBO, not the other way around.
The sync is always on. When new information is created in Skimmer, it will automatically copy over to QBO. If the connection to QBO is lost or interrupted, but the sync is still enabled, Skimmer will hold onto any data created during that disconnected time, and once the connection is reestablished, it will be sent to QBO and saved.

-

- 7
-
To continue and view the tutorial on syncing your data, click here.
- 8
-
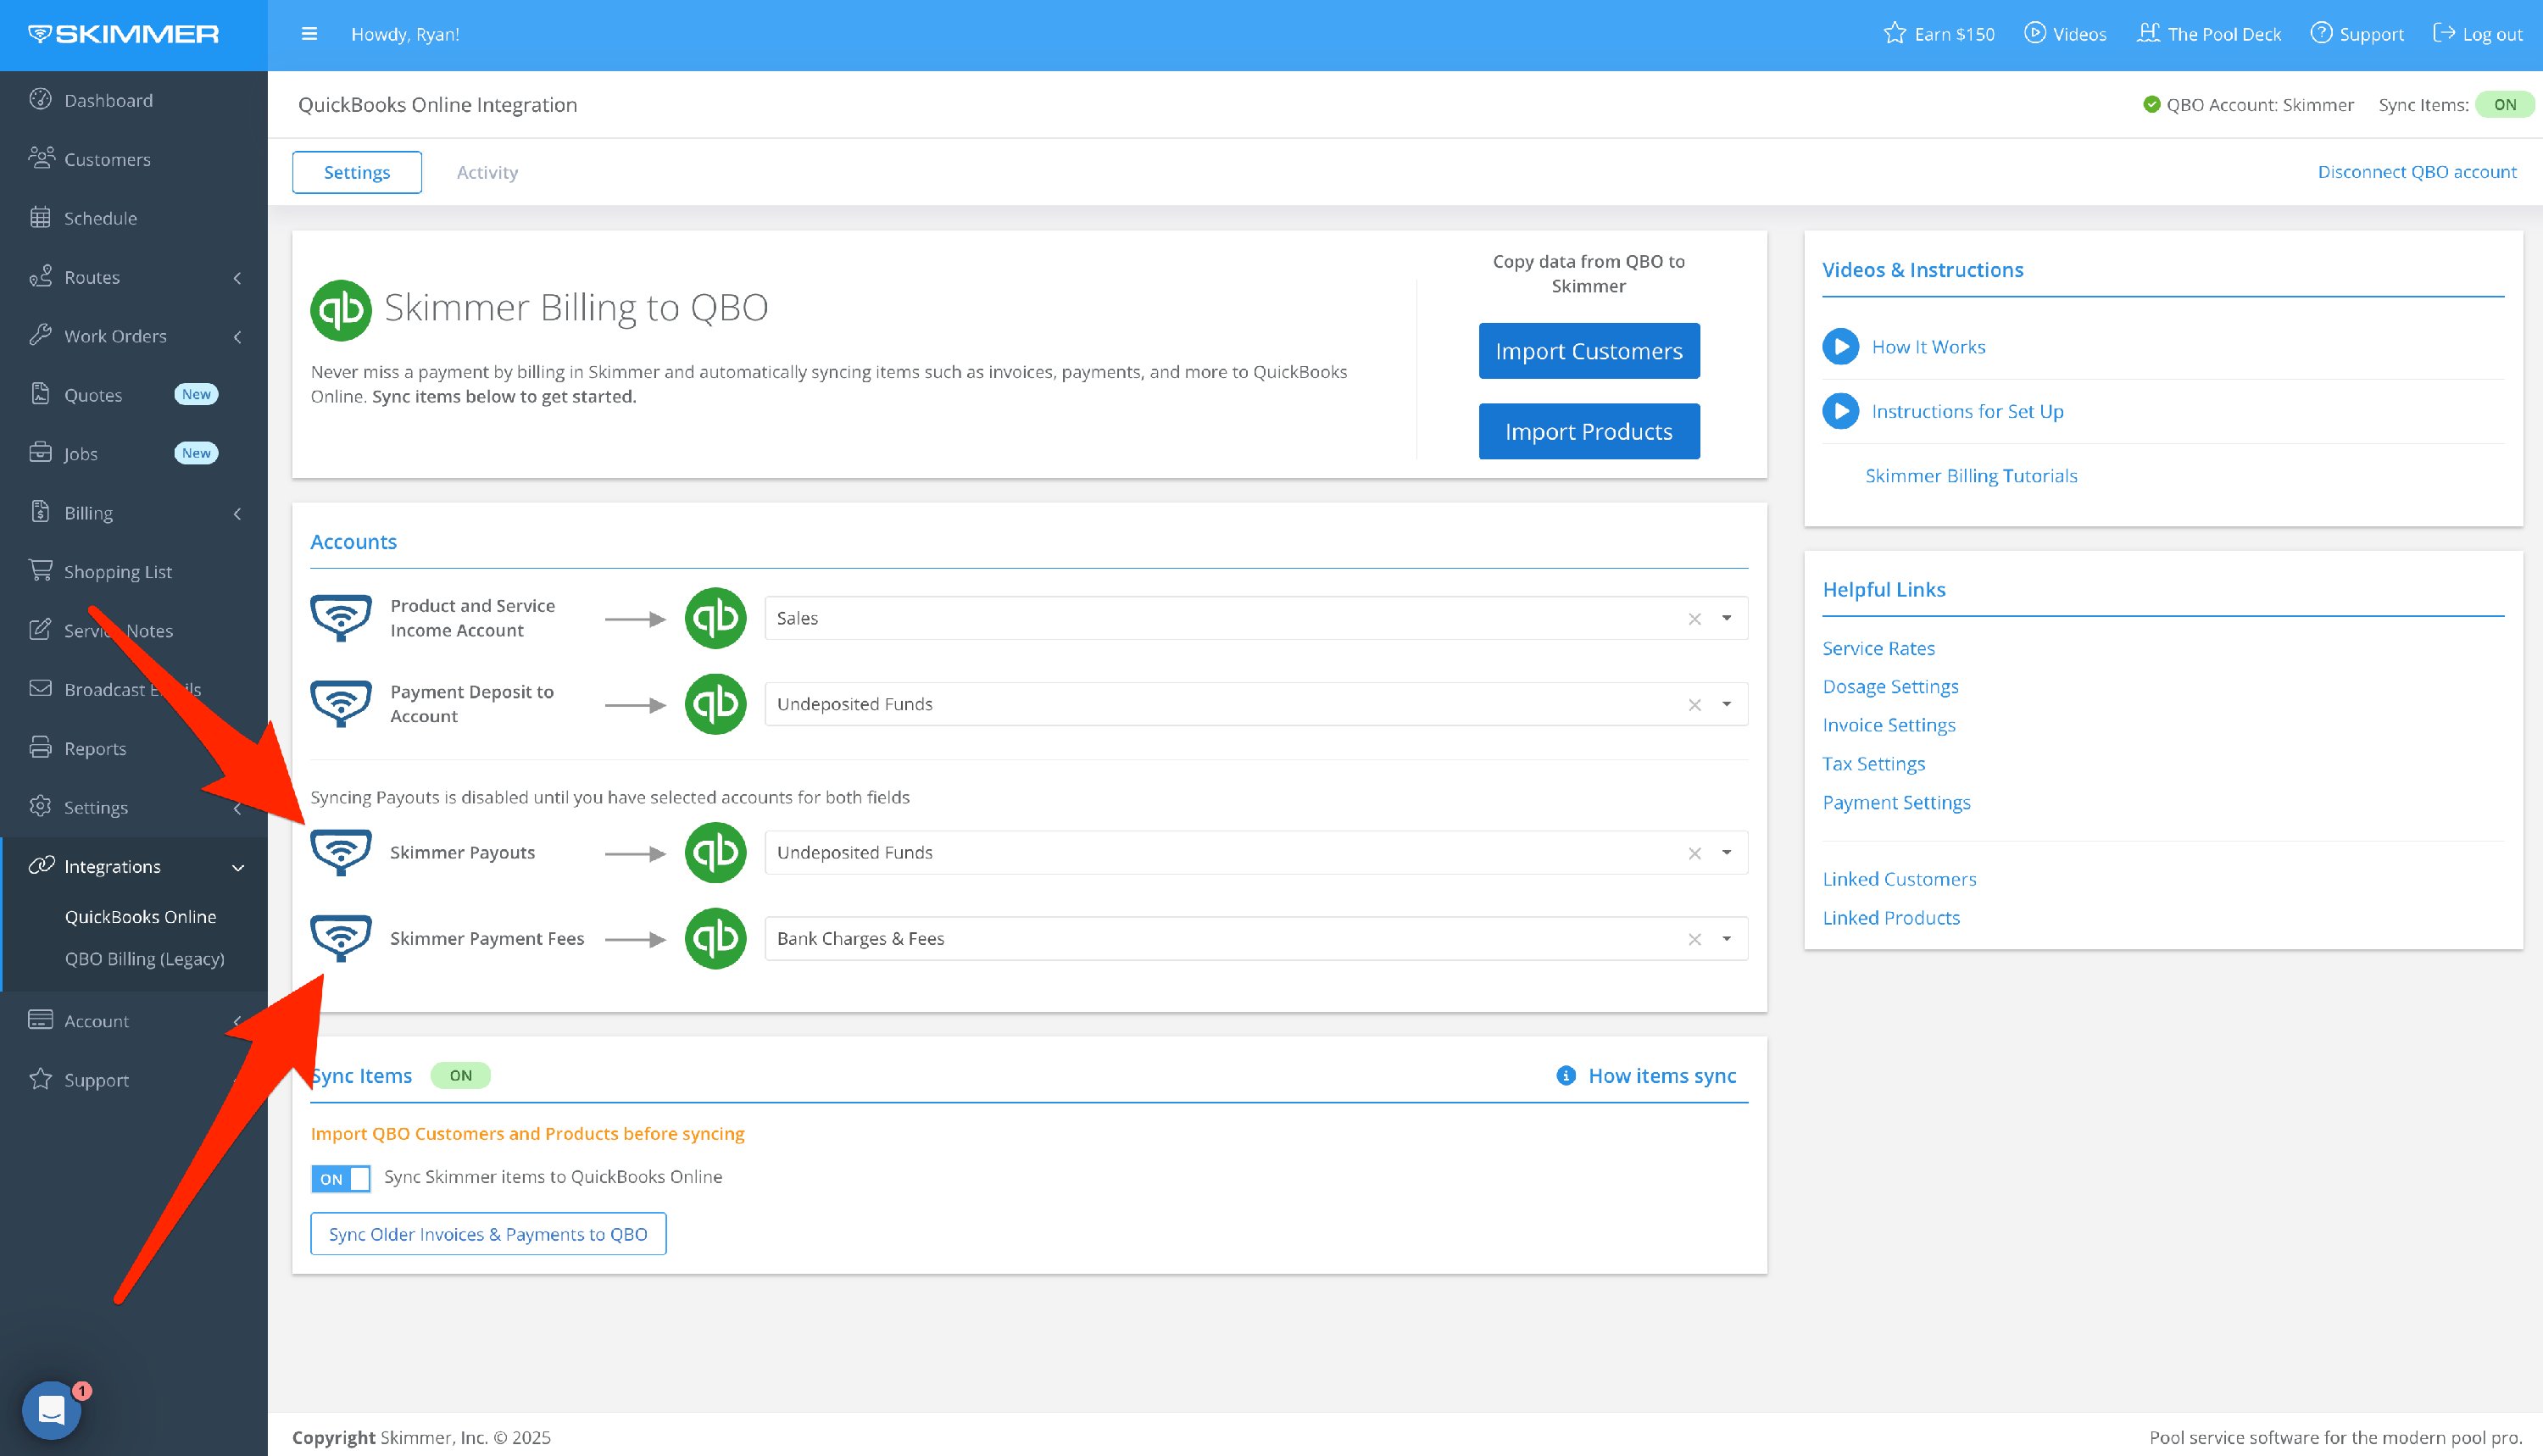
We’ve also added some new features over time. In addition to income account mapping, you can also map payout accounts, including one for payment fees.
- 9
-
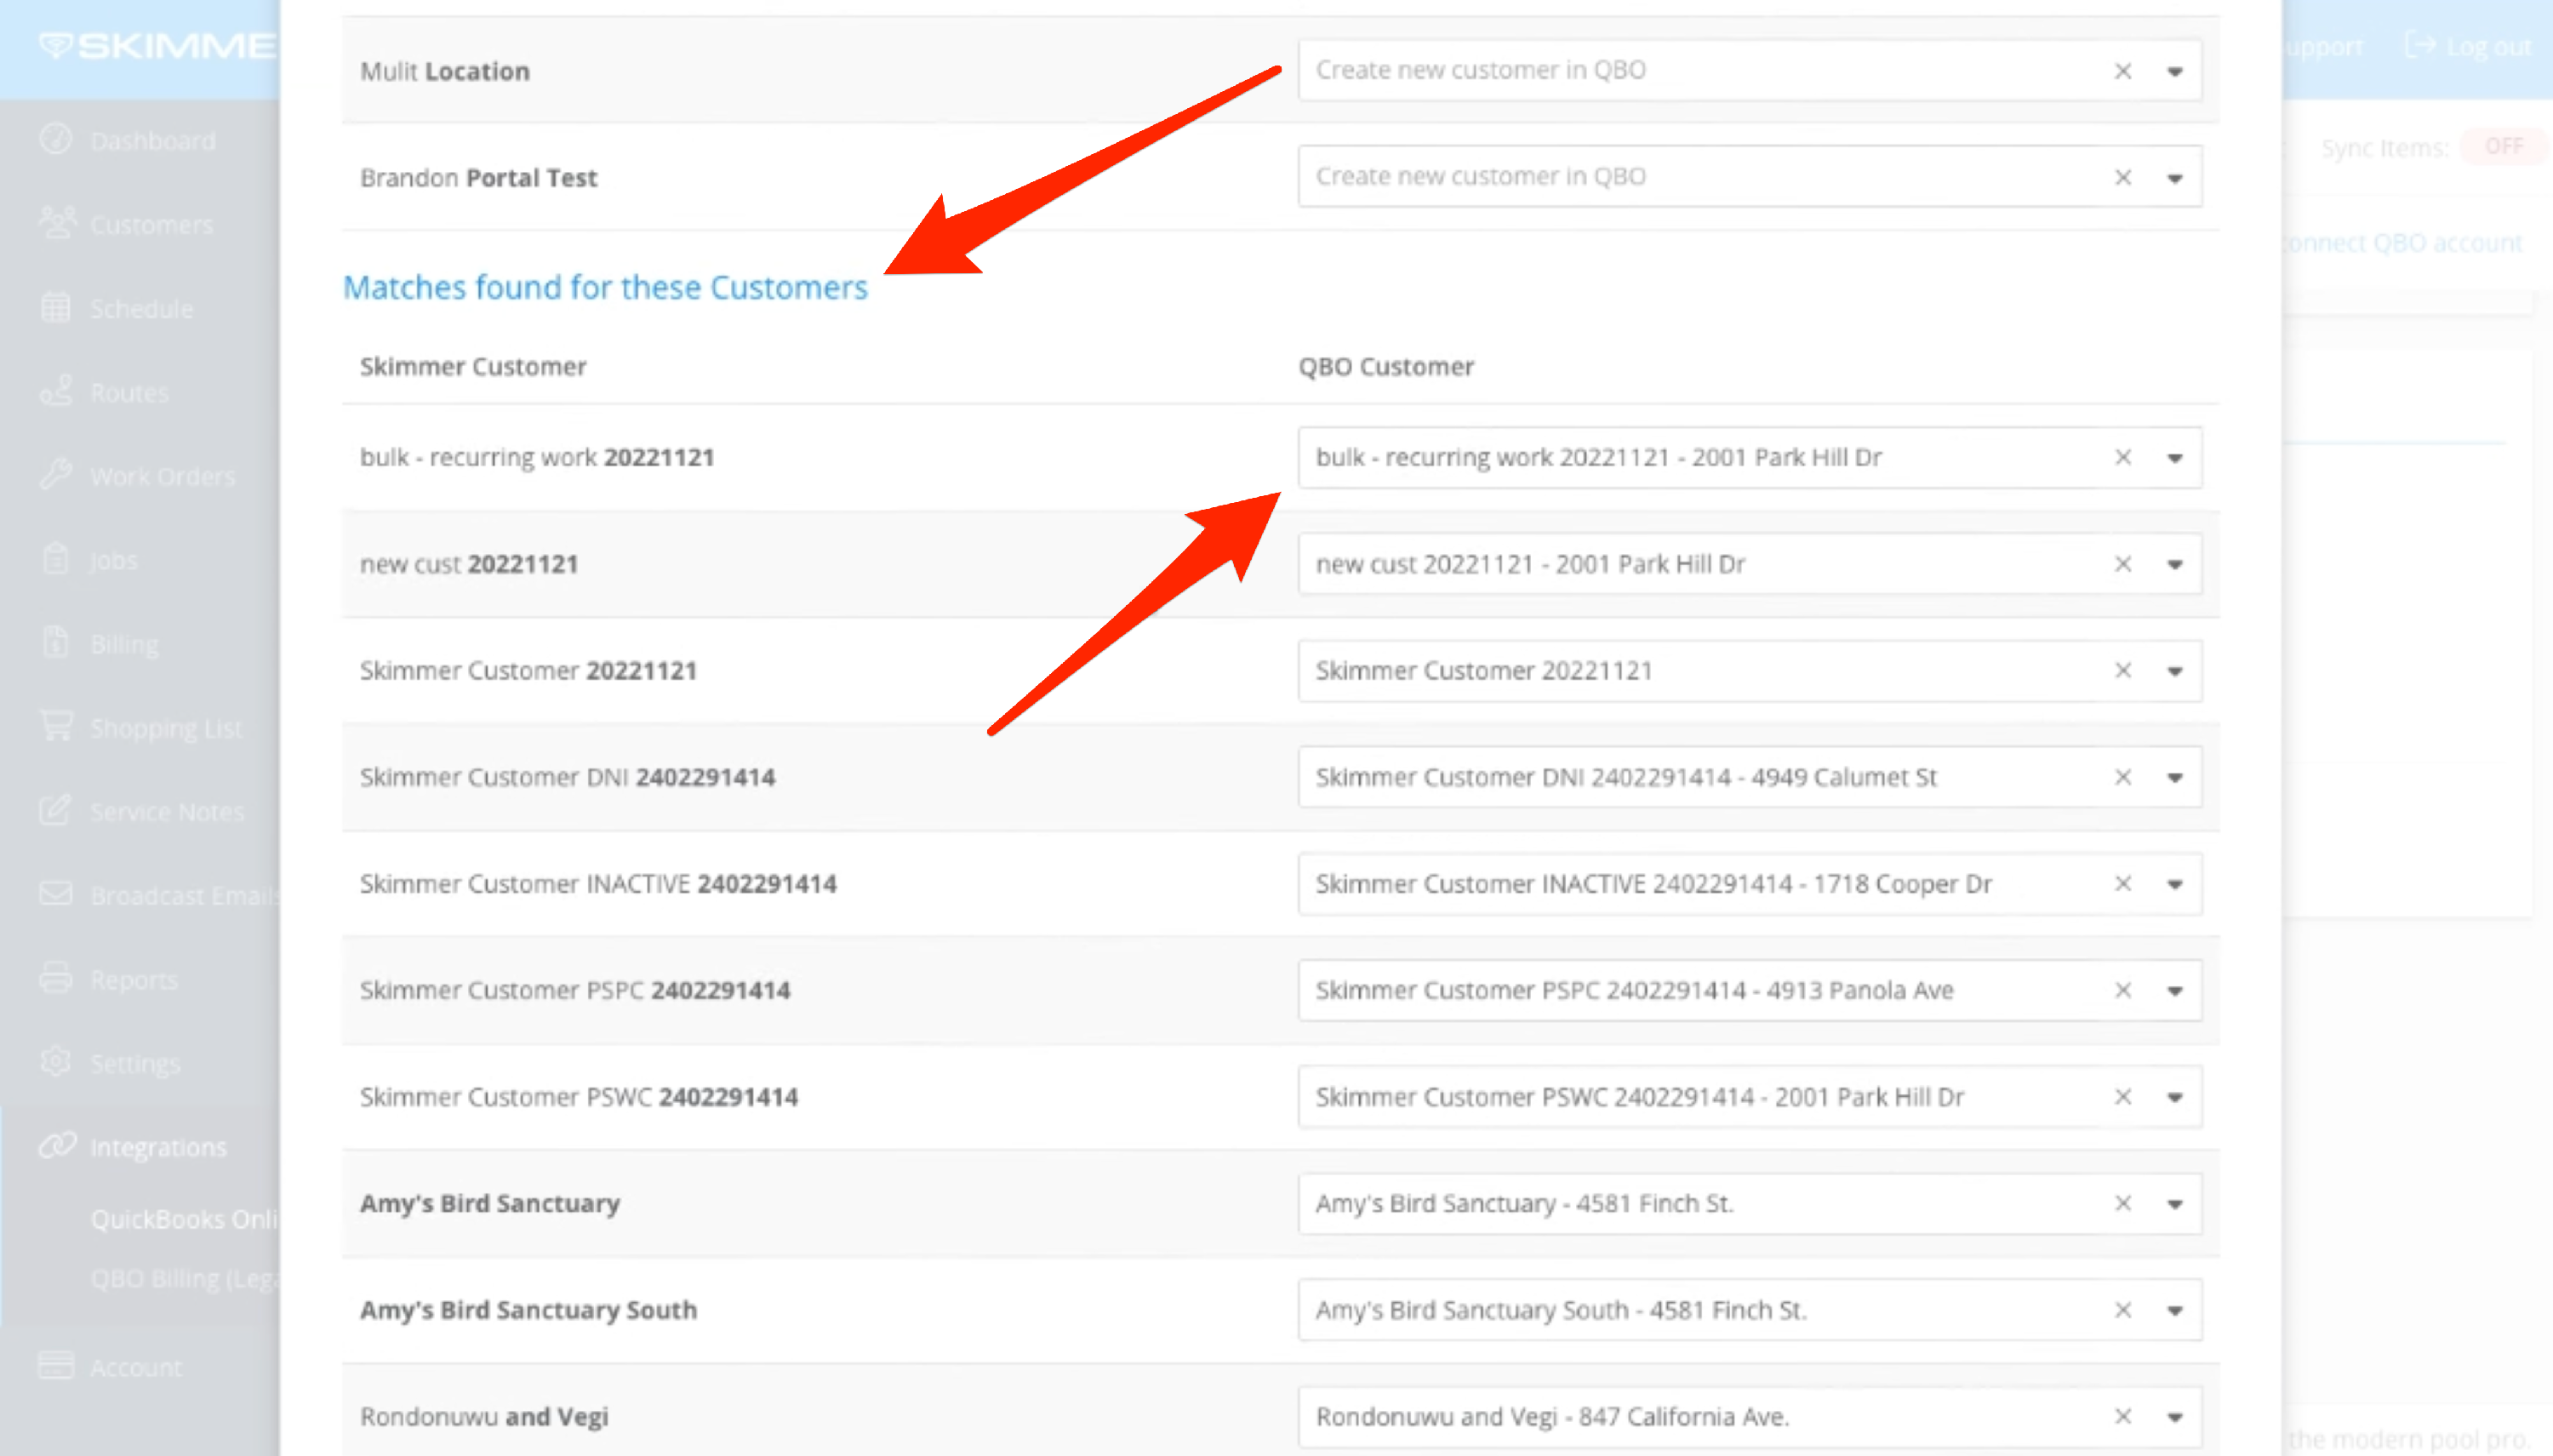
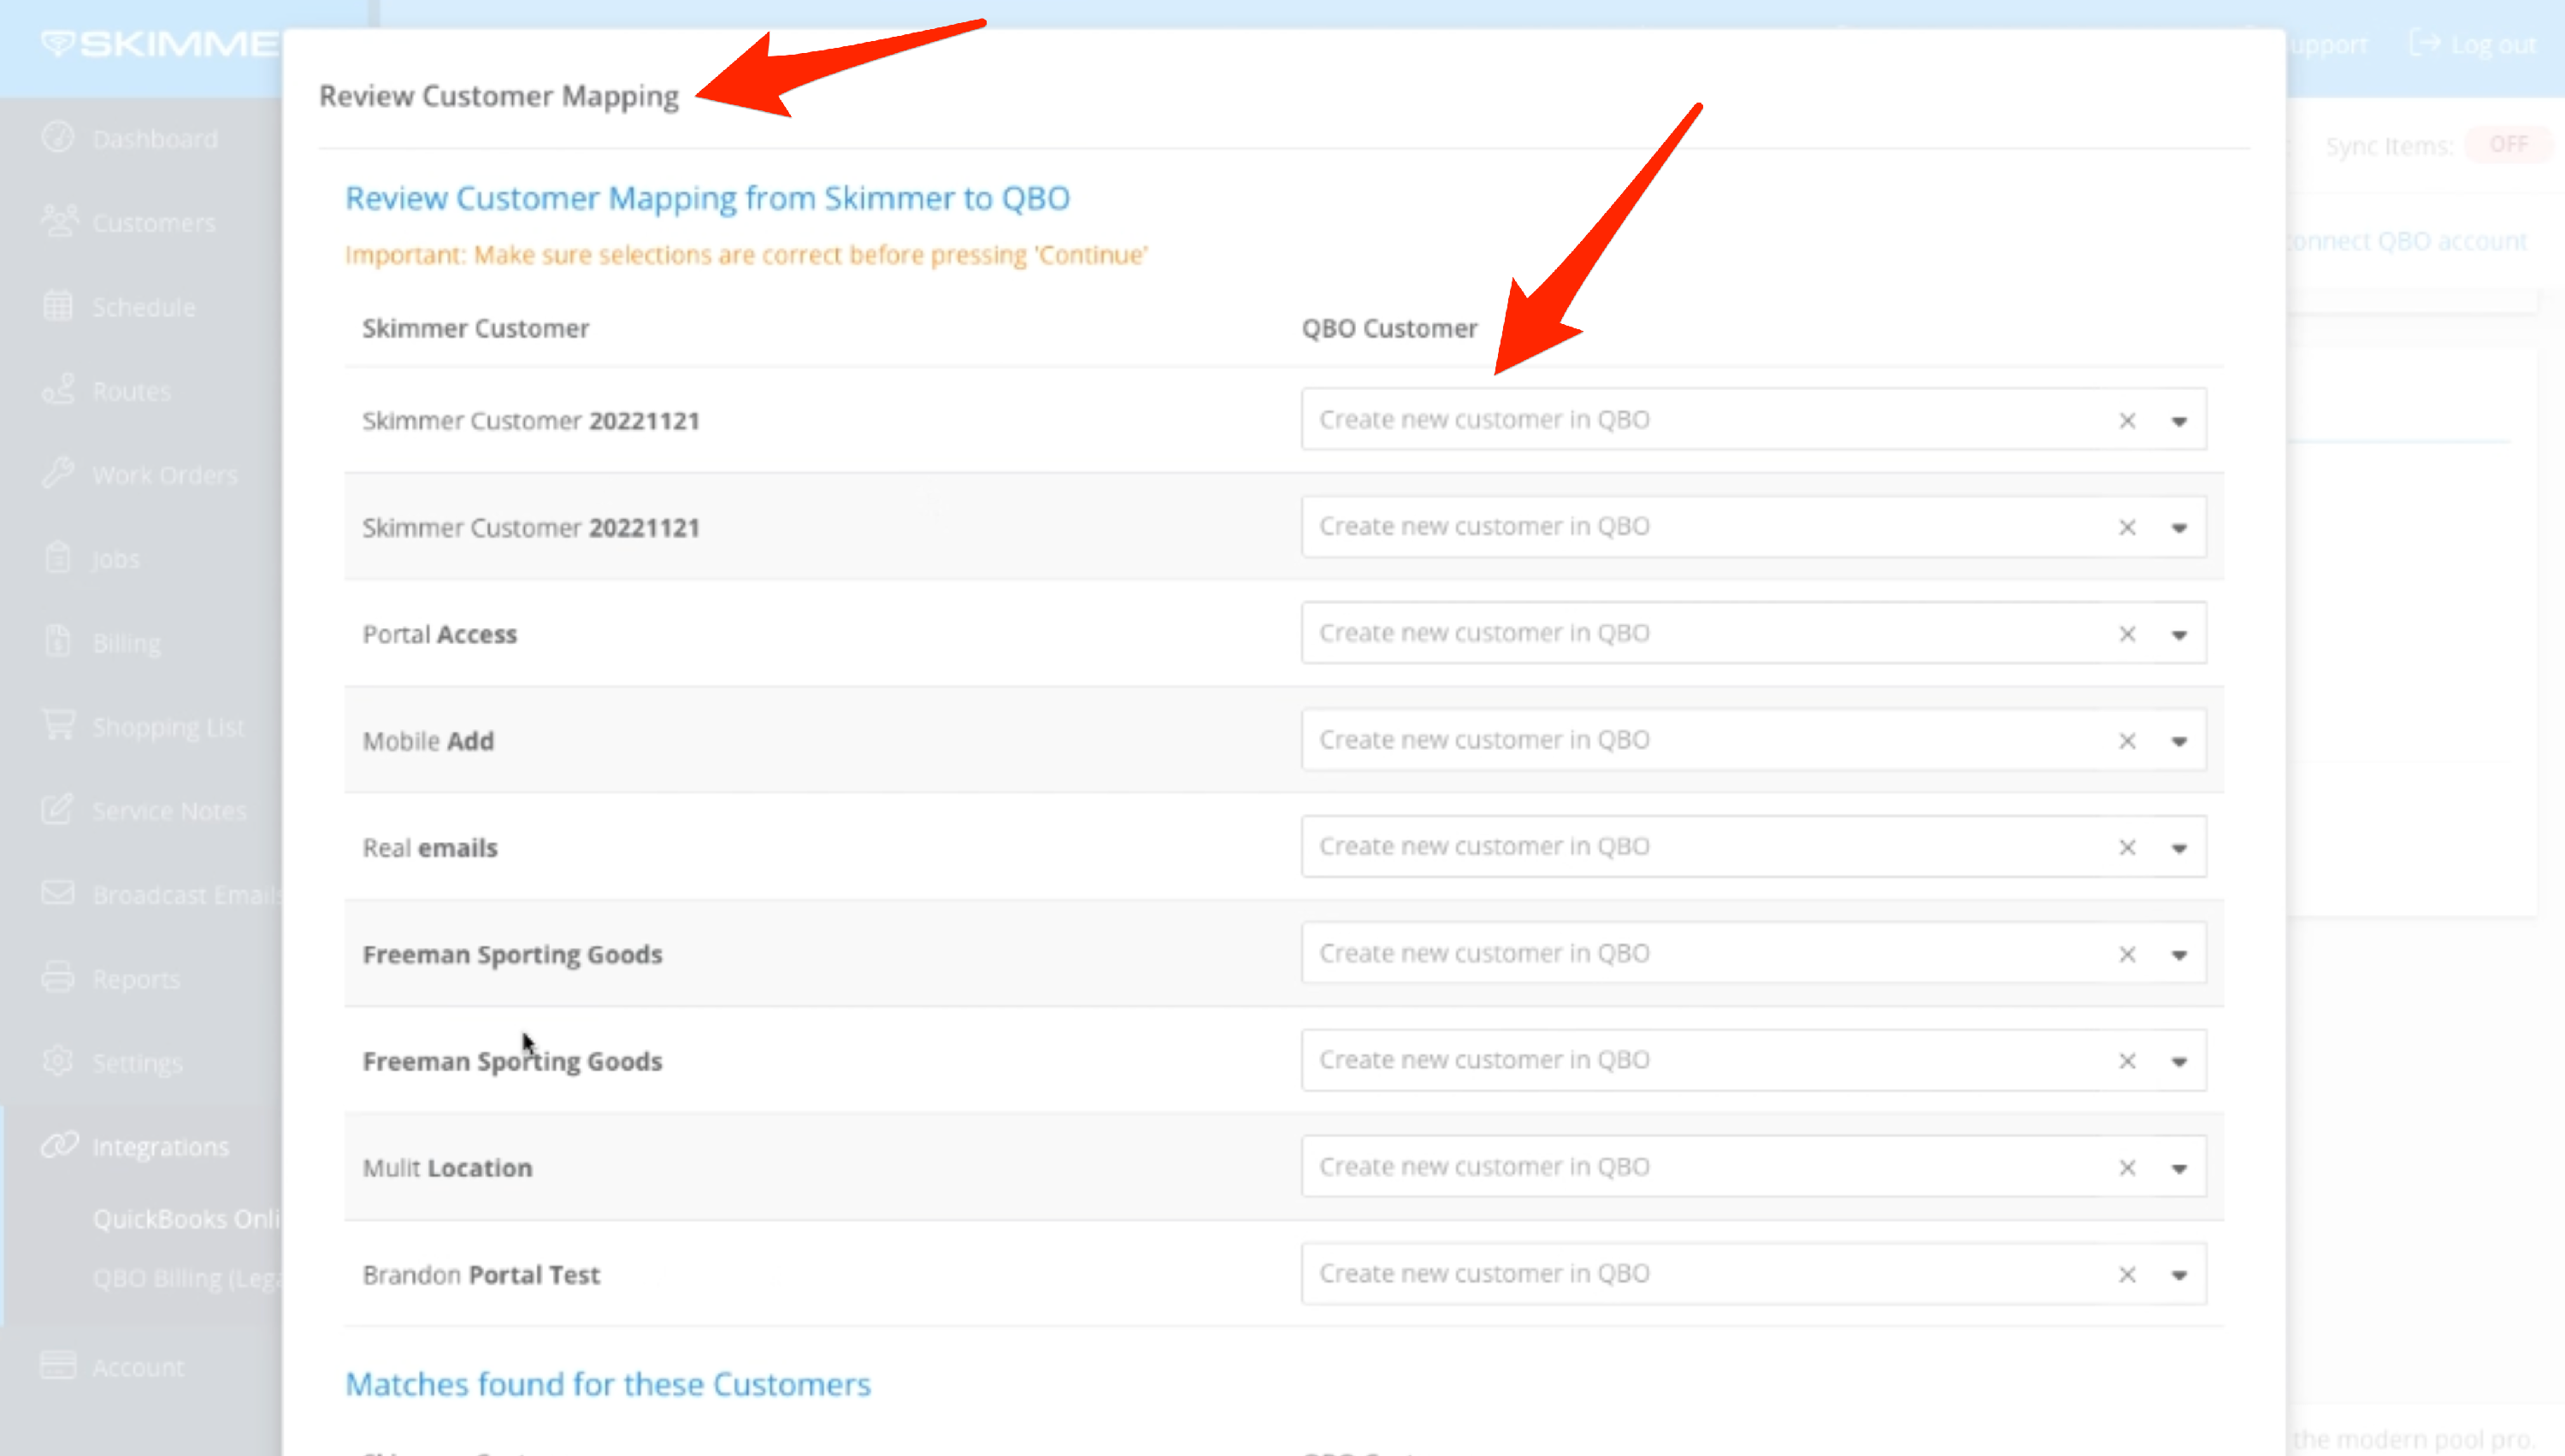
Once you activate the sync, you’ll automatically get this pop-up screen. Review all the customers that this integration will map from Skimmer to QBO. At the top, you’ll see customers in Skimmer that the system wasn’t able to find direct matches for. To map them to accounts in QBO, use the dropdown lists. If you leave the dropdown blank, Skimmer will create a new customer in QBO.
You can also review all matches that Skimmer did find, and adjust the mapping if you need to. Once you’re done with this step, the sync will proceed just like you saw earlier in the tutorial.
-