The Schedule – Calendar
Watch the video or scroll down for step-by-step instructions.
Tiers: Scaling Up and above

Step-by-step instructions . . .
- 1
-
In this tutorial, we'll cover details of the one of three modules that make up the Schedule – the Calendar. To focus on showing the calendar, we'll uncheck Unscheduled and Map.

- 2
-
At the top left, access filter options for the Calendar. You can filter by type of work, choose to see all regular route stops as well as work orders, or filter down to one or the other. If you want to see only work orders, you can specify a particular work order type. You can also choose to hide finished work and view only what needs to be completed, as well as filter by tech.


- 3
-
On the left, you see names of all the user accounts in the company, both techs and admins (since both are eligible to have work scheduled). If you want access a user account from here, just click their name and the profile screen will open.

- 4
-
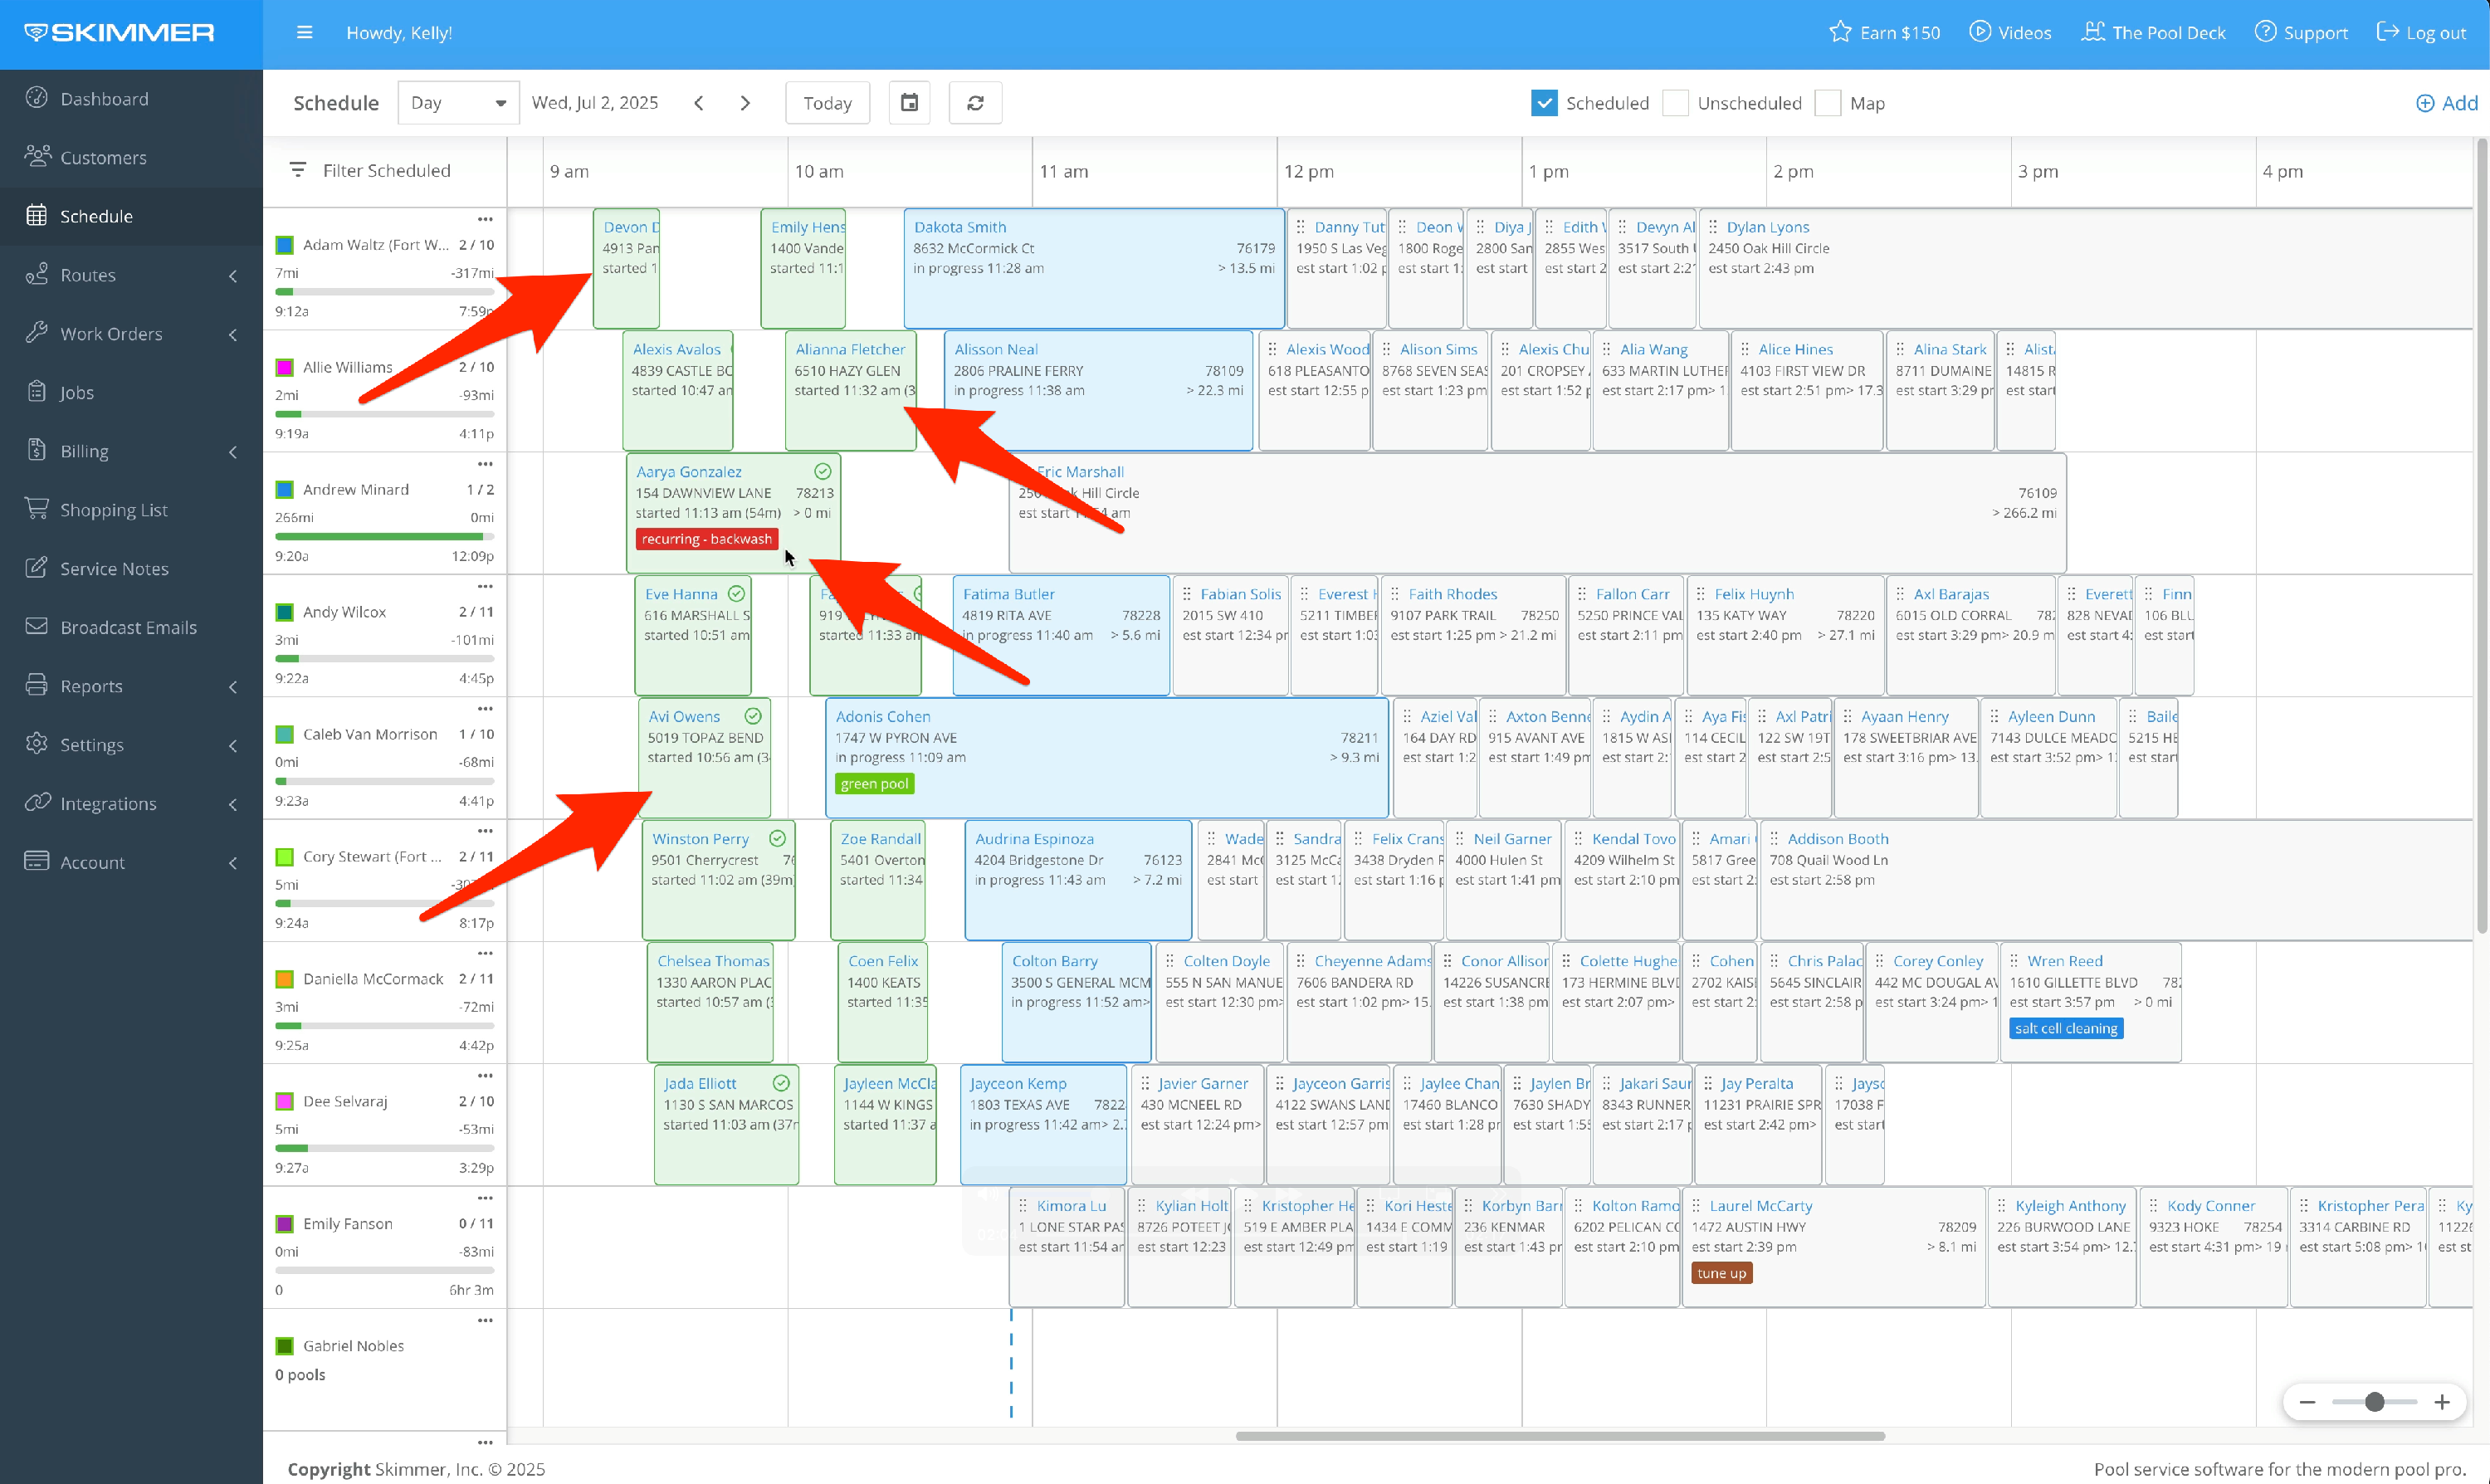
The calendar of scheduled work updates as work is completed in field. Each square is a summary of that person’s assigned work for that day. We call each square a Route Summary.
If a Route Summary square is gray, it’s either in the past or it has no work scheduled. Each summary also gives you the estimated duration of that route, based on your default setting for route stop duration and projected drive times between each stop.
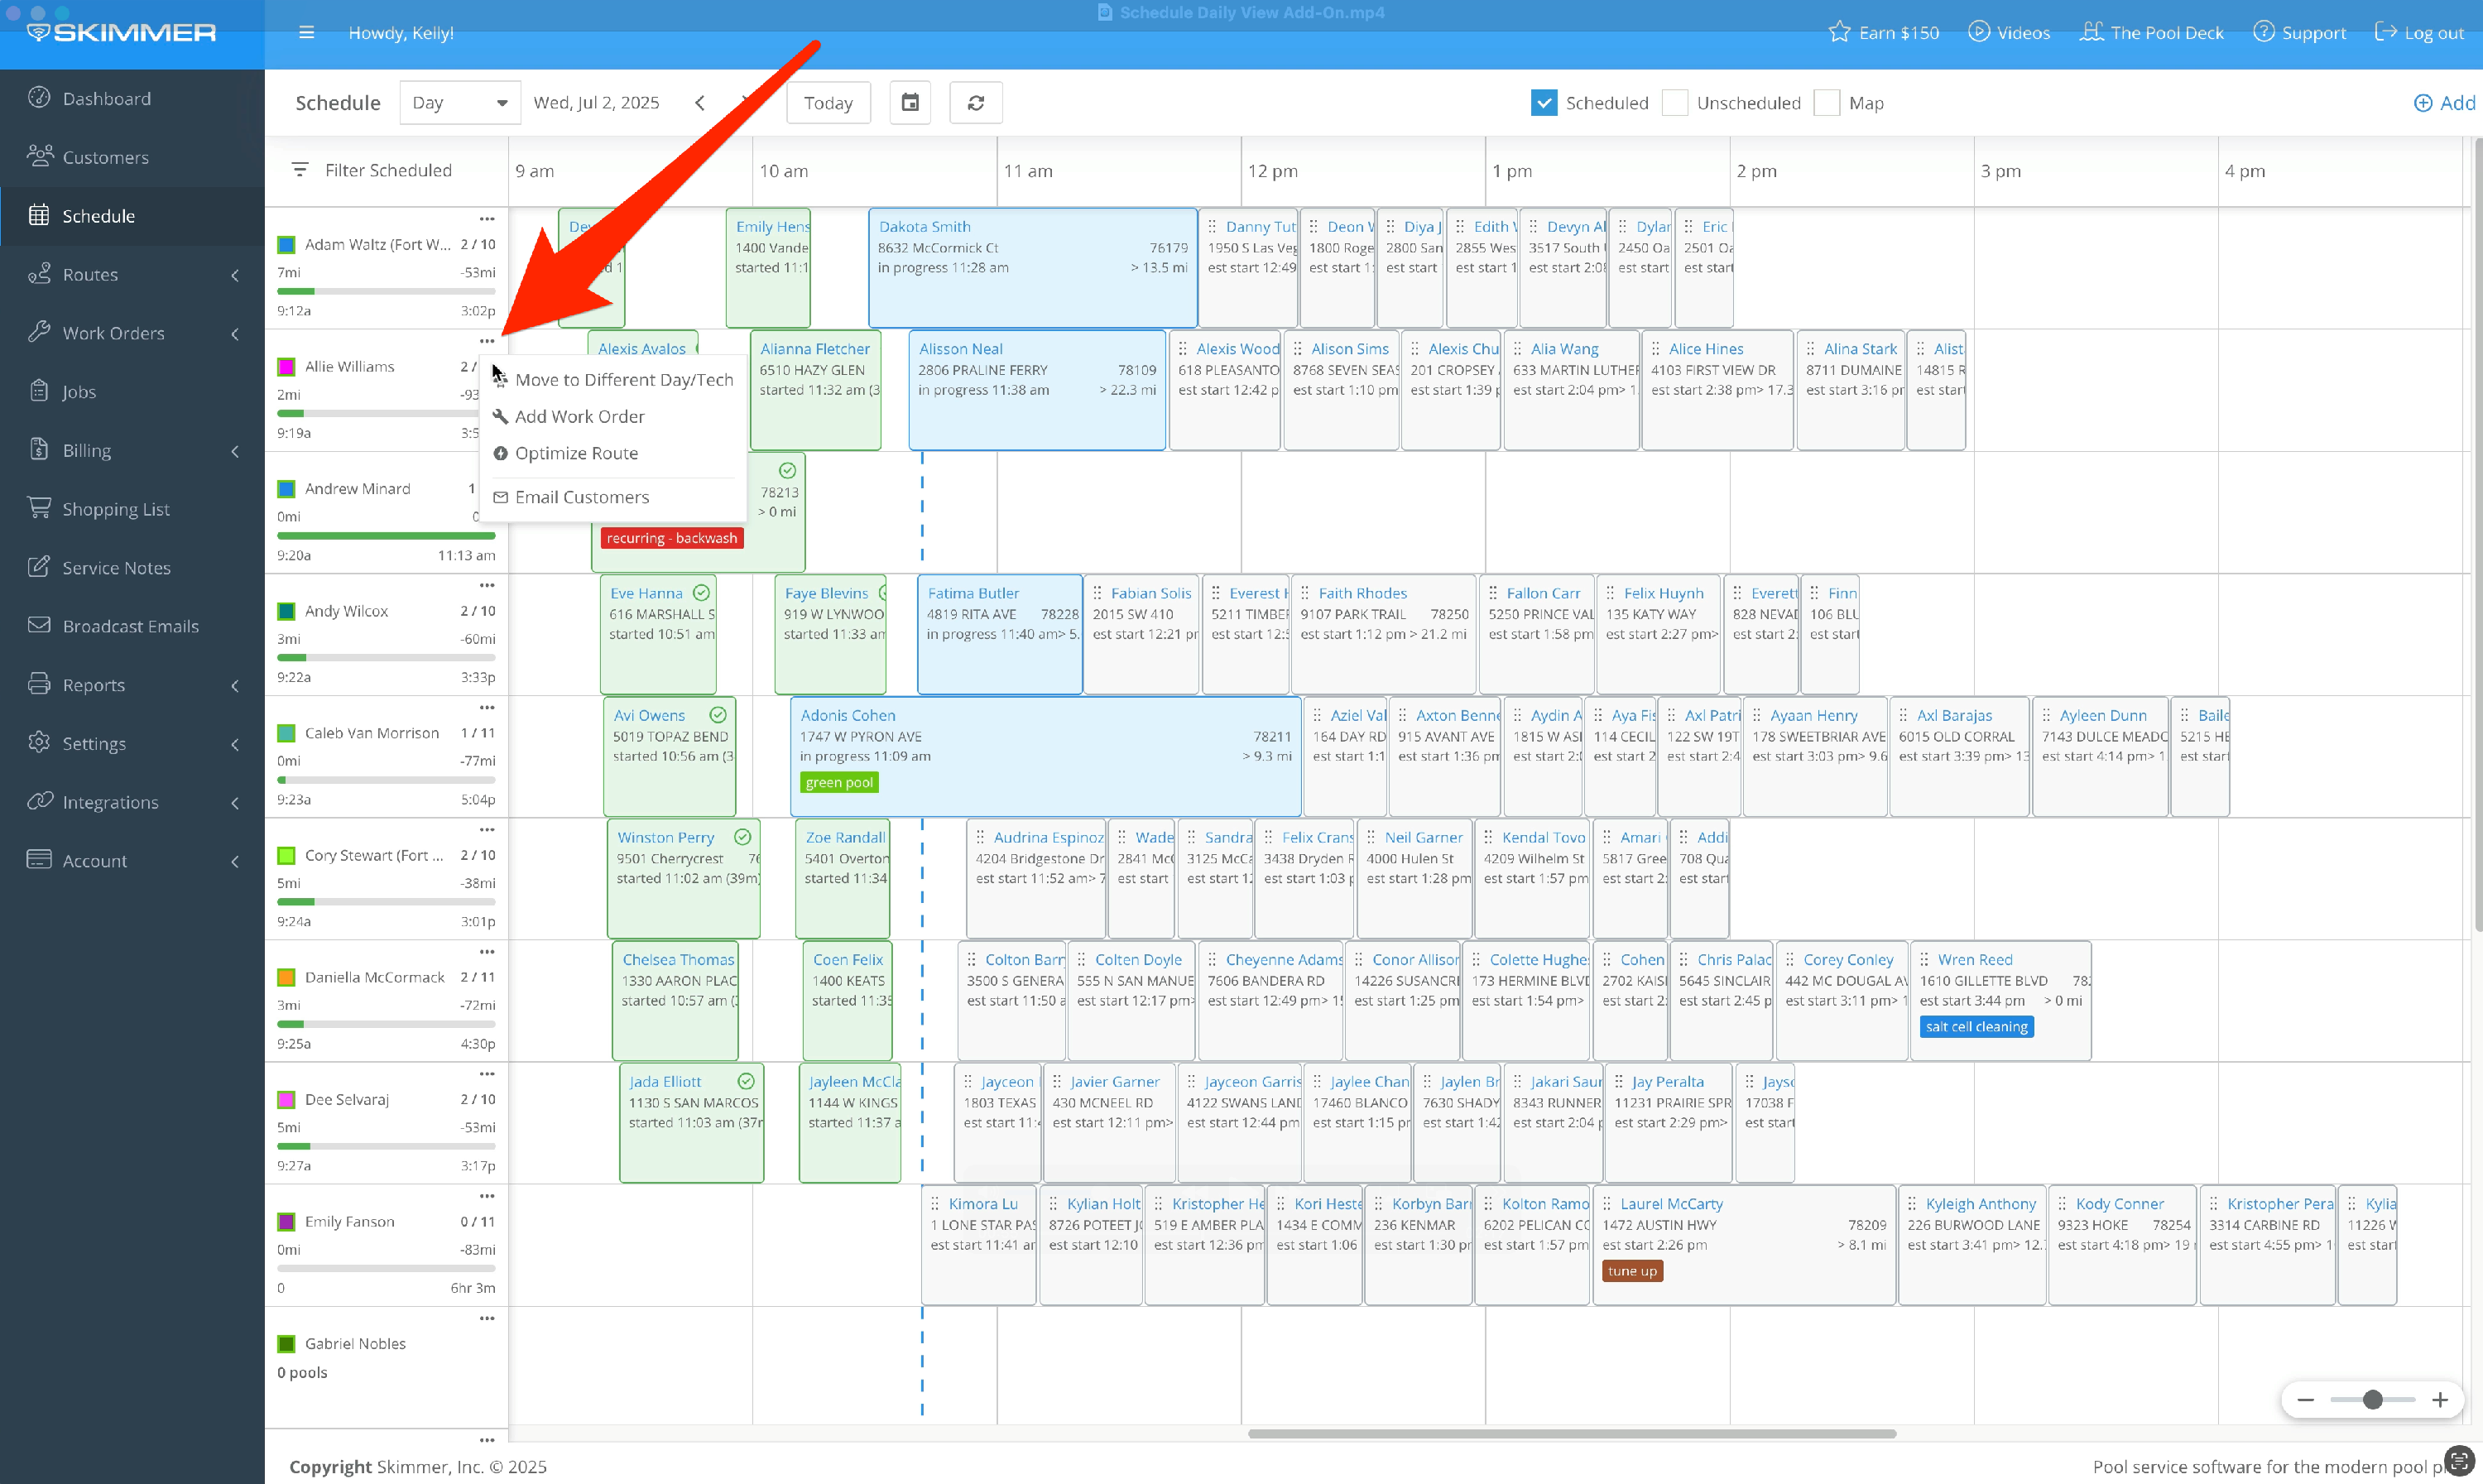
Click the dots in square’s top right corner to access options for managing work. You can move some or all to a different day or tech, and choose a one-time move or permanent move. You can also add a new work order and optimize this tech’s route for this day.


-

- 5
-
When you click on the Route Summary, an expanded view called the Route Detail opens on the right side. You'll see more information about work assigned, including customer name and location. If there are work orders, you will see a label for work order type.
If you want to rearrange the order of work, click and drag and drop to place a route stop or work order in a new spot.
At the top, you have same options to move work, add a work order, optimize this route, or mass email these customers.


-

- 6
-
Route Detail gives you another way to move work. Click and hold, then drag it over to the tech and day you want to move it to, and release. A move box pops up, asking you to confirm details of the move. It defaults to a one-time move, but you can make it permanent. Click Move Stop when the details are what you want, and that move will occur.
If you want to collapse Route Detail, either click X in top right corner or click on Route Summary again and it will fold away.

-

-

-

- 7
-
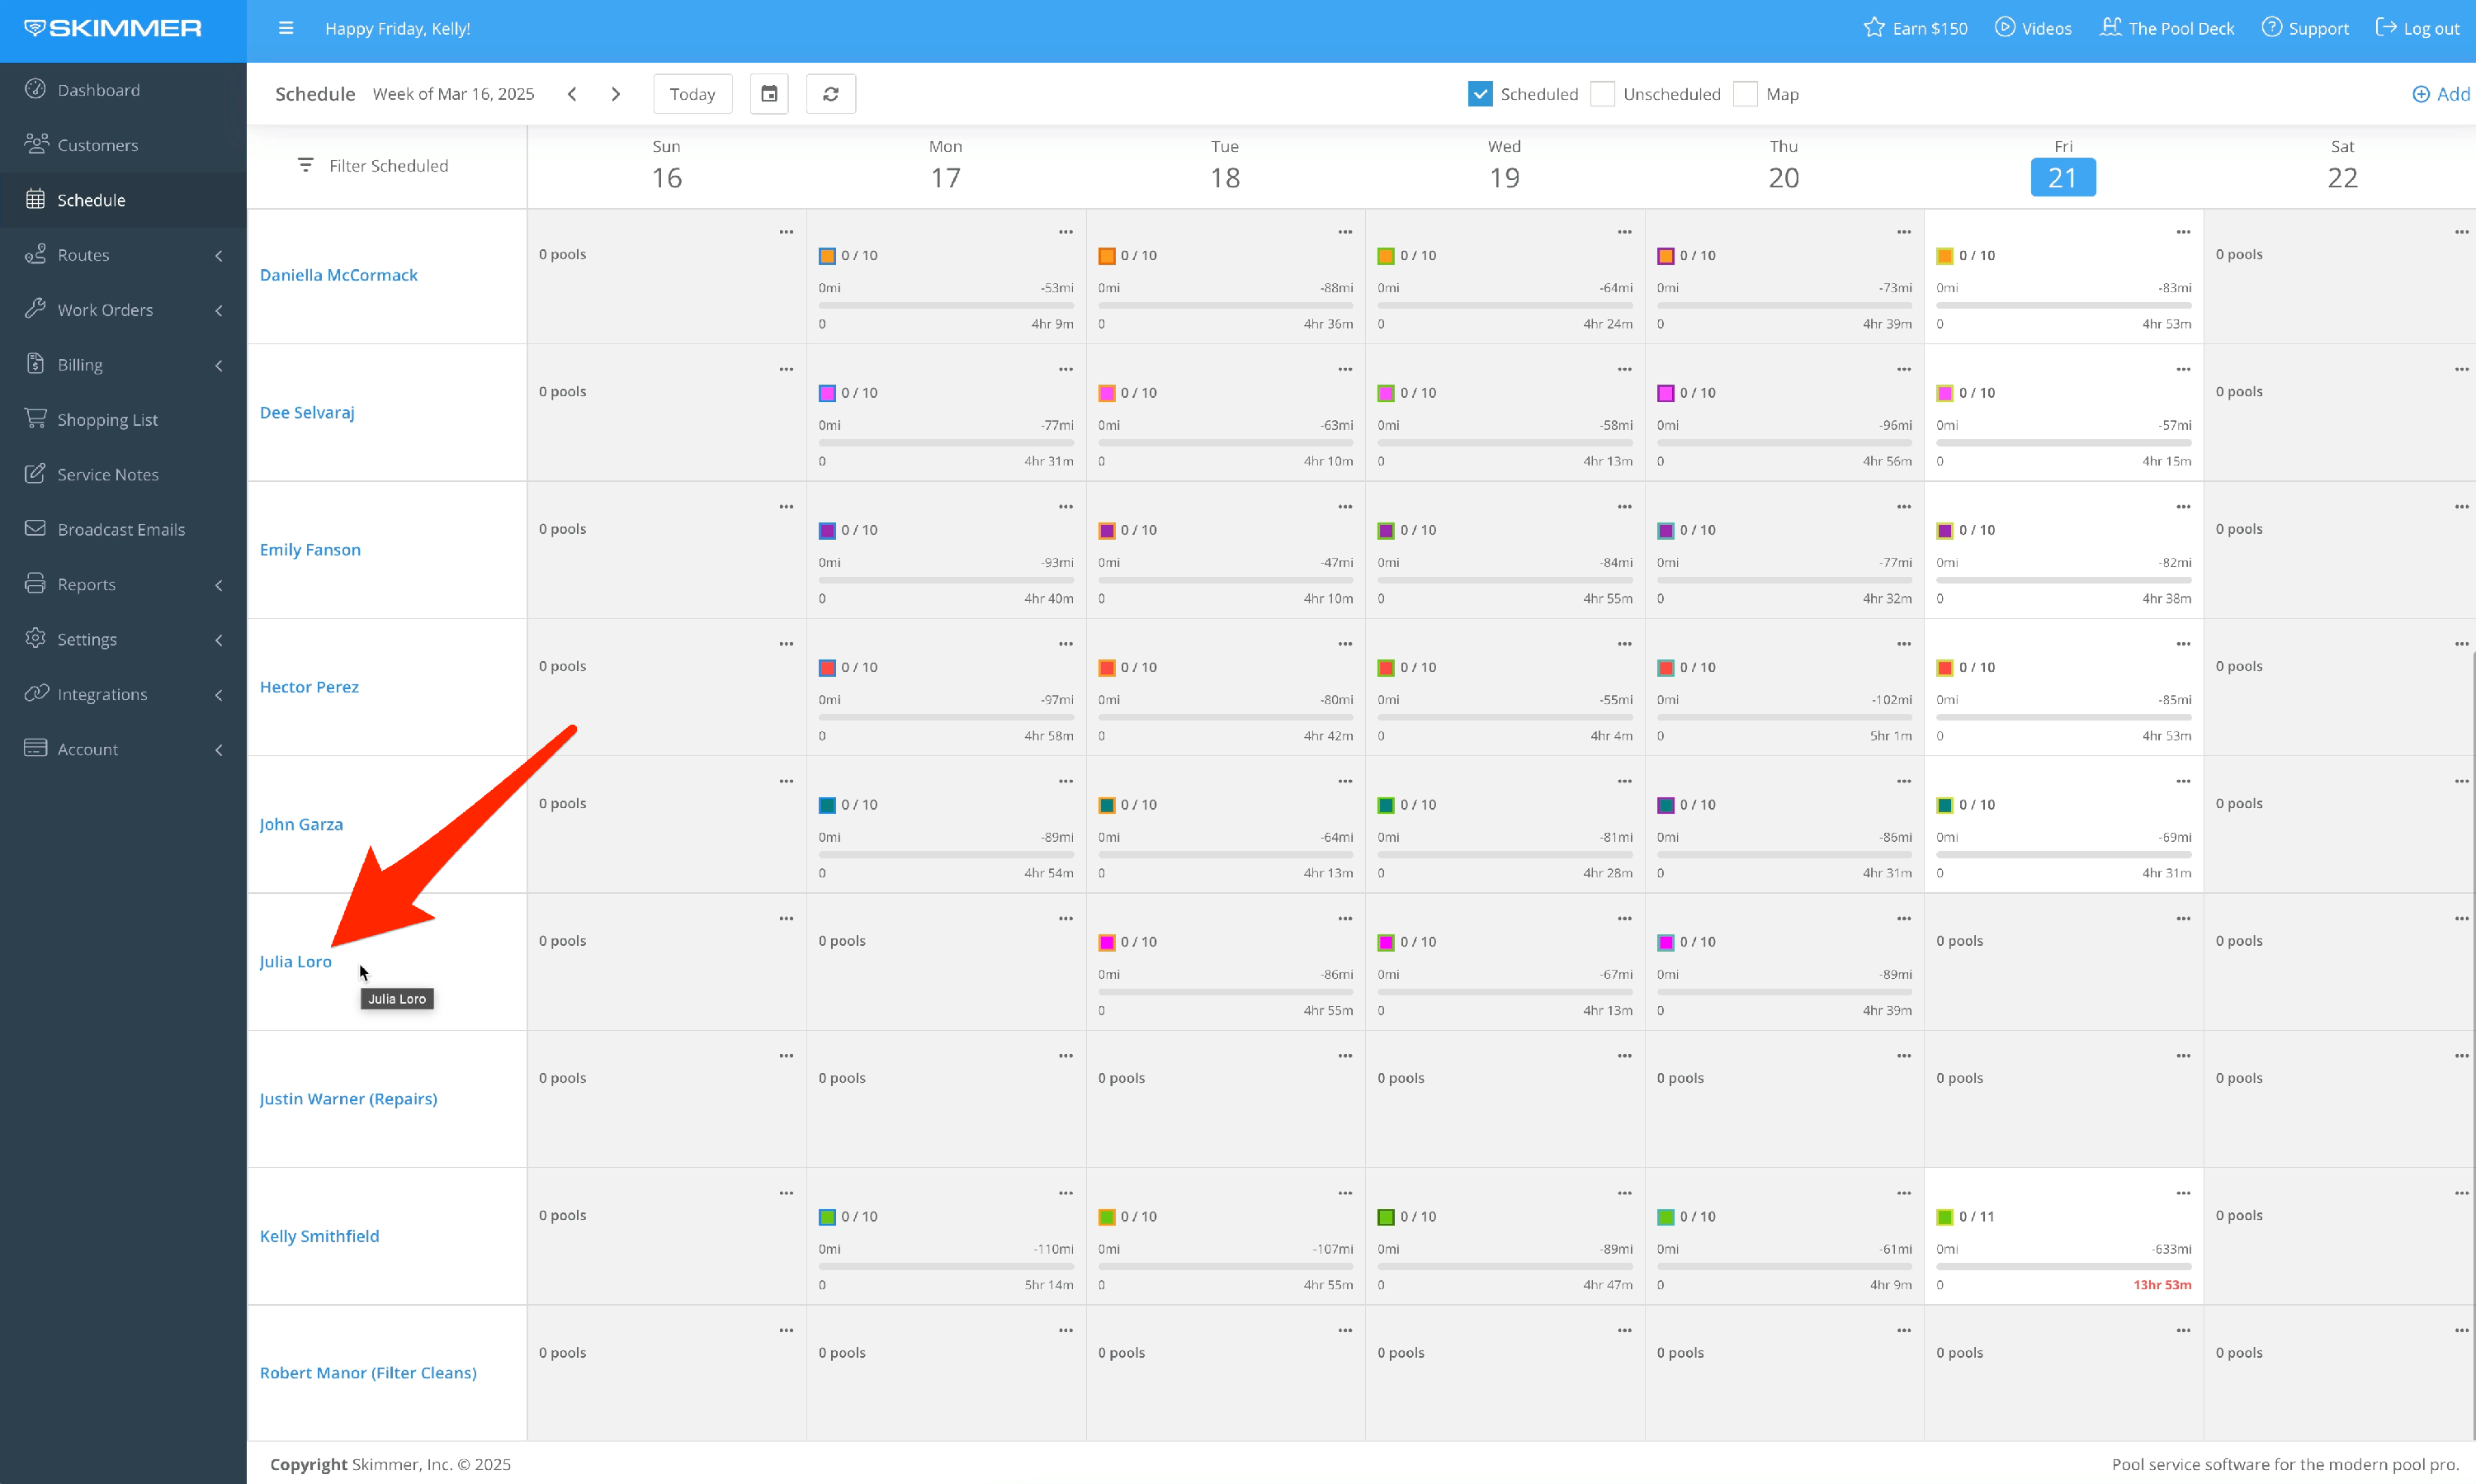
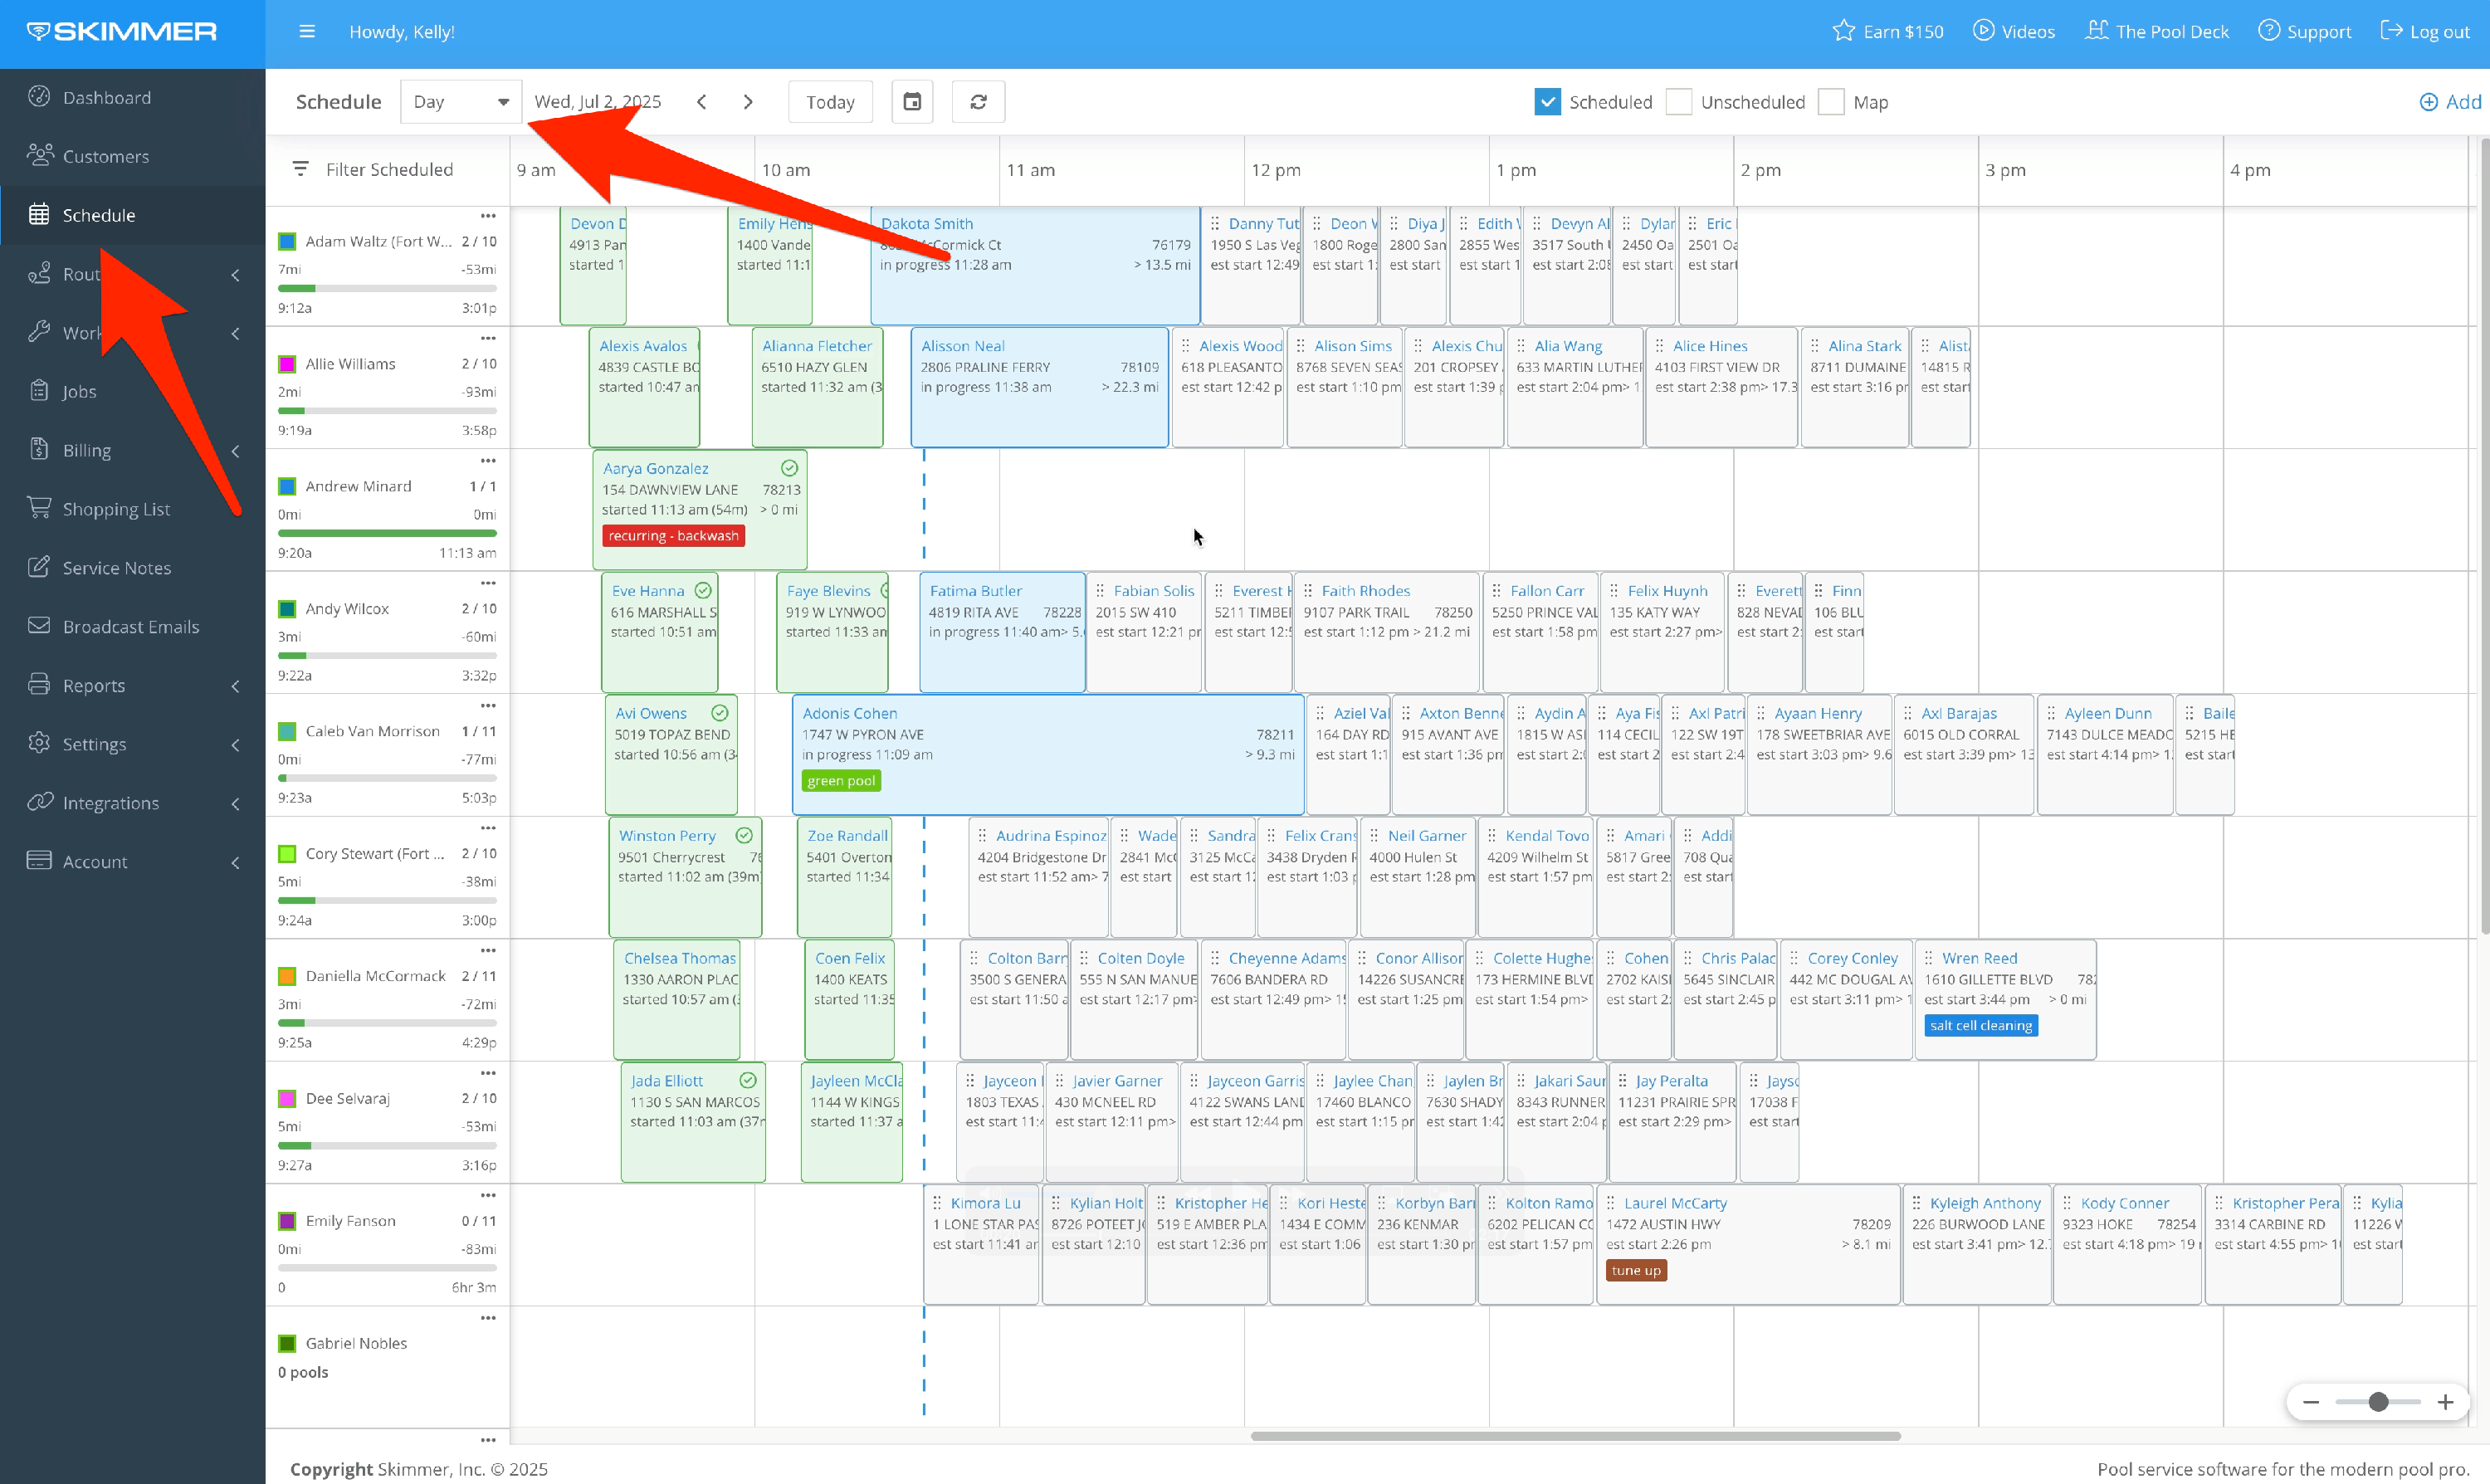
In addition, we have a daily view of assigned work. Go to the top left corner and click the dropdown that’s currently set to Week, and then select Day. If you want to zoom in or out, you can use the slider in the bottom right corner.
- 8
-
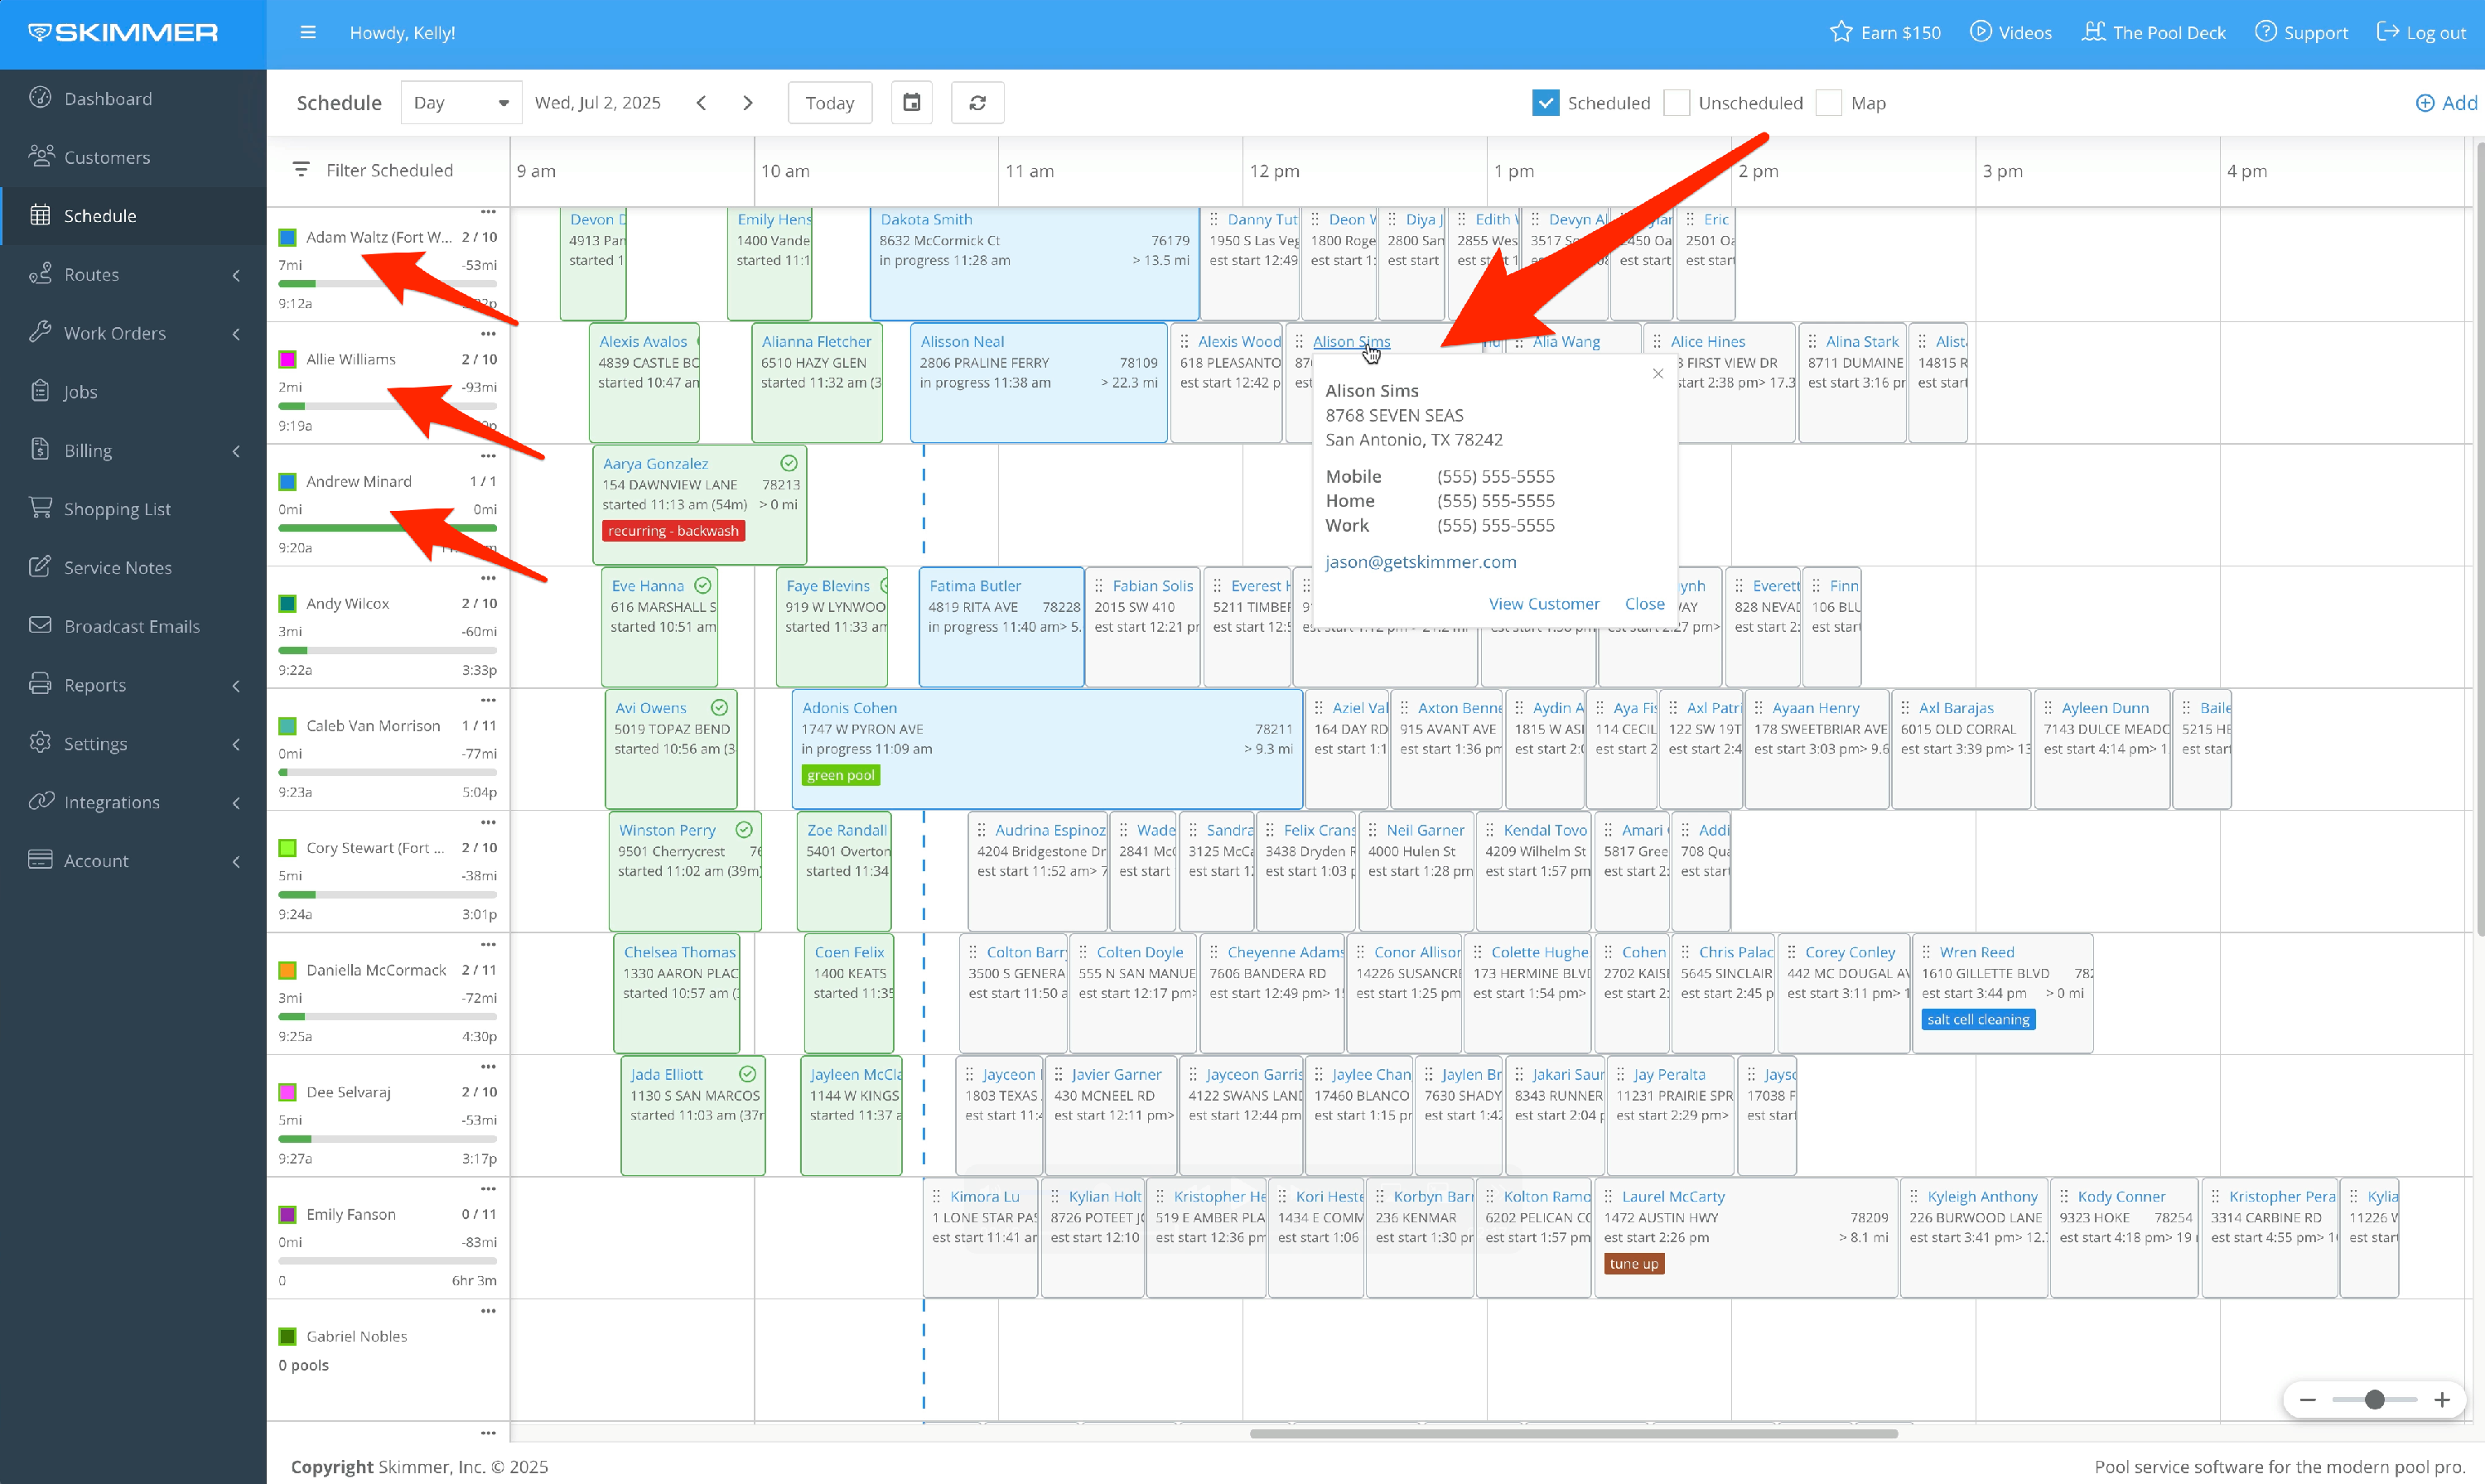
All techs, and all assigned work for the day, will appear on this daily view. Hover over any box and it will expand to show the customer and location, and you can click their name to get more info and options.
- 9
-
In the tech box, click the three dots for options to move work to a different day or tech, add a work order, optimize the route, or email the customers on the tech’s route for the day.
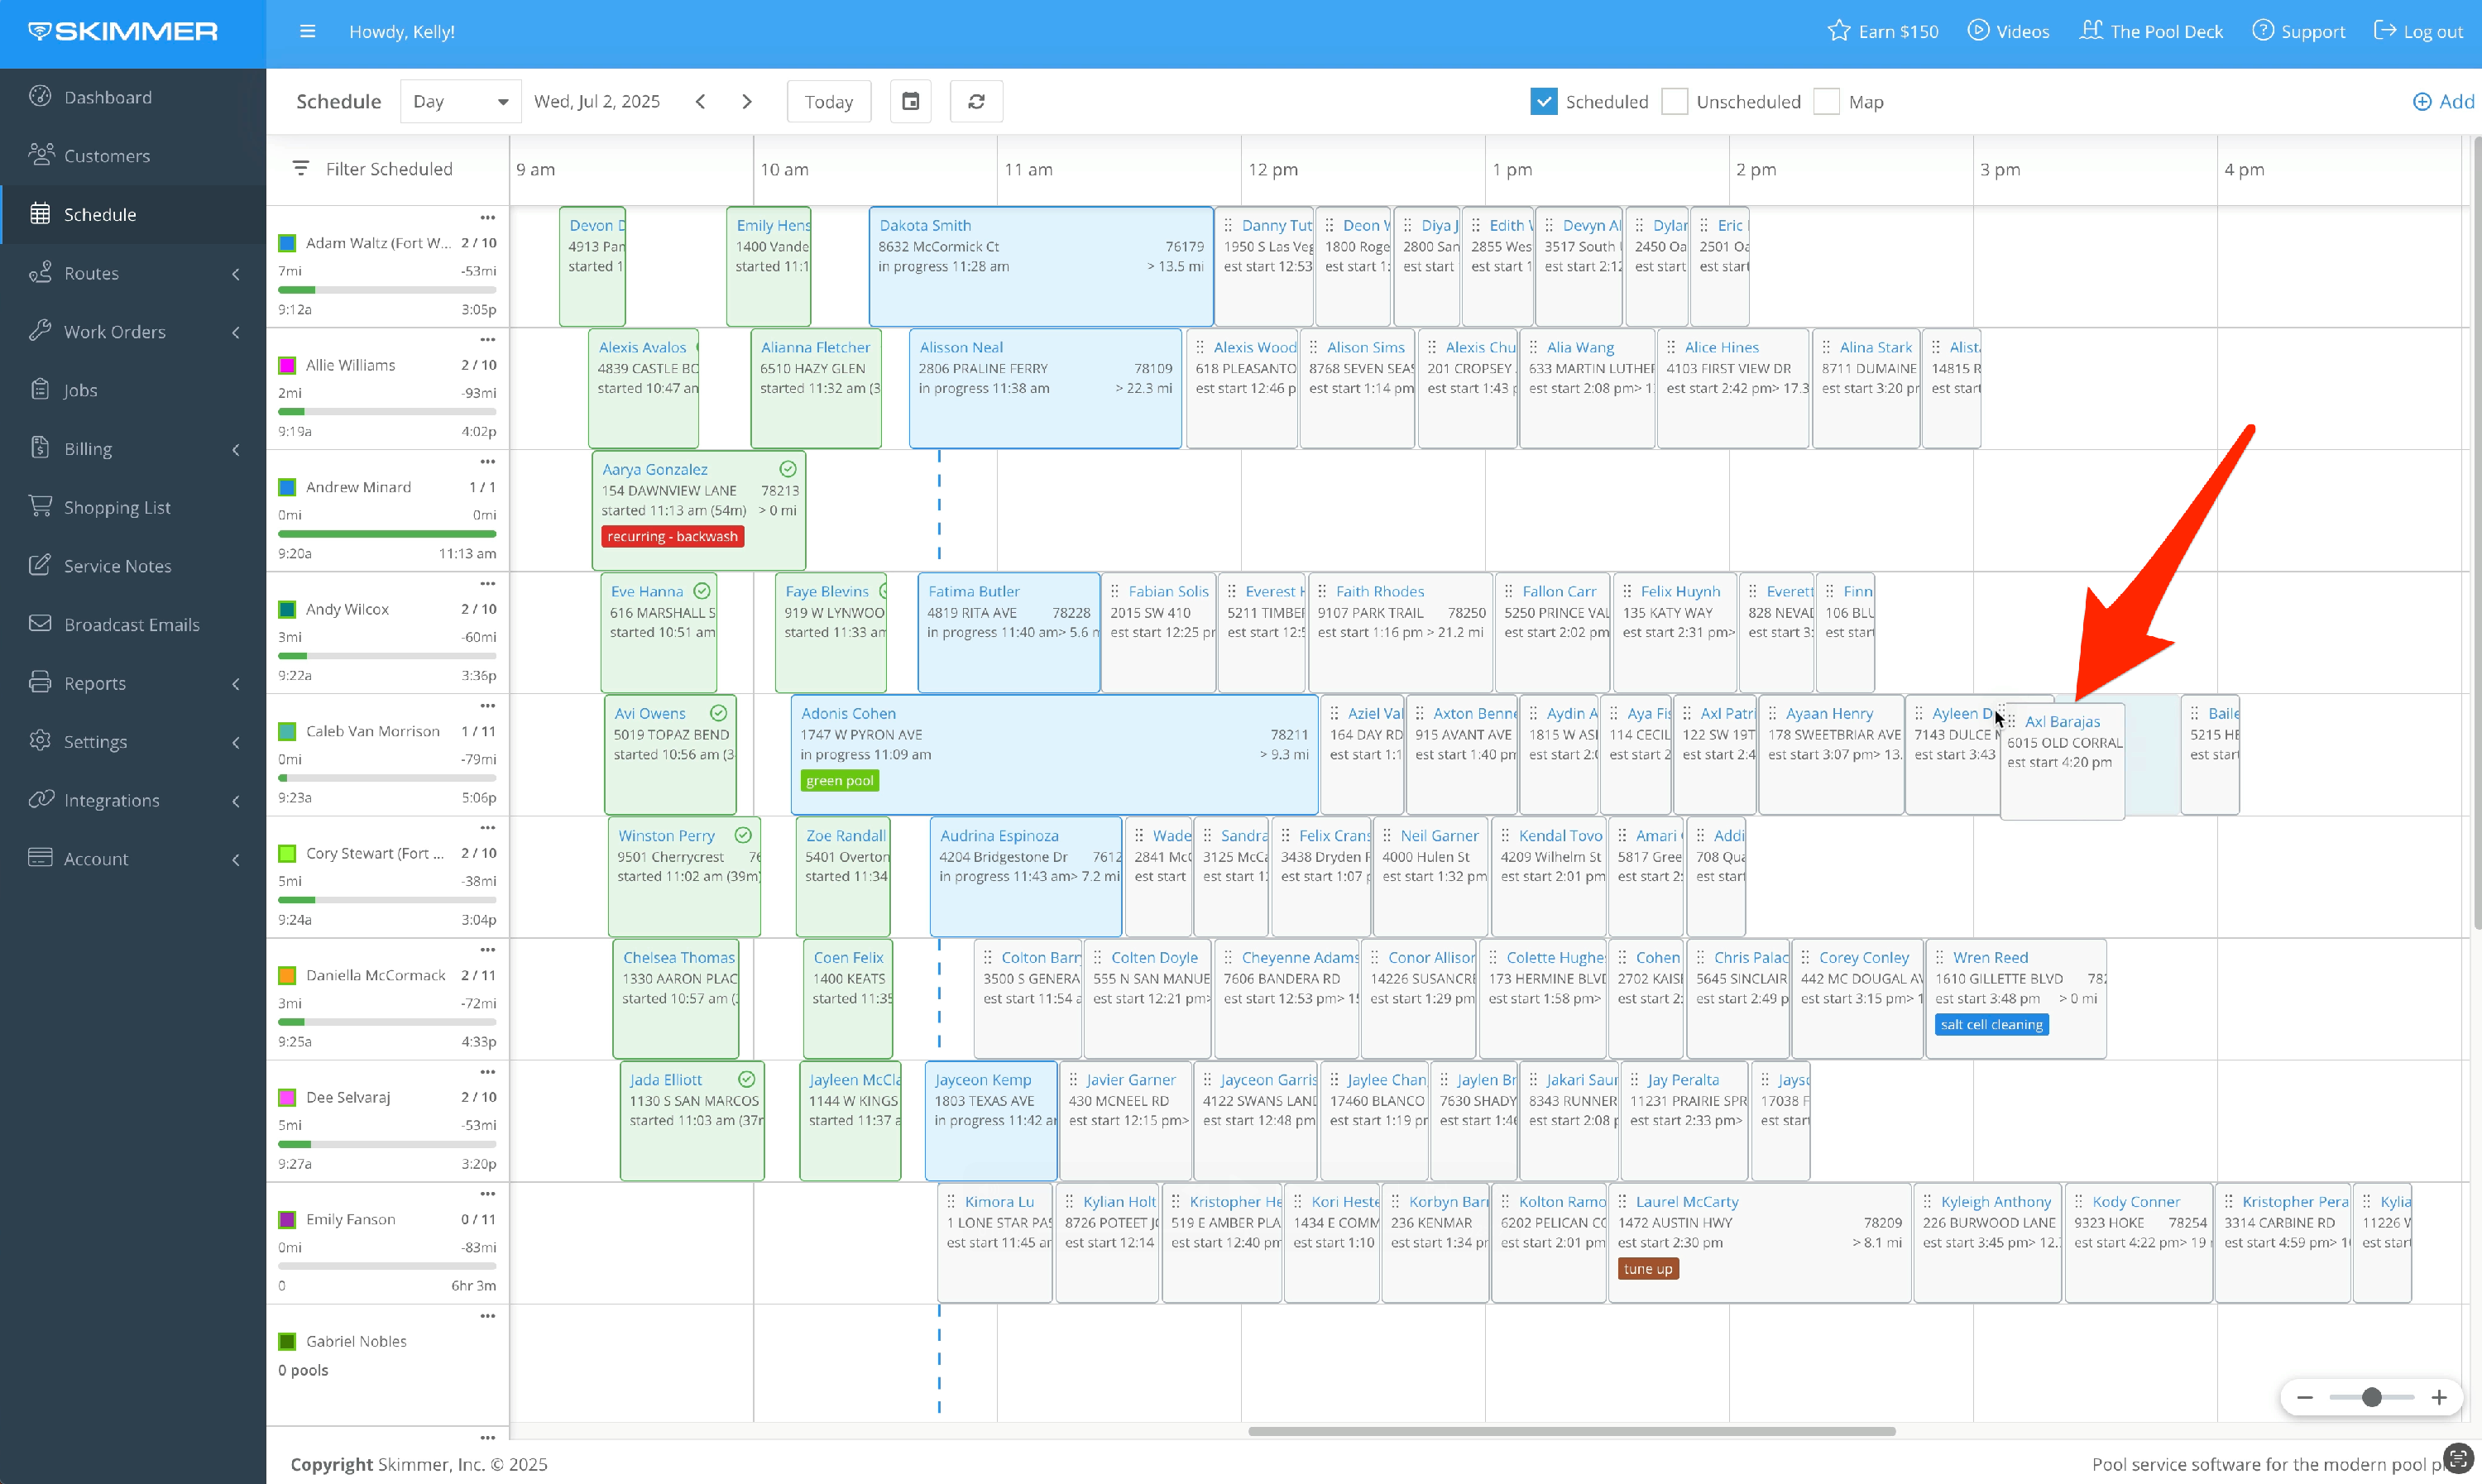
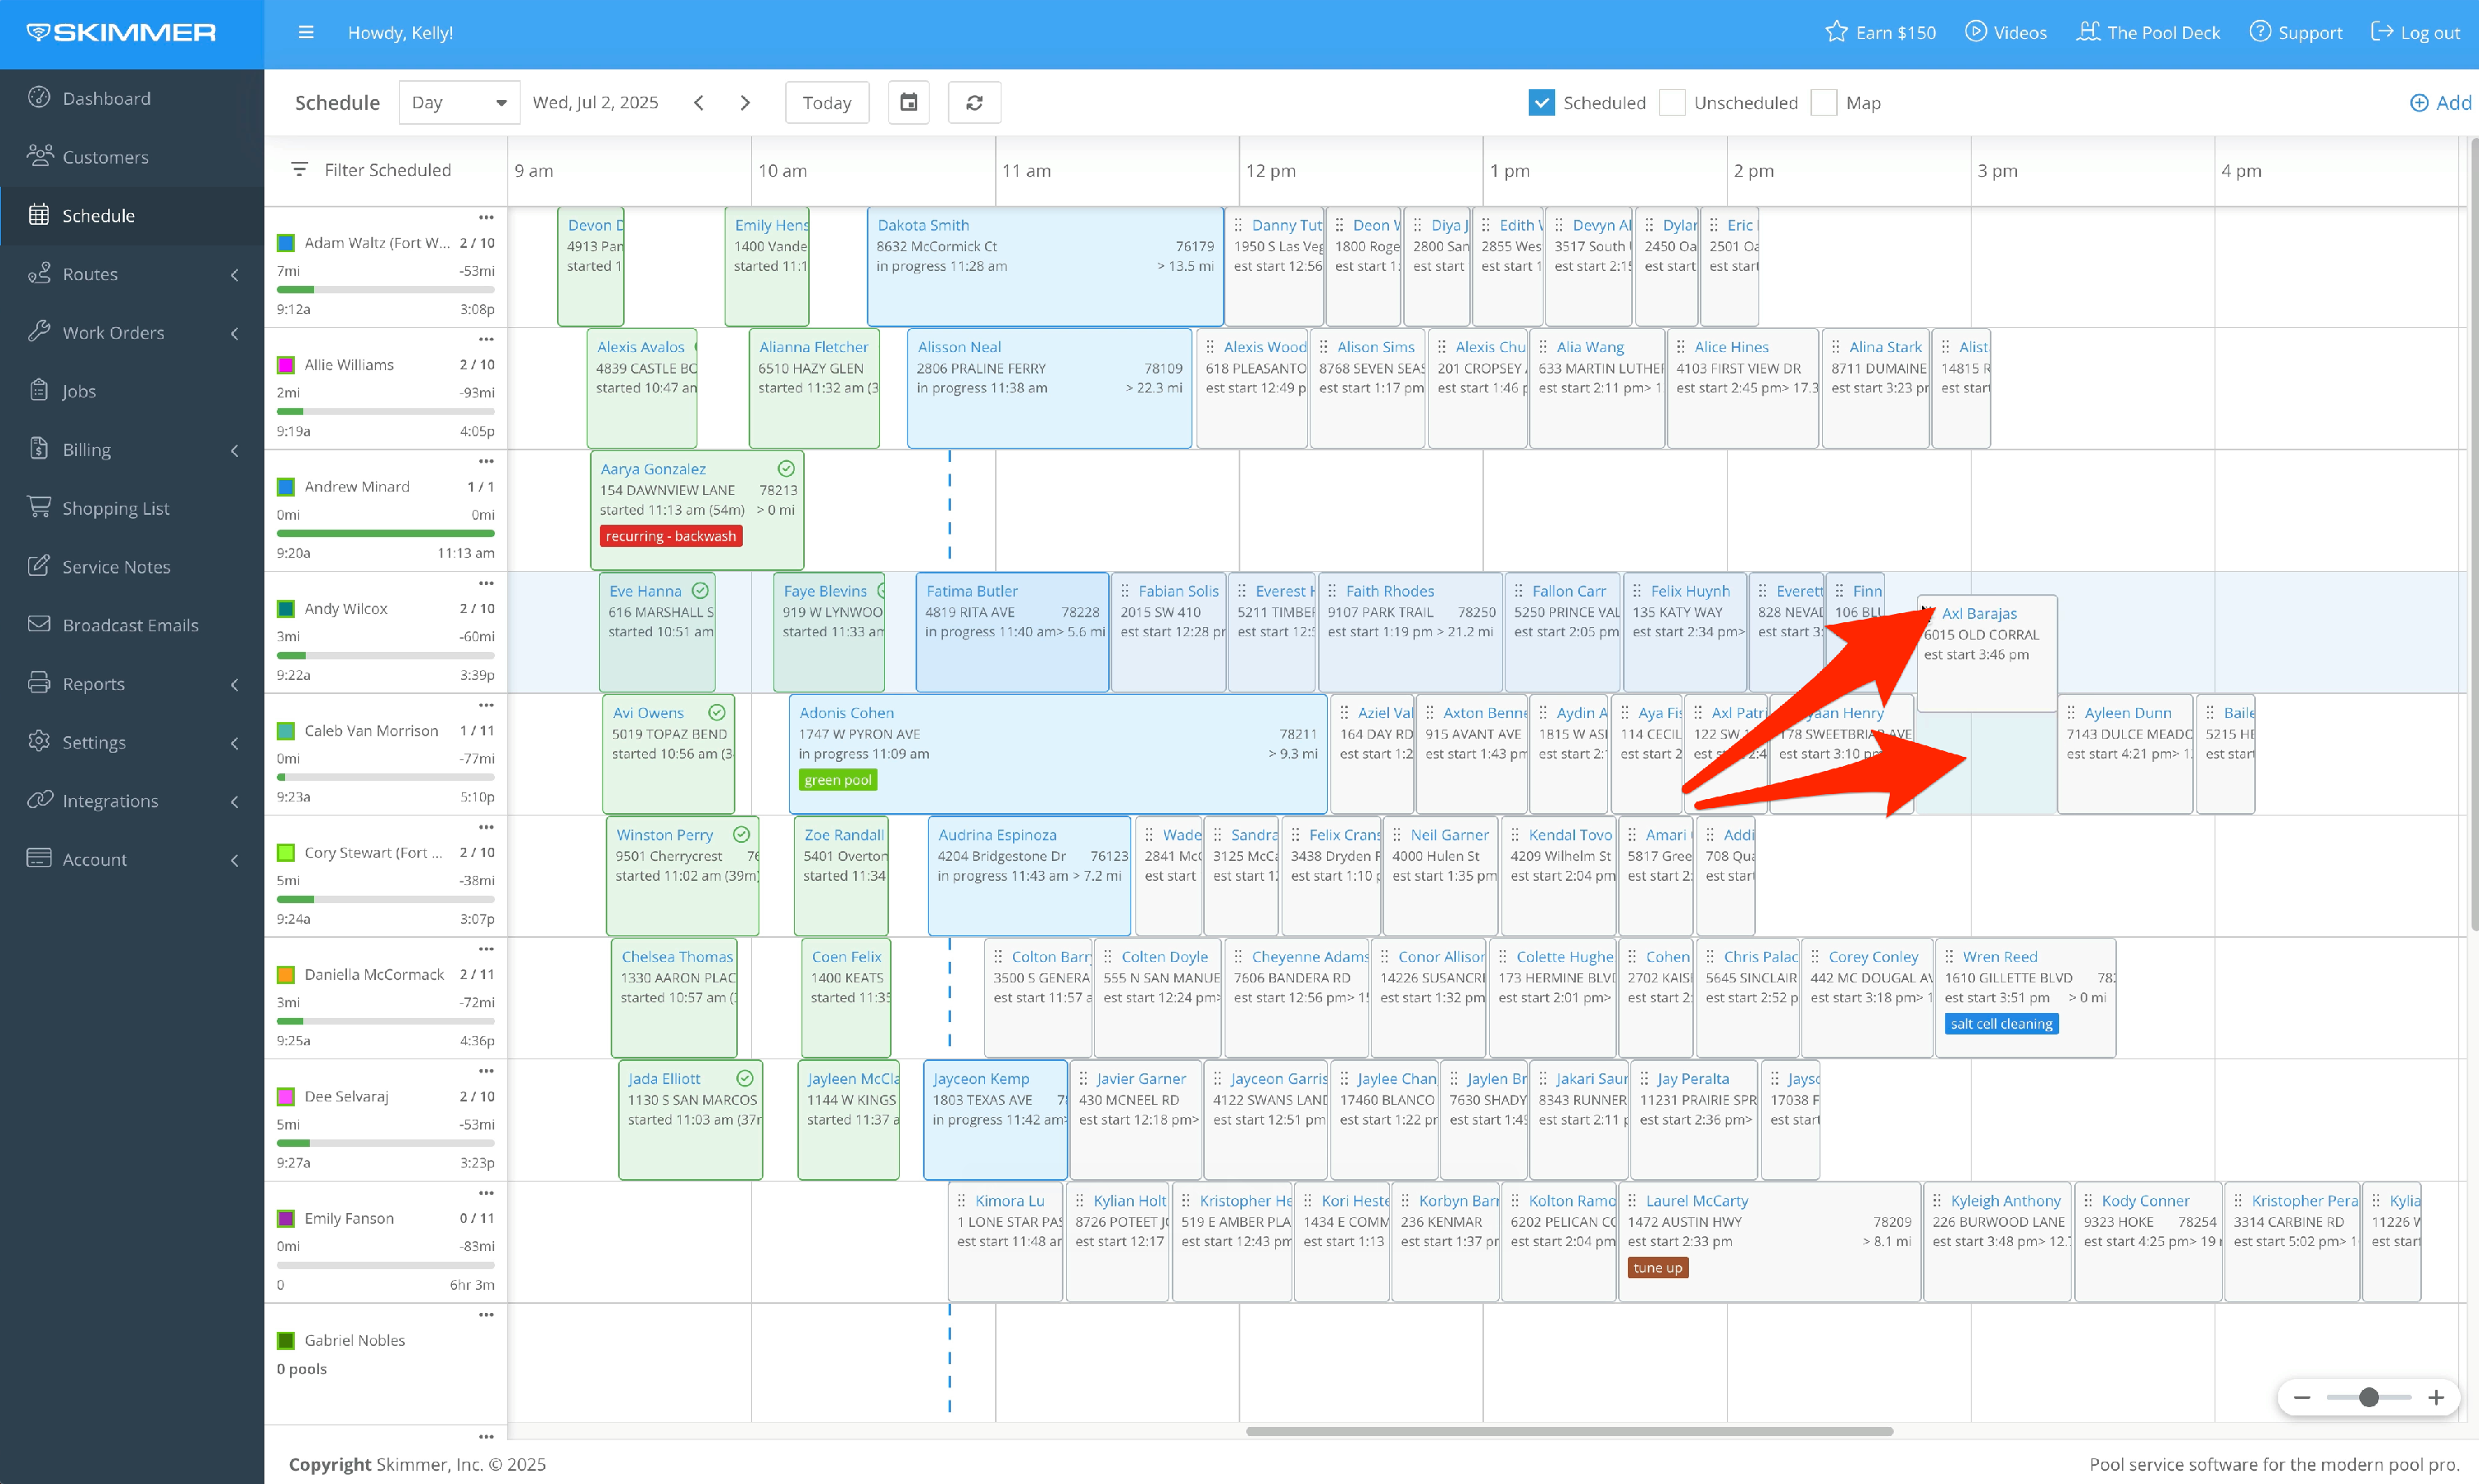
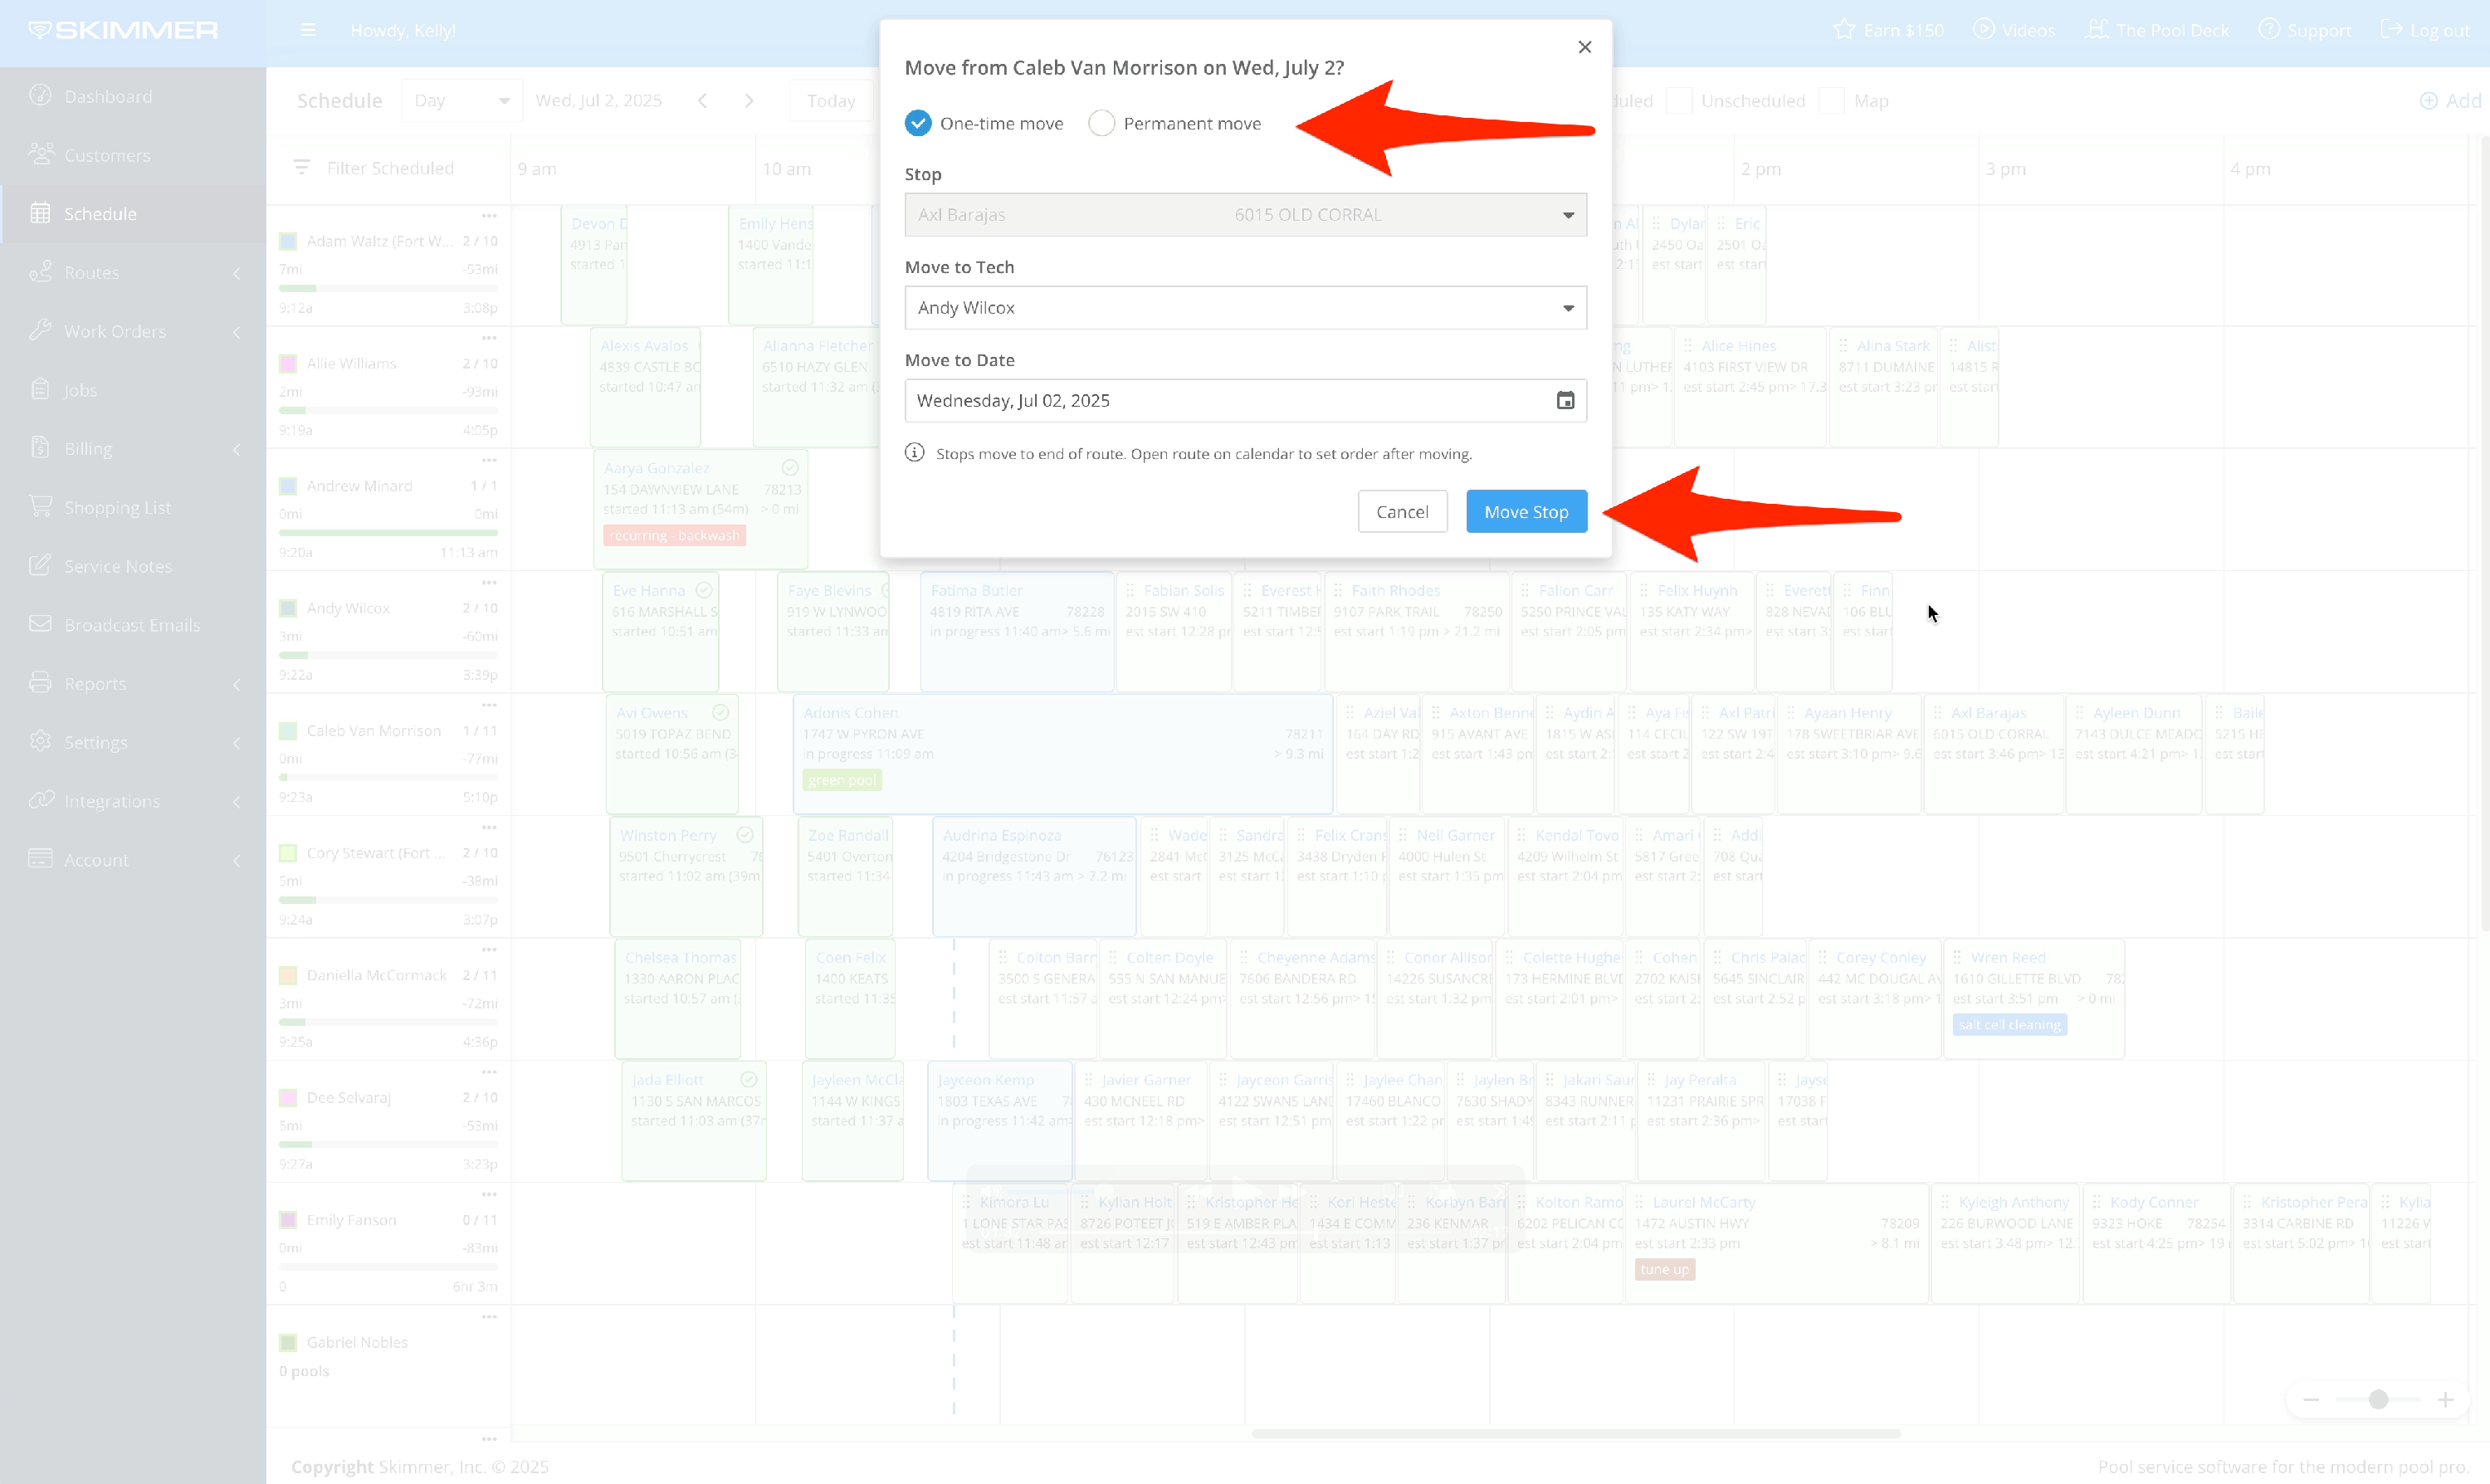
To move work individually, click and grab the dots in the top left corner. Then drag and drop, either within the same tech’s schedule or over to another tech. When you move to another tech, you’ll get a pop-up screen asking for more details. When you’re ready, click Move Stop and it’s done.
-
-
-
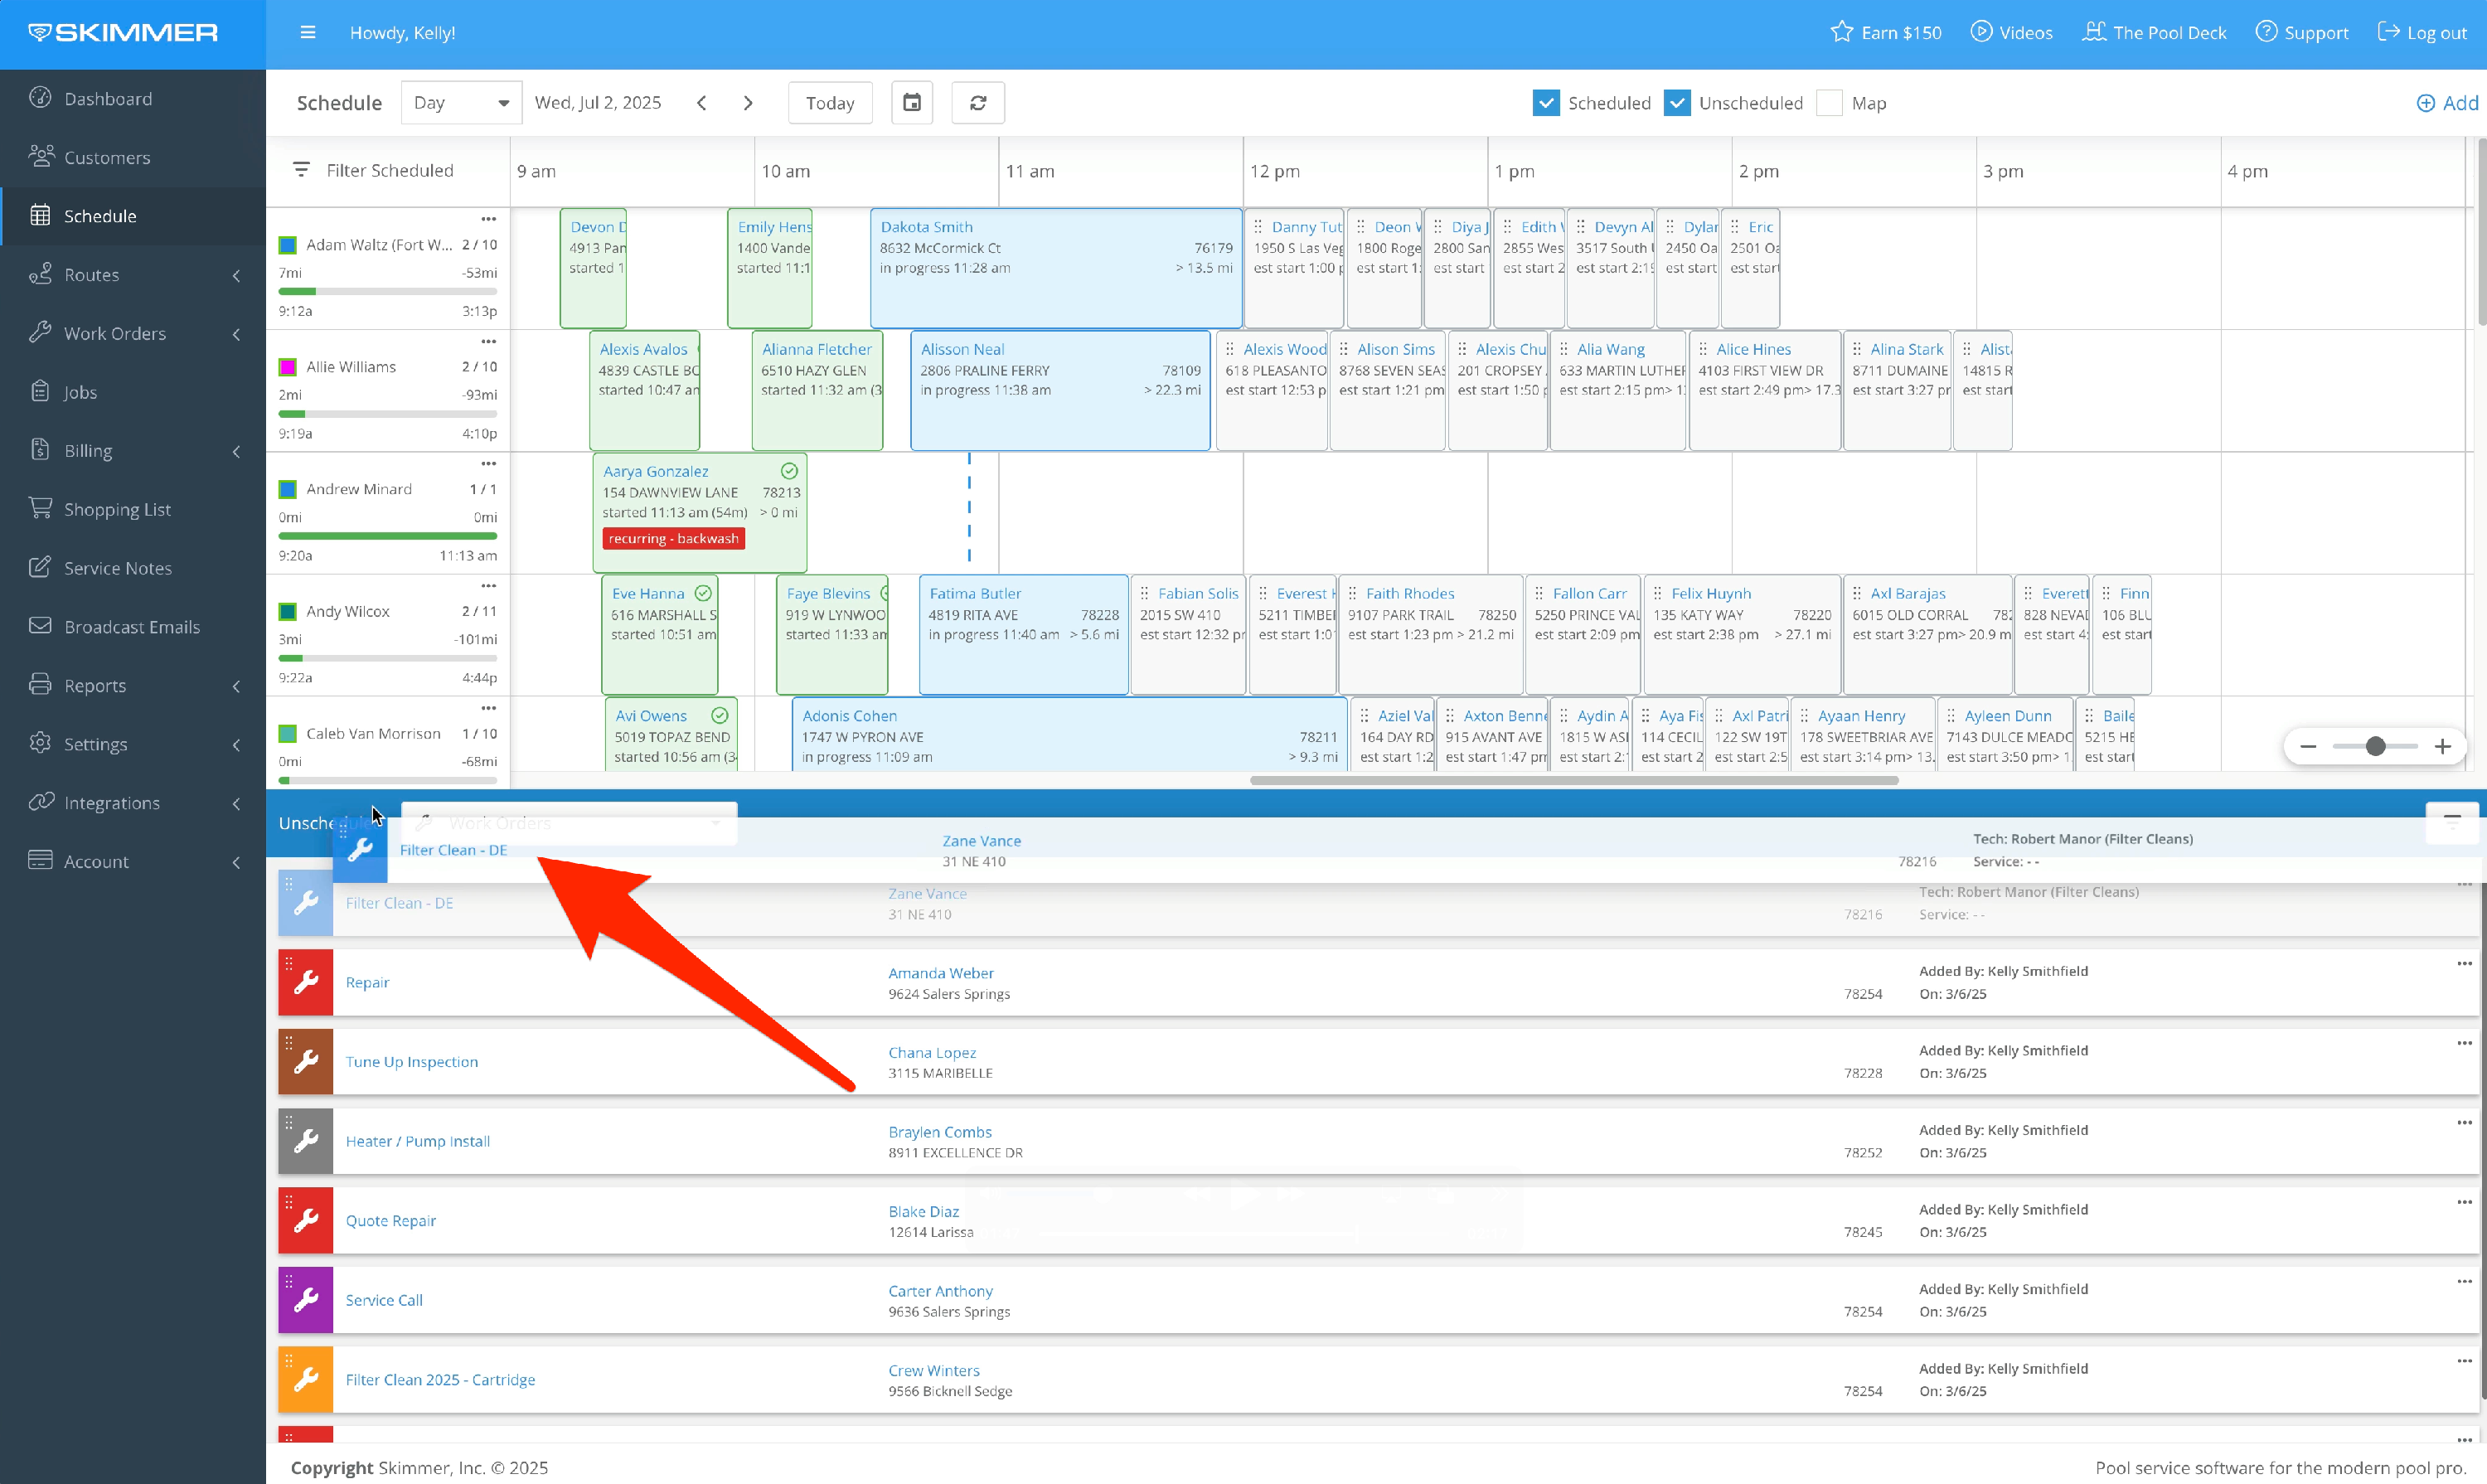
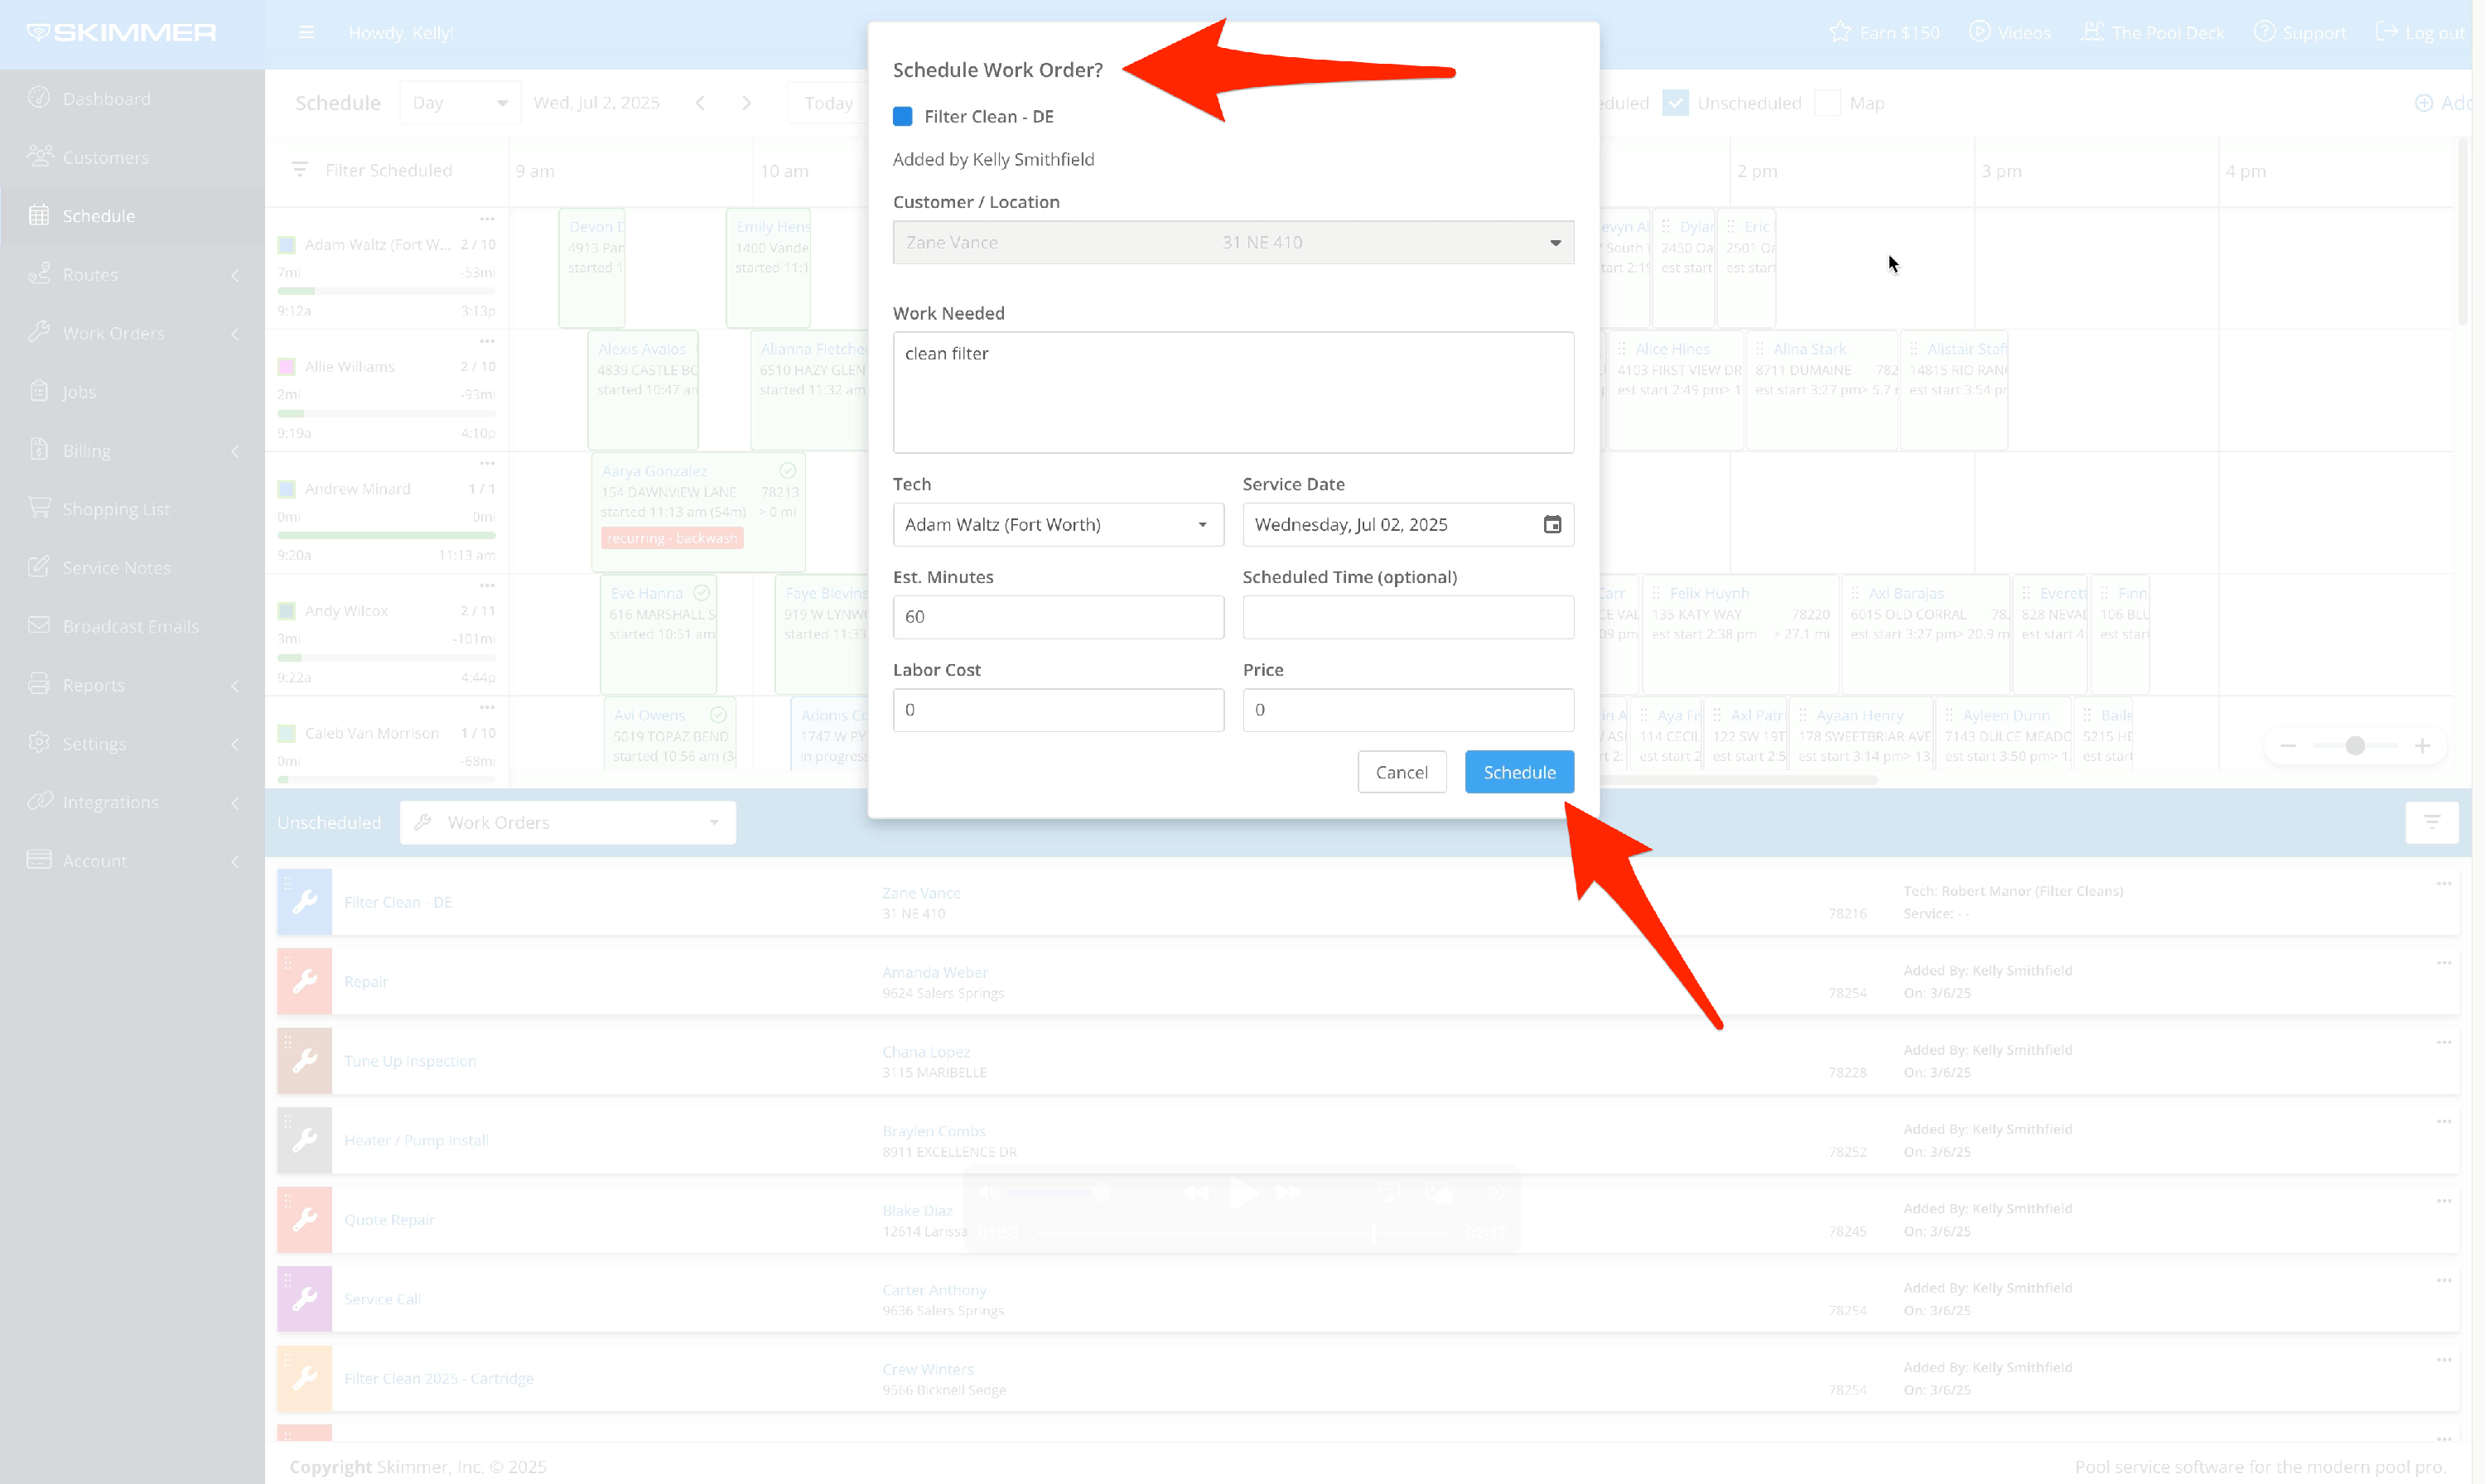
- 10
-
Is there unscheduled work you want to get done today? Click and hold, then drag it onto the daily schedule and drop. You’ll get a pop-up screen to confirm all the details. When it’s all set, click Schedule.
- 11
-
This is what a completed stop looks like in the daily view. The size of this box will vary depending on how long the stop took to complete.