
Zoho CRM Integration
Zoho CRM is a customer relationship management (CRM) tool for managing leads, deals, accounts, and contacts. The Zoho CRM integration keeps your Zoho CRM records and Skimmer customers in step, so you don't enter the same customer twice.
When a deal reaches the Zoho CRM stage you choose, Skimmer creates the customer and a work order. Every night, Skimmer adds its new customers to Zoho CRM as accounts and contacts.
Zoho CRM is a marketplace integration. You add it to your subscription and set it up with a step-by-step wizard in the Integrations Center.
What Zoho CRM can do
The integration runs two ongoing syncs that are always on, plus two optional imports you choose during setup.
| Sync | When it runs | What it does |
|---|---|---|
| Zoho CRM to Skimmer | Every 15 minutes | Looks for deals that reached your trigger stage. Creates a Skimmer customer from the deal's account and contact, unless a customer with the same email address already exists, and tags it Created by Zoho. Creates a work order for every deal, dated the day the deal syncs. |
| Skimmer to Zoho CRM | Every night at 4:00 am Eastern time | Adds active customers created in Skimmer in the last 25 hours to Zoho CRM as an account and a contact, unless a Zoho CRM contact already has the same email address. |
| Initial import from Zoho CRM (optional) | When you finish setup, and again when you reconfigure or upgrade | Brings your existing Zoho CRM accounts into Skimmer as customers tagged Created by Zoho. Skips accounts with no email address and accounts already in Skimmer. |
| Initial export to Zoho CRM (optional) | When you finish setup, and again when you reconfigure or upgrade | Sends your existing Skimmer customers, including inactive ones, to Zoho CRM as accounts and contacts. Skips customers already in Zoho CRM. |
Tips & tricks
- Skimmer matches records by email address only. Keep each customer's email address in Skimmer the same as the contact's email address in Zoho CRM.
- The integration only creates records. It doesn't update records that already exist, so changes you make in one system don't carry over to the other.
- Deals and accounts without an email address don't sync.
- Skimmer creates a work order for every deal that reaches your trigger stage, even when the customer already exists in Skimmer. Work orders are dated the day Skimmer picks up the deal, with no scheduled time. If Skimmer picks up a deal after 8:00 pm Eastern (7:00 pm in winter), the work order is dated the next day.
- Your account field mapping works both ways. It fills Skimmer customer fields from Zoho CRM and Zoho CRM account fields from Skimmer.
- Skimmer doesn't build or change your Zoho CRM pipeline. Set up your deal stages in Zoho CRM before you choose a trigger stage.
- Lead sources you don't map use your default Skimmer lead source. If you add a new lead source in Zoho CRM, open the setup wizard and map it.
- Initial imports run again each time you reconfigure or upgrade the integration, if they're turned on. Turn them off after your first setup unless you want them to run again.
Before you start
Note: If your company is on the Enterprise tier, contact your Skimmer customer success manager (CSM) for assistance before you begin configuring the Zoho CRM integration.
You need:
- A Zoho CRM login with permission to connect apps to your Zoho CRM account. This is usually a Zoho CRM administrator.
- The Can view the Integrations Center permission in Skimmer.
- An Enterprise subscription or the Zoho CRM add-on. If you don't have it yet, see Add Zoho CRM to your subscription below.
- The exact name of the Zoho CRM deal stage that should create a Skimmer customer, for example Closed Won.
- A Skimmer work order type for the work orders created from deals.
If you mark primary contacts with a custom checkbox field in Zoho CRM, have the field's name ready too. Skimmer uses it to pick each account's contact details.
Add Zoho CRM to your subscription
Zoho CRM requires the Enterprise tier and a paid add-on. Its card shows Upgrade Required until you add it. You can buy the add-on and start setup in one pass.
If you add Zoho CRM partway through your billing cycle, the charge is prorated and included on your next Skimmer invoice. Only users with the Can view payment method page permission can add it. If you don't have that permission, ask your account owner or an admin. If your account isn't on the Enterprise tier, contact your Customer Success Manager about upgrading.
- Click Integrations Center on the left navigation menu.
- Find the Zoho CRM card. It shows Upgrade Required.
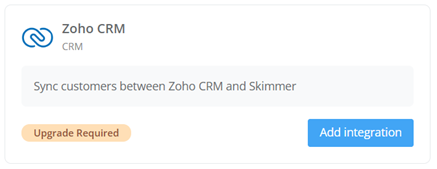
- Click Add integration.
- In the Add Zoho CRM? window, review the monthly price.
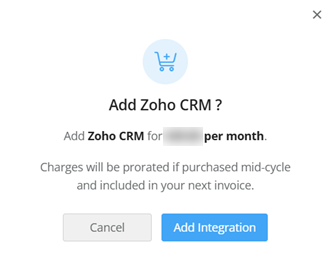
- Click Add Integration to confirm. Skimmer adds Zoho CRM to your subscription and opens the setup wizard.
Connect Zoho CRM in Skimmer
The setup wizard opens inside Skimmer and has five steps, listed on the left side of the window. Click Next to move forward or Previous to go back.
- Click Integrations Center on the left navigation menu.
- In the Available Integrations section, find the Zoho CRM card and click Connect. If you just added Zoho CRM to your subscription, the wizard is already open.
- On the Initial Configuration step, type a name for the integration.
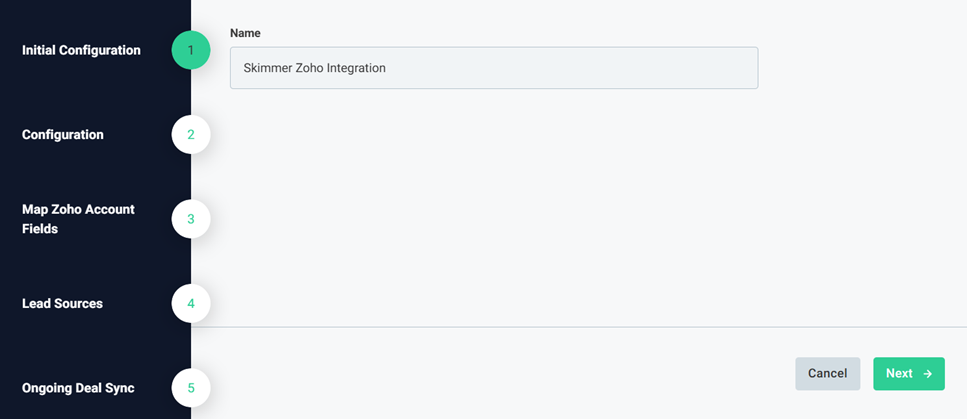
- Click Next.
- On the Configuration step, connect your account and choose your initial imports:
- Zoho Connection: click Connect, sign in to Zoho CRM, and allow Skimmer to access your account.
- Entities to Sync: Initial Load: Zoho to Skimmer imports your existing Zoho CRM accounts into Skimmer, and Initial Load: Skimmer to Zoho exports your existing Skimmer customers to Zoho CRM. Both are on by default, so turn off any you don't want. Each one that's on runs when you finish setup.
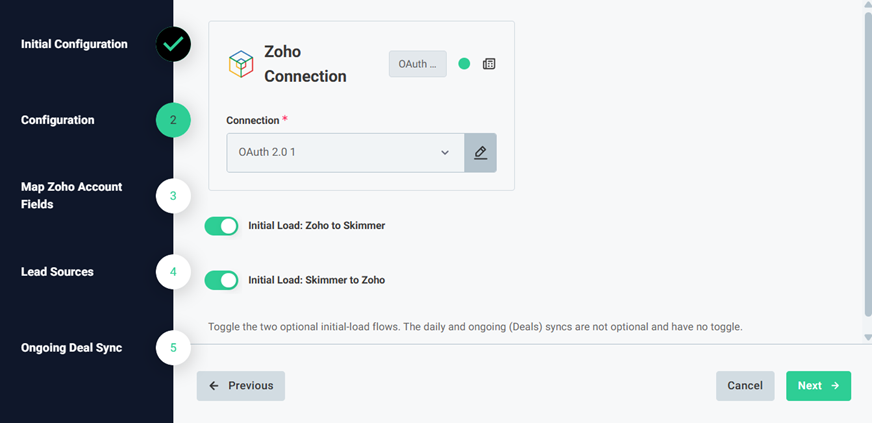
- Click Next.
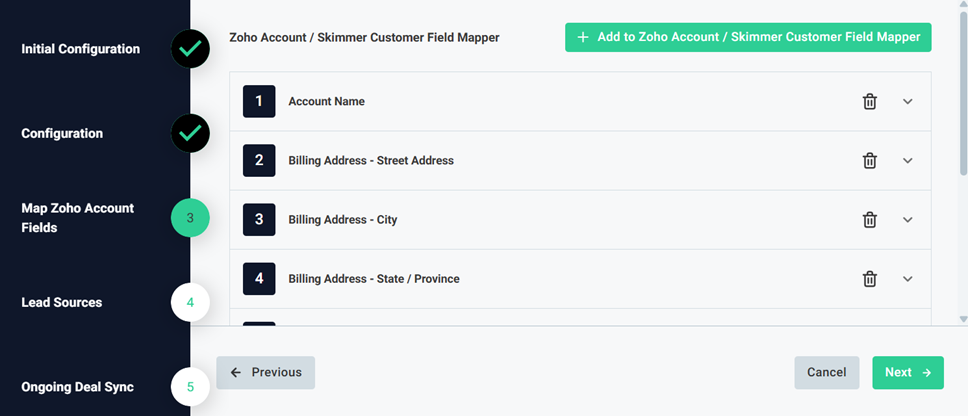
- On the Map Zoho Account Fields step, set how customer details move between the two systems:
- Zoho Account / Skimmer Customer Field Mapper: click Add to Zoho Account / Skimmer Customer Field Mapper to match each Zoho CRM account field to the Skimmer customer field it fills. Skimmer uses the same mapping in reverse when it adds customers to Zoho CRM.
- Primary Contact Field Name: if you mark primary contacts with a custom checkbox field in Zoho CRM, enter the field's name. If you leave it blank, Skimmer uses the deal's contact, then the oldest contact on the account.
- Click Next.
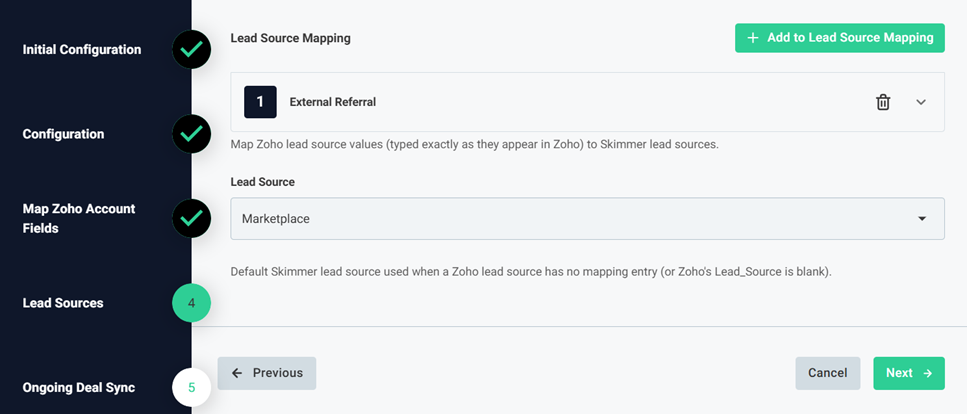
- On the Lead Source Mapping step, set the lead source for new customers:
- Lead Source Mapping: click Add to Lead Source Mapping to match each Zoho CRM lead source to a Skimmer lead source.
- Lead Source: choose the default Skimmer lead source for any Zoho CRM lead source you didn't map.
- Click Next.
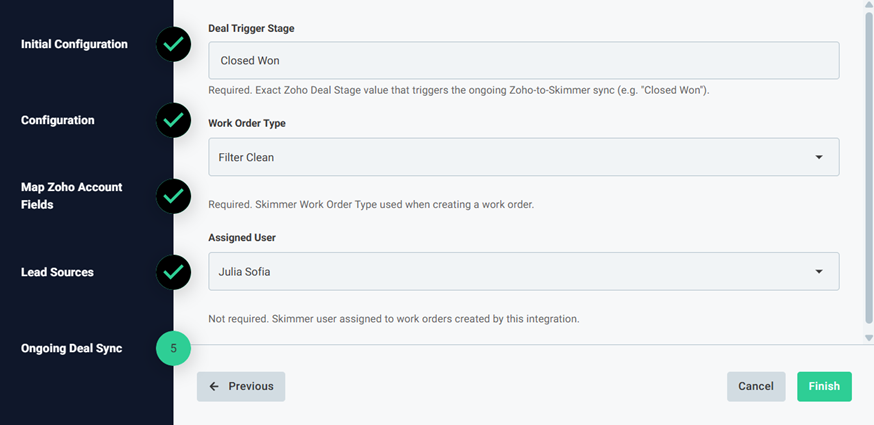
- On the Ongoing Deal Sync step, set when customers and work orders are created:
- Deal Trigger Stage: enter the exact name of the Zoho CRM deal stage that creates a Skimmer customer, for example Closed Won. The field is case sensitive, so match the spelling and capitalization in Zoho CRM.
- Work Order Type: select the type for work orders created from deals.
- Assigned User: select the Skimmer user assigned to new work orders. This setting is optional. If you leave it blank, work orders come in with no tech assigned
- Click Finish. The Zoho CRM card changes to Connected and moves to the Connected Integrations section. Any initial imports you chose start right away. If you click Cancel or close the window before you finish, Zoho CRM stays Available. Click Connect to start again any time.
Test your connection
- In Zoho CRM, move a test deal into your trigger stage. Make sure the deal's contact has an email address.
- Wait up to 15 minutes for the next check.
- In Skimmer, check your customer list. The new customer shows the Created by Zoho tag and has a work order of the type you chose, dated today, or tomorrow if you test in the evening.
Change your Zoho CRM settings
Use the setup wizard to change your mapping, lead sources, trigger stage, or work order details, or to reconnect your Zoho CRM account. Your current settings are already filled in.
- Click Integrations Center on the left navigation menu.
- In the Connected Integrations section, find the Zoho CRM card and click Manage.
- On the Zoho CRM detail page, click Configure.
- In the Configure Zoho CRM window, click Reconfigure.
- Step through the wizard and update your settings.
Note: If you rename your trigger stage in Zoho CRM, update Deal Trigger Stage right away. Deals stop syncing until the names match.
- On the last step, click Finish. Any initial import that's still turned on runs again. To skip it, turn it off on the Configuration step first. If you close the wizard without finishing, your existing settings stay the same.
Upgrade to a newer version
Most updates to the integration install automatically. When an update needs you to review your settings, an Upgrade button appears on the Zoho CRM detail page in place of Configure.
- On the Zoho CRM detail page, click Upgrade.
- In the Upgrade Zoho CRM window, add any new information it asks for and click Finish. Your integration keeps running. If you cancel, your current version keeps working, and you can upgrade later.
Pause or unpause Zoho CRM
Pausing stops all syncs but keeps your settings, so you don't have to set up the integration again.
- On the Zoho CRM detail page, click Configure.
- On the Configure Zoho CRM page, click the three dots menu.
- Click Pause Integration.
To turn syncs back on, open the three dots menu and click Unpause Integration.
Disconnect Zoho CRM
Disconnecting turns off all syncs. Skimmer saves your settings, so you can reconnect later without starting over.
- On the Zoho CRM detail page, click Disconnect Zoho CRM.
- In the Disconnect Zoho CRM? window, click Disconnect to confirm. The Zoho CRM card moves back to Available Integrations.
Important: Disconnecting doesn't remove the add-on from your Skimmer invoice. To stop paying for it, remove the Zoho CRM add-on from your Payment Method page.
Troubleshooting
A deal reaches the trigger stage, but no customer is created
- Wait up to 15 minutes for the next check.
- Check that Deal Trigger Stage matches the stage name in Zoho CRM exactly, including capitalization.
- Check that the deal's contact has an email address in Zoho CRM. Skimmer skips deals without one.
- Search Skimmer for a customer with the same email address. If one exists, Skimmer doesn't create a second customer, but it still creates the work order on that customer's first service location.
The same deal created two work orders
If someone edits a deal while it's still in the trigger stage, Skimmer can pick it up again and create another work order. Delete the extra work order in Skimmer. To avoid this, finish your edits before you move a deal into the trigger stage.
New Skimmer customers don't show in Zoho CRM
- Check that the customer is active and has an email address in Skimmer.
- Wait for the next nightly sync. It runs at 4:00 am Eastern time.
If a Zoho CRM contact already has the same email address, Skimmer doesn't add a second one.
A change in one system doesn't show in the other
The integration only creates new records. It doesn't update customers, accounts, or contacts that already exist. Make the change in both systems.
Customer details show up in the wrong fields
Check Zoho Account / Skimmer Customer Field Mapper in the setup wizard. For example, if a Zoho CRM phone field is mapped to a Skimmer email field, phone numbers show up as email addresses.
Still stuck?
Contact Skimmer Support as soon as you notice a problem. Sync records are kept for only two weeks, so older problems are hard to trace. Include screenshots of your setup wizard steps and the name and email address of a customer or deal that didn't sync. That gets you a faster answer.